
- 전체
- Python 일반
- Python 수학
- Python 그래픽
- Python 자료구조
- Python 인공지능
- Python 인터넷
- Python SAGE
- wxPython
- TkInter
- iPython
- wxPython
- pyQT
- Jython
- django
- flask
- blender python scripting
- python for minecraft
- Python 데이터 분석
- Python RPA
- cython
- PyCharm
- pySide
- kivy (python)
Python 인공지능 [python] 인공지능 katiehouse / django-scikit-learn-tutorial
2023.06.03 17:08
[python] 인공지능 katiehouse / django-scikit-learn-tutorial
1. Install Django
Django can be installed with pip:
pip3 install Django
Similarly, to install all of the package requirements for this project, you can run this in the root directory:
pip3 install -r requirements.txt
2. Create Django Project
A Django Project is a collection of settings for an instance of Django, including database configuration, Django-specific options and application-specific settings. These configurations will be in the /mysite directory. You can change mysite to any project name you'd like. Tip: avoid using project names like test and Django - it might mess things up.
django-admin startproject mysite .
This creates the following files:
├── manage.py           # How you run Django code
└── mysite
    ├── __init__.py     # Tells Python this is a Python code folder
    ├── asgi.py         # Provides hooks for web servers when Django app is deployed
    ├── settings.py     # Configures the Django project
    ├── urls.py         # Routes web requests based on the URL
    └── wsgi.py         # Provides hooks for web servers when Django app is deployed
manage.py ,mysite/__init__.py, mysite/asgi.py, mysite/wsgi.py mysite/settings.py, mysite/urls.py
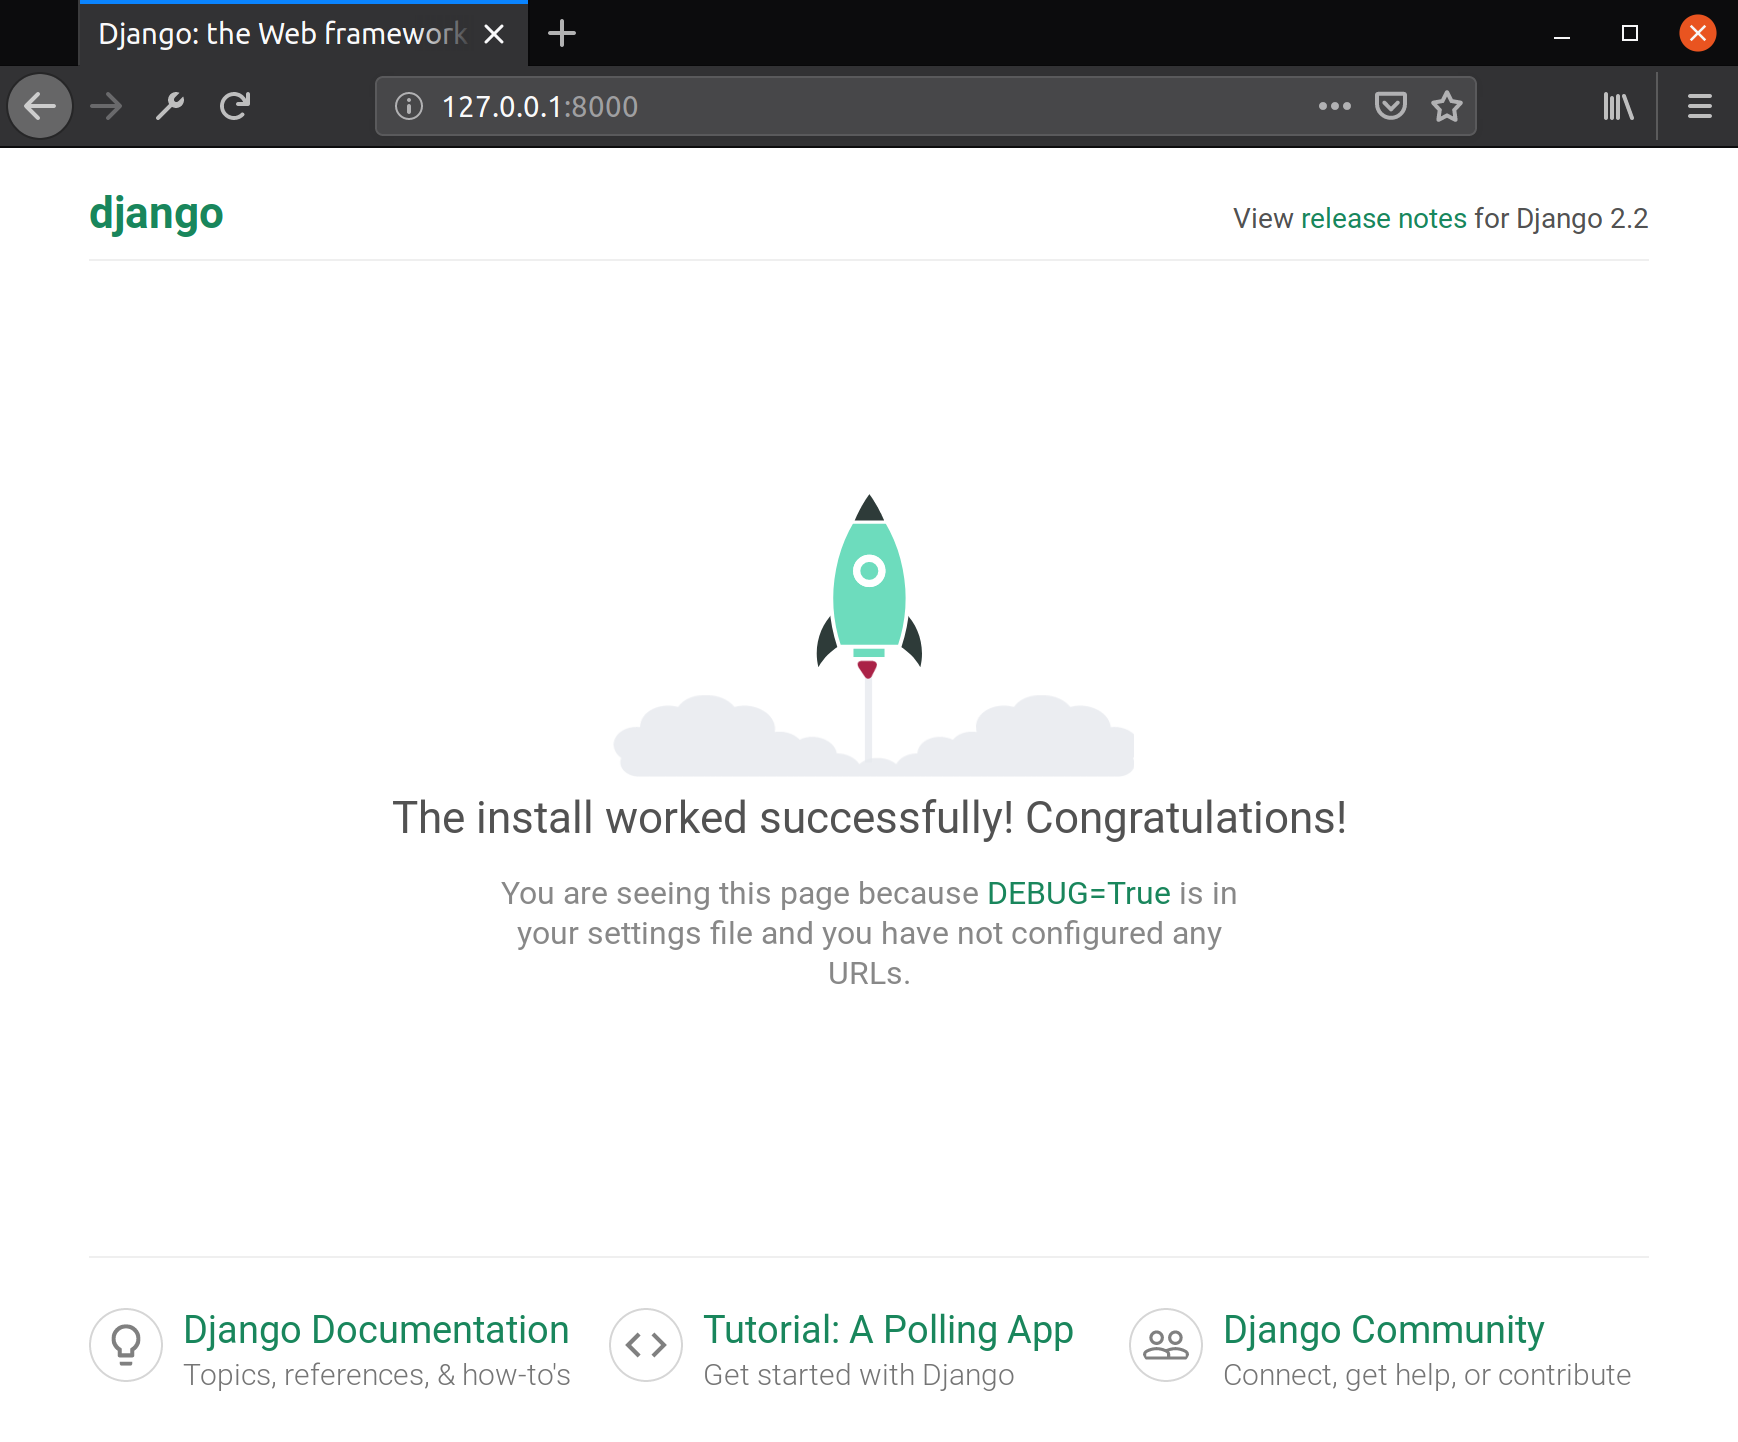
3. Run your project for the first time
To see if your project is set up correctly, run:
python3 manage.py runserver
Then on your browser (Chrome, Safari, Firefox), go to: http://localhost:8000/ . Your screen should look like the following:
To stop your project, hold control + C.
Running your server for the first time generated a db.sqlite3 file. This is a default SQLite database for your app.
4. Create a Django App
A Django App is a component in a Django project that has a specific purpose, such as a blog, a wiki, or a dashboard. Most Django starter projects only have 1 app (like in this tutorial). Django expects a certain files in each app. The following command creates those files automatically for an app called iris.
python3 manage.py startapp iris
This creates the following files:
├── iris
│   ├── __init__.py
│   ├── admin.py        # Defines app admin access to see/edit the database
│   ├── apps.py         # Controls settings specific to the iris app
│   ├── migrations      # Holds files to migrate the database to create and change database schema
│   │   └── __init__.py
│   ├── models.py       # Used to construct the database schema and queries
│   ├── tests.py        # Provide unit tests for the app
│   └── views.py        # Defines the logic for handling HTTP requests and HTTP responses
apps.py
5. Add iris app to INSTALLED_APPS
Whenever a new app is installed or created, we must add it to the INSTALLED_APPS array in mysite/settings.py.
Here is what it will look like after iris is added:
INSTALLED_APPS = [
    'django.contrib.admin',
    'django.contrib.auth',
    'django.contrib.contenttypes',
    'django.contrib.sessions',
    'django.contrib.messages',
    'django.contrib.staticfiles',
    'iris',
]
6. Add the landing page to the app
The file mysite/urls.py determines which view function the HTTP request will map to when the client makes a URL request. For example, in the local django web app, the home page will load with the URL http://localhost:8000/ or a URL path of ''. When this happens, we want to map to the home() function in iris/views.py to render the home page.
To do this, change the mysite/urls.py to the following:
from django.contrib import admin
from django.urls import path
from iris import views

urlpatterns = [
    path('admin/', admin.site.urls),
    path('', views.home, name='home'),
]
Now, we must add the home() function to iris/views.py:
from django.shortcuts import render


def home(request):
    return render(request, 'home.html')
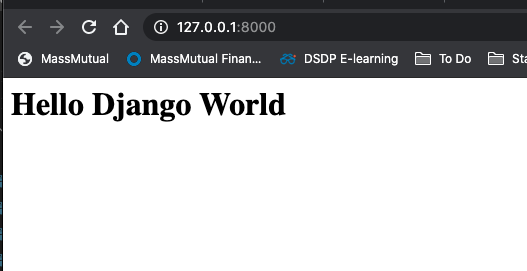
Finally, we need to create a home.html file to render for the landing page. To do this, add the following file iris/templates/home.html. Notice we are creating a new templates/ folder.
In iris/templates/home.html, add this:
<h1>Hello Django World</h1>
Check your new landing page works with:
python manage.py runserver
You should see:
7. Make the landing page fancy with Bootstrap
Bootstrap is a CSS framework that makes front end development easier than ever. To add Bootstrap to your app, an easy way is to copy the following into a new iris/templates/base.html file.
<!doctype html>
<html lang="en">

<head>
    <meta charset="utf-8">
    <meta name="viewport" content="width=device-width, initial-scale=1, shrink-to-fit=no">
    <link rel="stylesheet" href="https://stackpath.bootstrapcdn.com/bootstrap/4.1.3/css/bootstrap.min.css"
        integrity="sha384-MCw98/SFnGE8fJT3GXwEOngsV7Zt27NXFoaoApmYm81iuXoPkFOJwJ8ERdknLPMO" crossorigin="anonymous">
</head>

<body>
    <div class="container">
        <div class="row justify-content-center">
            <div class="col-8">
                <h1 class="mt-2">Iris Model Predictions</h1>
                <hr class="mt-0 mb-4">
                {% block content %}
                {% endblock %}
            </div>
        </div>
    </div>
</body>

</html>
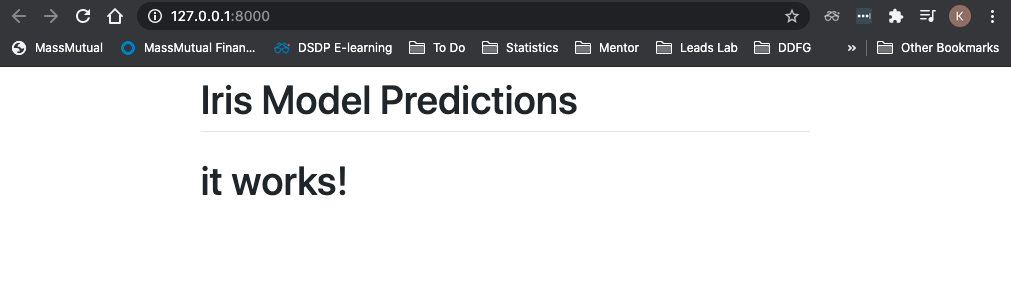
Update iris/templates/home.html to the following:
{% extends 'base.html' %}

{% block content %}
<h1>it works!</h1>
{% endblock %}
Your landing page should look like this after doing python3 manage.py runserver:
8. Create a machine learning model with the Iris dataset
In this tutorial, we are going to write a simple machine learning model and deploy it in our Django web app.
We are using the Iris dataset and Decision Trees for a multiclass classifier.
To create the model, first install Scikit-learn:
pip3 install -U scikit-learn
Add this script to a new folder in the root directory ml_model/iris_model.py. Note: this is not a machine learning tutorial and the model is super basic. The model should be revised with things like train/test splits, cross validation, hyperparameter tuning, etc. to be more robust.
from sklearn import datasets
from sklearn.tree import DecisionTreeClassifier
import pickle

# Load the Iris dataset
iris = datasets.load_iris()
X = iris.data
y = iris.target

# Train a Decision Tree Classifier
clf = DecisionTreeClassifier(random_state=0)
clf.fit(X, y)

# Save the model as a pkl file
filename = 'ml_model/iris_model.pkl'
pickle.dump(clf, open(filename, 'wb'))
Run the script with:
python3 ml_model/iris_model.py
and it should create an ml_model/iris_model.pkl file. This is a serialized version of the trained classifier.
9. Create Django form to take in user input and send back model prediction
First create a django form class in a new file iris/forms.py for which each attribute is the expected user input to your model:
from django import forms

class ModelForm(forms.Form):
    sepal_length = forms.DecimalField(label='Sepal Length (cm)', decimal_places=2, max_digits=3)
    sepal_width = forms.DecimalField(label='Sepal Width (cm)', decimal_places=2, max_digits=3)
    petal_length = forms.DecimalField(label='Pedal Length (cm)', decimal_places=2, max_digits=3)
    petal_width = forms.DecimalField(label='Pedal Width (cm)', decimal_places=2, max_digits=3)
Django forms make it easy to define form inputs and perform data validation.
Then, update the iris/views.py and replace the home() function with a predict_model() function. The predict_model view is run when the user hits the landing page. When the landing page is loaded, there is a HTTP GET request to show the blank form. When the "submit" button is clicked, there is a HTTP POST request to send back the predicted class.
from django.shortcuts import render
from .forms import ModelForm


def predict_model(request):
    # if this is a POST request we need to process the form data
    if request.method == 'POST':
        # create a form instance and populate it with data from the request:
        form = ModelForm(request.POST)
        # check whether it's valid:
        if form.is_valid():
            # process the data in form.cleaned_data as required
            sepal_length = form.cleaned_data['sepal_length']
            sepal_width = form.cleaned_data['sepal_width']
            petal_length = form.cleaned_data['petal_length']
            petal_width = form.cleaned_data['petal_width']

            # give prediction response
            prediction = "MyPrediction"
            return render(request, 'home.html', {'form': form, 'prediction': prediction})

    # if a GET (or any other method) we'll create a blank form
    else:
        form = ModelForm()

    return render(request, 'home.html', {'form': form})
the render() function returns an HTTPResponse object that is rendered in the home.html template. The third argument in the render() function, or {'form': form} and {'form': form, 'prediction': prediction} is called "context". This is data you want to send back to the html template. For example, {'form': form} sends back the ModelForm object that can be accessed in the home.html file with {{form}}. Similarly, {'form': form, 'prediction': prediction} also sends back the "MyPrediction" string that is rendered with {{prediction}}.
Update your mysite/urls.py with the new view:
from django.contrib import admin
from django.urls import path
from iris import views

urlpatterns = [
    path('admin/', admin.site.urls),
    path('', views.predict_model, name='predict_model'),
]
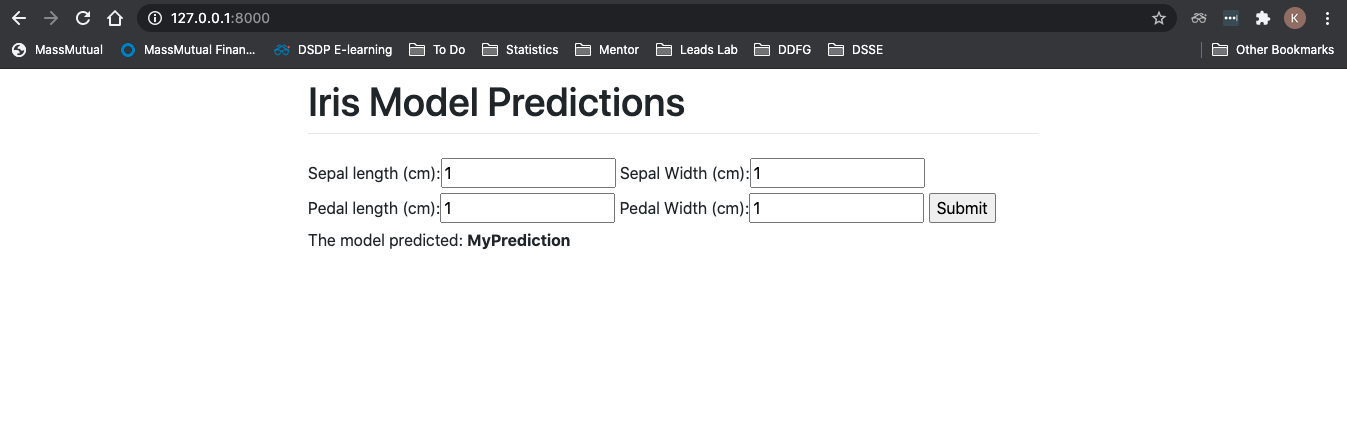
Lastly, edit the iris/templates/home.html so that you can view the new form and the prediction:
{% extends 'base.html' %}

{% block content %}
<form action="" method="post">
    {% csrf_token %}
    {{ form }}
    <input type="submit" value="Submit">
</form>

{% if form.is_valid %}
<p> The model predicted: <b>{{ prediction }}</b></p>
{% endif %}

{% endblock %}
Now run your app to see if it worked! You should see a blank form that validates data and sends back "My Prediction"!
Now it's time to add the machine learning model! To do this, you make a couple edits in iris/views.py
Add pickle to the import statements:
import pickle
in if form.is_valid(): use the model.predict method on the user inputs:


# Run new features through ML model
model_features = [
    [sepal_length, sepal_width, petal_length, petal_width]]
loaded_model = pickle.load(
    open("ml_model/iris_model.pkl", 'rb'))
prediction = loaded_model.predict(model_features)[0]
The revised iris/views.py will now look like this:
from django.shortcuts import render
from .forms import ModelForm
import pickle


def predict_model(request):
    # if this is a POST request we need to process the form data
    if request.method == 'POST':
        # create a form instance and populate it with data from the request:
        form = ModelForm(request.POST)
        # check whether it's valid:
        if form.is_valid():
            # process the data in form.cleaned_data as required
            sepal_length = form.cleaned_data['sepal_length']
            sepal_width = form.cleaned_data['sepal_width']
            petal_length = form.cleaned_data['petal_length']
            petal_width = form.cleaned_data['petal_width']

            # Run new features through ML model
            model_features = [
                [sepal_length, sepal_width, petal_length, petal_width]]
            loaded_model = pickle.load(
                open("ml_model/iris_model.pkl", 'rb'))
            prediction = loaded_model.predict(model_features)[0]

            return render(request, 'home.html', {'form': form, 'prediction': prediction})

    # if a GET (or any other method) we'll create a blank form
    else:
        form = ModelForm()

    return render(request, 'home.html', {'form': form})
Your model is now predicting user inputs! 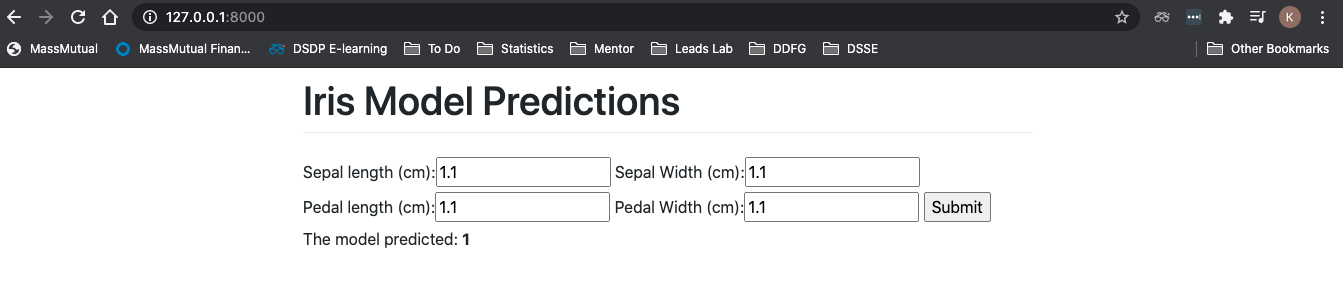
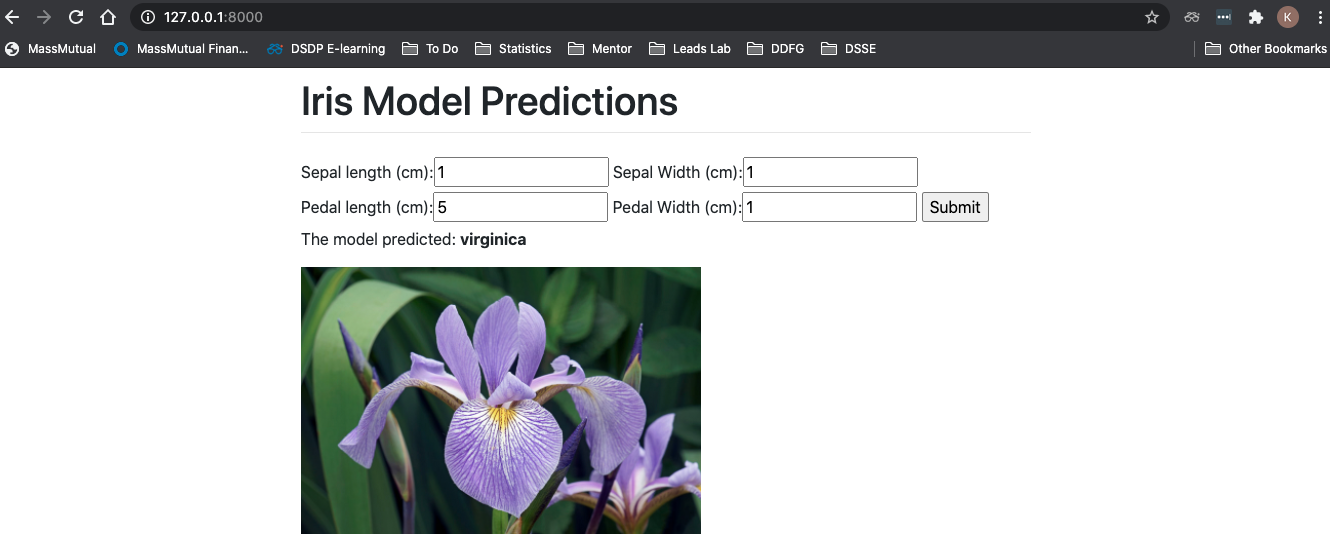
10. Update model prediction with text and an image
Now that your machine learning model is connected to the web app, let's make things fancy by sending back the Iris classifiaction with text and an image.
To do this, create a dictionary that maps the numeric classification with the Iris name and an image of the Iris online. Put this after the iris/views.py file makes the prediction:
prediction = loaded_model.predict(model_features)[0]

prediction_dict = [{'name': 'setosa',
                    'img': 'https://alchetron.com/cdn/iris-setosa-0ab3145a-68f2-41ca-a529-c02fa2f5b02-resize-750.jpeg'},
                    {'name': 'versicolor',
                    'img': 'https://wiki.irises.org/pub/Spec/SpecVersicolor/iversicolor07.jpg'},
                    {'name': 'virginica',
                    'img': 'https://www.gardenia.net/storage/app/public/uploads/images/detail/xUM027N8JI22aQPImPoH3NtIMpXkm89KAIKuvTMB.jpeg'}]

prediction_name = prediction_dict[prediction]['name']
prediction_img = prediction_dict[prediction]['img']

return render(request, 'home.html', {'form': form, 'prediction': prediction,
                                        'prediction_name': prediction_name,
                                        'prediction_img': prediction_img})
Now add the new context variables to iris/views.py. (<p> The model predicted: <b>{{ prediction_name }}</b></p> <img src={{ prediction_img }} style="max-width:400px">)
{% extends 'base.html' %}

{% block content %}
<form action="" method="post">
    {% csrf_token %}
    {{ form }}
    <input type="submit" value="Submit">
</form>

{% if form.is_valid %}
<p> The model predicted: <b>{{ prediction_name }}</b></p>
<img src={{ prediction_img }} style="max-width:400px">

{% endif %}

{% endblock %}
Now you will see an image and the iris name when the model makes a prediction!
11. Define the SQLite Database Schema
In this example, our database will have one table. The database will store the user-inputted preditions, by saving the inputted features features, the classifier prediction, an auto generated ID, and the current date/time in the database.
Here is an example of the database Predictions table:
| id | predict_datetime | sepal_length | sepal_width | petal_length | petal_width | prediction |
|---|---|---|---|---|---|---|
| 1 | 09-11-2020 9:00am | 5.1 | 3.5 | 1.4 | 0.2 | setosa |
| 2 | 09-11-2020 9:01am | 4.9 | 3 | 1.4 | 0.2 | setosa |
| 3 | 09-11-2020 9:02am | 4.7 | 3.2 | 1.3 | 0.2 | setosa |
| 4 | 09-11-2020 9:03am | 4.6 | 3.1 | 1.5 | 0.2 | setosa |
| 5 | 09-11-2020 9:04am | 5 | 3.6 | 1.4 | 0.2 | setosa |
Update iris/models.py to create the Predictions table:
from django.db import models
from django.utils import timezone

# Create your models here.


class Predictions(models.Model):
    # The possible predictions the model can make in the 'predictions' field
    # defined by: (<database name>, <human readible name>)
    PREDICT_OPTIONS = [
        ('setosa', 'Setosa'),
        ('versicolor', 'Versicolor'),
        ('virginica', 'Virginica')
    ]

    # Prediction table fields (or columns) are defined by creating attributes
    # and assigning them to field instances such as models.CharField()
    predict_datetime = models.DateTimeField(default=timezone.now)
    sepal_length = models.DecimalField(decimal_places=2, max_digits=3)
    sepal_width = models.DecimalField(decimal_places=2, max_digits=3)
    petal_length = models.DecimalField(decimal_places=2, max_digits=3)
    petal_width = models.DecimalField(decimal_places=2, max_digits=3)
    prediction = models.CharField(choices=PREDICT_OPTIONS, max_length=10)
Notice that id was not included. This is because by default, Django gives each model an id = models.AutoField(primary_key=True) auto incrimenting primary key.
Check here: https://www.webforefront.com/django/modeldatatypesandvalidation.html or here: https://docs.djangoproject.com/en/3.1/topics/db/models/ for more built-in field options.
7. Create the database with migrations
Although models.py determines the database schema, you must migrate the database for these changes to be in affect.
You must migrate in the following scenarios:
- Adding a Model (aka Table)
- Adding a Field (aka Column in Table)
- Removing a Field
- Changing a Field Schema
python3 manage.py makemigrations
python3 manage.py migrate
12. Use admin mode to see edit database
First you must register your model with Django admin. To do this, edit the iris/admin.py file with the following:
from django.contrib import admin
from .models import Predictions

@admin.register(Predictions)
class PredictionsAdmin(admin.ModelAdmin):
    pass
Now, create a superuser with the following command:
python3 manage.py createsuperuser
!! Do not forget your admin username/password !!
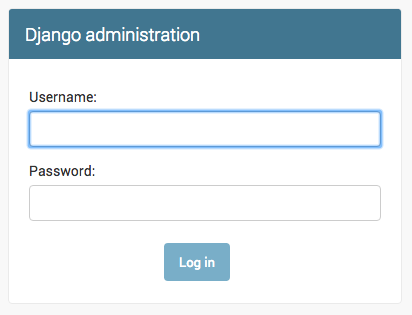
To access the admin site run the server and then go to: http://localhost:8000/admin
python3 manage.py runserver
You should see the following login where you can enter your credentials:
Once you enter your admin credentials, you should see your "Predictions" table under "IRIS". You can add to your table by clicking the "Add" button and entering a new row in your database.
13. Save prediction data to SQLite database
To save all model predictions to the SQLite database, you can use the create() method for Django models.
To do this, input the Predictions model at the beginning of iris/views.py
from .models import Predictions
Then add the following to iris/views.py just before return render(request, 'home.html', {'form': form, 'prediction': prediction...
Predictions.objects.create(sepal_length=sepal_length,
                            sepal_width=sepal_width,
                            petal_length=petal_length,
                            petal_width=petal_width,
                            prediction=prediction_name)
Notice how we do not add predict_datetime because it is automatically generated.
To check that the database works try running the app locally, inputting some data, and go the Admin site to check if the data was saved.
Your iris/views.py will now look like:
from django.shortcuts import render
from .forms import ModelForm
from .models import Predictions
import pickle


def predict_model(request):
    # if this is a POST request we need to process the form data
    if request.method == 'POST':
        # create a form instance and populate it with data from the request:
        form = ModelForm(request.POST)
        # check whether it's valid:
        if form.is_valid():
            # process the data in form.cleaned_data as required
            sepal_length = form.cleaned_data['sepal_length']
            sepal_width = form.cleaned_data['sepal_width']
            petal_length = form.cleaned_data['petal_length']
            petal_width = form.cleaned_data['petal_width']

            # Run new features through ML model
            model_features = [
                [sepal_length, sepal_width, petal_length, petal_width]]
            loaded_model = pickle.load(
                open("ml_model/iris_model.pkl", 'rb'))
            prediction = loaded_model.predict(model_features)[0]

            prediction_dict = [{'name': 'setosa',
                                'img': 'https://alchetron.com/cdn/iris-setosa-0ab3145a-68f2-41ca-a529-c02fa2f5b02-resize-750.jpeg'},
                               {'name': 'versicolor',
                                'img': 'https://wiki.irises.org/pub/Spec/SpecVersicolor/iversicolor07.jpg'},
                               {'name': 'virginica',
                                'img': 'https://www.gardenia.net/storage/app/public/uploads/images/detail/xUM027N8JI22aQPImPoH3NtIMpXkm89KAIKuvTMB.jpeg'}]

            prediction_name = prediction_dict[prediction]['name']
            prediction_img = prediction_dict[prediction]['img']

            # Add prediction to database Predictions table
            Predictions.objects.create(sepal_length=sepal_length,
                                       sepal_width=sepal_width,
                                       petal_length=petal_length,
                                       petal_width=petal_width,
                                       prediction=prediction_name)

            return render(request, 'home.html', {'form': form, 'prediction': prediction,
                                                 'prediction_name': prediction_name,
                                                 'prediction_img': prediction_img})

    # if a GET (or any other method) we'll create a blank form
    else:
        form = ModelForm()

    return render(request, 'home.html', {'form': form})
[출처] https://github.com/katiehouse/django-scikit-learn-tutorial/wiki
광고 클릭에서 발생하는 수익금은 모두 웹사이트 서버의 유지 및 관리, 그리고 기술 콘텐츠 향상을 위해 쓰여집니다.