
Ubuntu is one of the most widely used Linux operating systems among home users and enterprises.Ubuntu is normally installed by booting from a USB.
Installing the entire Ubuntu on a USB Flash drive is simple and straightforward. We need a bootable usb and another USB to which complete Ubuntu to be installed.
You can use ubuntu installed USB as a portable computer and bootable device. This tutorial we learn how to install the entire Ubuntu on a USB Flash Drive.
Prerequisites
The minimum recommended space required for Ubuntu operating system is 25GB. We need a USB with minimum 32GB to which we install the complete Ubuntu.
Also required a bootable Ubuntu USB or a Live CD. Earlier we learned to create a bootable USB and can use any tools to create it.
Once you have the bootable USB drive ready, plug it in and reboot your PC. Be sure that the BIOS is configured to boot from the bootable USB flash drive.
Installing Ubuntu on a USB drive
Once Ubuntu has booted using the bootable USB, plug in the second USB drive on which Ubuntu will be installed.
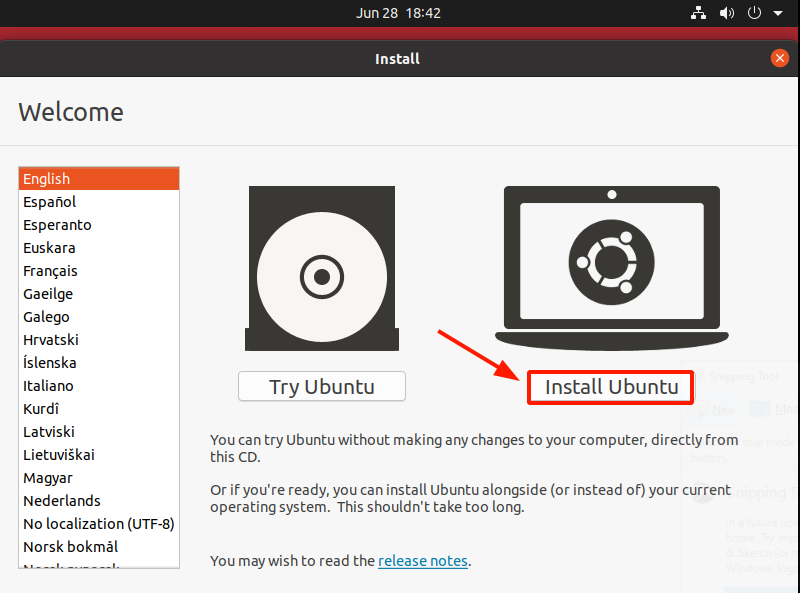
Click on the 'Install Ubuntu' option.
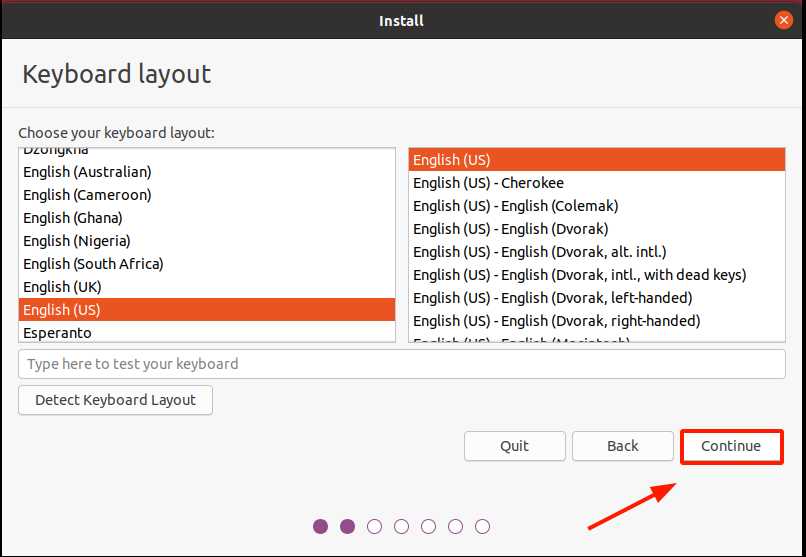
In the next step, select the preferred Keyboard Layout & language and click on the 'Continue' button.
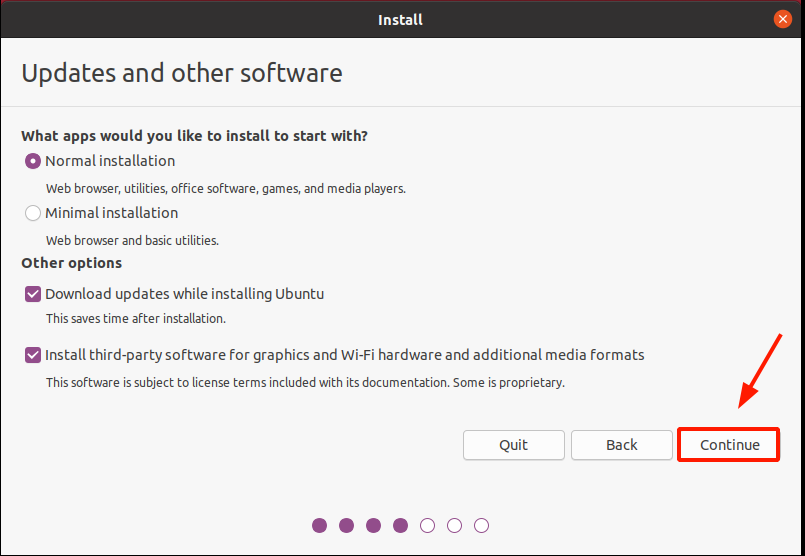
In the next step, select the nature of installation ( either Normal or Minimal ) and the updates and third-party Apps that you'd wish installed. Then click 'Continue'.
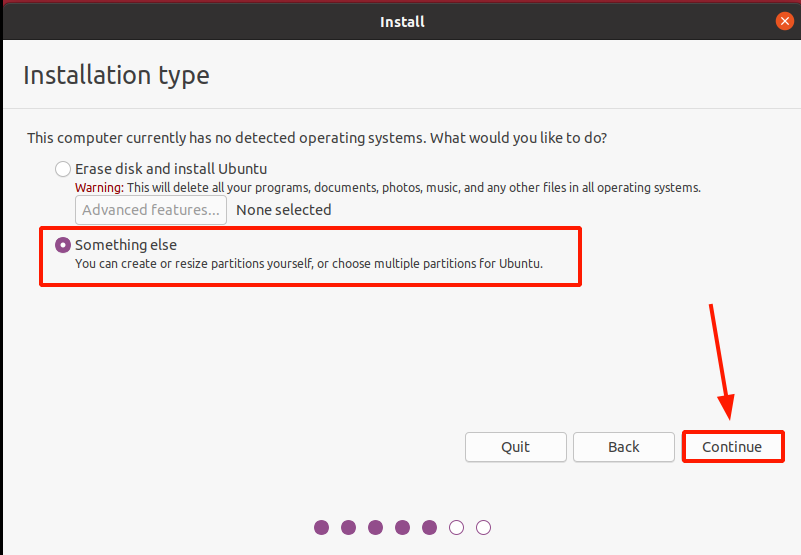
In the 'Installation Type' section, select 'Something Else' so that the installer can present you with an option to install Ubuntu on your USB drive.
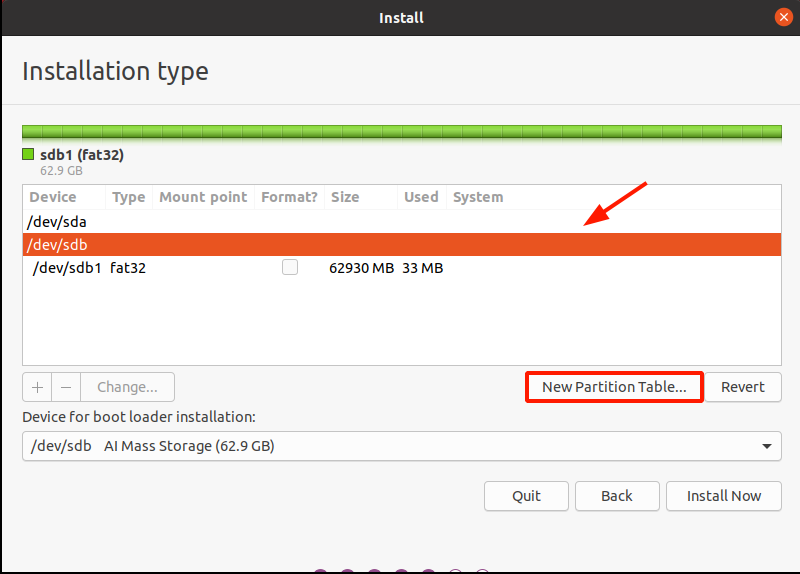
The next window displays all the available drives on which Ubuntu can be installed. This is the important step, carefully choose the correct USB drive partition.
In our case, the USB drive partition is /dev/sdb and this is where we shall install Ubuntu. In your case, the label might be different.
Note: Menu may look different based on the Ubuntu version. Here we using Ubuntu 20.04 LTS.
So, click on your USB drive and click the 'New Partition Table' option.
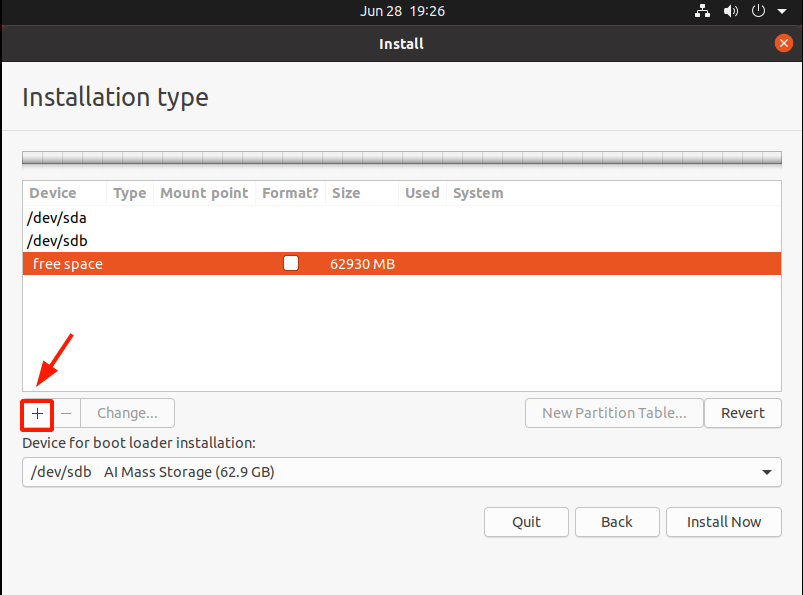
When prompted to delete all the partitions, click 'Continue' to format and erase pre-existing partitions on the USB drive.

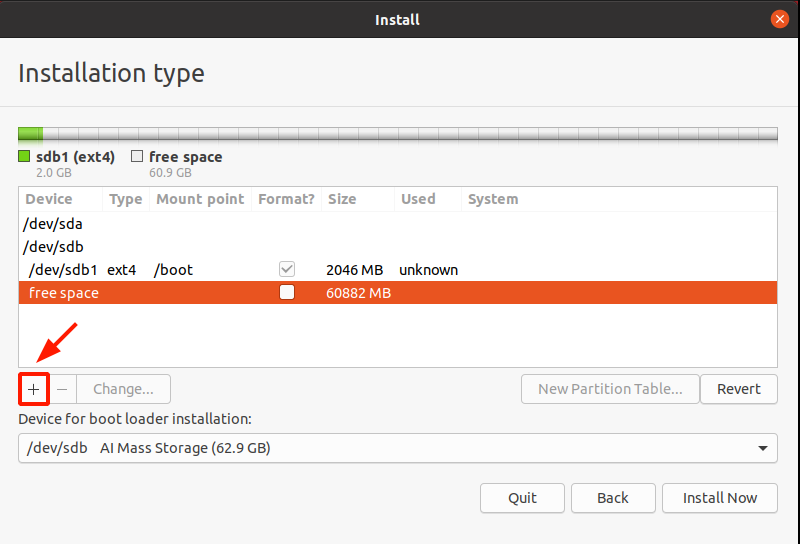
This creates free space in the partition table equivalent to the capacity of your USB drive. Click on the plus sign ( + ) to begin creating partitions.
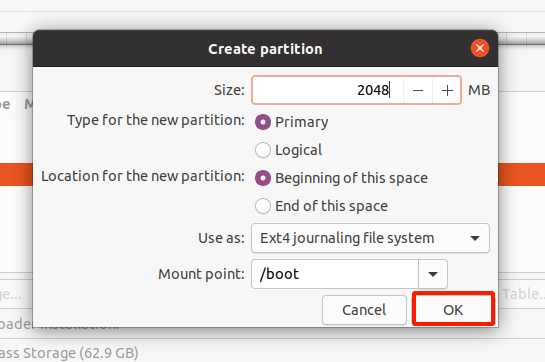
We will create the following partitions on the USB drive:
/boot - 2GB
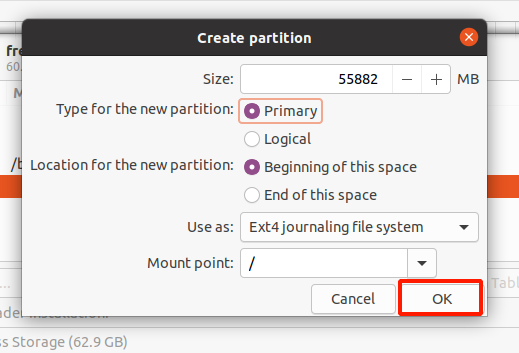
/ ( root ) - 55 GB
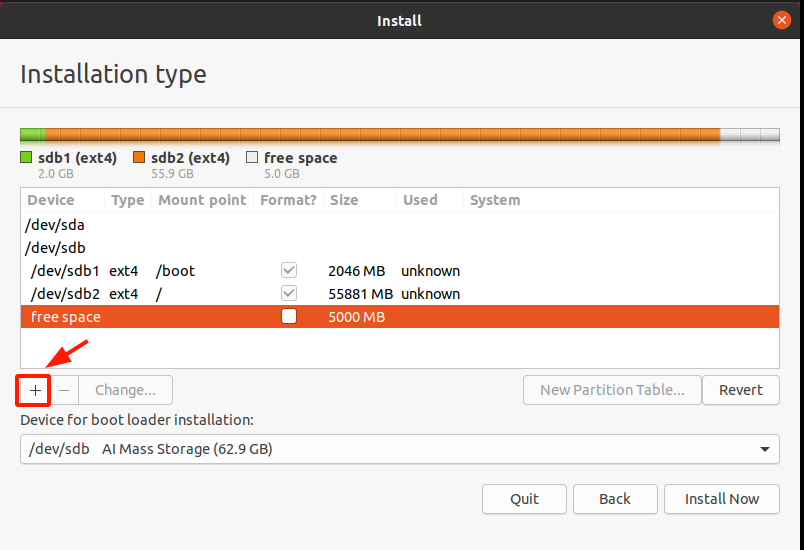
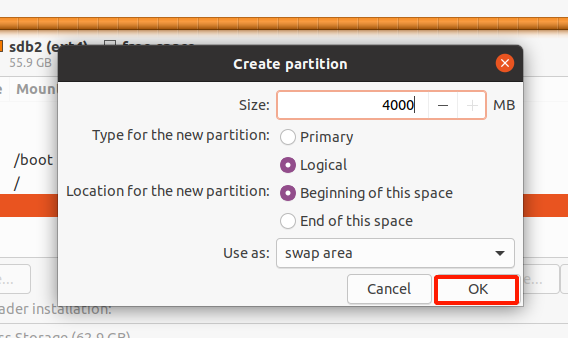
Swap 4 GB
Let's begin by creating the boot partitions. Specify the size in Megabytes and ensure mount point is set to /boot then click 'OK'.
This takes you back to the partition table. As evident, the boot partition has been created. To create the root ( / ) partition, click on the plus sign ( + ) once again.
Then specify the root partition size and mount point as / . And then click 'OK'.


So far, we have 2 partitions, boot and root partitions. To create the swap mount point, click on the plus sign ( + ) for the last time.
Define the size of Swap and in the 'Use as:' option, select Swap area. Then click 'OK'.
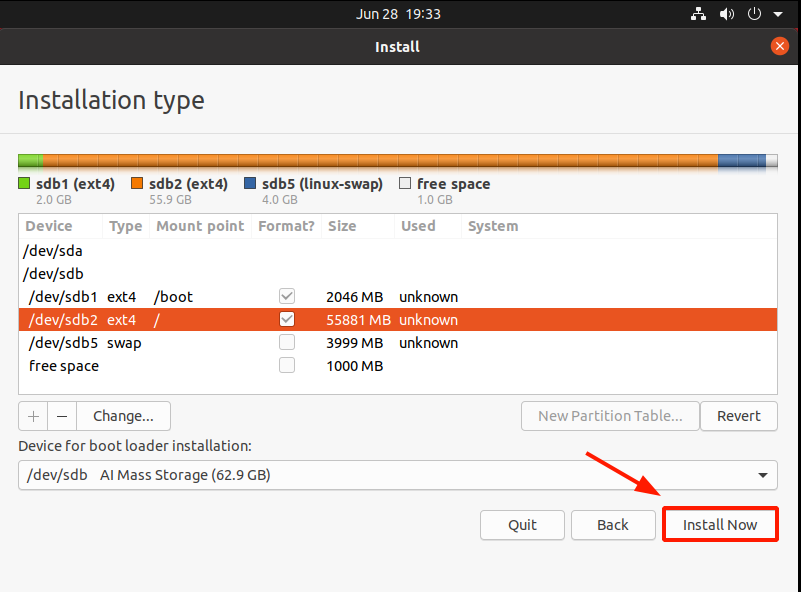
The partition table is now complete with all the partitions in place. To start the installation of Ubuntu on the USB drive, click on 'Install Now'.
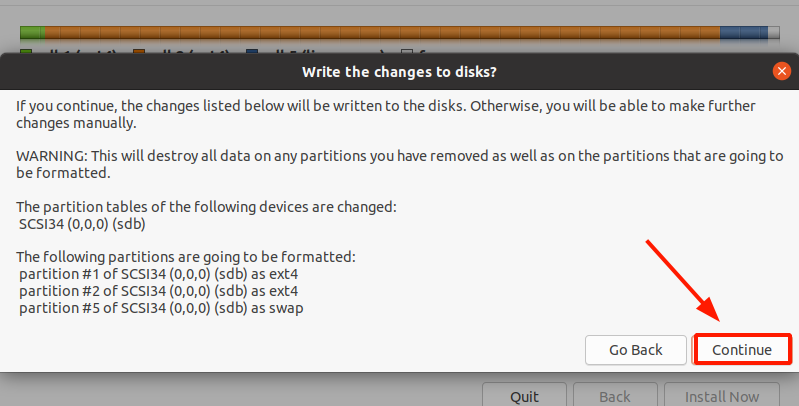
To save and write changes to the USB drive, click 'Continue'
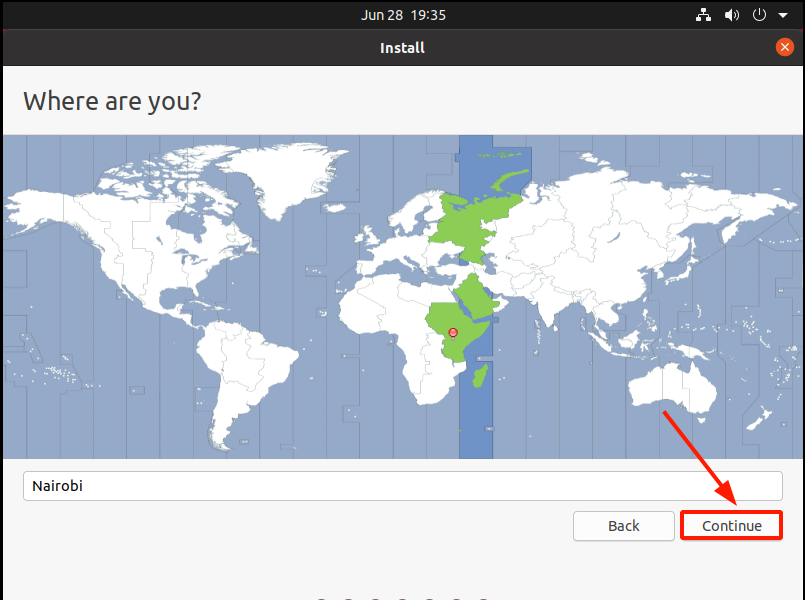
The installer automatically detects your location on the World map. Alternatively, you can click anywhere on the map to change your location. When satisfied, click on 'Continue'.
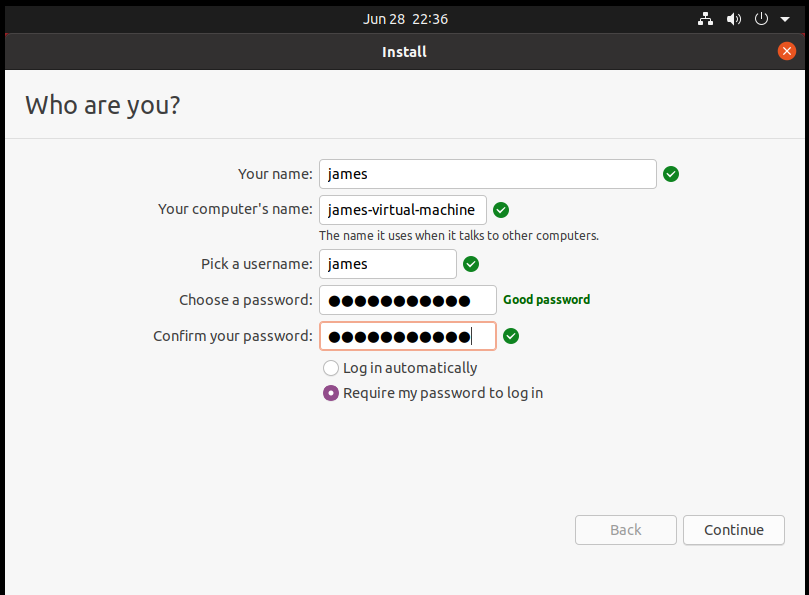
In the next step, fill out your credentials including your name, computer's name, username, and a strong password. Then click 'Continue'
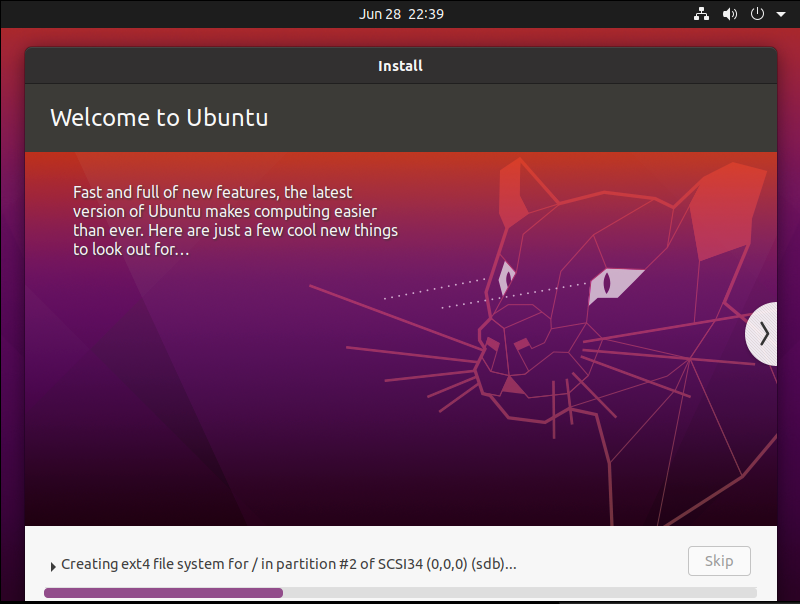
The installer will start installing all the software packages required by the system. Since the installation is being performed on a USB flash drive and not on a PC hard drive, the installation will take quite a while. So, just give it time as the installation progresses.
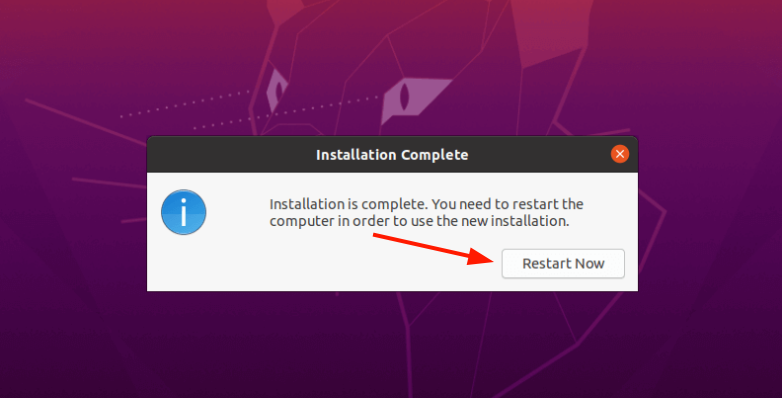
Finally, when the installation is complete, hit the 'Restart now' button. Be sure to remove the USB drives so that your PC can boot normally into its operating system.
You can now plug your USB drive into any PC and boot into your instance of Ubuntu that you have just created.
Conclusion
As demonstrated, the installation of Ubuntu to a USB drive is pretty similar to installing it normally on a PC. However, the performance of Ubuntu on a USB drive, is quite slow. It's therefore recommended to only carry out light workloads for best performance.
[출처] https://linoxide.com/how-to-install-ubuntu-on-usb-flash-drive/