
Spring 3 MVC Hello World Example
2011.11.01 15:31
Spring 3 MVC Hello World Example
[출처] http://www.roseindia.net/tutorial/spring/spring3/web/spring-3-mvc-hello-world.html
Getting stated with the Spring 3 MVC by developing first Hello World MVC example. This is the first example of writing first example in Spring MVC. After completing the tutorial you will be able to start developing small applications using Spring MVC.
In this section we will create a new project in Eclipse IDE and will name it "Spring MVC Hello World" application. We are using Spring 3 libraries in the application. You can download the latest Spring 3 framework fromhttp://www.eclipse.org/downloads/.
Let's start application "Spring MVC Hello World " example
Step 1:
Before we start Spring 3.0 at least requires JDK 5. So, make sure you have JDK 5 or above. Open dos prompt if you are using windows and type java -version. This will display the version of Java installed on your machine as shown below:
| C:\>java -version java version "1.6.0_14" Java(TM) SE Runtime Environment (build 1.6.0_14-b08) Java HotSpot(TM) Client VM (build 14.0-b16, mixed mode, sharing) C:\> |
If you don't know how to install Java read it athttp://www.roseindia.net/java/index.shtml
Step 2:
Download Eclipse IDE from Eclipse download site athttp://www.eclipse.org/downloads/. find the eclipse.exe in the extracted folder and double click eclipse.exe.
Step 3:
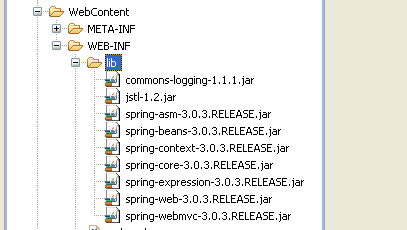
Spring 3.0 MVC JAR files:. Following are the list of JAR files required -
- commons-logging-1.1.1.jar
- jstl-1.2.jar
- spring-asm-3.0.3.RELEASE.jar
- spring-beans-3.0.3.RELEASE.jar
- spring-context-3.0.3.RELEASE.jar
- spring-core-3.0.3.RELEASE.jar
- spring-expression-3.0.3.RELEASE.jar
- spring-web-3.0.3.RELEASE.jar
- spring-webmvc-3.0.3.RELEASE.jar
Step 4:
Let us start with our first Spring 3.0 MVC based application.Open Eclipse and goto File->New->Dynamic Web Project-(click) wizard screen

After selecting Dynamic Web Project, open wizard screen, Inter Project name

After entering project name press Next; wizard will display the following screen:
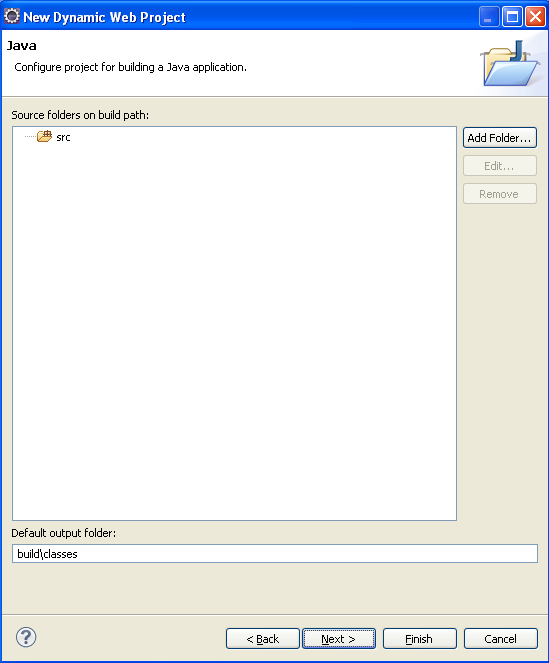
After that press Next button
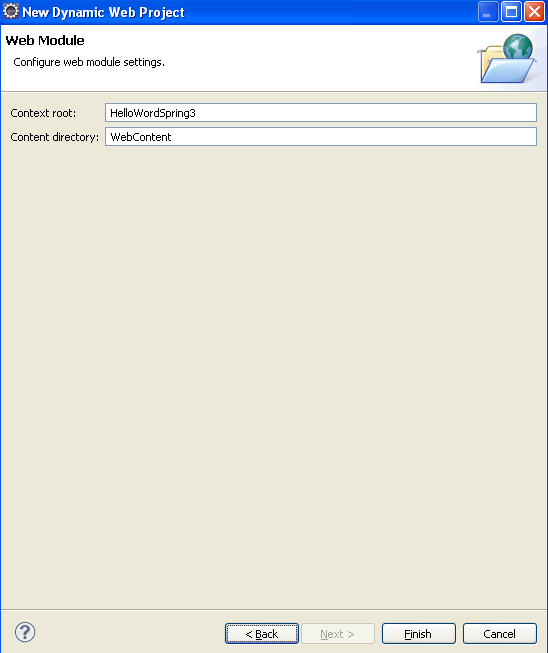
Now press Finish display project structure

Step 5:
Now copy all jar files and put in WebContent->WEB-INF > lib folder. display as
Step 6:
now src->New->other->Select Class and press Next
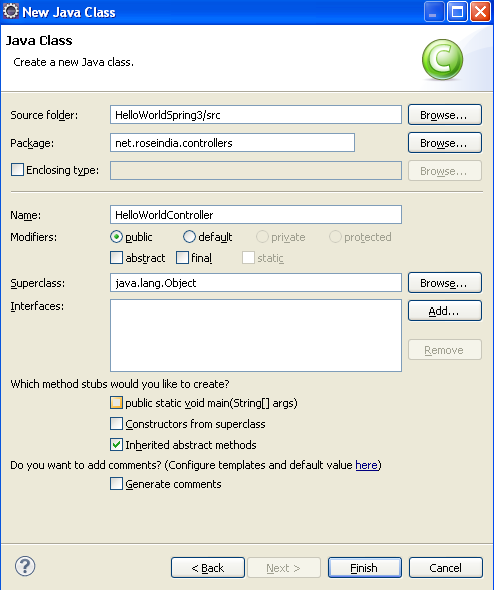
After press Next Inter Package name "net.roseindia.controllers" and Controller class name "HelloWorldController" and press Finish . after modify "HelloWorldController" as
| package net.roseindia.controllers; import org.springframework.web.servlet.ModelAndView; import org.springframework.stereotype.Controller; import org.springframework.web.bind.annotation.RequestMapping; import org.springframework.web.context.ContextLoaderListener; @Controller public class HelloWorldController { @RequestMapping("/helloworld") public ModelAndView helloWord(){ String message = "Hello World, Spring 3.0!"; return new ModelAndView("helloworld", "message",message); } } |
Step 7:
Now select WebContent->WEB-INF->New ->select Folder and Inter Folder name "views" and press Finish. Now create "helloworld.jsp" under WEB-INF->views.
File: WEB-INF/views/helloworld.jsp
| <%@ page language="java" contentType="text/html; charset=ISO-8859-1" pageEncoding="ISO-8859-1"%> <!DOCTYPE html PUBLIC "-//W3C//DTD HTML 4.01 Transitional//EN" "http://www.w3.org/TR/html4/loose.dtd"> <html> <head> <meta http-equiv="Content-Type" content="text/html; charset=ISO-8859-1"> <title>Spring 3.0 MVC Series: Hello World</title> </head> <body> ${message} </body> </html> |
Step 8:


Now create "index.jsp" under WebContent->index.jsp
File:WebContent/index.jsp
| <%@ page language="java" contentType="text/html; charset=ISO-8859-1" pageEncoding="ISO-8859-1"%> <!DOCTYPE html PUBLIC "-//W3C//DTD HTML 4.01 Transitional//EN" "http://www.w3.org/TR/html4/loose.dtd"> <html> <head> <meta http-equiv="Content-Type" content="text/html; charset=ISO-8859-1"> <title>Spring 3, MVC Examples</title> </head> <body> <h1>Spring 3, MVC Examples</h1> <ul> <li><a href="forms/helloworld.html">Hello World</a></li> </ul> </body> </html> |
Step 9:
Now modify web.xml under WebContent/WEB-INF/web.xml
| <?xml version="1.0" encoding="UTF-8"?> <web-app version="2.4" xmlns="http://java.sun.com/xml/ns/j2ee" xmlns:xsi="http://www.w3.org/2001/XMLSchema-instance" xsi:schemaLocation="http://java.sun.com/xml/ns/j2ee http://java.sun.com/xml/ns/j2ee/web-app_2_5.xsd"> <display-name>RoseIndia</display-name> <servlet> <servlet-name>dispatcher</servlet-name> <servlet-class>org.springframework.web.servlet.DispatcherServlet</servlet-class> <load-on-startup>1</load-on-startup> </servlet> <servlet-mapping> <servlet-name>dispatcher</servlet-name> <url-pattern>/forms/ *</url-pattern> </servlet-mapping> <welcome-file-list> <welcome-file>index.jsp</welcome-file> </welcome-file-list> </web-app> |
Step 9:
| <?xml version="1.0" encoding="UTF-8"?> <beans xmlns="http://www.springframework.org/schema/beans" xmlns:xsi="http://www.w3.org/2001/XMLSchema-instance" xmlns:p="http://www.springframework.org/schema/p" xmlns:context="http://www.springframework.org/schema/context" xsi:schemaLocation="http://www.springframework.org/schema/beans http://www.springframework.org/schema/beans/spring-beans-3.0.xsd http://www.springframework.org/schema/context http://www.springframework.org/schema/context/spring-context-3.0.xsd"> <context:component-scan base-package="net.roseindia.controllers"/> <bean id="viewResolver" class="org.springframework.web.servlet.view.InternalResourceViewResolver"> <property name="prefix"> <value>/WEB-INF/views/</value> </property> <property name="suffix"> <value>.jsp</value> </property> </bean> </beans> |
Step 10:
After we Add server in project . right click project -> New->server-> select server
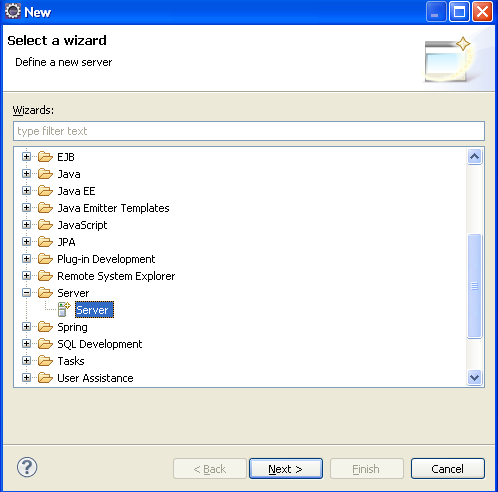
Now press Next

Now press Add and set server runtime environment. if exists in local tomcat then press "Browse" and select Tomcat server path otherwise press "Download and Install" .
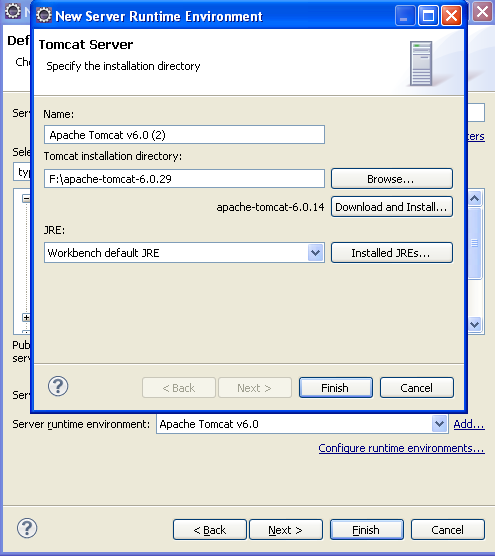
Now press Finish and press Next.
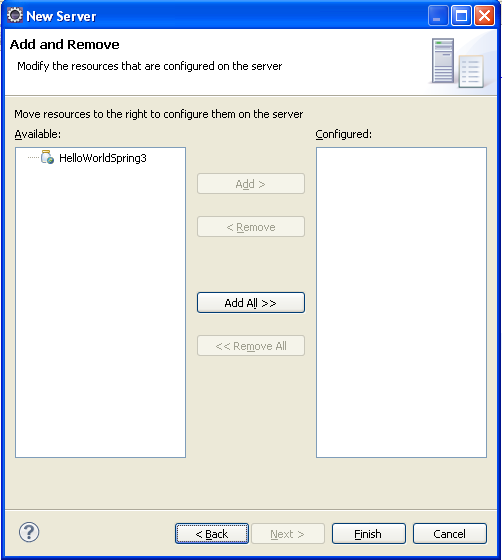
Now press Add All>> and after press Finish .
Step 11:
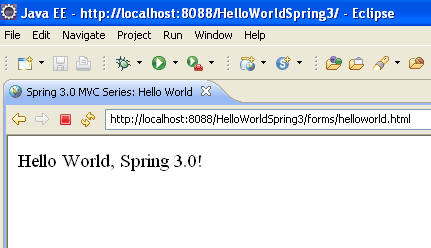
Now Run the Project , Right click project ->Run As->Run on Server((Shortcut: Alt+Shift+X, R))
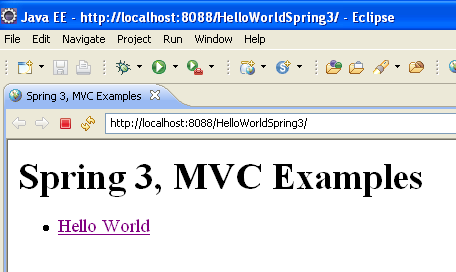
After click "Hello World" Link
Download Source Code
Click here to download source code
광고 클릭에서 발생하는 수익금은 모두 웹사이트 서버의 유지 및 관리, 그리고 기술 콘텐츠 향상을 위해 쓰여집니다.