
[ 一日30分 인생승리의 학습법 ] Build Your Own Remote Desktop Application using Javascript, Python & WebRTC — Part 2
2022.08.05 17:52
[ 一日30分 인생승리의 학습법 ] Build Your Own Remote Desktop Application using Javascript, Python & WebRTC — Part 2
Build Your Own Remote Desktop Application using Javascript, Python & WebRTC — Part 2
Part 2 : Screen Sharing and integration of Mouse Onclick Events
What we going to do ?
We going to build a simple web page which will share your screen on the browser and in that we will integrate mouse onclick events which will get the events from the browser and it will be executed on your desktop using “Python”.
Note : Basically Screen Share API will only allow us to share the screen and its audio. It won’t provide the control functionalities like mouse movements or onclick events. So we are going to add the control feature manually.
Requirements
- Python 3.4 or above
- HTML & JavaScript ????
Python Libraries
Let us code . . . ????
Step 1 : Create a client web page with Share Screen Share API
index.html
<!DOCTYPE html>
<html lang="en">
<head>
<meta charset="UTF-8">
<meta http-equiv="X-UA-Compatible" content="IE=edge">
<meta name="viewport" content="width=device-width, initial-scale=1.0">
<title>Document</title>
<script src="./app.js"></script>
<link href="./style.css" rel="stylesheet">
</head>
<body>
<video id="vid"
autoplay
onclick="pointer(event)"
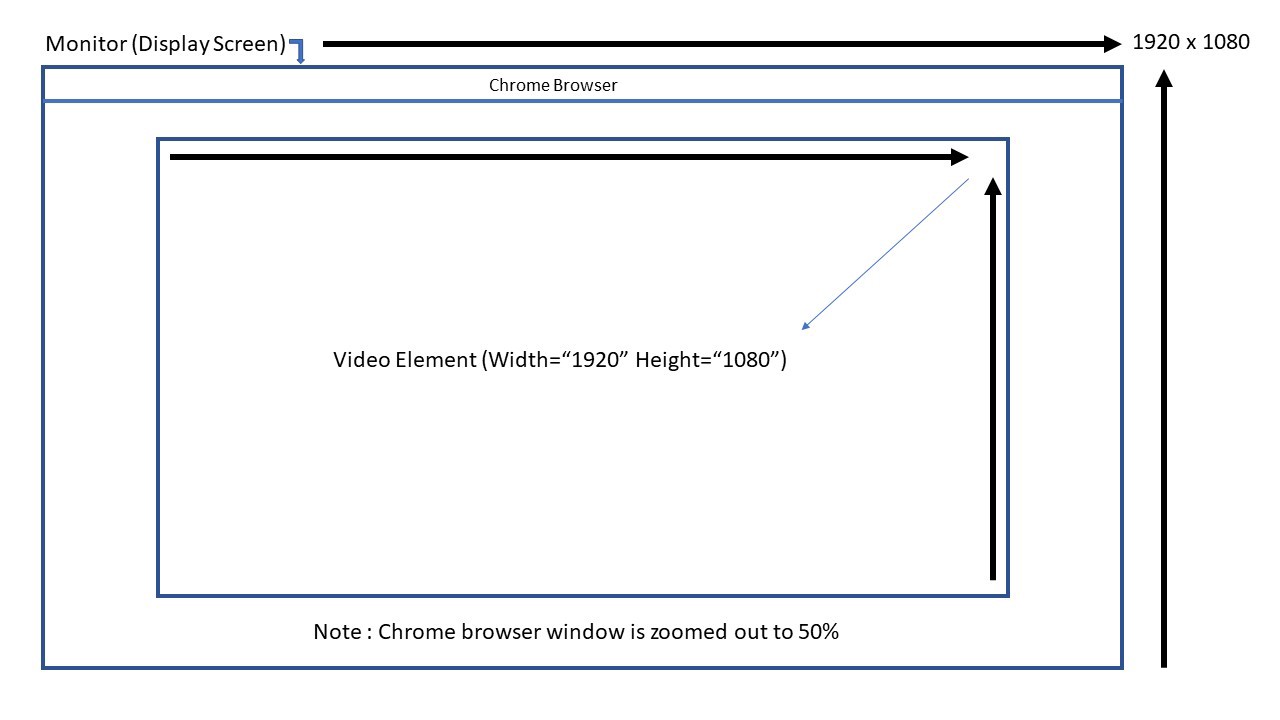
width="1920" height="1080">
</video>
</body>
</html>
style.css
body {
    display: flex;
    justify-content: center;
}
app.js
/* code to connect with websocket server */
const socket = new WebSocket('ws://localhost:5000')
/* code to get screen display */
navigator.mediaDevices.getDisplayMedia({video: true, audio: true})
.then(stream => {
    // inject stream object as a source for video element //
    document.getElementById('vid').srcObject = stream
    document.getElementById('vid').play
    // inject stream object as a source for video element //
})
.catch(e => console.log(e))
/* The below function send the mouse coordinates to the server */
function pointer(e) {
    let posX = document.getElementById('vid').offsetLeft
    let posY = document.getElementById('vid').offsetTop
    let X = e.pageX - posX
    let Y = e.pageY - posY
    let pointer = X.toString() + ',' + Y.toString()
    console.log(pointer)
    socket.send(pointer)
}
Note : The above javascript code will act as a client and it will send the mouse coordinates (click event) to the server.
Step 2 : Create a websocket server to execute a mouse movement on desktop using Python
implementer.py
import asyncio      # importing asyncio library #
import websockets   # importing websocket library #
import pyautogui    # importing pyautogui library ## Asynchronous function receive the message from client #
async def handler(websocket, path):
    async for message in websocket:
        try:
            pointer = message.split(',')
            pyautogui.moveTo(int(pointer[0]), int(pointer[1]))
            print('X : ', pointer[0])
            print('Y : ', pointer[1])
        except:
            pass# Iinitating the server #
start_server = websockets.serve(handler, "localhost", 5000)# Run's the server continuously #
asyncio.get_event_loop().run_until_complete(start_server)
asyncio.get_event_loop().run_forever()
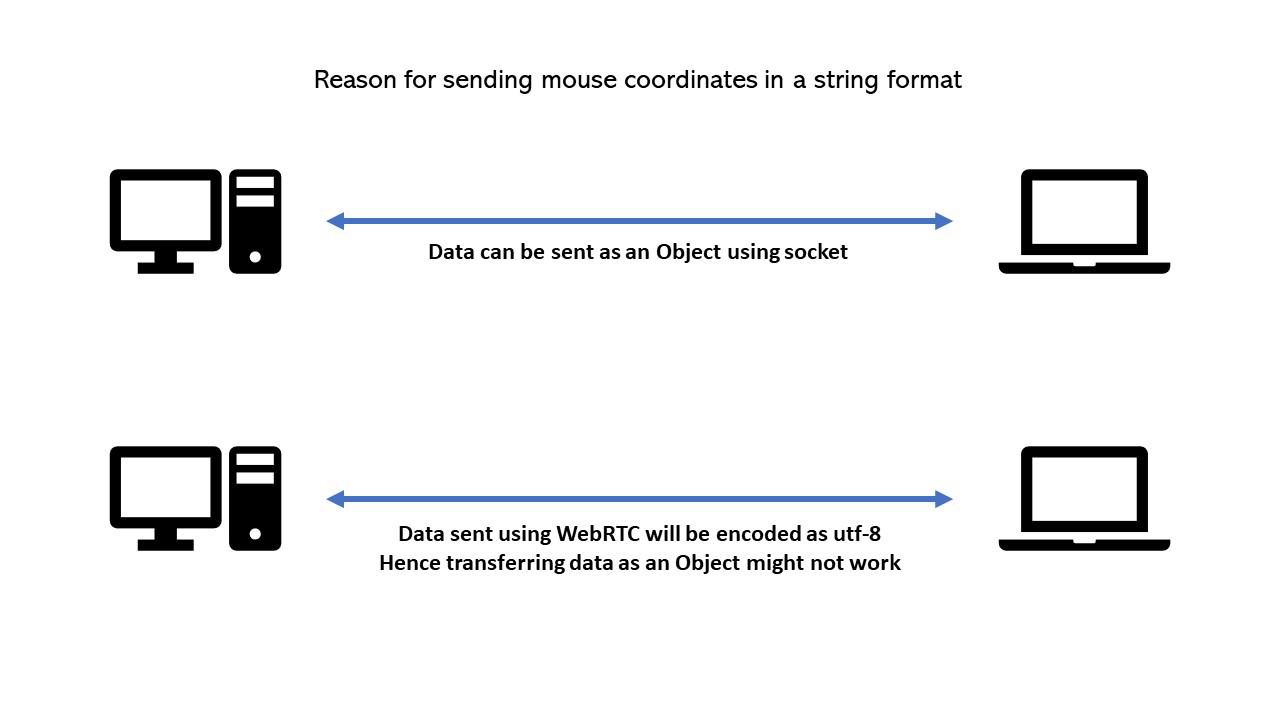
Note : In the above python program we are receiving the coordinates as a string instead of getting it as an object and splitting it by passing “comma” as an argument. There is a reason behind sending and receiving the coordinates in “string” format. Because in this example we are integrating the mouse click event functionalities using websockets but in future will establish a remote connection between two different computers using “WebRTC” instead of websockets or socket.io based on that transferring of object using WebRTC may not work. Hence we are transferring the coordinates as a string.
How it works ?
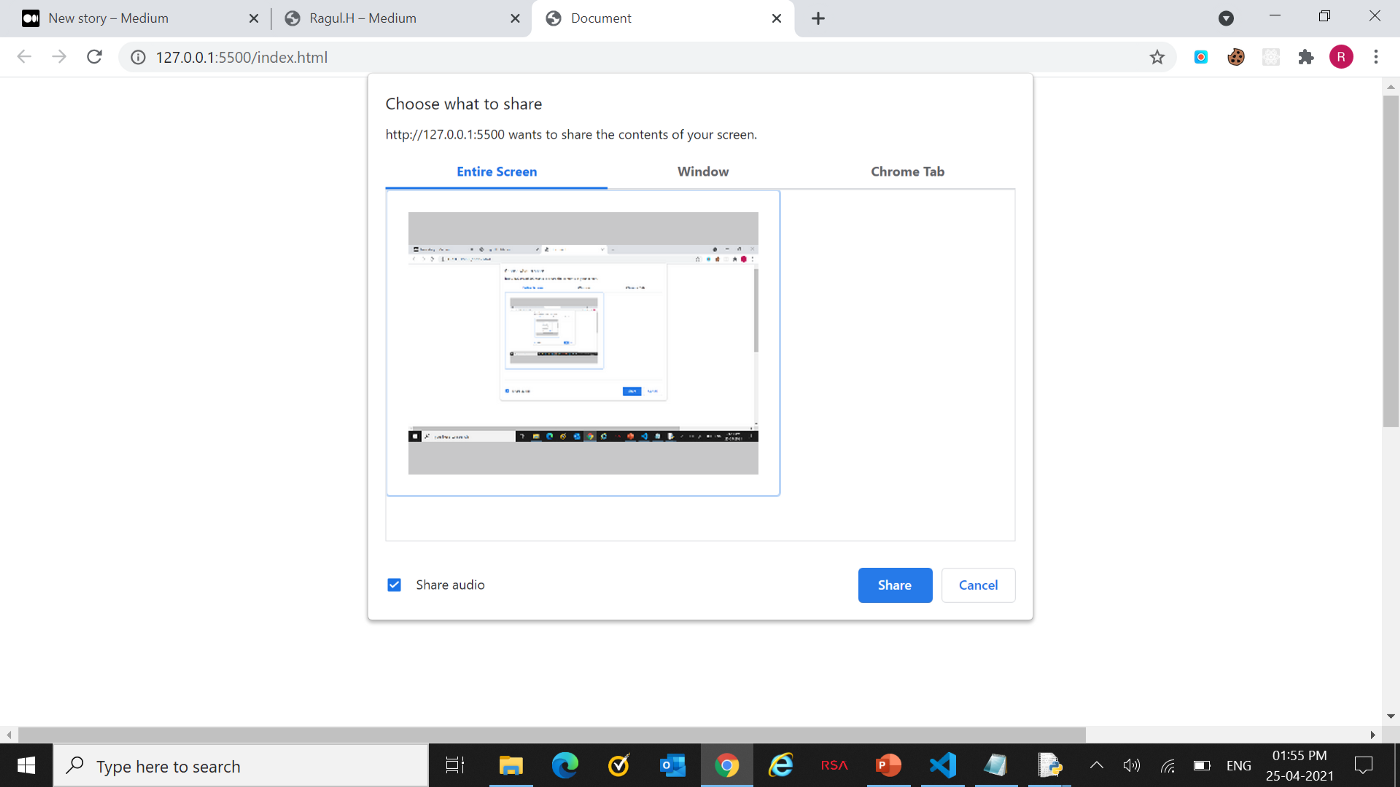
We need to execute python script first and it will wait for the client to connect and then run the web page. Once the web page loaded on the browser it will ask us to select the window to share. After clicking the window it will start to share screen and at the same time the websocket connection will be established.
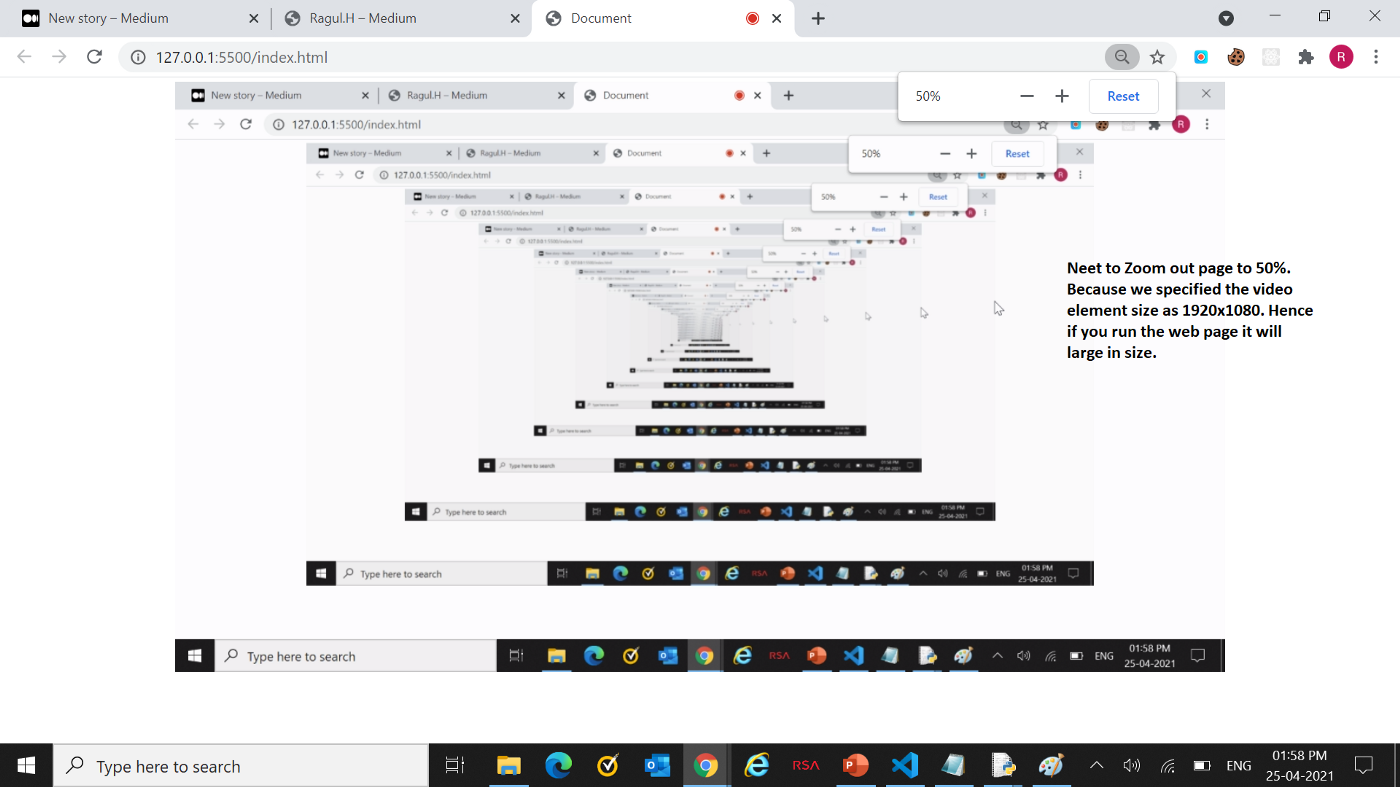
Note : We need to zoom out the browser to 50%. Because we specified video size as 1920 x 1080 hence in default the web page will be large in size so we need to resize it using browser zoom out option.
After zooming out to 50% you will see your screen on the browser. Now if you click anywhere on the video element the cursor will automatically move to that position on your main desktop.
That’s it… Done.
Finally we added the mouse onclick functionality to Screen Share API. ????


Important Note :
The Part 1 & Part 2 blogs are mainly posted to get some idea about developing Remote Desktop Application. In upcoming posts we will develope Remote Desktop Application with full functionalities like Mouse Events, Keyboard Events & On-Screen JoyPad Controls (To play PC games on Mobile).
The latest blog links will be updated here soon…
Thank You & Happy Learning ????
[출처] https://ragul-harisankar.medium.com/build-your-own-remote-desktop-application-using-javascript-python-webrtc-c77b32c0249e
광고 클릭에서 발생하는 수익금은 모두 웹사이트 서버의 유지 및 관리, 그리고 기술 콘텐츠 향상을 위해 쓰여집니다.