
Learning how to create a metaverse dApp with Unity is currently on every developer’s mind. This is no surprise as blockchain technology, NFTs, and in-game assets are gaining massive popularity in the Web3 realm. Although, we need to keep in mind that, in its truest form, the metaverse remains a concept. As such, there are Web3 applications that currently include metaverse-like elements. However, only time will tell if/when we will be able to create a true and fully immersive metaverse (think Ready Player One). But for now, we have to settle with what’s possible. Therefore, we can create dApps containing metaverse-like elements. Furthermore, these can be all sorts of games, virtual social networks, and virtual events. So, if creating a metaverse Web3 application sounds interesting, follow along as we discover how to create a metaverse dApp with Unity in this article.
As we move forward, you’ll learn how to use the ultimate Web3 development platform, Moralis. This “Firebase for crypto” platform is here to cover all of your blockchain-related backend needs. With the Moralis Metaverse SDK, you can include crypto functionality with just short snippets of code. Moreover, when it comes to tackling “how to create a metaverse”, Moralis’ ultimate NFT API can also be helpful. Thus, by joining us as we build a metaverse dApp with Unity, you have a chance to put Moralis to use. All you need to do is create your free Moralis account and complete the initial setup, which we will guide you through. Of course, being familiar with Unity makes things easier. However, the example project that we are about to take on herein is rather simple. As such, even complete beginners should have no problem to build a metaverse dApp with Unity.
How to Create a Metaverse dApp – An Example Project
In the following sections, we’ll dive straight into our example project. Now, in order to build a metaverse dApp with Unity, we will take several shortcuts. We will heavily rely on the asset store from Unity, which will provide us with the elements we’ll use to build our 3D space and our character. Furthermore, to make things even simpler, you have a chance to access our complete code at GitHub. However, before we actually show you how to create a metaverse, let’s do a brief preview of our example dApp.
Build a Metaverse dApp with Unity – Preview
Note: If you are more of a video person, we recommend checking out the video at the end of this article starting at 0:51. There, a Unity and Moralis expert will show you the details of our example dApp.
Here is a screenshot of our example metaverse before a user logs in:
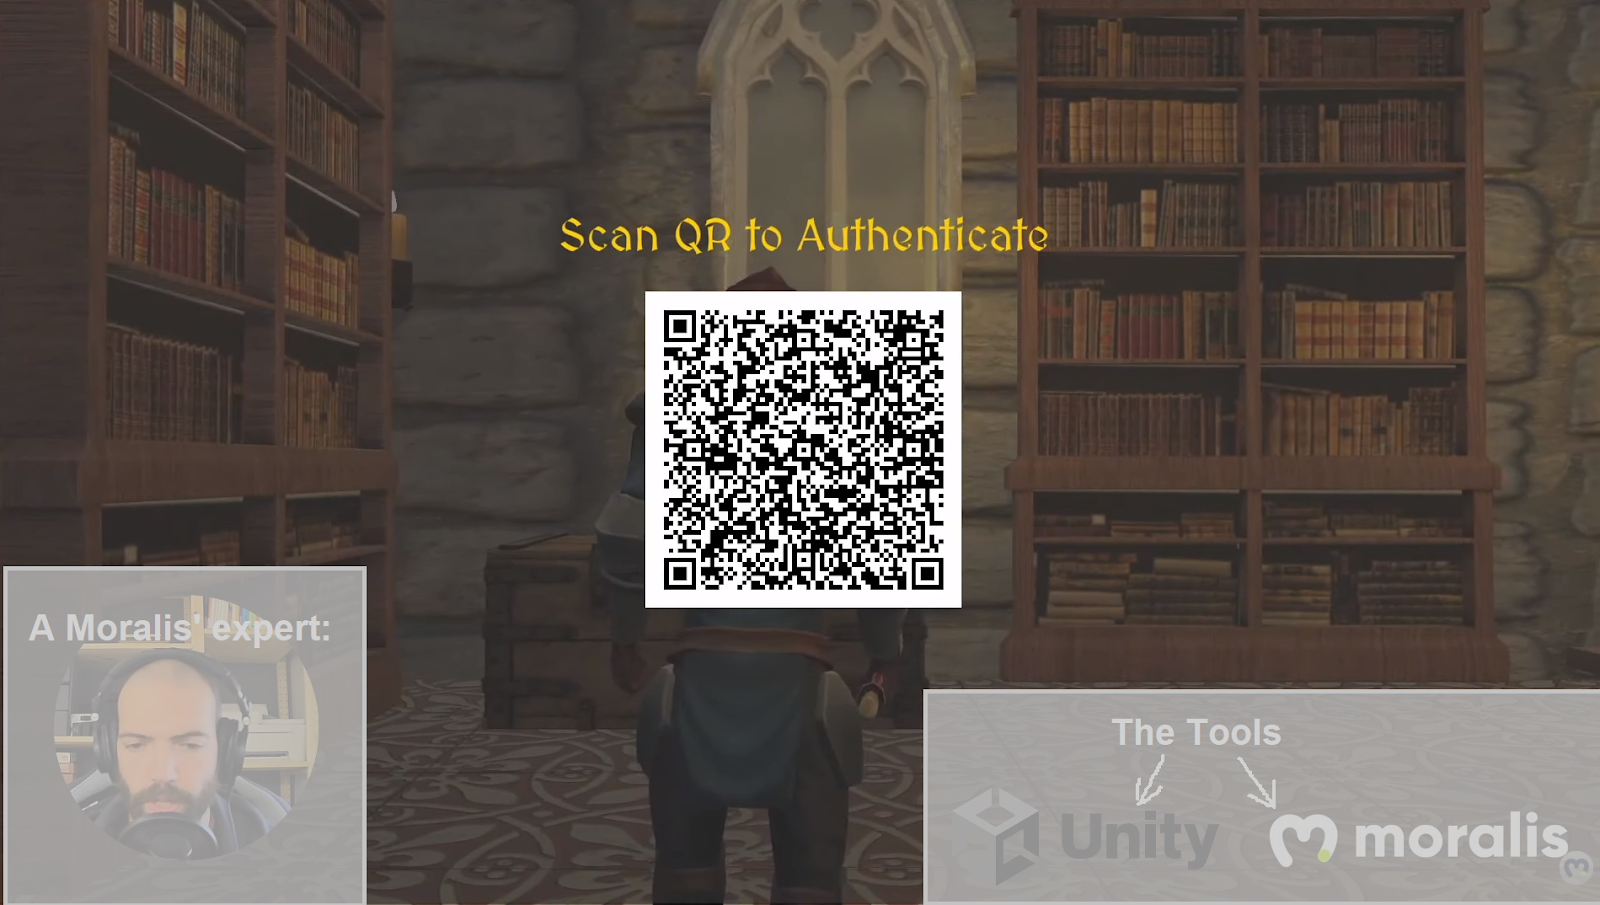
Looking at the image above, you can see our example 3D world – a medieval library. Also, you can see a QR code, which serves as a gateway to our metaverse. Furthermore, just above the code is a clear instruction that tells users what to do.
However, once users scan the QR code and confirm their login, they get to control the avatar. Moreover, the avatar now has a user’s Web3 wallet address displayed above its head:
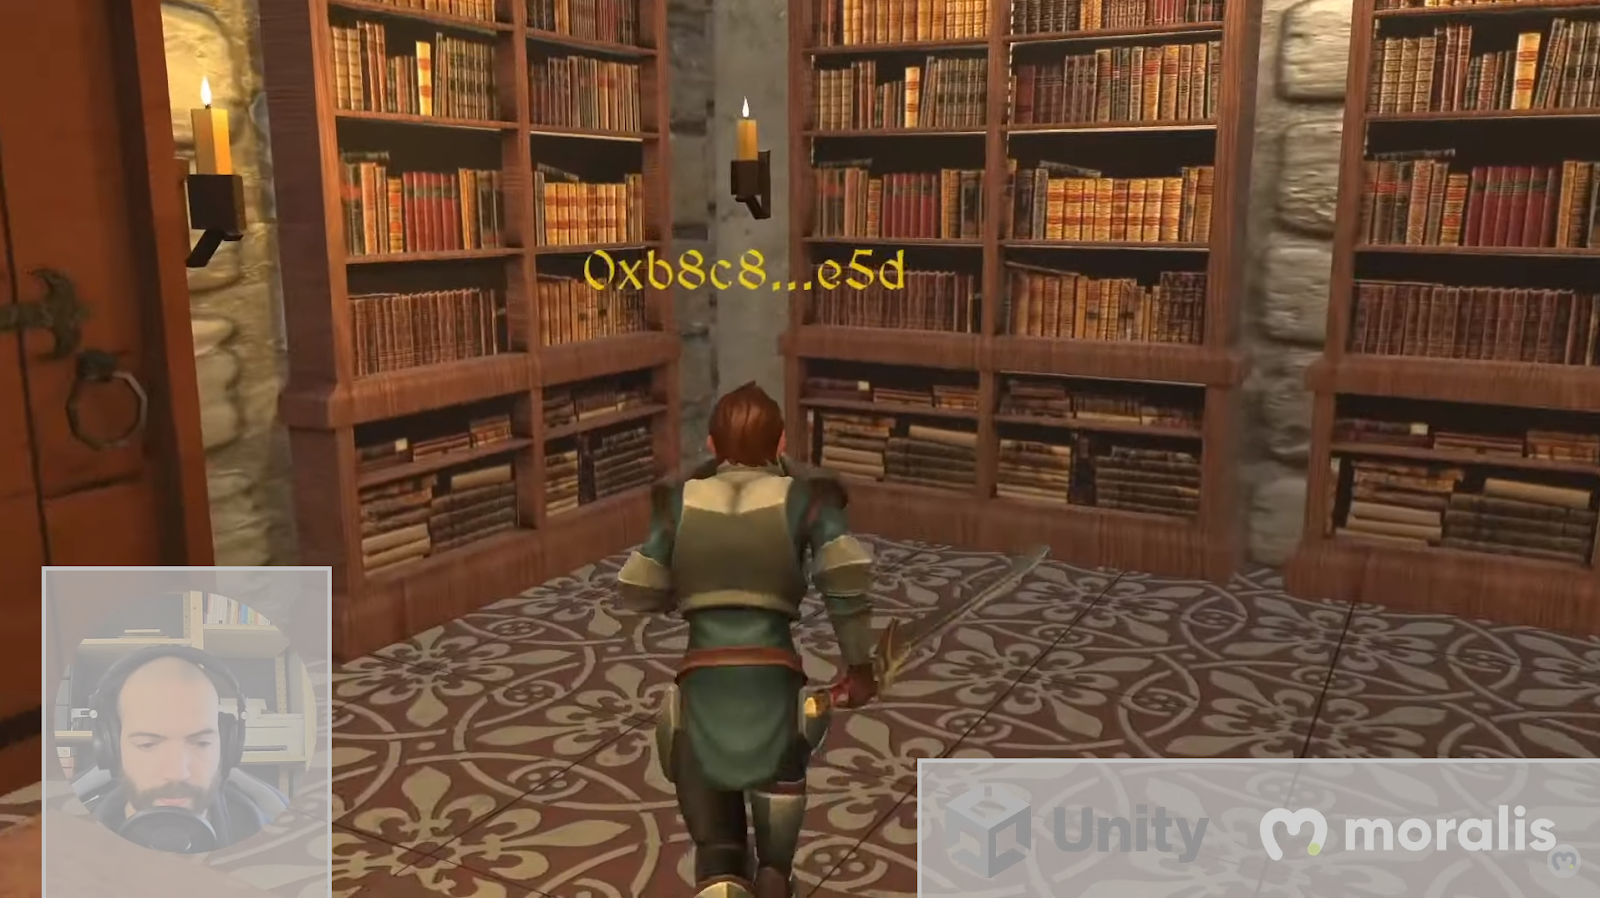
The above two screenshots are the gist of our example dApp. As you can see, we kept things as simple as possible. However, we hope that you can see the potential of our example. By expanding the 3D world (adding rooms, buildings, maps, etc.) and adding multiple characters, you can have yourself a proper metaverse. With the preview under our belts, let’s show you how to create a metaverse dApp with Unity and Moralis.
If you feel like you need to brush up on your metaverse knowledge before moving forward, make sure to read our article answering the question “what is the metaverse?“.
How to Create a Metaverse dApp with Unity and Moralis
Here are the main steps we will complete during our “how to create a metaverse” quest:
- Create a 3D world.
- Create a third-person character (an avatar).
- Add a Web3 wallet login using a neat QR code option.
We will complete the first two steps using Unity. As mentioned above, we will make our work a whole lot simpler by using free assets offered by the Unity Asset Store. You can find all the used assets in the “Assets” folder on GitHub.
Nonetheless, in the last step, we’ll put the best Web3 backend platform to use. Furthermore, this is also the step that will enable users to enter our example metaverse. Moreover, let’s point out that Web3 authentication or Web3 login is an essential part of all dApps. Fortunately, there are many reliable and user-friendly options available. For instance, when targeting crypto-savvy users, MetaMask and WalletConnect authentications are the way to go. However, when Web3 user onboarding focuses on more traditional users, Web3 social login and Web3 authentication via email are even better options. As such, make sure to know which audience are you targeting when creating dApps or metaverses.
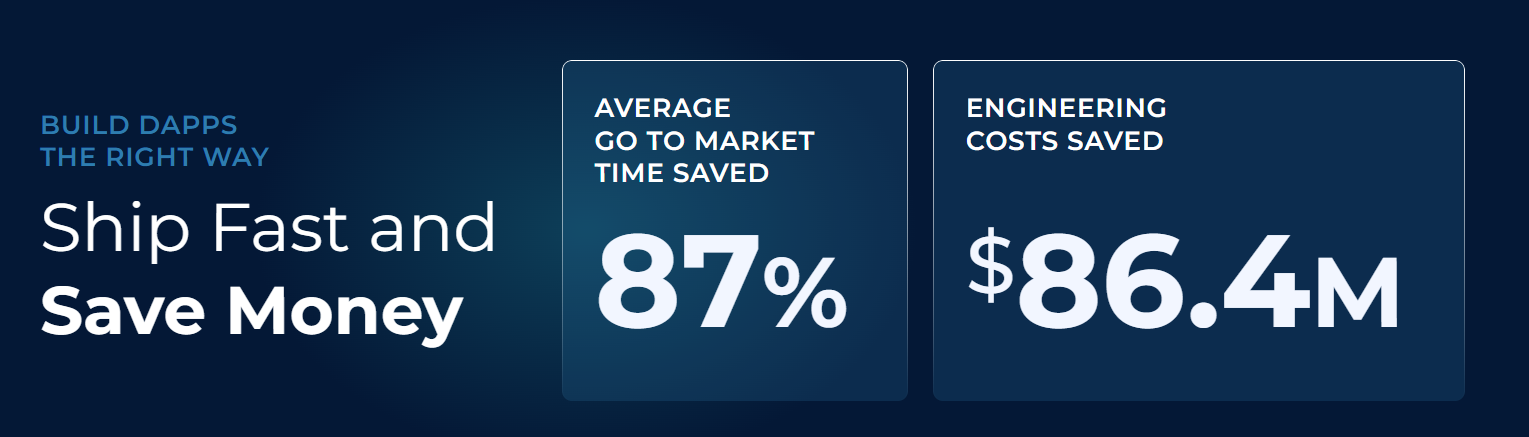
In addition, it is the third step where you will get to experience the power of the Moralis SDK. As such, you’ll get a peek at why Moralis saves developers more than 87 percent (87%) of development time. Moreover, by using Moralis, you can avoid all of the limitations of RPC nodes. Furthermore, thanks to Moralis’ cross-chain interoperability, your dApps are not limited to a single chain. In turn, your work is “future-proofed”. Aside from outstanding APIs, Moralis also provides you with Moralis servers, Moralis dashboard (database), and the Moralis “sync” feature. The combination of these tools enables you to sync and index smart contract events and index the blockchain.
Build a Metaverse dApp with Unity – Create a 3D World
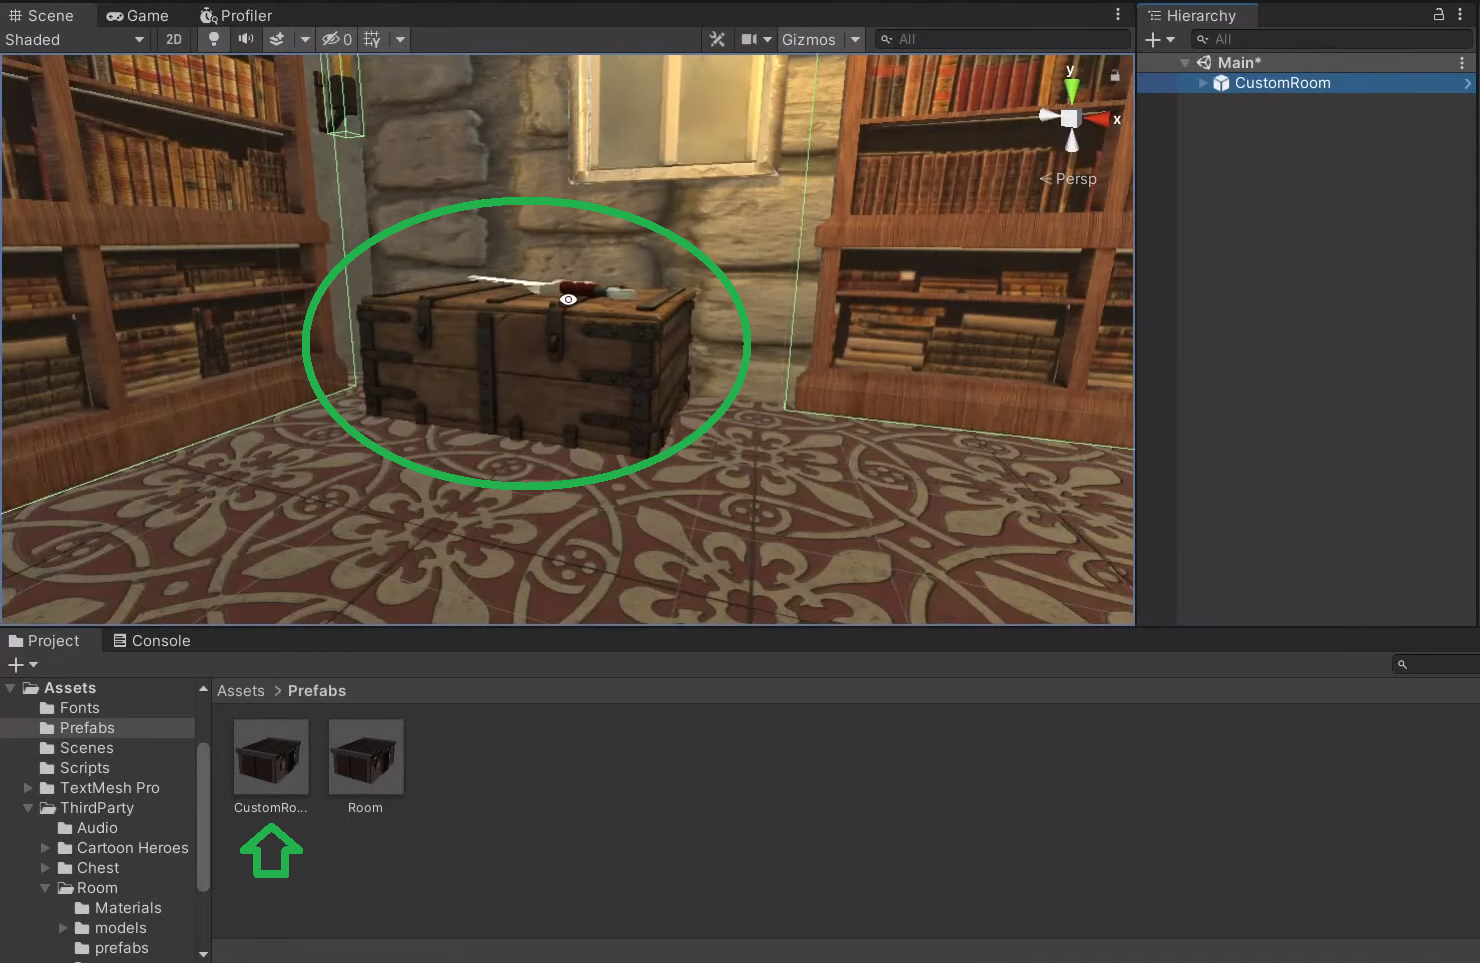
Using the video below (starting at 3:57), a Moralis expert will guide you through the steps to create a 3D world. If you want to be creative, feel free to use different assets. You will start by creating a new scene. Then, you will learn how to neatly arrange and group the asset files so that you can navigate your folders easily. Essentially, he will be using the “CustomRoom” file, which contains a chest with a sword on top of it:
Build a Metaverse dApp with Unity – Adding a Third-Person Character
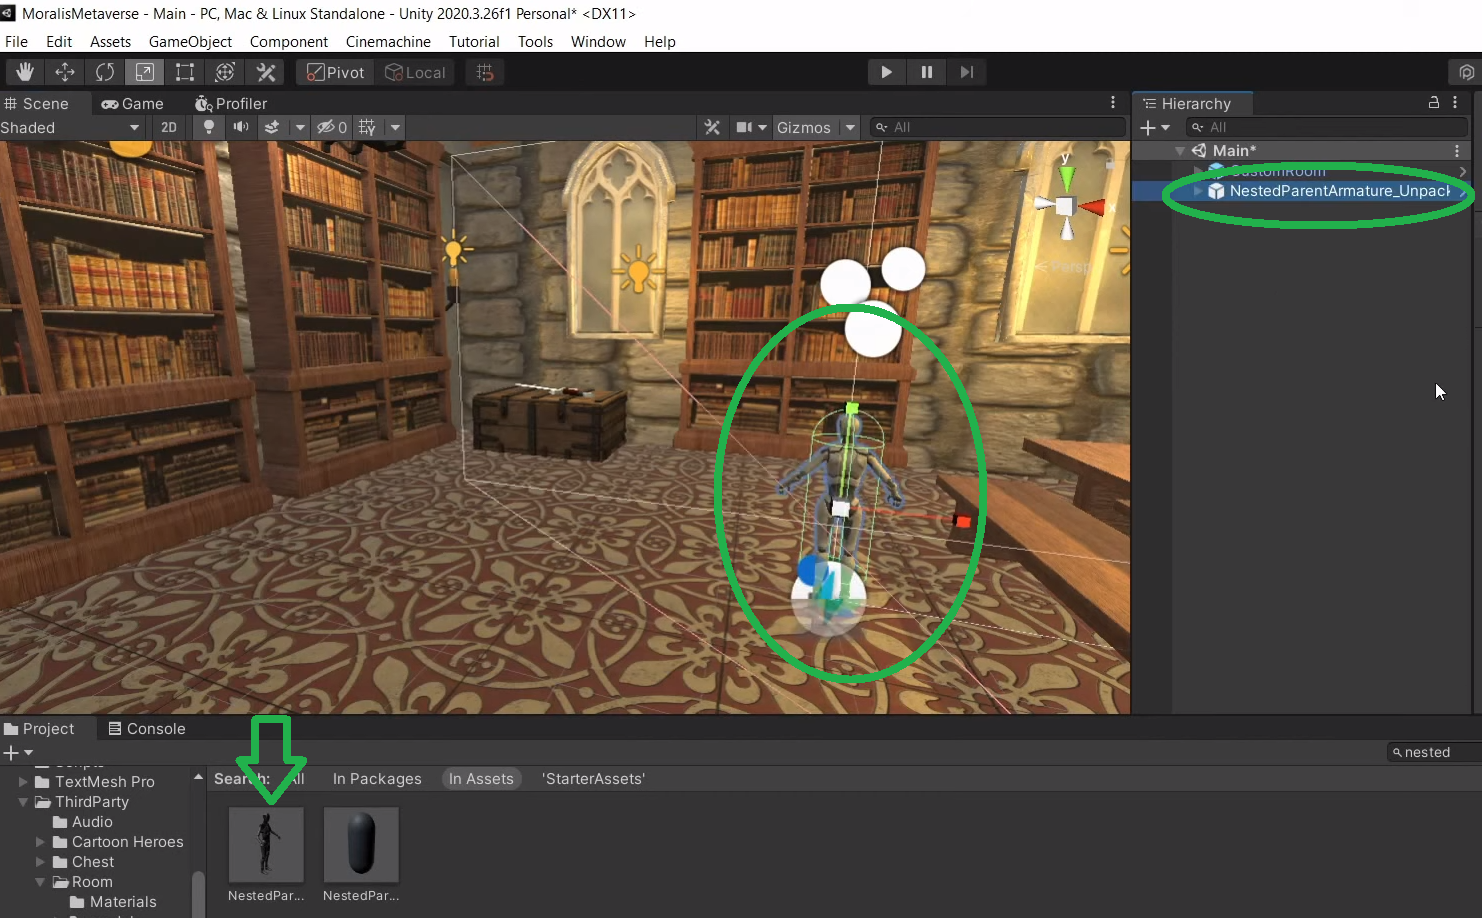
Once you have your 3D world ready, you can add a third-person character. Fortunately, you can use free assets to avoid building characters from scratch. For more detailed guidance on how to add an avatar, watch the video at 5:30. There, the expert will show you how to locate “NestedParentArmature” (“Player”), which you can use as a base for your character:
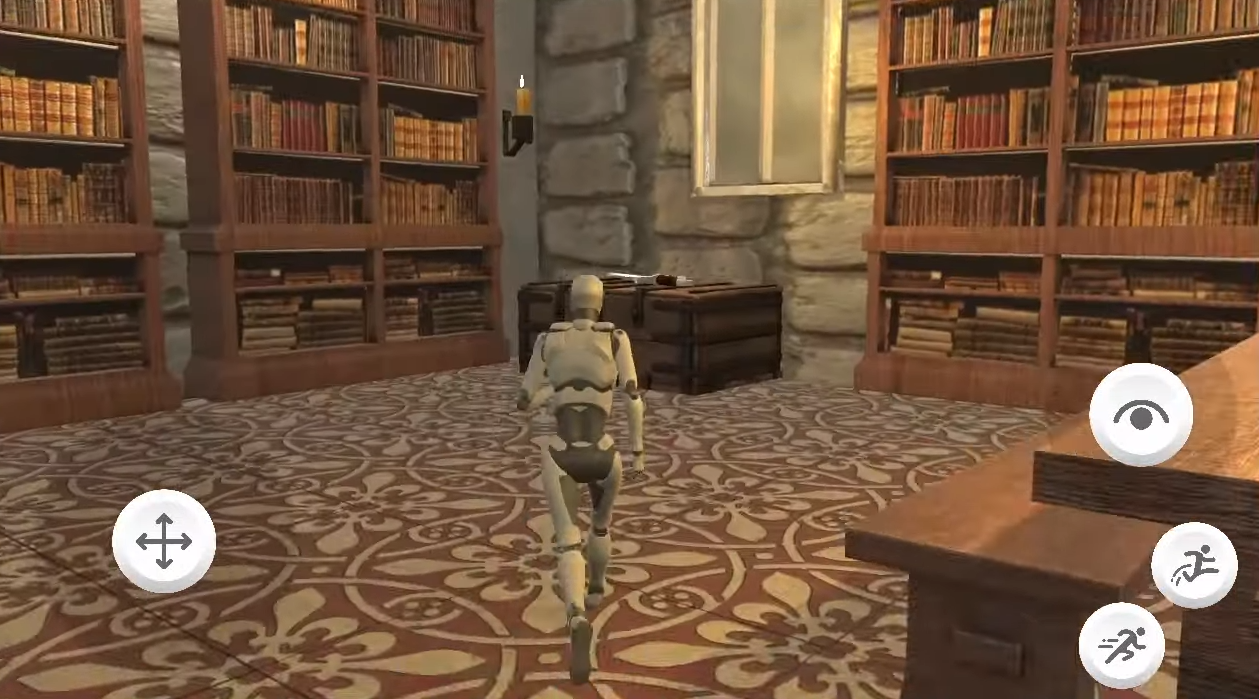
Moreover, you’ll learn how to add a mesh collider to your room so that the character can walk on the floor. This will already provide you with a fully functional avatar; however, in a robot appearance:
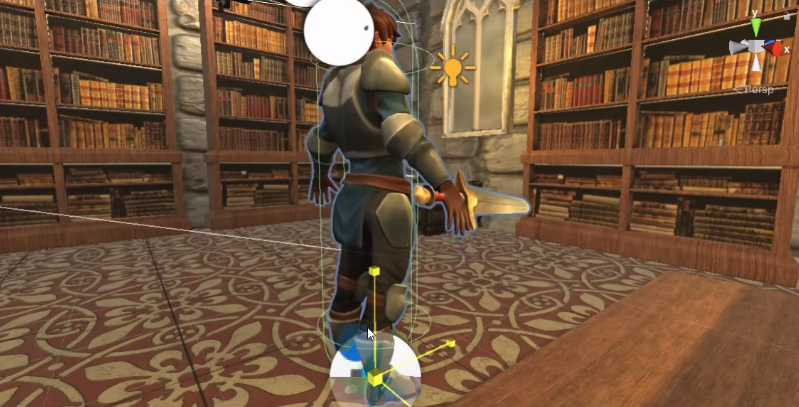
Then, you’ll learn how to change the avatar’s armature. For this example, we’ve gone with the “Male C” option. With a few simple clicks, you will have a cool-looking avatar at your disposal. Furthermore, since the initial size of the character is a bit smaller, you’ll also learn how to scale it up:
With the above steps completed, you should now have your example 3D world and your third-person character ready. This means that it is time to add blockchain features. As explained above, this is where Moralis makes things as straightforward as it gets.
How to Create a Metaverse dApp – Crypto Integration
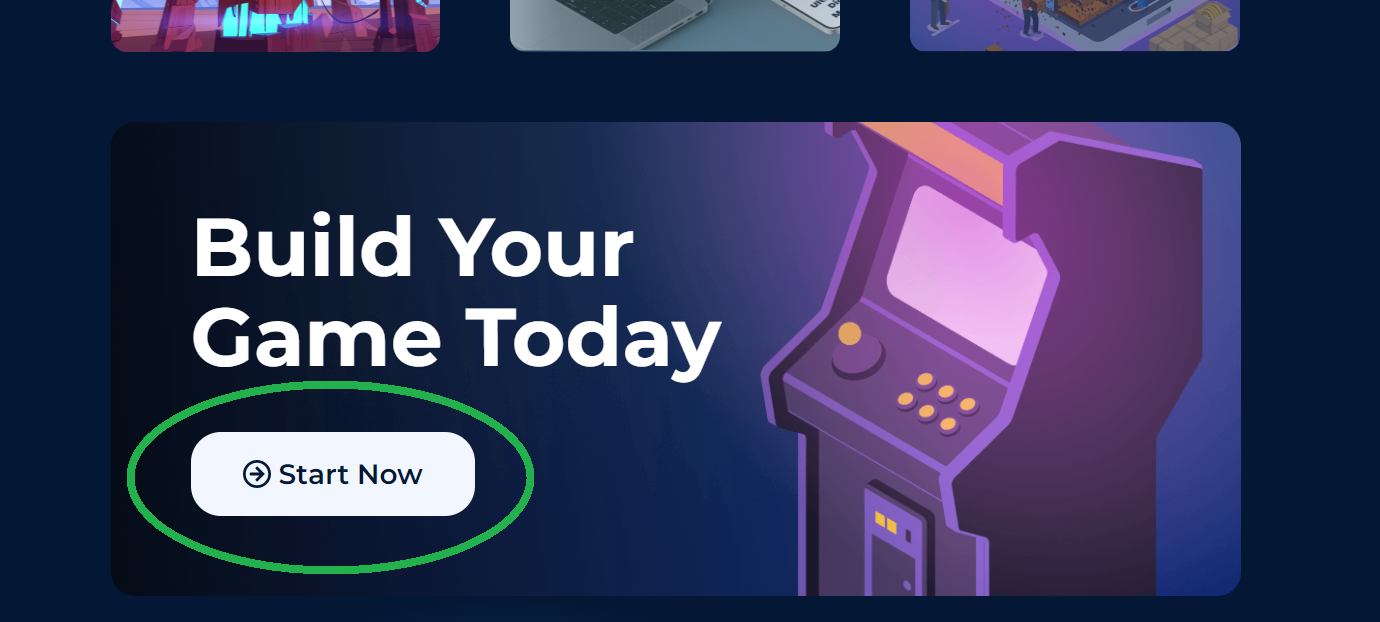
In case you want to rely on the video below, jump to 8:25. There you’ll see that you can even use Google to access the Moralis Metaverse SDK. However, you may use the link mentioned earlier. Once on the Moralis Metaverse SDK page, scroll down a bit and click on the “Start Now” button:
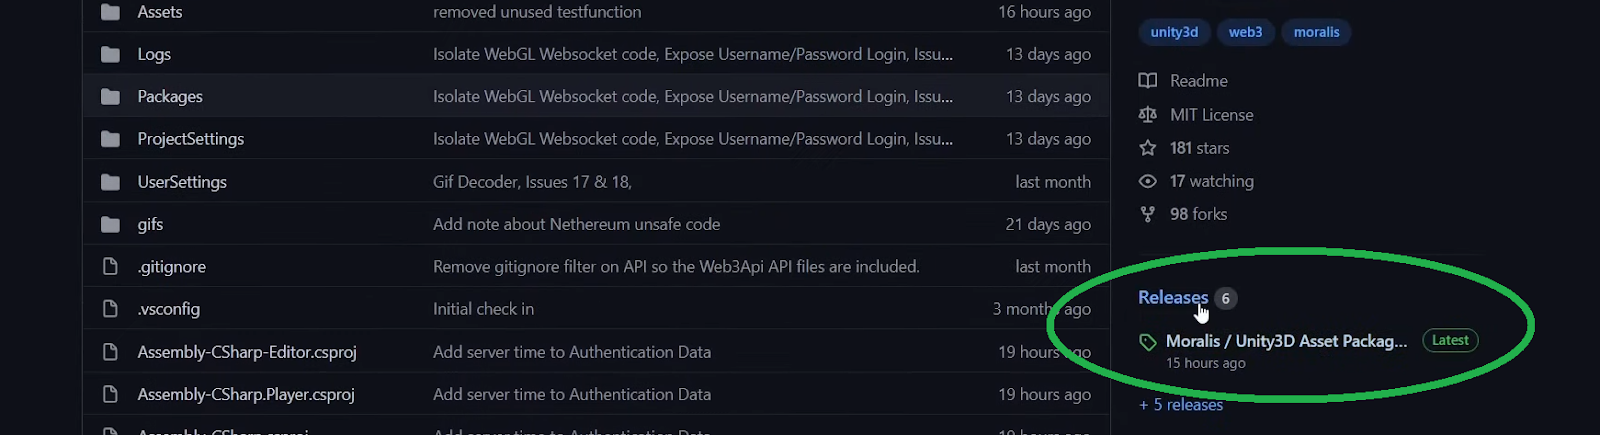
This will take you to the Ethereum Unity boilerplate that is waiting for you at GitHub. Next, click on the “Releases” section to access the latest version:
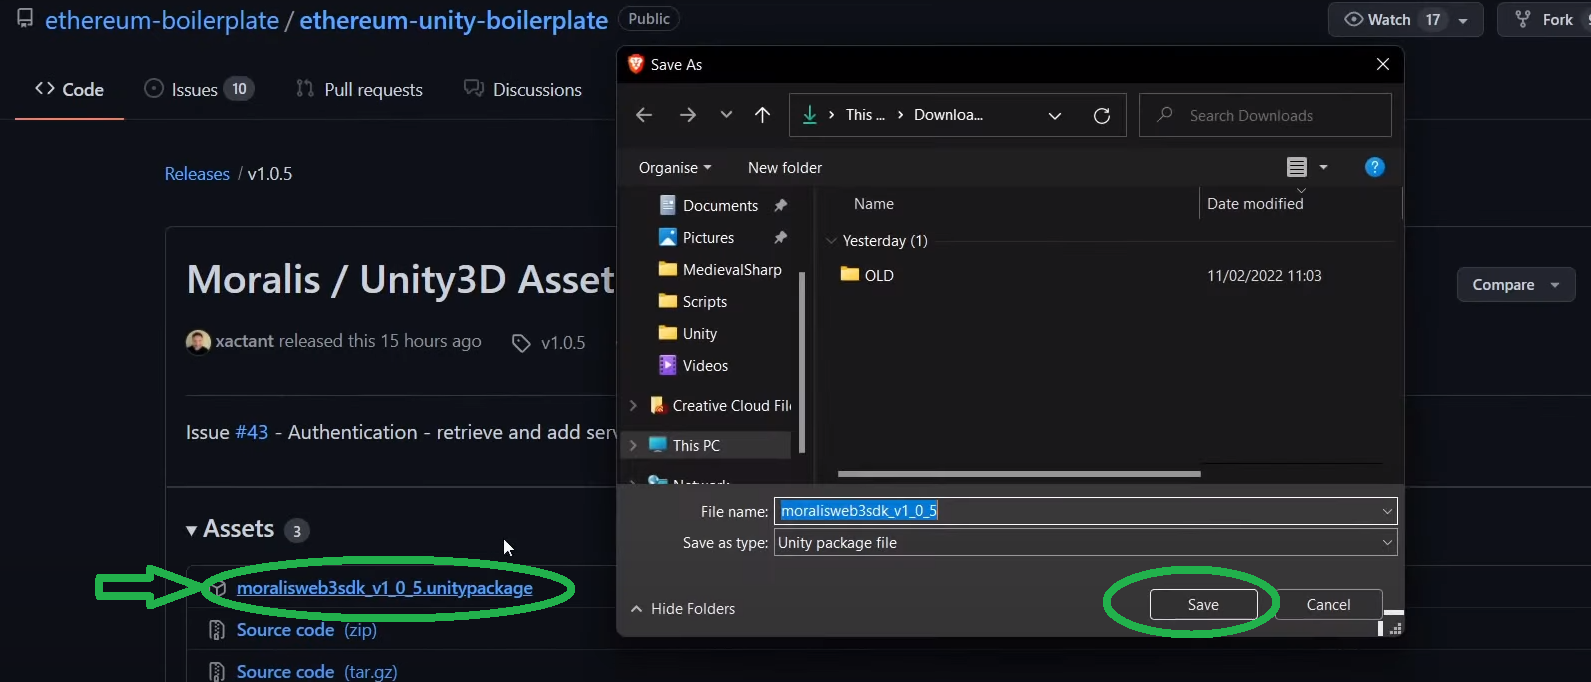
Then, save the “.unitypackage” file to your computer:
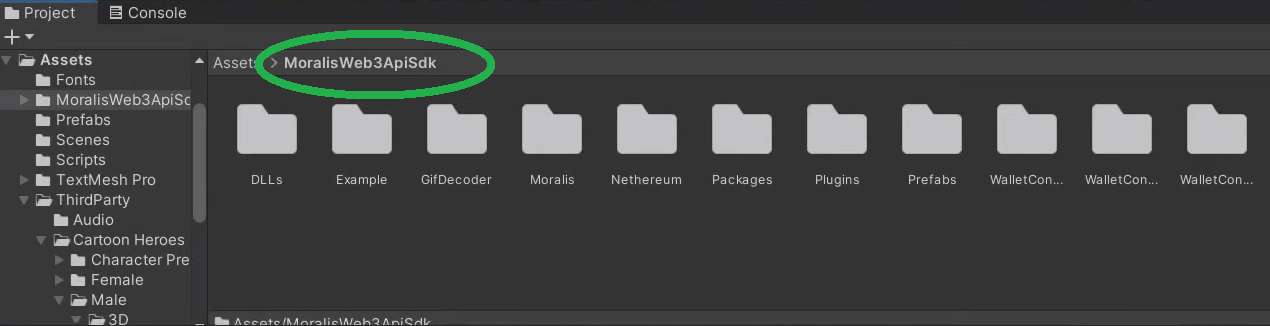
Next, go back to Unity, where you need to drag and drop the above-downloaded folder onto Unity’s interface. Moreover, you’ll also need to confirm the import. Once the import is completed, you’ll see the “MoralisWeb3ApiSdk” folder in Unity:
For the purpose of our example project, we’ll only need “WalletConnect” and “MoralisSetup”. To speed things up, use the search button to find these two components. Then, just drag and drop them to your “Hierarchy” tab:
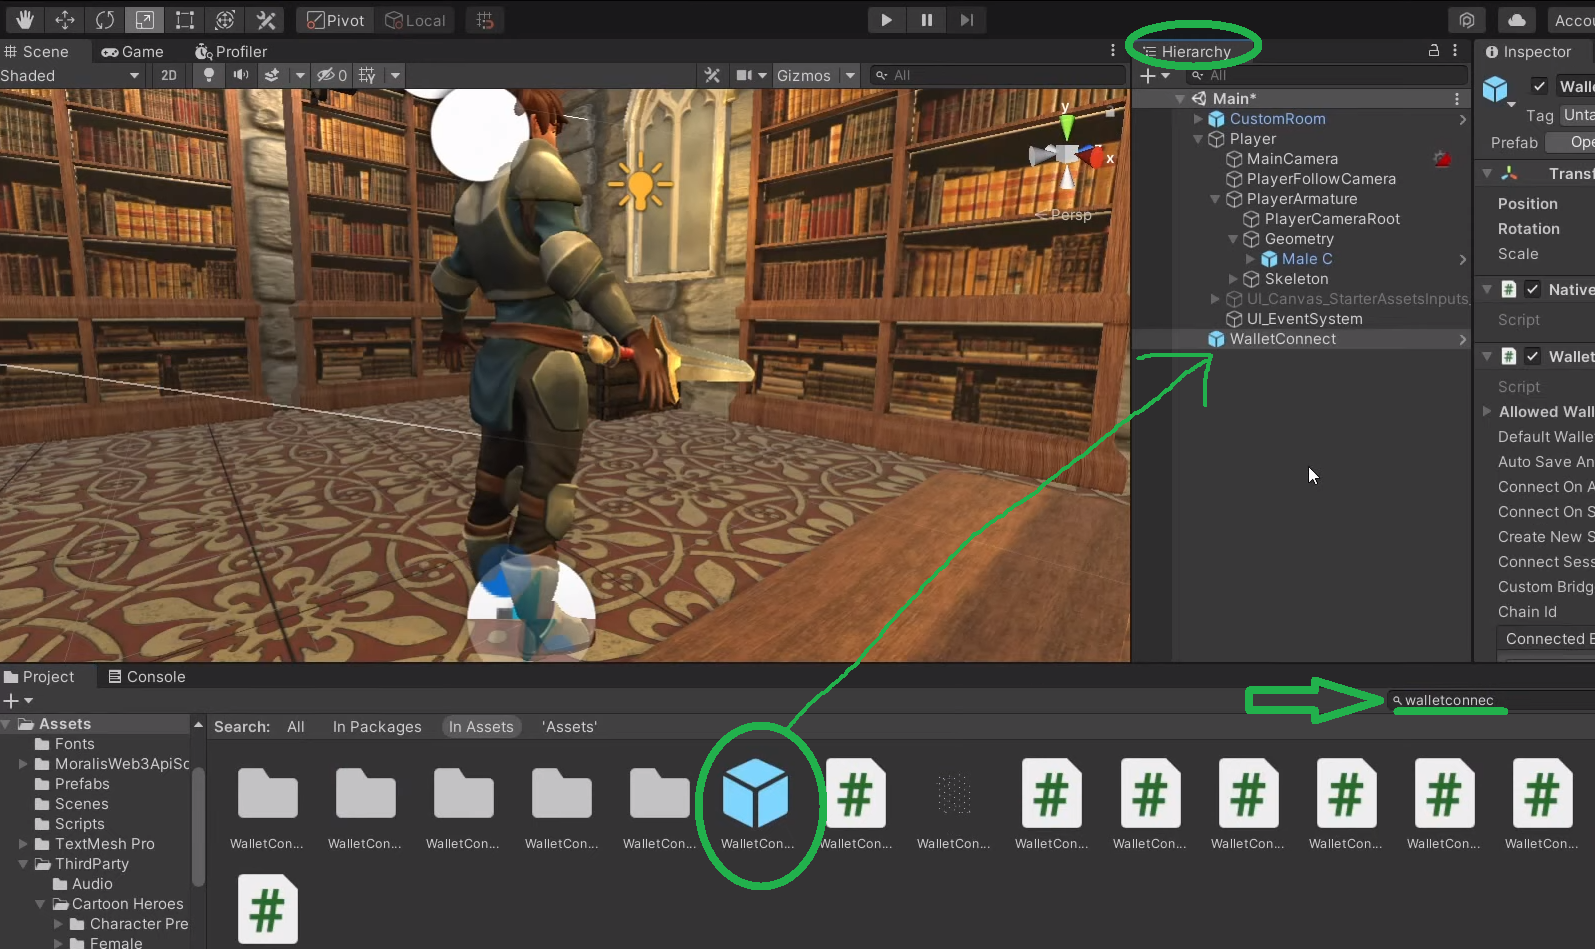
With the WalletConnect component added, you need to tweak some settings (10:00). The same goes for the “MoralisSetup” component (10:17). This is also the place where you’ll need your Moralis server’s details:
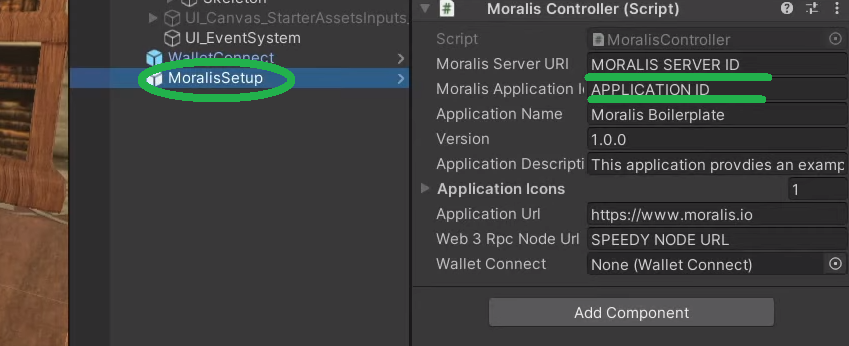
Hence, this is the cue to create your Moralis server. For that purpose, you’ll need to complete the initial Moralis setup.
Initial Moralis Setup – Part 1
Whether you want to build a metaverse dApp with Unity or just a simple dApp using the ultimate Ethereum dApp boilerplate, you need to create your Moralis server. Here are the steps that will help you do that:
- Log In to Your Moralis Account – At this point, you probably already have an active Moralis account; as such, just log in. However, if you don’t have a Moralis account yet, sign up here. Then, enter your email, create your password, and finalize the process by clicking on the confirmation link (check your email inbox).
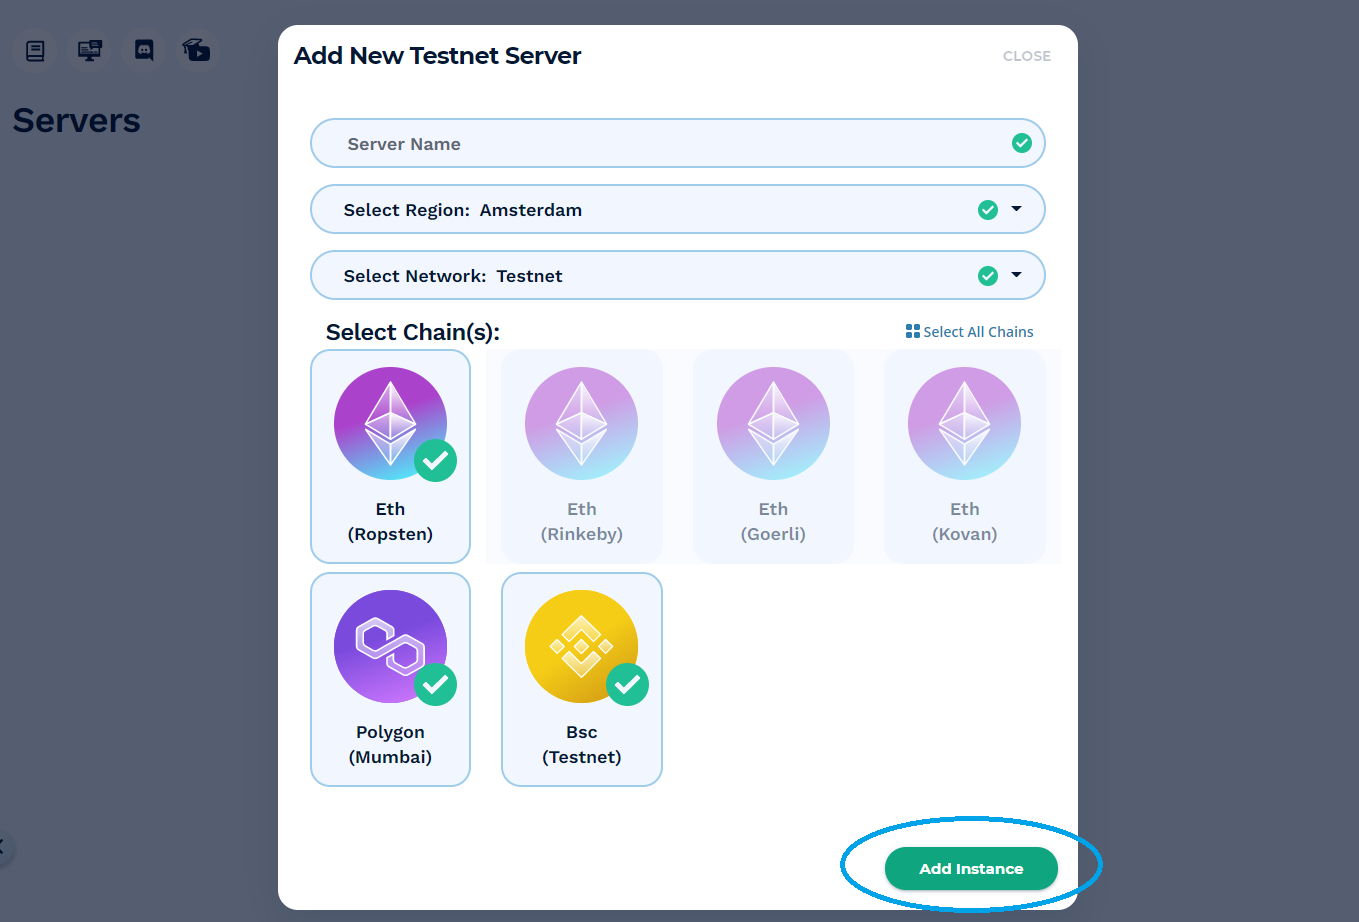
- Create a Moralis Server – Once logged in, click on the “+ Create a new Server” button (top-right corner inside the “Servers” tab). Next, select the network type that best suits your project (see the screenshot below). In the case of example projects or when testing dApps, “Testnet Server” or “Local Devchain Server” should be your focus. However, when you want to go live, you’ll need to click on “Mainnet Server”.

Then, you’ll see a pop-up window asking for your server details. You need to enter your server’s name (this can be anything you want), then select your region, network type, and chain(s). To spin up your server, click on “Add Instance”:
- Access Server Details – Once your server is up and running, you can access its details by clicking on the “View Details” button:
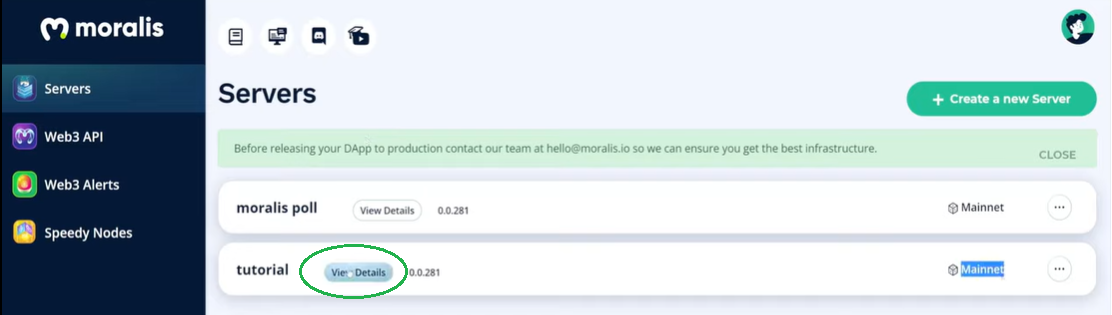
Another window containing all the details will appear. This gives you a chance to copy your server’s URL and application ID by clicking on the copy icons:
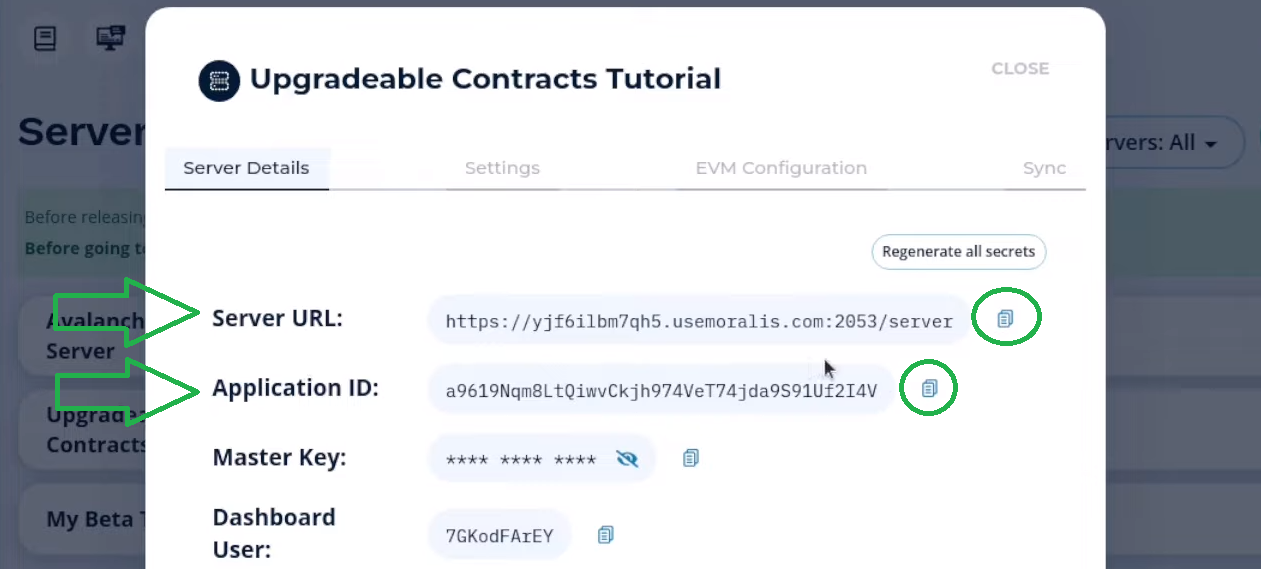
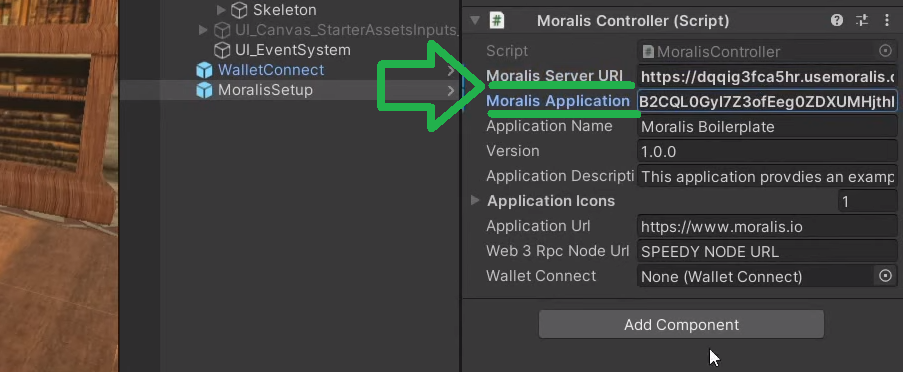
- Populate Unity – Now, you need to paste the above-copied server details into Unity:
Initial Moralis Setup – Part 2
Another part of the Moralis setup requires you to add a Moralis Speedy Node URL (see the image above). Fortunately, Moralis Speedy Nodes are also at your disposal after creating your Moralis account. Thus, return to your Moralis admin area and select the “Speedy Nodes” tab. Then, click on the “Endpoints” button under the network that you chose for your server:
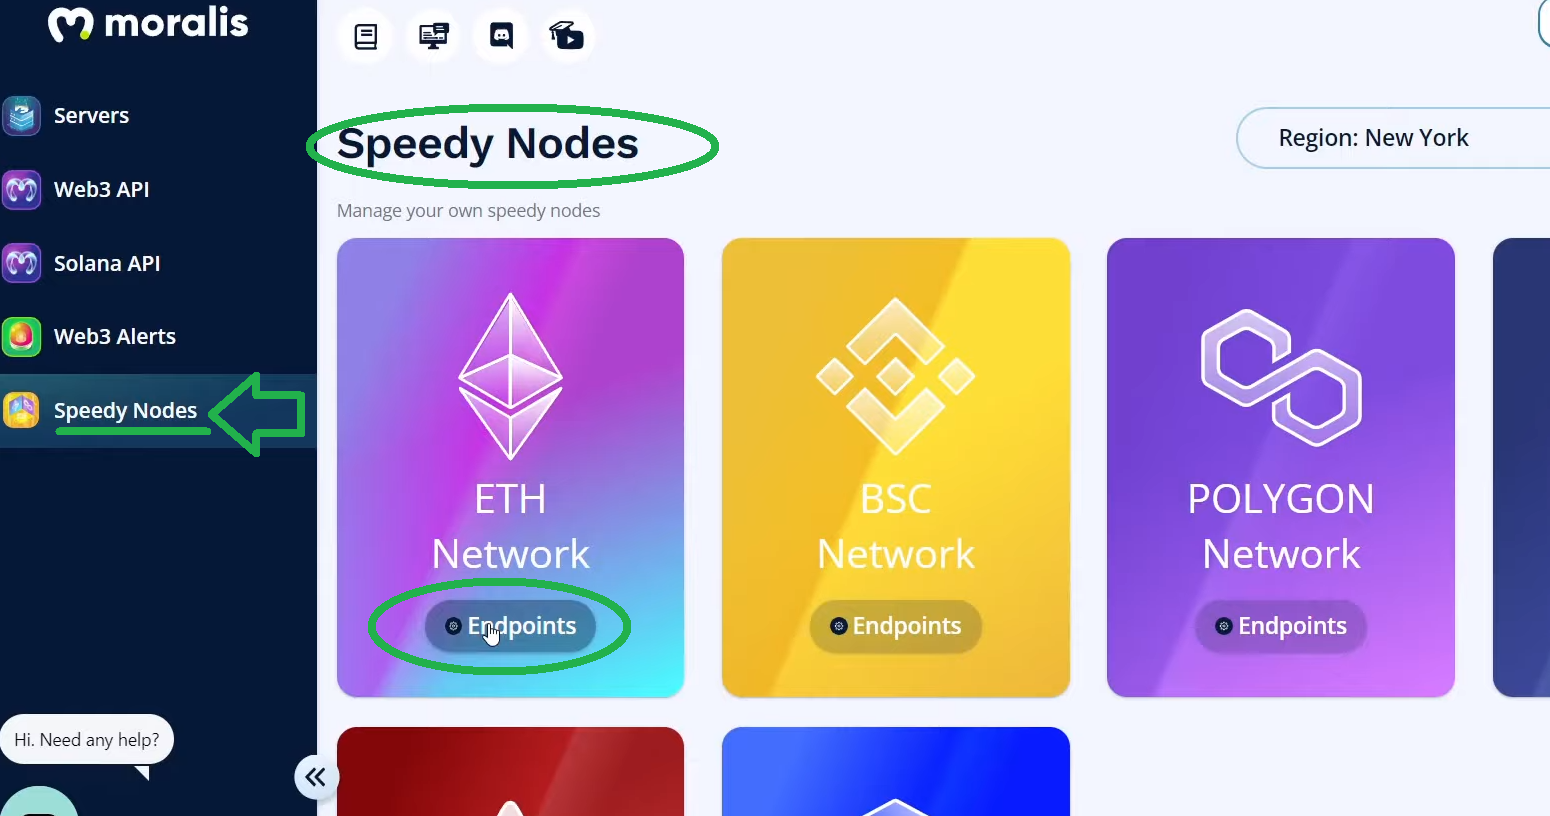
If we assume that your server is on the Ethereum mainnet, then you would need to click on “Endpoints” under “ETH Network”. From the pop-up window, you need to copy the mainnet URL address (the same principles apply for other mainnets or testnets):
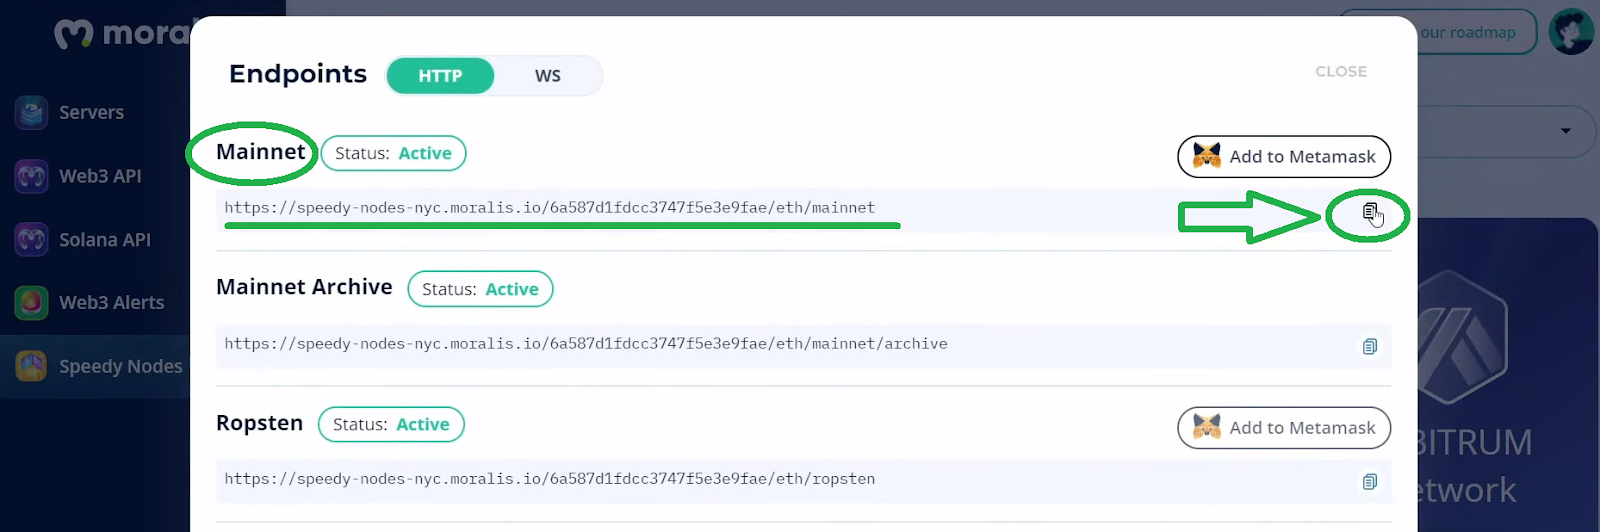
Now, return to Unity and paste the copied URL next to the “Web 3 Rpc Node Url” option as seen below:
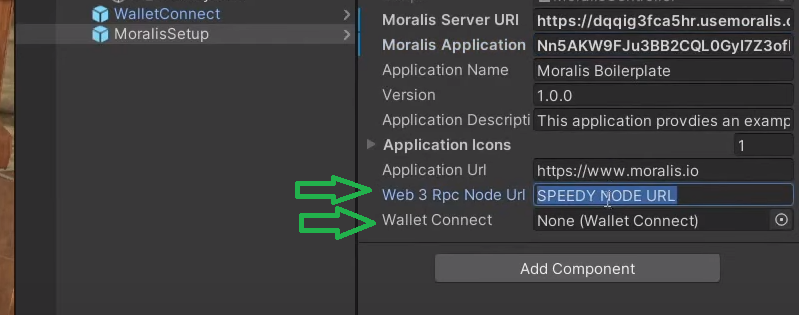
Moreover, don’t forget to link your WalletConnect by dragging and dropping “WalletConnect” from the “Hierarchy” tab (for more details, watch the video at 11:50).
By completing the above setup, you are ready to add the final features to our metaverse dApp example. If you remember our preview, we still need the QR code, and the wallet address displayed. For details on how to add both of these features, use the video below. The QR code implementation starts at 11:56, and the displayed address above the avatar’s head is at 13:47. Finally, the Moralis expert will also guide you through the code script starting at 15:00.
How to Create a Metaverse dApp with Unity – Summary
If you’ve followed our guidance and the video tutorial above, you now know how to create a metaverse (its inception). You’ve learned how to build a metaverse dApp with Unity by creating a 3D world, adding a third-person character, and setting things up to use Moralis for the Web3 backend.
So, at this point, you might be pretty excited and eager to take things to the next level. However, in case you need to first boost your confidence, get some ideas, or focus on other aspects of the blockchain realm, we recommend exploring and learning other Web3 aspects. As such, you may continue your free crypto education by exploring the Moralis YouTube channel and the Moralis blog. There you can find a ton of valuable content. For instance, some of our latest topics cover how to set up a Binance Smart Chain wallet, governance tokens, reentrancy smart contract example, React Native Web3, and Web3 gamification.


