
- 전체
- JAVA 일반
- JAVA 수학
- JAVA 그래픽
- JAVA 자료구조
- JAVA 인공지능
- JAVA 인터넷
- Java Framework
- Java GUI (AWT,SWING,SWT,JFACE)
- SWT and RCP (web RAP/RWT)[eclipse], EMF
Java GUI (AWT,SWING,SWT,JFACE) Java SWT 소개
2015.03.30 16:40
Introduction to Java SWT
In this part of the Java SWT programming tutorial, we will introduce the Java SWT library and create our first programs.
[출처] http://zetcode.com/gui/javaswt/introduction/
The purpose of this tutorial is to get you started with the Java SWT toolkit. Images used in this tutorial can be downloaded here. I used some icons from the tango icons pack of the Gnome project.
About
The Standard Widget Toolkit (SWT) is a graphical widget toolkit for the Java programming language. It was originally developed by IBM. It is an alternative to the Java Swing GUI toolkit provided by Sun Microsystems, which is a part of the Java Platform, Standard Edition. SWT is written in Java. It uses the native GUI APIs like Winapi, GTK+ to create its widgets via the JNI.
Centering a window
In the first example, we create a simple window. The window is centered on the screen.
package com.zetcode;

import org.eclipse.swt.graphics.Point;
import org.eclipse.swt.graphics.Rectangle;
import org.eclipse.swt.widgets.Display;
import org.eclipse.swt.widgets.Shell;

/**
 * ZetCode Java SWT tutorial
 *
 * In this program, we show a window in
 * the center of the screen
 *
 * @author jan bodnar
 * website zetcode.com
 * last modified June 2009
 */

public class SWTApp {


    public SWTApp(Display display) {

        Shell shell = new Shell(display);
        shell.setText("Center");
        shell.setSize(250, 200);

        center(shell);

        shell.open();

        while (!shell.isDisposed()) {
          if (!display.readAndDispatch()) {
            display.sleep();
          }
        }
    }


    public void center(Shell shell) {

        Rectangle bds = shell.getDisplay().getBounds();

        Point p = shell.getSize();

        int nLeft = (bds.width - p.x) / 2;
        int nTop = (bds.height - p.y) / 2;

        shell.setBounds(nLeft, nTop, p.x, p.y);
    }


    public static void main(String[] args) {
        Display display = new Display();
        new SWTApp(display);
        display.dispose();
    }
}
This example shows a 250x200px window in the centre of the screen. In each SWT application, there are two important classes. The Display and the Shell. The Display is the connection between the SWT and the underlying OS. It implements the event loop and provides information about the OS. The Shell represents a window. There are top level shells. These take a Display as a parent. Other shells are called secondary shells.
Shell shell = new Shell(display);
Top level window is created.
shell.setText("Center");
We set a title for the window.
shell.setSize(250, 200);
Here we set a size for the shell/window.
shell.open();
The window is shown on the screen.
while (!shell.isDisposed()) {
  if (!display.readAndDispatch()) {
    display.sleep();
  }
}
These lines start the event mainloop.
Rectangle bds = shell.getDisplay().getBounds();
We get the resolution of the screen. If you work with more than one display, you might need to call the getMonitor() method instead of getDisplay().
int nLeft = (bds.width - p.x) / 2;
int nTop = (bds.height - p.y) / 2;
We calculate the left and top coordinates of the window.
shell.setBounds(nLeft, nTop, p.x, p.y);
We set the shell's bounds.
Display display = new Display();
Display is created.
new SWTApp(display);
We instantiate our example program.
display.dispose();
After the application terminates, we release the OS resources.


Creating a Tooltip
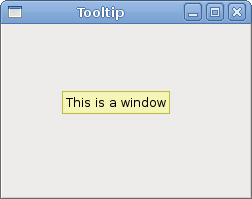
The second example will show a tooltip. A tooltip is a small rectangular window, which gives a brief information about an object. It is usually a GUI component. It is part of the help system of the application.
package com.zetcode;

import org.eclipse.swt.widgets.Display;
import org.eclipse.swt.widgets.Shell;

/**
 * ZetCode Java SWT tutorial
 *
 * In this program, we show a tooltip
 *
 * @author jan bodnar
 * website zetcode.com
 * last modified June 2009
 */

public class SWTApp {


    public SWTApp(Display display) {

        Shell shell = new Shell(display);

        shell.setText("Tooltip");
        shell.setLocation(300, 300);
        shell.setToolTipText("This is a window");

        shell.setSize(250, 200);

        shell.open();

        while (!shell.isDisposed()) {
          if (!display.readAndDispatch()) {
            display.sleep();
          }
        }
    }

    public static void main(String[] args) {
        Display display = new Display();
        new SWTApp(display);
        display.dispose();
    }
}
The example creates a window. If we hover a mouse pointer over the area of the window, a tooltip pops up.
shell.setToolTipText("This is a window");
This line creates a tooltip for the window.
Quit button
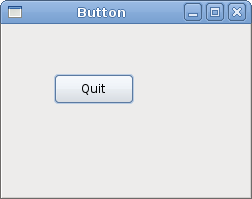
In the last example of this section, we will create a quit button. When we press this button, the application terminates.
package com.zetcode;

import org.eclipse.swt.SWT;
import org.eclipse.swt.events.SelectionAdapter;
import org.eclipse.swt.events.SelectionEvent;
import org.eclipse.swt.widgets.Button;
import org.eclipse.swt.widgets.Display;
import org.eclipse.swt.widgets.Shell;

/**
 * ZetCode Java SWT tutorial
 *
 * This example shows a button on a window.
 * Clicking on the button, we terminate the
 * application.
 *
 * @author jan bodnar
 * website zetcode.com
 * last modified June 2009
 */

public class SWTApp {

    private Shell shell;

    public SWTApp(Display display) {

        shell = new Shell(display);

        shell.setText("Button");

        initUI();

        shell.setSize(250, 200);
        shell.setLocation(300, 300);

        shell.open();

        while (!shell.isDisposed()) {
          if (!display.readAndDispatch()) {
            display.sleep();
          }
        }
    }


    public void initUI() {

        Button quit = new Button(shell, SWT.PUSH);
        quit.setText("Quit");
        quit.setBounds(50, 50, 80, 30);

        quit.addSelectionListener(new SelectionAdapter() {
            @Override
            public void widgetSelected(SelectionEvent e) {
                shell.getDisplay().dispose();
                System.exit(0);
            }
        });
    }


    public static void main(String[] args) {
        Display display = new Display();
        new SWTApp(display);
        display.dispose();
    }
}
We use a Button widget. This is a very common widget. It shows a text label, image or both.
initUI();
We delegate the creation of the user interface to the initUI() method.
Button quit = new Button(shell, SWT.PUSH);
Button widget is created. The parent is the shell. The SWT.PUSH specifies the type of the button.
quit.setText("Quit");
quit.setBounds(50, 50, 80, 30);
We set a label and the size for the button.
quit.addSelectionListener(new SelectionAdapter() {
    @Override
    public void widgetSelected(SelectionEvent e) {
        shell.getDisplay().dispose();
        System.exit(0);
    }
});
We add a selection listener for the button. When we click on the button, the widgetSelected() method is called. Inside this method, we release the OS resources and exit the application.
This section was an introduction to the Java SWT library.
광고 클릭에서 발생하는 수익금은 모두 웹사이트 서버의 유지 및 관리, 그리고 기술 콘텐츠 향상을 위해 쓰여집니다.
