
- 전체
- Python 일반
- Python 수학
- Python 그래픽
- Python 자료구조
- Python 인공지능
- Python 인터넷
- Python SAGE
- wxPython
- TkInter
- iPython
- wxPython
- pyQT
- Jython
- django
- flask
- blender python scripting
- python for minecraft
- Python 데이터 분석
- Python RPA
- cython
- PyCharm
- pySide
- kivy (python)
Python 인터넷 [python][web] Separate Front-end from Back-end with Flask+AJAX
2021.08.13 23:18
[python][web] Separate Front-end from Back-end with Flask+AJAX
Separate Front-end from Back-end with Flask+AJAX

Here I am sharing the information that I’ve just tried out for my work. I needed to integrate a new app that I wrote with Flask to a platform based on Odoo. The problem was it would not be a time efficient way to rewrite the app with Odoo and I have to update my code easily so I need to host it in my own server. So I wrote an API with Flask and I used AJAX in the GUI so they can communicate each other from different servers.
In this article I’ll show you how to use Flask and AJAX together with a very simple example. Lets start with installing modules that we need. I assume that you have Python 3 installed on your machine:
~$ sudo pip3 install flask
And thats it all w need to install is flask! Now let’s create our environment:
~$ mkdir flask-ajax
~$ cd flask-ajax
~/flask-ajax$ nano app.py
That’s it we created our directory and created our Python file or the API. Now we can create a simple API:
from flask import Flask, request, jsonifyapp = Flask(__name__)@app.route('/api/', methods=["POST"])
def main_interface():
    response = request.get_json()
    print(response)
    return jsonify(response)if __name__ == '__main__':
    app.run(debug=True)
Here we are created a simple POST request handler that gets the JSON serialized data as a Python dict and print it and send it back as JSON. But if we want our API to work separately we have to ad some more code… We have to ad response headers into our response like this:
from flask import Flask, request, jsonifyapp = Flask(__name__)@app.route('/api/', methods=["POST"])
def main_interface():
    response = request.get_json()
    print(response)
    return jsonify(response)@app.after_request
def add_headers(response):
    response.headers.add('Access-Control-Allow-Origin', '*')
    response.headers.add('Access-Control-Allow-Headers', 'Content-Type,Authorization')
    return responseif __name__ == '__main__':
    app.run(debug=True)
That’s it our API is ready. Now we can dive into the Front-end:
~/flask-ajax$ nano app.html
We created our HTML file. Now we can create a simple form:
<!DOCTYPE html>
<html>
<body><p>Send a message to the api!</p>
message: <input id="message">
<button id="send">Send</body>
</html>
That will look like this:

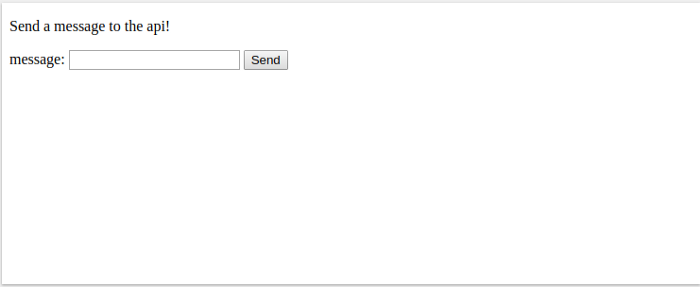
Now create our JS file to write our AJAX request:
~/flask-ajax$ touch app.js
Now we can add the AJAX request code but first we need to include jQuery library and link our JS file:
<!DOCTYPE html>
<html><head>
<script src="https://ajax.googleapis.com/ajax/libs/jquery/3.3.1/jquery.min.js"></script>
</head><body><p>Send a message to the api!</p>
message: <input id="message">
<button id="send">Send<script src="app.js"></script></body>
</html>
Finally we can start write our AJAX request:


$("document").ready(function(){
    $("#send").click(function(){
        var message = $("#message").val();        $.ajax({
            url: "http://localhost:5000/api/",
            type: "POST",
            contentType: "application/json",
            data: JSON.stringify({"message": message})        }).done(function(data) {
            console.log(data);        });    });});
That’s it we finished our app. To try it out run your code and open your HTML file with your favorite browser. If you send a message you can see it printed in your terminal that you run your Python code and you can also see it in your browser’s console.
I know that this is an easy example but I build a working app using this example as my base knowledge. I hope this will help you as well.
Here you can find the code in the tutorial:
Check out my other tutorials:


광고 클릭에서 발생하는 수익금은 모두 웹사이트 서버의 유지 및 관리, 그리고 기술 콘텐츠 향상을 위해 쓰여집니다.
