
- 전체
- 게임 일반 (make game basics)
- 모바일 기획 및 디자인
- GameMaker Studio
- Unity3D
- Cocos2D
- 3D Engine OGRE
- 3D Engine irrlicht
- copperCube
- corona SDK
- Windows Basic Game
- BaaS (Mobile Backend)
- phnegap & cordova
- ionic & anguler
- parse (backend)
- firebase (backend)
- Game Backend Server / Opt
- web assembly
- Smart Makers
- pyGame & Ren'Py
- 머드(MUD) 게임 만들기
- Xamarin(자마린)
- flutter (플루터 앱 개발)
- construct 2 / 3
- pocketbase
- RPG Maker 시리즈
- godot engine
- playmaker(unity)
- react native
백엔드레스 서버 / 안드로이드 예제 /
backendless server / android example
Quick Start Guide for Android
This guide will help you get up and running with Backendless quickly so you can develop Android applications. At the end of the guide you will have a configured working environment and a basic project with the code communicating with the Backendless services.
- Login to your Backendless account or register to create a new one.
- Download Android SDK package from the Backendless SDK Downloads page and unzip it to a temporary folder.
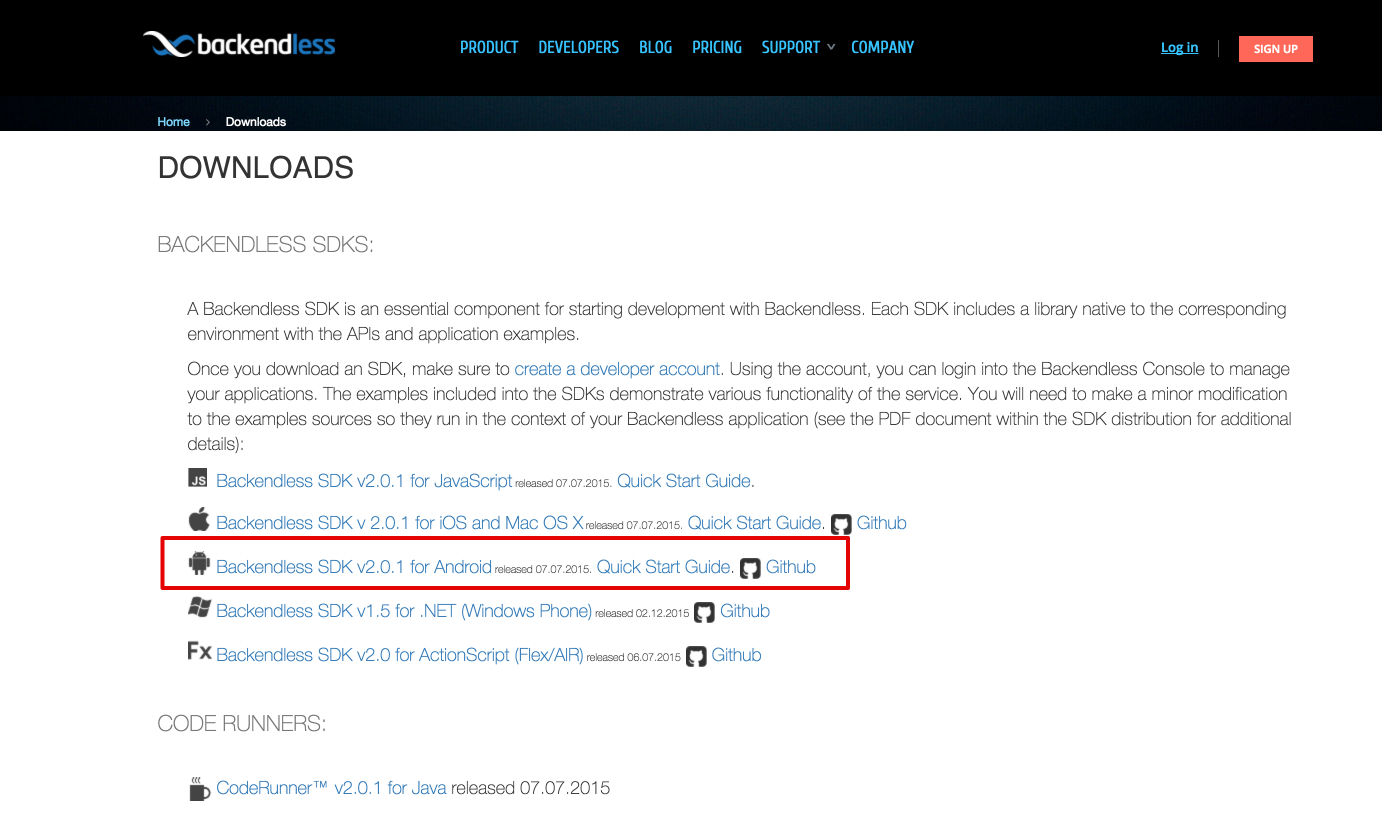
- Create a new Android application project or open an existing project.
- Add backendless.jar from the SDK distribution to your project classpath. Alternatively, you can add the backendless dependency by looking it up in maven – simply search for backendless and pick the latest version.
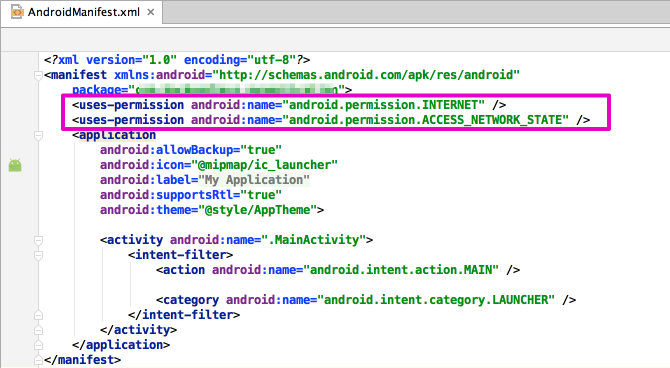
- Open “AndroidManifest.xml” from the root of your project and add the following sections:
- Add the android.permission.INTERNET and android.permission.ACCESS_NETWORK_STATE permissions to the application’s manifest file. To do so, add the following lines into the <manifest> element:
The image below demonstrates where in the file to add the permissions:
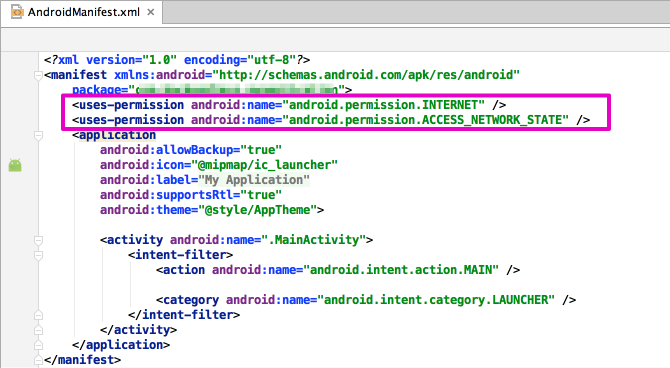
- Add the android.permission.INTERNET and android.permission.ACCESS_NETWORK_STATE permissions to the application’s manifest file. To do so, add the following lines into the <manifest> element:
- Open the main activity class and add the following import statements:
- Get your Backendless application keys for Android SDK from the Backendless Console. The keys can be found at the Manage > App Settings section:
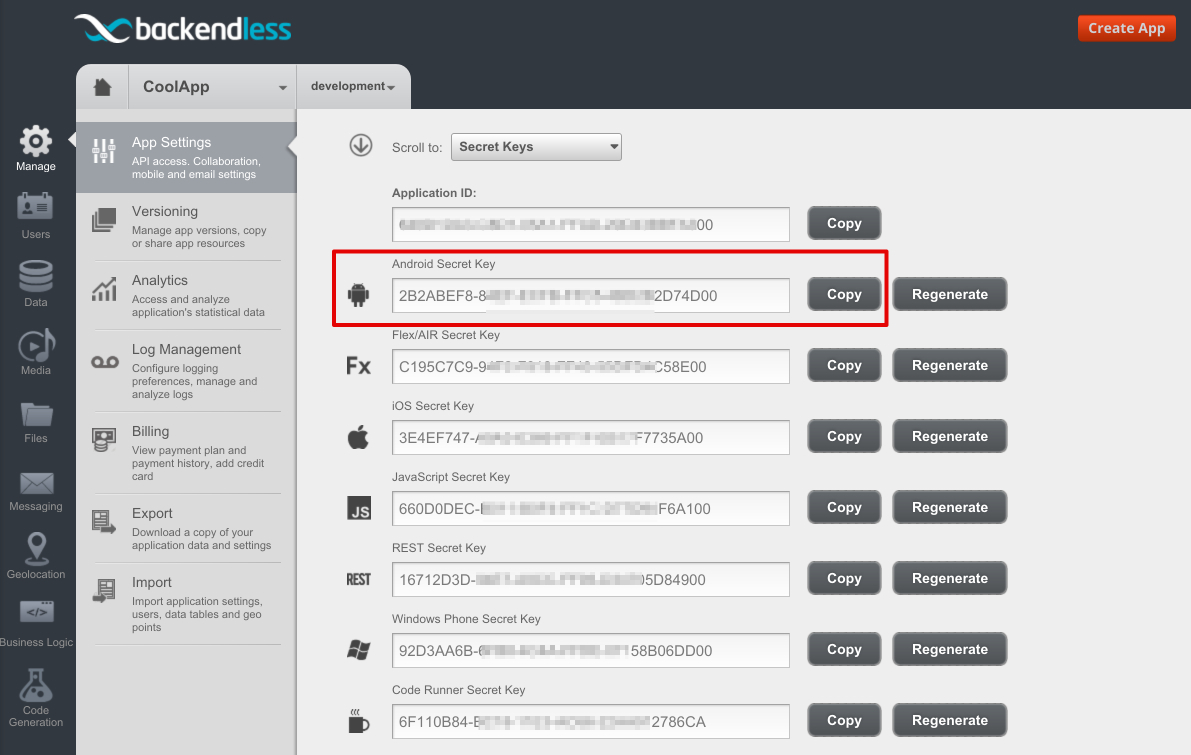
- Add Backendless application initialization code block to your main Activity “onCreate” method to set the application ID and secret key:
- Add some code which uses the Backendless API to test your application. For example, the code below registers a new Backendless user (instead of michael@backendless.com used in the code, consider using an email address where you can check email – your Backendless backend will send out an email welcoming the user to your app):
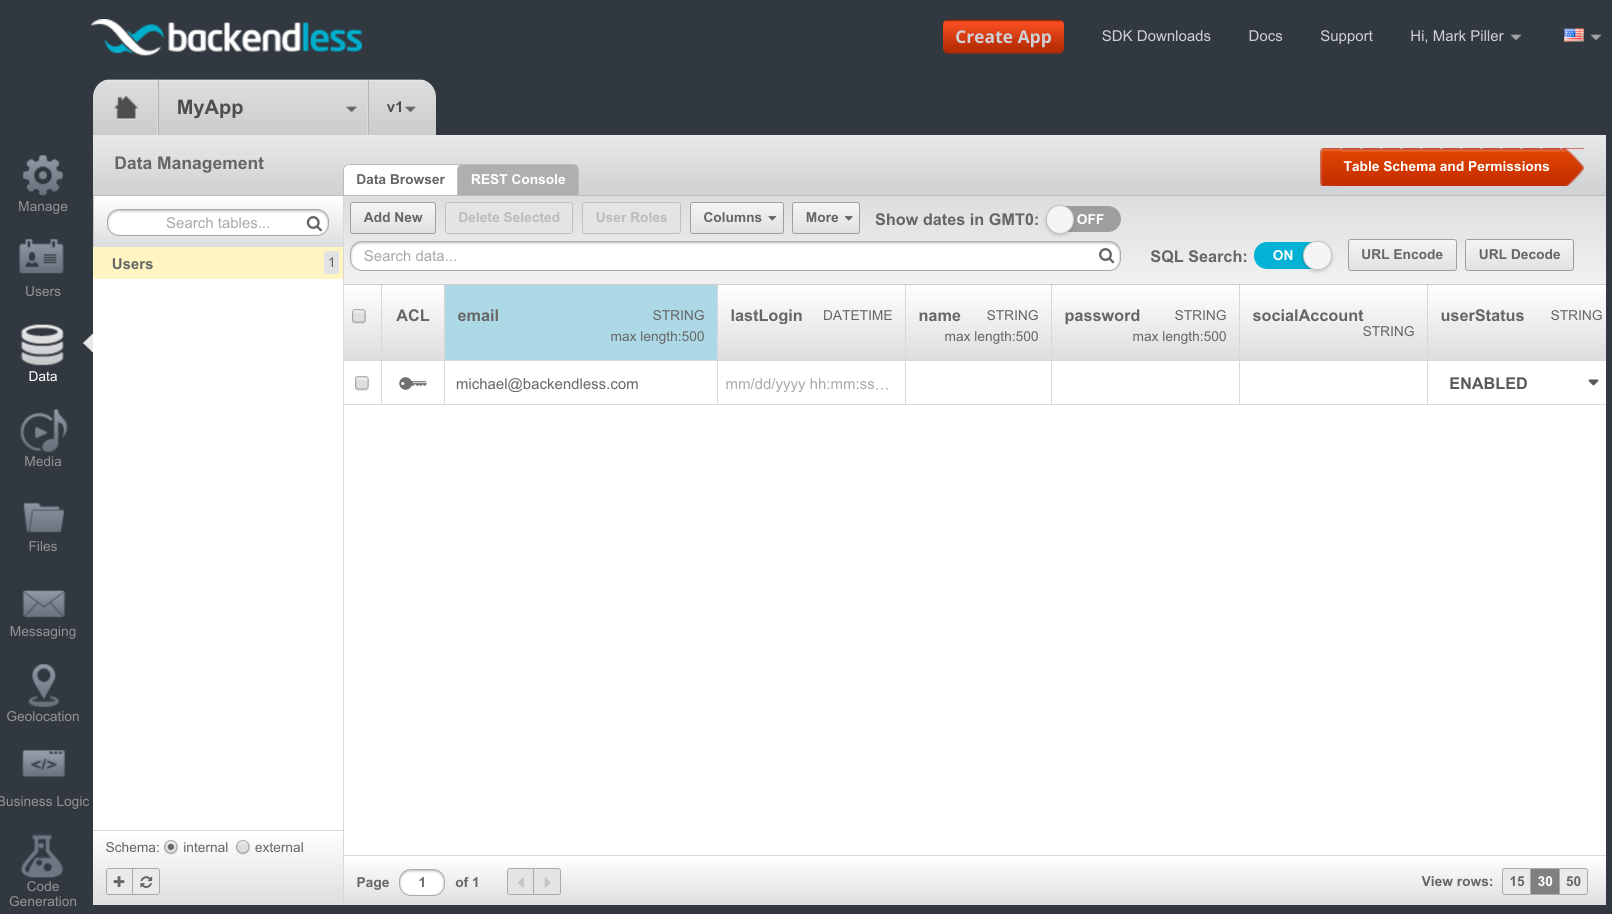
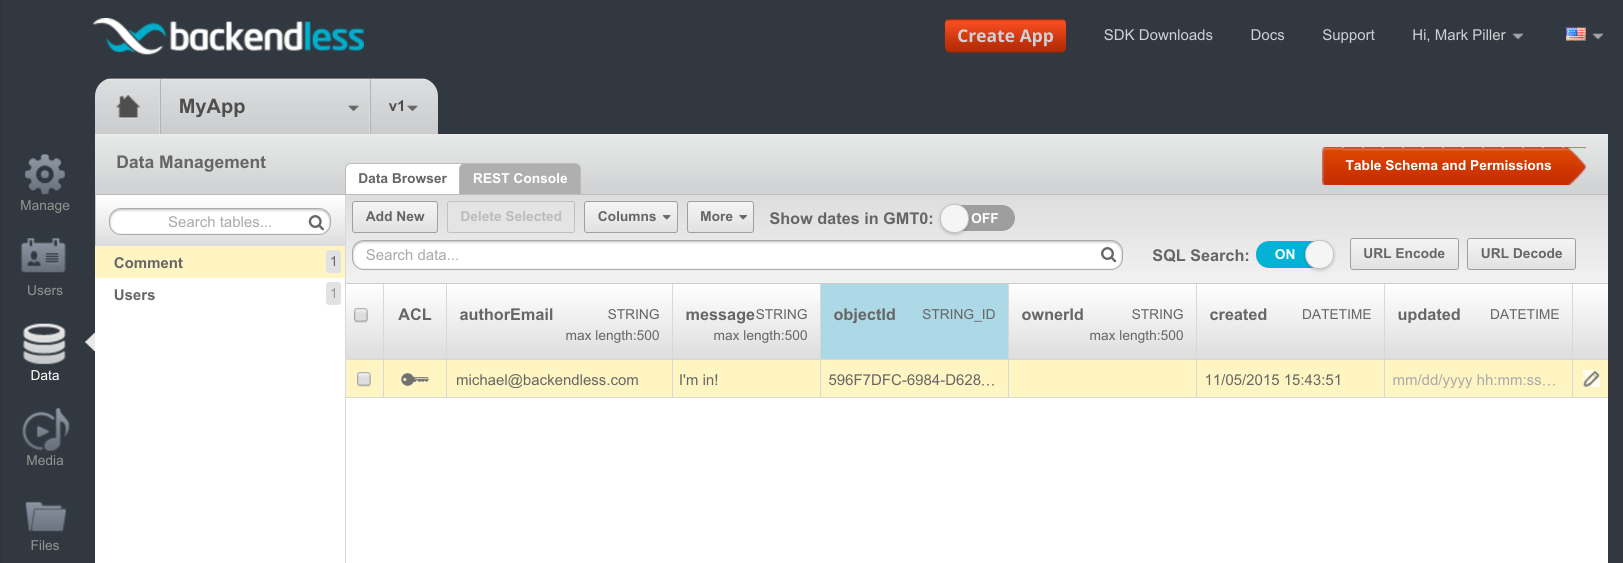
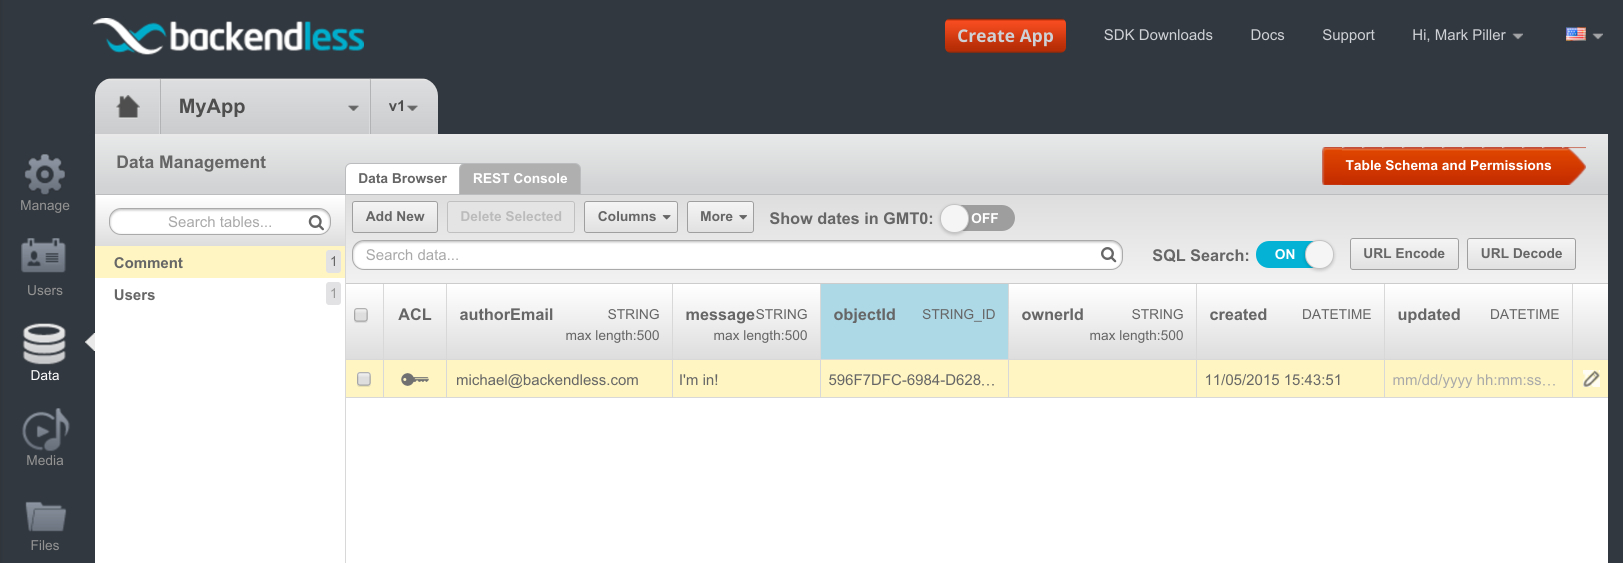
- Run your application. A new Backendless user will be registered with Backendless. You can verify the registered user in the Data section of the Backendless Console:
- Next example will use the Backendless API to save a plain Java object from the Android client. First declare a class which will be saved in Backendless. Make sure the class is declared in its own .java file and is not an inner class. It is also important that the class has the default no-argument constructor:
- Use the code snippet below to store an instance of the “Comment” class from the registered user:
- Now you can verify in the Backendless Console that the “Comment” data table has been created with the columns corresponding to the properties of the Comment class and it contains the saved object.





[출처] https://backendless.com/mobile-developers/quick-start-guide-for-android/
본 웹사이트는 광고를 포함하고 있습니다.
광고 클릭에서 발생하는 수익금은 모두 웹사이트 서버의 유지 및 관리, 그리고 기술 콘텐츠 향상을 위해 쓰여집니다.
광고 클릭에서 발생하는 수익금은 모두 웹사이트 서버의 유지 및 관리, 그리고 기술 콘텐츠 향상을 위해 쓰여집니다.