
- 전체
- android studio
- Android SDK
- Android NDK
- Android ADK
- Android Etc. Lib.
- Android dalvik VM
- Android 보안
- PhoneGap
- AOSP 개발
- MIT App Inventor 2
- kivy (python)
- ionic framework
- Kotlin (코틀린)
- React Native
Android SDK Android Basic JSOUP Tutorial
2017.03.27 15:27
Android Basic JSOUP Tutorial
In this tutorial, you will learn how to implement JSOUP open source java library in your Android application. JSOUP provides a very convenient API for extracting and manipulating data, using DOM, CSS, and jquery-like methods. JSOUP allows you to scrape and parse HTML from a URL, file, or string and many more. We will create 3 buttons on the main view and each button will perform different tasks such as showing the website title, description and a logo. So lets begin…
Before you proceed with this tutorial, download the latest JSOUP library from here.
Paste your downloaded Jsoup file into your project libs folder as shown on the image below.
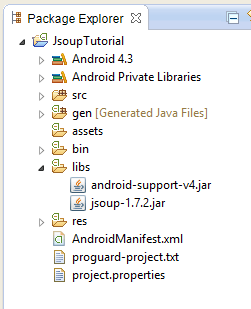
Create a new project in Eclipse File > New > Android Application Project. Fill in the details and name your project JsoupTutorial.
Application Name : JsoupTutorial
Project Name : JsoupTutorial
Package Name : com.androidbegin.jsouptutorial
Open your MainActivity.java and paste the following code.
MainActivity.java
In this activity, we have created three buttons that response to three different AsyncTask. Before I proceed with further explanation, see the steps below on how to get the html source codes from a website.
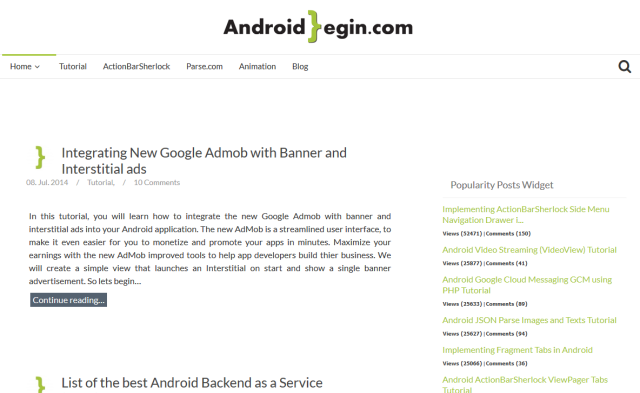
Step 1 : Visit http://www.androidbegin.com with any preferred Internet browser on your PC
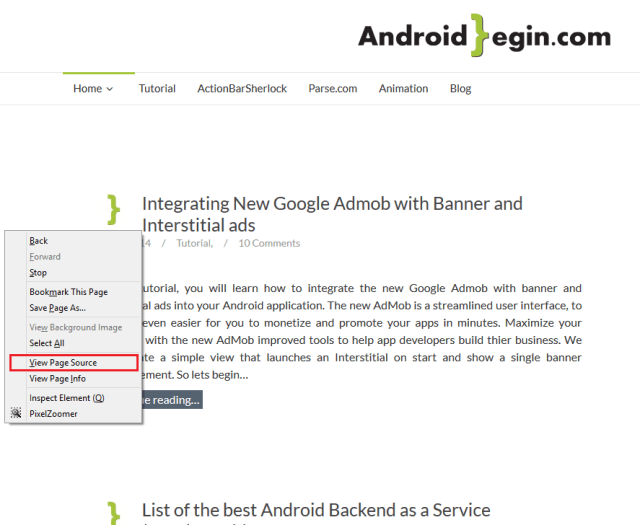
Step 2 : Right-Click on an open space and select “View page source”
Step 3 : Website source codes
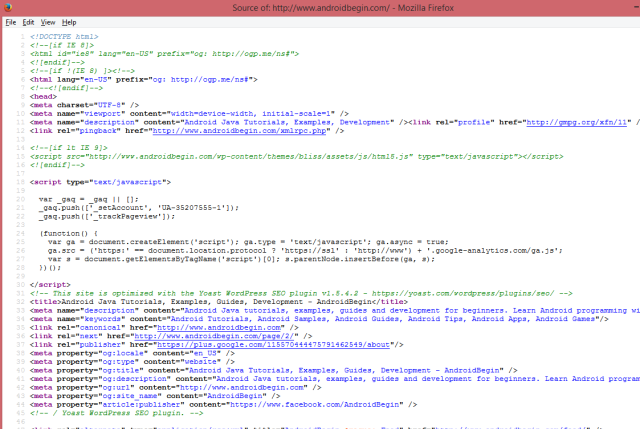
A website source code determines how your webpages should appear. However, source code of a web page will only display information and code that is not processed by the server.
The first button retrieves the website title. This is a way to get the page title.
Java Code
Website Source Code
The second button retrieves the website description. By using Elements, we are able to specify the exact location of the data.
Java Code


Website Source Code
The third button retrieves the website logo. By using Elements, we are able to specify the exact location of the data.
Java Code
Website Source Code
Next, create an XML graphical layout for the MainActivity. Go to res > layout > Right Click on layout > New > Android XML File
Name your new XML file activity_main.xml and paste the following code.
activity_main.xml
Next, change the application name and texts. Open your strings.xml in your res > values folder and paste the following code.
strings.xml
In your AndroidManifest.xml, we need to declare permissions to allow the application to connect to the Internet. Open your AndroidManifest.xml and paste the following code.
AndroidManifest.xml
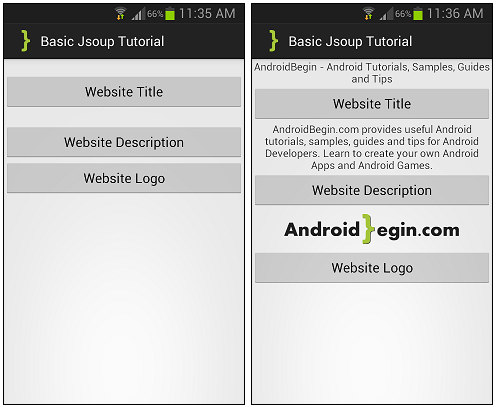
Output:
Source Code
[출처] http://www.androidbegin.com/tutorial/android-basic-jsoup-tutorial/
광고 클릭에서 발생하는 수익금은 모두 웹사이트 서버의 유지 및 관리, 그리고 기술 콘텐츠 향상을 위해 쓰여집니다.
댓글 0
| 번호 | 제목 | 글쓴이 | 날짜 | 조회 수 |
|---|---|---|---|---|
| 12 |
App Inventor - MySQL interface 앱 인벤터 mysql 연결
 | 졸리운_곰 | 2018.04.07 | 7999 |
| 11 |
Connect App Inventor to MySQL Database 앱 인벤터와 mysql 데이터베이스 연결
| 졸리운_곰 | 2018.04.07 | 7273 |
| 10 |
Create an API (PHP) 앱 인벤터와 php 통합
| 졸리운_곰 | 2018.04.07 | 630 |
| 9 |
Using the WebViewer Control in App Inventor 앱인터에서 웹뷰 컨트롤 사용
| 졸리운_곰 | 2018.03.24 | 512 |
| 8 |
WebView Javascript Processor for App Inventor 앱 인벤터 웹뷰 자바스크립트 인터페이스
| 졸리운_곰 | 2018.03.24 | 505 |
| 7 |
Creating a digital wallet application in App Inventor 2
| 졸리운_곰 | 2017.05.01 | 287 |
| 6 | Creating a Custom TinyWebDB Service | 졸리운_곰 | 2016.05.18 | 201 |
| 5 |
TinyDB is a lightweight document oriented database
| 졸리운_곰 | 2016.05.16 | 270 |
| 4 |
구글 앱엔진에 의한 소형웹데이터베이스의 접속방법 tinywebdb
| 졸리운_곰 | 2016.05.15 | 547 |
| 3 |
App inventor 멀티스크린, 스크린 이동, 다중화면,
| 졸리운_곰 | 2016.02.17 | 779 |
| 2 |
Communicating with Web APIs
| 졸리운_곰 | 2016.02.17 | 1080 |
| 1 |
JSON data on the Android mobile with App Inventor 2
| 졸리운_곰 | 2016.02.17 | 364 |