
- 전체
- HTML
- Web Design (웹디자인)
- XE 응용 개발
- wordpress plugin dev
- Javascript & JavaScript Application
- MEAN Stack : full stack javascript
- angular js & ionic framework
- bootstrap
- WebGL, Three.js and Babylon.js
- restful api design
- mobile web
- node.js 응용
- Cloud Service 응용
- 웹 어셈블리 개발 [WASM, WebAssembly]
- 마이크로서비스, MSA (microservice architecture)
- WebGL / WebGPU
- next.js 개발
- micro frontend (마이크로프론트앤드)
- 전자상거래/쇼핑몰
- 서버 클라우드 (aws, azure, google)
마이크로서비스, MSA (microservice architecture) Building a real-time prediction pipeline using Spark Structured Streaming and Microservices
2021.02.21 15:23
Building a real-time prediction pipeline using Spark Structured Streaming and Microservices
Building a real-time prediction pipeline using Spark Structured Streaming and Microservices
In this tutorial, we will discuss the benefits of decoupling the machine learning model when dealing with a low latency data pipeline

We will build a real-time pipeline for machine learning prediction. The main frameworks that we will use are:
- Spark Structured Streaming: a mature and easy to use stream processing engine
- Kafka: we will use the confluent version for kafka as our streaming platform
- Flask: open source python package used to build RESTful microservices
- Docker: used to start a kafka cluster locally
- Jupyter lab: our environment to run the code
- NLTK: NLP library for python with pre-trained models.
TL;DR: The code is on GitHub.
Benefits of building the ML model into a microservice
In a realtime ML pipeline we embed a model in two ways: by using the model directly into the framework that is doing the processing or by decoupling the model separately into a microservice. By building the wrapper for the ML model we require extra effort, so why bother? There are two major advantages. Firstly, when we want to deploy a new model we don’t need to deploy the whole pipeline, we just need to expose a new microservice version. Secondly, it gives you more power into testing different versions of that ML model. For example we are able to use canary deployments and use 80% of the stream of data on the version1 of the model and 20% on version2 . Once we are happy with the quality of version2 , we shift more and more traffic towards it.
Now let’s deep dive into the development of the application.
Step 1: run docker compose to start the kafka cluster
To build the cluster we will use a docker-compose file that will start all the docker containers needed: zookeeper and a broker.
Now very briefly, kafka is a distributed streaming platform capable of handling a large number of messages, that are organized or grouped together into topics. In order to be able to process a topic in parallel, it has to be split into partitions, and the data from these partitions are stored into separate machines called brokers. And finally, zookeeper is used to manage the resources of the brokers in the clusters.To read or write into a kafka cluster we need a broker address and a topic.
The docker-compose will start zookeper on port 2181 , a kafka broker on port 9092. Besides that we use another docker container kafka-create-topic for the sole purpose to create a topic (called test) in the kafka broker.
To start the kafka cluster, we have to run the following command line instruction in the same folder where we have defined the docker compose file:
docker-compose up
This will start all the docker containers with logs. We should see something like this in the console:

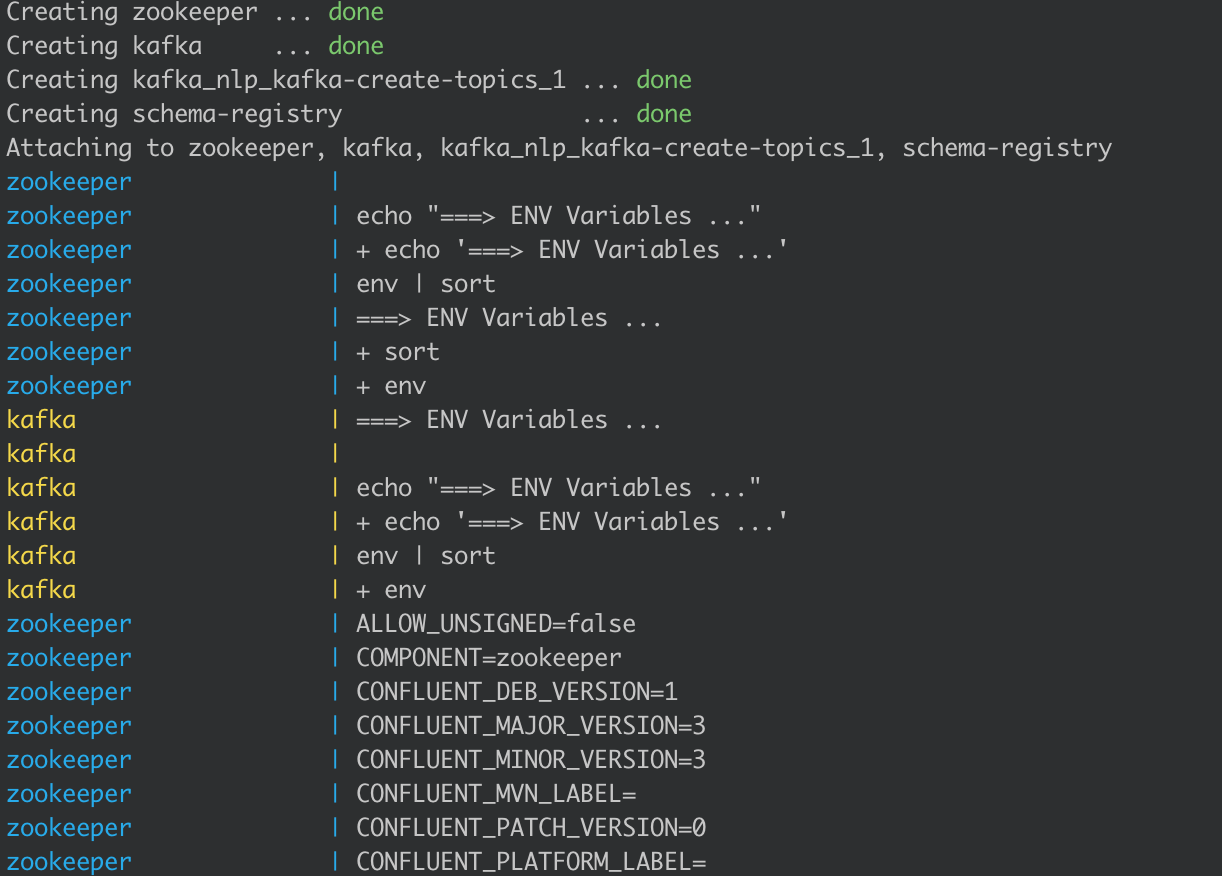
Step 2: building and deploying the microservice
We are using the REST protocol for our web service. We will do sentiment analysis using NLTK’s Vader algorithm. This is a pre-trained model, so we can only focus on the prediction part:
@app.route('/predict', methods=['POST'])
def predict():
    result = sid.polarity_scores(request.get_json()['data'])
    return jsonify(result)
We are creating a POST request that received a JSON message in the form {"data": "some text"} , where the field data contains a sentence. We will apply the algorithm and send the response back as another JSON .
To run the app simply run:
python app.py
The REST service will be available at http://127.0.0.1:9000/predict .
Step 3: starting pySpark with the Kafka dependency
After we start the Jupyter lab notebook we need to make sure that we have the kafka jar as a dependency for spark to be able to run the code. Add the following in the first cell of the notebook:
import os
os.environ['PYSPARK_SUBMIT_ARGS'] = "--packages=org.apache.spark:spark-sql-kafka-0-10_2.11:2.4.4 pyspark-shell"
Following that we can start pySpark using the findspark package:


import findspark
findspark.init()
Step 4: run the Kafka producer
To be able to consume data in realtime we first must write some messages into kafka. We will use the confluent_kafka library in python to write a producer:
We will send the sameJSON messages {"data": value} as previously, where value is a sentence from a predefined list. For each message we write into the queue we also need to assign a key. We will assign a random one based on the uuid to achieve a good distribution into the cluster. In the end, we also run a flush command to ensure that all the messages are sent.
Once we run the confluent_kafka_producer we should receive a log telling us that the data has been sent correctly:
we’ve sent 6 messages to 127.0.0.1:9092
Step 5: start reading data from Kafka
As stated previously we will use Spark Structured Streaming to process the data in real-time. This is an easy to use API that treats micro batches of data as data frames. We first need to read the input data into a data frame:
df_raw = spark \
  .readStream \
  .format('kafka') \
  .option('kafka.bootstrap.servers', bootstrap_servers) \
  .option("startingOffsets", "earliest") \
  .option('subscribe', topic) \
  .load()
The startingOffset is earliest indicating that each time we run the code we will read all the data present in the queue.
This input will contain different columns that represent different metrics from kafka like keys, values, offsets, etc. We are only interested in the values, the actual data and we can run a transformation to reflect that:
df_json = df_raw.selectExpr('CAST(value AS STRING) as json')
Step 6: create a UDF for applying the ML model
In Structured Streaming we can use user defined functions, that can be applied to each row in the data frame.
def apply_sentiment_analysis(data):
    import requests
    import json

    result = requests.post('http://localhost:9000/predict', json=json.loads(data))
    return json.dumps(result.json())
We need to make our imports in the function as this is a piece of code that can be distributed on multiple machines. We post a request to our endpoint and return the response.
vader_udf = udf(lambda data: apply_sentiment_analysis(data), StringType())
We will call our udf as vader_udf and it will return a new string column.
Step 7: applying the vader udf
In this final step, we get to see our results. The format of the input data is in JSON and we can transform it into a string . For that, we will use the helper function from_json . The same thing we can do to the output column from the sentiment analysis algorithm that has also the JSON format:
We can display our results in the console. Because we are using the notebook, you will only be able to visualise it from the terminal you have started the Jupyter. The command trigger(once=True) , will only run the stream processing for a short period and show the output.
That was it folks, I hope you enjoy this tutorial and find it useful. We saw how by using Structured Streaming API together with a microservice calling the ML model we can construct a powerful pattern that can be the backbone of our next real-time application.
[출처] https://towardsdatascience.com/building-a-real-time-prediction-pipeline-using-spark-structured-streaming-and-microservices-626dc20899eb
광고 클릭에서 발생하는 수익금은 모두 웹사이트 서버의 유지 및 관리, 그리고 기술 콘텐츠 향상을 위해 쓰여집니다.
