
- 전체
- Python 일반
- Python 수학
- Python 그래픽
- Python 자료구조
- Python 인공지능
- Python 인터넷
- Python SAGE
- wxPython
- TkInter
- iPython
- wxPython
- pyQT
- Jython
- django
- flask
- blender python scripting
- python for minecraft
- Python 데이터 분석
- Python RPA
- cython
- PyCharm
- pySide
- kivy (python)
Python 인터넷 Python Django 프로젝트를 위한 Jenkins 설정 : Assembling a Continuous Integration Service for a Django project on Jenkins
2018.11.03 16:54
Python Django 프로젝트를 위한 Jenkins 설정
Assembling a Continuous Integration Service for a Django project on Jenkins
Disclaimer: this post is the English version of the one I wrote on Concrete Solutions’ blog.
In this tutorial, we will do a demonstration of how to add a Django project in Continuous Integration using Jenkins.
Assuming you’ve already finished this tutorial, let’s put Jenkins to run the tests of our application whenever we push new commits to the repository.
So let’s get down to business!

The project
For this tutorial, we are going to use as project the official Django tutorial from version 1.7 because it already has unit tests for this example.
Project installation
First of all, let’s clone the project:
git clone https://bitbucket.org/suporte_concrete/cs-django-jenkins.git
Afterward, create a new Virtualenv* for our project:
virtualenv ~/projetos/virtualenvs/blog
Activate the Virtualenv:
source ~/projetos/virtualenvs/blog/bin/activate
*But what is a Virtualenv?
It is a tool used to create python isolated environments. That allows us to install the project’s dependencies without interfering on the dependencies from the OS’s global scope. To know more, visit this site.
Install the project’s dependencies::
pip install -r requirements.txt
Now that we have our Virtualenv with the needed packages installed, let’s run a command to run our database migrations:
python manage.py migrate
Once this is done, we can now run our project.
Running the project locally
To run the project, execute:
python manage.py runserver
Warning: this command should only be executed in a development environment. If you wish to run this project in Production, you must be relying on services Apache + modwsgi, gunicorn + Nginx, etc.
Executing the tests
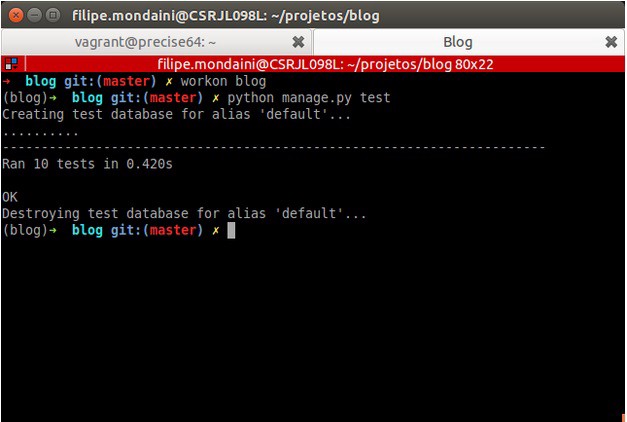
To run the tests, execute:
python manage.py test
The result must be like this:
Now that we already know how to prepare the project and execute the tests, we are going to install Jenkins on the Continous Integration server.
Preparing the server
Installing the dependencies
We must install some packages for Jenkins to be able to create the environment and build the project. Install the following packages using apt-get:
sudo apt-get install -y git python-pip python-virtualenv
The next step is to install Jenkins on the server. As for this post we are using a Ubuntu instance, we can easily install using apt-get:
# Add the Jenkins repository key
wget -q -O — https://jenkins-ci.org/debian/jenkins-ci.org.key | sudo apt-key add -
sudo sh -c ‘echo deb http://pkg.jenkins-ci.org/debian binary/ > /etc/apt/sources.list.d/jenkins.list’
sudo apt-get update
sudo apt-get install jenkins
After the installation, check if the server is running with the command:
sudo service jenkins status
If the server is running correctly, you will receive this message:


Jenkins Continuous Integration Server is running with the pid XXX
To start the service, run:
sudo service jenkins start
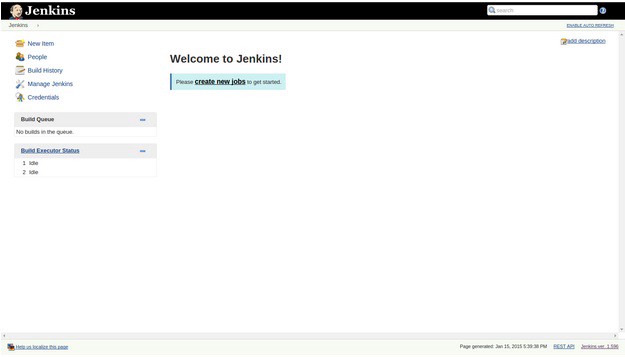
Now we can access Jenkins on port 8080 from the server. Go to your browser and go to localhost:8080 (where localhost is the name or the IP of your server).
Dependencies
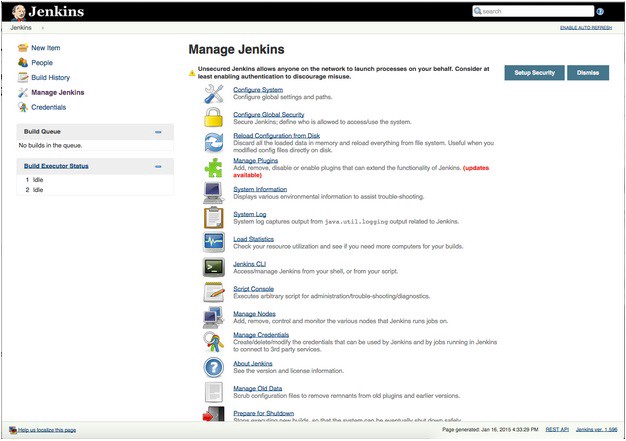
Jenkins by default do not access git repositories, so we must install a Git plugin. Go to the Jenkins server, select the “Manage Jenkins” option and on the next page click on “Manage Plugins”:
On the plugins page, click on the “Available” tab and then filter by “git plugin”:
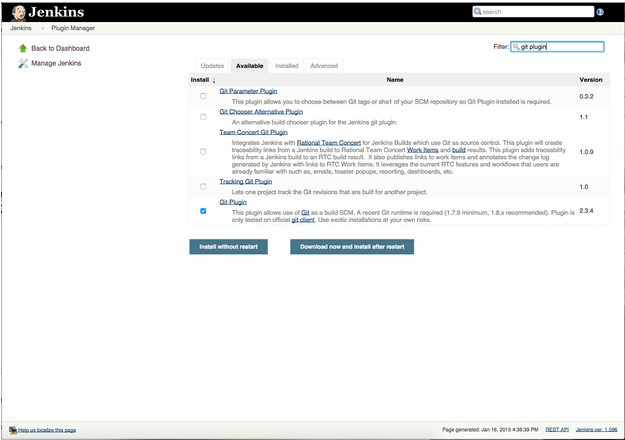
Select the plugin and click on “Download now and install after restart”
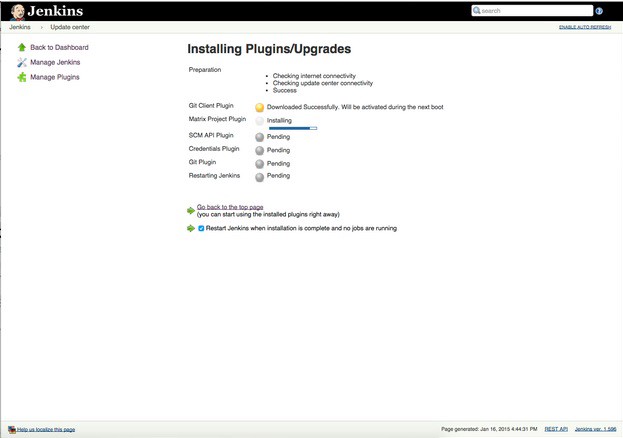
Warning: If the page stops responding after a while, go back to the Jenkins home manually because the installation might be already done. ☹
Configuring our Job
Now with our Jenkins server installed with the Git plugin, we must configure our job for Jenkins to be able to poll our repository for changes.
Initial configuration
On Jenkins homepage, click on “New Item” to create a new Job. Write the job name and select the “Freestyle project” option:
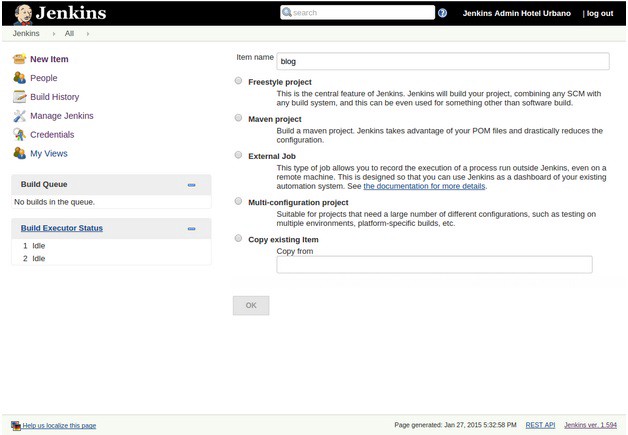
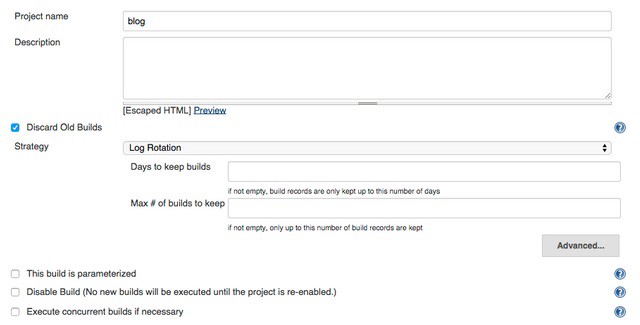
On the next page, select the “Discard Old Builds” option so the older builds to be discarded automatically.
Accessing the repository:
This step is vital. Here we are going to select the type of the repository (Git, Subversion, CVS), address, which branch to pick up and so on. As our project is a git repository, select the Git option and type the Repository URL:
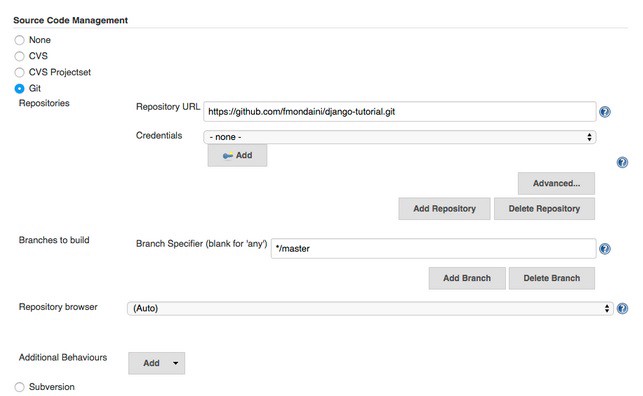
Warning: the URL from this repository is public. In a private repository, you will probably need to configure a ssh key on the server so Jenkins can have access to the repository.
Build Triggers
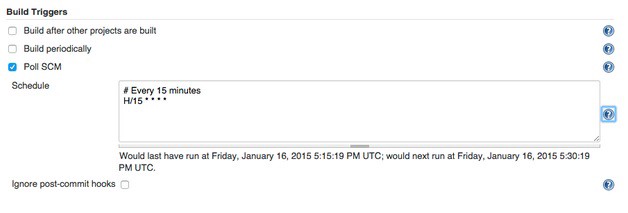
Here we can schedule the Job according to our needs. In this case, I chose to poll the repository on every 15 minutes. If there is a change, Jenkins will download it and do the tests.
Build
After downloading the newer version, Jenkins must run the tests to finally validate our project. Let’s add a step on Build. In order to configure we will add a small shell script.
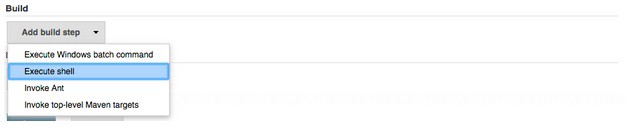
Our shell script for the Job:
#!/bin/bash
export WORKSPACE=`pwd`
# Create/Activate virtualenv
virtualenv venv
source venv/bin/activate
# Install Requirements
pip install -r requirements.txt
# Run tests
python manage.py test
The Job configuration is now done, so click on save! ☺
Is it working?
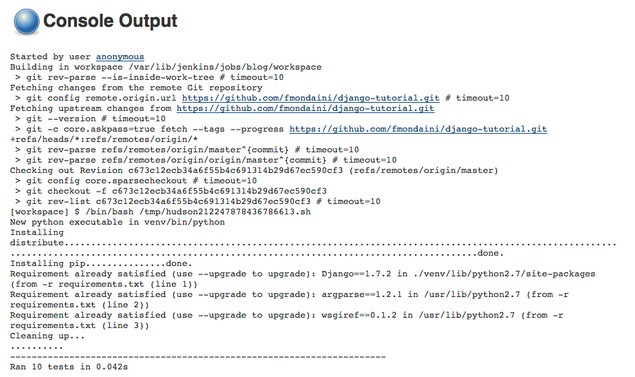
As you can see, Jenkins polled our Bitbucket repository, downloaded the latest version and ran the tests:

Bonus(!)
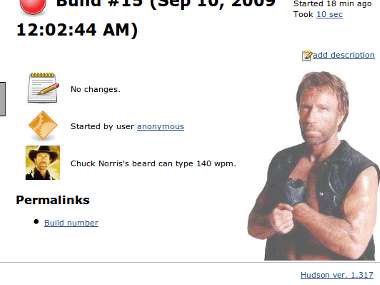
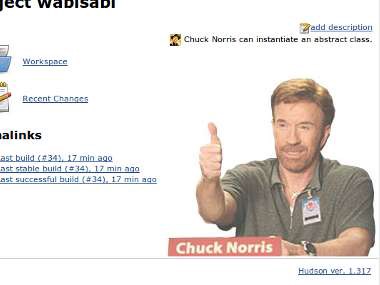
Let’s install these plugins: “Green Balls” and “ChuckNorris Plugin”. Because a green light is much better than a blue one and Chuck Norris because who is best to persuade someone not to break the build than him? :-)

These are the results of the builds with the new installed plugins:
Well, this is it! I hope you liked it and if you had any doubts, post a comment or get in touch with me on my Twitter @filipecm. Remember that the project from this post is hosted on Concrete Solutions’ Bitbucket.
[출처] https://medium.com/@mondaini/assembling-a-continuous-integration-service-for-a-django-project-on-jenkins-5f979d4c4184
광고 클릭에서 발생하는 수익금은 모두 웹사이트 서버의 유지 및 관리, 그리고 기술 콘텐츠 향상을 위해 쓰여집니다.
