
- 전체
- HTML
- Web Design (웹디자인)
- XE 응용 개발
- wordpress plugin dev
- Javascript & JavaScript Application
- MEAN Stack : full stack javascript
- angular js & ionic framework
- bootstrap
- WebGL, Three.js and Babylon.js
- restful api design
- mobile web
- node.js 응용
- Cloud Service 응용
- 웹 어셈블리 개발 [WASM, WebAssembly]
- 마이크로서비스, MSA (microservice architecture)
- WebGL / WebGPU
- next.js 개발
- micro frontend (마이크로프론트앤드)
- 전자상거래/쇼핑몰
- 서버 클라우드 (aws, azure, google)
WebGL, Three.js and Babylon.js WebGL and ThreeJS Using Blender Models
2017.08.05 19:40
WebGL and ThreeJS Using Blender Models
Have a 3D model you want to include in your WebGL project using ThreeJS? Using Blender (a free and Open Source 3D software application), you can export that model into a WebGL compatible JSON file and load it into your 3D scene using Three.js. Follow the steps below or jump down to the end of the post for the code or download the project. Leave any comments or questions below.
Install the Three.js Blender Exporter
You can follow the instructions at the Three JS Github page to install the exporter for Blender but I found a slightly better way:
- Download ThreeJS to get the JavaScript files, exporters and other useful files. I prefer to clone this Git repo and perform a “git pull” to get the latest and greatest code. I recommend you use the Git UI tool SourceTree if you’re not familiar with Git. Or, you can simply download the zip file.
- In the ThreeJS folder you just downloaded, open the utils/exporters/blender/addons folder. Create a zip file of the “io_three” folder by right-clicking the folder and compressing the file. This will create a zip file in the same folder.
- Open Blender and go to File -> User Preferences. In User Preferences, click on the “Add-ons” tab. Then press the “Install from File…” button and navigate to the zip file you created and select it.
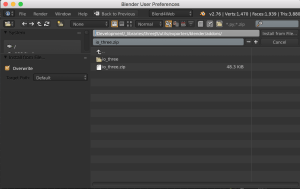
- Check the box next to “Import-Export: Three.js Format” to activate it.

Prepare your Blender Model
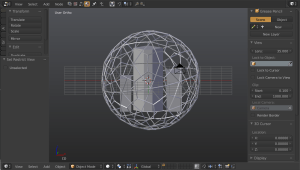
The exporter will export one object at a time so by selecting the model you wish to export, it’ll create a JSON (JavaScript Object Notation) file that represents the data to reconstruct your model. Select each object you wish to export and go to File -> Export -> Three.js (.json).


Ensure that the “Face Materials” check box is enabled under the “Shading” category in the export window. This will export the materials on your model as well.

Load Your WebGL Models in Three.js
<html>
<head>
 <style>
 body { margin: 0; }
 canvas { width: 100%; height: 100% }
 </style>
</head>
<body>
 <script src="js/three.js"></script>

 <script>
 // Setup a new scene
 var scene = new THREE.Scene();


 // Setup the camera
 var camera = new THREE.PerspectiveCamera(75, window.innerWidth/window.innerHeight, 0.1, 1000);
 camera.position.z = 5;
 camera.position.y = 1;

 // Setup the renderer
 var renderer = new THREE.WebGLRenderer();
 renderer.setSize(window.innerWidth, window.innerHeight);
 document.body.appendChild(renderer.domElement);


 // Add the lights
 var ambientLight = new THREE.AmbientLight(0x111111);
 scene.add(ambientLight);

 var light = new THREE.PointLight( 0xFFFFDD );
 light.position.set( -15, 10, 15 );
 scene.add( light );


 // Models
 var model;
 var sphereModel;

 // Load the JSON files and provide callback functions (modelToScene
 var loader = new THREE.JSONLoader();
 loader.load( "models/main_building.json", addModelToScene );
 loader.load( "models/building_right.json", addModelToScene );
 loader.load( "models/building_left.json", addModelToScene );
 loader.load( "models/sphere.json", addSphereToScene );


 // After loading JSON from our file, we add it to the scene
 function addModelToScene( geometry, materials ) {
   var material = new THREE.MeshFaceMaterial(materials);
   model = new THREE.Mesh( geometry, material );
   model.scale.set(0.5,0.5,0.5);
   scene.add( model );
 }

 // Special callback to get a reference to the sphere
 function addSphereToScene( geometry, materials ){
   var material = new THREE.MeshFaceMaterial(materials);
   sphereModel = new THREE.Mesh( geometry, material );
   sphereModel.scale.set(0.5,0.5,0.5);
   sphereModel.position.y += 0.5;
   scene.add( sphereModel );
 }


 // Render loop to rotate our sphere by a little bit each frame
 var render = function () {
   requestAnimationFrame(render);

   if( typeof sphereModel != "undefined" ){
     // Rotate the sphere
     sphereModel.rotation.y += 0.001;
     sphereModel.rotation.x += 0.002;
   }

   renderer.render(scene, camera);
 };

 render();
 </script>
</body>
</html>
Example code
Download the Blender file and WebGL example code. If you end up using it for a project, let me know and leave any comments or questions below.
광고 클릭에서 발생하는 수익금은 모두 웹사이트 서버의 유지 및 관리, 그리고 기술 콘텐츠 향상을 위해 쓰여집니다.
댓글 0
| 번호 | 제목 | 글쓴이 | 날짜 | 조회 수 |
|---|---|---|---|---|
| 4 |
AngularJS 개념 및 기초잡기
 | 졸리운_곰 | 2017.01.29 | 584 |
| 3 |
AngularJS
| 졸리운_곰 | 2017.01.29 | 620 |
| 2 |
[tutorial] AngularJS 튜토리얼 - 1
| 졸리운_곰 | 2017.01.29 | 357 |
| 1 |
[튜토리얼/번역] AngularJS Modules (AngularJS 모듈)
| 졸리운_곰 | 2017.01.29 | 675 |