
- 전체
- Native Apps
- WinJS App
- C# Apps
- XAML
- VB.net
- VisualC.net
- C++
- MFC
- visual studio mobile app dev
- Azure ms cloud service
- Asp.net
- 인공지능 (AI)
- wpf
- UWP
- MAUI
- asp.net
C# Apps [C# App] Gidon - Avalonia 기반 MVVM 플러그인 IoC 컨테이너 : Gidon - Avalonia based MVVM Plugin IoC Container
2023.03.07 15:04
[C# App] Gidon - Avalonia 기반 MVVM 플러그인 IoC 컨테이너 : Gidon - Avalonia based MVVM Plugin IoC Container
Gidon - Avalonia 기반 MVVM 플러그인 IoC 컨테이너


소개
Avalonia용 Gidon IoC/MVVM 프레임워크
이 기사에서는 필자의 IoCy Inversion-of-Control/Dependency-Injection 컨테이너 위에 훌륭한 멀티플랫폼 WPF와 같은 Avalonia 패키지용으로 구축된 새로운 Gidon IoC/MVVM 프레임워크를 소개합니다. 내가 아는 한, Prism/MEF를 Avalonia로 포팅하려는 이전 시도(성공 여부는 확실하지 않음)가 있었다는 것을 이해하지만 Avalonia를 위한 최초의 IoC/MVVM 프레임워크입니다.
따라서 합리적인 질문은 새 프레임워크를 구축하는 대신 Prism을 포팅(또는 이전 포팅을 사용)하지 않는 이유입니다.
제 생각에는 Prism과 함께 자주 사용되는 MEF는 너무 복잡하여 WPF 및 Avalonia(예: Event Aggregation)와 함께 사용해서는 안 되며 매우 문서화되지 않은 오래된 패러다임을 사용할 수 있습니다.
Gidon의 목적은 매우 간단한 API와 구현을 제공하면서도 필요한 모든 기능을 포함하는 것입니다.
Gidon 프레임워크는 이미 상당히 작동 가능하다는 점에 유의하십시오(이 기사의 샘플이 보여줄 예정임). 가까운 장래에 여전히 많은 새롭고 훌륭한 기능이 추가될 것입니다.
MVVM(Model-View-ViewModel) 패턴 리프레셔
MVVM이란 무엇입니까?
MVVM 패턴은 세 부분으로 구성됩니다.
- 모델 - 백엔드에서 오는 비시각적 데이터
- 보기 모델 - 또한 데이터를 포함하는 비시각적 개체이지만 시각적 버튼, 메뉴 항목 등에서 호출할 시각적 기능 및 메서드를 반영하는 비시각적 속성도 제공합니다.
- 보기 - 애플리케이션의 시각적 개체를 나타내는 시각적 객체
View Model은 모델을 인식하지만 그 반대는 아닙니다.
뷰는 뷰 모델을 중심으로 구축되므로 뷰에 대한 지식이 어느 정도 있지만 뷰 모델은 뷰에 대해 아무것도 몰라야 합니다.
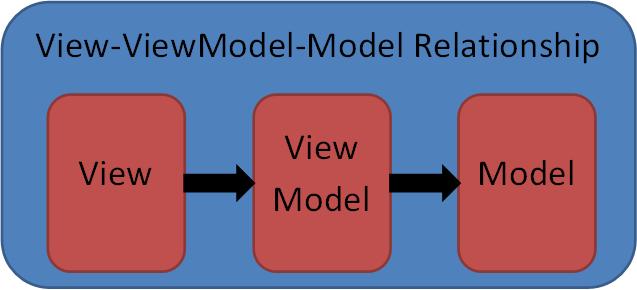
View는 일반적으로 수동적입니다. 단순히 View Model을 모방하고 View Model의 메서드를 호출합니다. View는 자신의 View Model에 대해서만 인식합니다. 다른 View 간의 모든 통신은 일반적으로 해당 View Model을 통해 수행됩니다.

중요 참고 : 보기와 해당 보기 모델 간의 양방향 통신은 보기 모델이 보기에 대해 아무것도 모른다는 것을 의미하지 않습니다. 보기 모델에서 보기로의 통신은 바인딩 또는 이벤트를 통해 이루어집니다.
MVVM 패턴의 주요 이점은 보기의 매우 복잡한 시각적 개체가 보기 모델의 훨씬 단순한 비시각적 개체를 모방한다는 것입니다. 비시각적 뷰 모델 개체는 생성, 확장, 테스트 및 디버그가 훨씬 쉽고 모든 비즈니스 로직이 뷰 모델 내에 있으므로 MVVM 애플리케이션을 훨씬 쉽게 구축하고 유지 관리할 수 있습니다.
MVVM 패턴은 원래 WPF의 뛰어난 바인딩 기능으로 인해 WPF 개발을 위해 발명되었지만 나중에 다른 도구 및 프레임워크에서도 채택되었습니다. 물론 모든 XAML 프레임워크(Avalonia, UWP, Xamarin 등 포함)는 MVVM을 지원하지만 Angular 및 Knockout JavaScript 패키지도 기본적으로 MVVM 프레임워크입니다.
코드에서 MVVM 패턴을 준수하면 일반적으로 Inversion of Control 또는 Dependency Injection이 필요하지 않습니다.
중요 참고 사항 : 내 광범위한 실습에서 모델은 매우 드물게 필요합니다. 백엔드 데이터는 뷰 모델 클래스로 직접 역직렬화될 수 있습니다. 그래서 나는 주로 모델 없이 VVM(View-View Model) 패턴을 연습하지만 단순성을 위해 두 접근 방식을 모두 MVVM이라고 부르겠습니다.
MVVM 패턴에 대해 자세히 알아보려면 내 기사인 MVVM Pattern Made Simple 또는 Data Templates and View Models를 읽을 수 있습니다 .
MVVM용 아발로니아 도구
ContentPresenterAvalonia에서 비시각적 뷰 모델을 시각적 뷰로 전환하는 가장 좋은 방법은 및 컨트롤을 사용하는 것입니다 ItemsPresenter(WPF에서는 그에 상응함 ContentControl) ItemsControl.
ContentPresenter속성 에 전달된 보기 모델 개체를 해당 속성에 전달된 개체와 '결합'하여 단일 비시각적 개체를 시각적 개체로 전환하는 데 이상적 Content입니다 .DataTemplateContenTemplate

ItemsPresenter비시각적 View Model 객체 컬렉션(속성 내에 저장된 )을 해당 속성에 저장된 객체 각각에 Items적용하여 비주얼 컬렉션으로 전환하는 데 유용합니다. 결과 컬렉션의 시각적 개체는 속성 에서 제공하는 Avalonia에 따라 정렬됩니다 (기본적으로 수직으로 누적되어 다음 항목 위에 하나씩 쌓임).DataTemplateItemTemplatePanelItemsPresenter.ItemsPanel

IoC(Inversion of Control) 컨테이너의 리프레셔(MVVM 없음)
MVVM과 IoC는 함께 갈 필요가 없습니다. MVVM 또는 시각적 프레임워크와 관련이 없는 일반 Inversion of Control(플러그인) 컨테이너가 많이 있습니다. 그 중에는 다음이 있습니다.
- MEF
- 오토팩
- 단일성
- Ninject
- 캐슬 윈저
- IoCy - IoCy 에서 사용할 수 있는 나만의 간단한 IoC 컨테이너입니다 .
이러한 프레임워크의 주요 목적은 기능을 느슨하게 결합된 플러그인(일부는 정적으로 로드되고 일부는 동적으로 로드됨)으로 쉽게 분할하여 애플리케이션 내에서 관심사의 분리를 개선하는 것입니다.
이렇게 하면 다음과 같은 이점이 있습니다.
- 플러그인 독립성 - 한 플러그인의 수정 구현이 다른 플러그인의 변경을 트리거해서는 안 됩니다.
- 더 쉬운 테스트 가능성 및 디버깅 - 각 플러그인을 개별적으로(종속되는 플러그인과 함께) 쉽게 테스트, 디버그 및 수정할 수 있어야 하며 고정된 플러그인은 다른 플러그인을 변경하지 않고 나머지 응용 프로그램과 함께 작동해야 합니다.
- 제품의 향상된 확장성 - 새로운 기능이 필요할 때 특정 확장에 대해 수정할 플러그인을 알거나 필요한 경우 새 API가 사용될 수 있는 위치에서만 수정하여 기존 플러그인에 새 플러그인을 추가할 수 있습니다. .
플러그인을 추가하여 응용 프로그램을 확장하는 위에 나열된 항목의 마지막 이점만 사용하는 많은 프로젝트(내가 설계하고 시작한 것이 아님)를 보았습니다. 반면에 그들의 플러그인은 너무 뒤섞이고 상호 의존적이어서 다른 플러그인에 영향을 미치지 않고는 그중 하나를 제거할 수 없었습니다. 이것은 매우 중요한 오류입니다. 우수한 플러그인 아키텍처의 이점을 얻으려면 서로 다른 플러그인 간의 상호 의존성을 최소화해야 하며 이것이 사실인지 확인하는 것이 설계자의 임무입니다.
어떤 의미에서 플러그인은 하드웨어 카드와 유사하지만 플러그인 인터페이스는 카드를 삽입하기 위한 슬롯과 매우 유사합니다.


중요 사항 : 플러그인 교체, 추가 또는 제거는 이미 덮개가 없는 컴퓨터에서 컴퓨터 카드를 교체, 추가 또는 제거하는 것만큼 쉬워야 합니다. 그렇지 않은 경우 플러그인 아키텍처에 추가 작업이 필요합니다.
플러그인 테스트는 하드웨어 테스터에 카드를 놓고 일부 입력을 보내고 테스터 내에서 해당 출력을 확인하는 것만큼 쉬워야 합니다. 물론 먼저 플러그인용 테스터를 빌드해야 합니다.
그러나 일반적으로 소프트웨어 플러그인은 하드웨어 카드에 비해 다음과 같은 이점이 있습니다.
- 소프트웨어에서 플러그인 개체를 생성하는 비용은 동일한 유형의 여러 플러그인 개체를 사용해도 응용 프로그램 비용이 증가하지 않기 때문에 하드웨어에서 카드를 생성하는 비용보다 훨씬 적습니다. 또한 동일한 유형의 다른 개체는 동일한 방식으로 동작하도록 보장됩니다. 즉, 소프트웨어 결함은 개체가 아닌 유형별로 발생합니다.
- 플러그인은 계층적일 수 있습니다. 즉, 플러그인 자체는 다른 하위 플러그인으로 구성될 수 있습니다(하드웨어 플러그인도 일부 하위 플러그인을 가질 수 있지만 소프트웨어에서 계층은 필요한 만큼 많은 수준으로 구성될 수 있습니다).
- 일부 플러그인은 싱글톤일 수 있습니다. 여러 곳에서 사용되는 동일한 플러그인입니다(물론 하드웨어에서는 불가능합니다).
플러그인 계층 구조는 괜찮지만 플러그인은 상호 종속적이거나 피어 종속적이지 않아야 합니다. 즉, 플러그인이 논리적 피어인 경우 서로 의존해서는 안 됩니다. 공통 기능은 다른 플러그인 또는 플러그인이 아닌 DLL로 분해되어야 합니다.
IoC와 MVVM을 함께 사용하는 이유는 무엇입니까?
MVVM은 IoC 없이 실행될 수 있고 IoC는 MVVM 없이 실행될 수 있다고 위에서 이미 언급했습니다. 그렇다면 두 가지를 모두 수행하는 프레임워크가 필요한 이유는 무엇입니까? 그 이유는 뷰와 해당 뷰 모델이 플러그인으로 구축하기에 좋은 후보이기 때문입니다. 이 경우 각 개발자는 자신의 보기/보기 모델 조합에서 작업하고 나머지 팀과 별도로 테스트한 다음 플러그인으로 함께 가져올 수 있으며 이상적으로는 모든 것이 작동합니다.
물론 때로는 뷰 모델이 완전히 독립적이지 않고 서로 통신해야 합니다. 통신 메커니즘은 서비스라고 하는 비시각적 싱글톤 플러그인을 통해 연결되거나 때로는 프레임워크에 내장될 수도 있습니다.
일반적으로 Microsoft의 MEF 또는 Unity IoC 컨테이너를 중심으로 구축된 몇 가지 잘 알려진 IoC/MVVM 프레임워크가 있으며 일부는 둘 다에서 작동할 수도 있습니다. 모두 원래 WPF용으로 생성되었지만 Xamarin 및 UWP용으로도 조정되었습니다. 그 중에는 다음이 있습니다.
- 프리즘
- 칼리번/칼리번.마이크로
- 꽉 쥐기
IoCy 컨테이너 리프레셔
여기에서는 간단하고 강력한 IoCy 컨테이너 의 기능을 설명합니다 . MEF, Autofac 및 Ninject에서 내가 좋아하는 모든 기능을 추가하는 동시에 널리 사용되지 않는 기능을 건너뛰었습니다.
IoC 및 DI(의존성 주입) 구현의 주요 원칙은 주입 가능한 개체가 생성자를 호출하여 생성되는 것이 아니라 반환할 개체를 생성하거나 찾는 컨테이너에서 일부 메서드를 호출하여 생성된다는 것입니다. 객체의 올바른 구현을 반환하기 전에 컨테이너가 생성됩니다. 모든 주입 가능한 개체에는 주입 가능한 일부 속성이 있을 수 있습니다. 이 경우 해당 속성도 동일한 컨테이너 등에서 재귀적으로 채워집니다.
다음은 IoCy의 가장 중요한 기능입니다.
컨테이너 만들기
IoCContainer container = new IoCContainer();
고유한 컨테이너 이름을 생성자에 전달할 수 있습니다. 그렇지 않으면 고유한 이름이 생성됩니다.
인터페이스(또는 슈퍼클래스)와 구현(또는 서브클래스) 간의 매핑 생성
container.RegisterType<IPerson, Person>();
IPerson의 인터페이스와 Person구현 간의 매핑을 설정하여 IPerson매번
IPerson person = container.Resolve<IPerson>();
메소드가 호출되면 새 객체를 생성하고 반환합니다 Person.
IPerson예를 들어 클래스에 대한 인터페이스와 같은 다른 매핑을 만들 수도 SuperPerson있지만 두 매핑이 동시에 존재하려면 일부 객체를 메서드 id에 대한 매핑으로 전달한 Map(object id = null)다음 동일한 것을 id해당 Resolve(object id = null)메서드에 전달해야 합니다.
container.RegisterType<IPerson, Person>(1);
IPerson superPerson = container.Resolve<IPerson>(1);
위의 코드에서 the는 id정수이고 equals입니다 1.
다른 모든 매핑 및 해결 방법도 인수를 허용합니다 id.
인터페이스(또는 슈퍼클래스)와 구현(또는 서브클래스) 간의 싱글톤 매핑 생성
Resolve<...>()모든 메서드 호출에 대해 새로 생성된 개체를 가져오는 이전 경우와 달리 Singleton 매핑은 매번 동일한 개체를 반환합니다.
Singleton 매핑을 수행하는 방법은 다음과 같습니다.
container.RegisterSingletonType<ILog, FileLog>();
a를 해결하는 Singleton것은 이전과 정확히 동일하며 매번 동일한 객체만 반환됩니다.
싱글톤 매핑을 설정하는 또 다른 방법이 있습니다. 이미 존재하는 객체가 가 되도록 하려면 메서드 Singleton에 전달하기만 하면 됩니다 .RegisterSingletonInstance(...)
ConsoleLog consoleLog = new ConsoleLog();
// change the mapping of ILog to ConsoleLog (instead of FileLog)
childContainer.RegisterSingletonInstance<ILog, ConsoleLog>(consoleLog);
멀티매핑 생성
다중 매핑은 키에 매핑된 특정 유형의 항목 모음을 만듭니다. 호출할 때마다 MapMultiType(...)컬렉션에 항목을 추가합니다. 예를 들어:
container.RegisterMultiCellType<ILog, FileLog>("MyLogs");
container.RegisterMultiCellType<ILog, ConsoleLog>("MyLogs");
FileLog유형 중 하나 와 유형 중 하나의 두 개체를 ConsoleLog컨테이너 내부 컬렉션에 추가합니다 . 이에 따라 MultiResolve()컨테이너에서 메서드를 호출하면 이 두 항목 컬렉션이 다음과 같이 반환됩니다 IEnumerable<ILog>.
IEnumerable<ILog> logs = container.MultiResolve<ILog>("MyLogs");
컴포지션에 속성 사용
MEF에서와 마찬가지로 IoCy는 컨테이너 내에서 객체를 구성하기 위해 속성을 사용할 수 있습니다. 예를 들어:
[RegisterType]
public class Person : IPerson
{
    public string PersonName { get; set; }

    [Inject]
    public IAddress Address { get; set; }
}
[RegisterType]상단의 속성은 이 구현이 어떤 유형으로 매핑됨을 의미합니다. 매핑되는 정확한 유형은 속성에 대한 매개변수로 지정되지 않으므로 기본적으로 현재 클래스의 기본 클래스로 매핑됩니다(기본 클래스가 NOT 인 경우 object). 기본 클래스가 인 경우 object클래스가 구현하는 첫 번째 인터페이스에 매핑됩니다. 클래스에 기본 클래스가 없기 때문에 Person첫 번째 인터페이스( )에 매핑됩니다 IPerson. 따라서 위의 코드는 container.RegisterType<IPerson, Person>();. TypeToResolve그러나 클래스에 대한 변경 사항(예: 클래스가 구현하는 인터페이스 순서 변경)이 구성에 영향을 미치지 않도록 특성에 대한 첫 번째 매개 변수로 매핑할 클래스를 전달하는 것이 좋습니다 .
다음 속성 선언: [RegisterType(typeof(IPerson))], 는 위에서 사용된 것보다 낫습니다.
[Inject]속성 위의 Address속성은 객체가 주입 가능함을 의미합니다 Address(컨테이너에서 제공됨). 주입된 속성은 주입하는 개체가 싱글톤인지 매번 새로 생성되는지 여부를 알지 못합니다. 개체를 채우는 방법은 컨테이너에 달려 있습니다.
[RegisterMultiCellType(...)]다중 구현의 경우 클래스 위의 속성과 [Inject] 속성 위의 일반적인 속성을 사용해야 합니다 . 예:
[RegisterMultiCellType(typeof(IPlugin), "ThePlugins")]
public class PluginOne : IPlugin
{
    public void PrintMessage()
    {
        Console.WriteLine("I am PluginOne!!!");
    }
}

[RegisterMultiCellType(typeof(IPlugin), "ThePlugins")]
public class PluginTwo : IPlugin
{
    public void PrintMessage()
    {
        Console.WriteLine("I am PluginTwo!!!");
    }
}

[RegisterType(typeof(IPluginAccumulator))]
public class PluginAccumulator : IPluginAccumulator
{
    [Inject(typeof(IEnumerable<IPlugin>)]
    public IEnumerable<IPlugin> Plugins { get; set; }
}
IoCContainer이에 따라 정적으로 또는 동적으로 로드된 전체 어셈블리 또는 특정 경로 아래에 있는 모든 DLL 어셈블리에서 컨테이너를 구성할 수 있는 몇 가지 방법이 있습니다 . 목록은 다음과 같습니다.
public class IoCContainer
{
    ...

    // injects an already loaded assembly
    public void InjectAssembly(Assembly assembly){...}

    // loads and injects a dynamic assembly by path to its dll
    public void InjectDynamicAssemblyByFullPath(string assemblyPath){...}

    // loads and injects all dll files located at assemblyFolderPath
    // whose name matches the regex
    public void InjectPluginsFromFolder
           (string assemblyFolderPath, Regex? matchingFileName = null){...}

    // loads and injects assemblies that match the rejex
    // from all direct sub-folders of folder specified
    // by baseFolderPath argument.
    public void InjectPluginsFromSubFolders
           (string baseFolderPath, Regex? matchingFileName = null){...}
}
기돈 샘플
코드 위치
이때 Gidon 샘플을 실행하기 위해서는 Gidon 에서 전체 Gidon 코드를 다운로드해야 합니다 .
이를 달성하려면 재귀 하위 모듈과 함께 git 명령을 사용해야 합니다.
git clone https://github.com/npolyak/NP.Avalonia.Gidon.git --recursive NP.Avalonia.Gidon
또는 복제 중에 사용자 ' --recursive' 옵션을 잊어버린 경우 복제 후 저장소 내에서 항상 다음 명령을 사용할 수 있습니다.
git submodule update --init
다음은 리포지토리 기본 디렉터리의 하위 폴더입니다.
- 프로토타입 - Gidon의 샘플이 포함되어 있으며, 그 중 일부는 아래 이 문서에서 설명합니다.
- src - Gidon의 코드 포함
- SubModules - Gidon이 의존하는 하위 모듈로 가져온 다른 저장소의 코드를 포함합니다.
- 테스트 - 여러 프로토타입에서 사용되는 코드를 포함합니다. 특히 테스트 플러그인과 서비스를 여기에 배치합니다.
플러그인테스트
솔루션 위치 및 구조
PluginsTest솔루션은 Prototypes/PluginsTest 폴더 아래에 있습니다 . 솔루션을 엽니다(그러려면 VS2022가 필요합니다).
PluginsTest프로젝트를 솔루션의 시작 프로젝트로 만듭니다 .
솔루션 폴더/프로젝트 구조는 다음과 같습니다.

PluginsTest 프로젝트를 마우스 오른쪽 버튼으로 클릭 하고 Rebuild 를 선택합니다 . 플러그인은 애플리케이션에 동적으로 로드되며 기본 프로젝트는 플러그인에 직접 의존하지 않습니다. 모든 플러그인을 빌드하려면 솔루션 내의 " TestAndMocks " 솔루션 폴더를 마우스 오른쪽 버튼으로 클릭하고 Rebuild 를 선택해야 합니다 .
플러그인/서비스 프로젝트가 다시 빌드되고 컴파일된 어셈블리가 현재 솔루션 아래의 bin/Debug/net6.0 폴더에 복사됩니다(빌드 후 이벤트를 통해). 해당 폴더에서 플러그인은 Gidon 프레임워크에 의해 동적으로 로드됩니다. 다음은 <CurrentSolution>/bin/Debug/net6.0 아래에 설치된 플러그인의 폴더 구조입니다 .
PluginsTest 프로젝트 실행

응용 프로그램을 실행해 보십시오. 다음과 같이 표시됩니다.

" 종료 " 버튼을 누르면 응용 프로그램이 종료됩니다.
사용자 nick이름은 " " 사용자이고 1234암호는 " "입니다. " 로그인 " 버튼을 누르면(활성화되어야 함) 다음과 같이 표시됩니다.

이들은 기본 창에서 헤더로 끌어올 수 있는 두 개의 도킹 가능한/부동 창입니다. 서비스를 통해 그들 사이에 연결이 있습니다. " Enter Text " 안에 아무 것도 입력하고 " SendTextBox " 버튼을 누르면 (활성화됨) 테스트가 도킹 가능한 다른 창에 나타납니다.

메인 프로젝트 PluginsTest의 코드
코드 설명
이제 코드를 살펴보겠습니다.
플러그인을 로드하는 Gidon 코드
플러그인을 로드하는 코드는 생성자 내의 App.axaml.cs 파일 에 있습니다 App.
public class App : Application
{
    /// defined the Gidon plugin manager
    /// use the following paths (relative to the PluginsTest.exe executable)
    /// to dynamically load the plugins and services:
    /// "Plugins/Services" - to load the services (non-visual singletons)
    /// "Plugins/ViewModelPlugins" - to load view model plugins
    /// "Plugins/ViewPlugins" - to load view plugins
    public static PluginManager ThePluginManager { get; } =
        new PluginManager
        (
            "Plugins/Services",
            "Plugins/ViewModelPlugins",
            "Plugins/ViewPlugins");

    // expose the IoC container
    public static IoCContainer TheContainer => ThePluginManager.TheContainer;

    public App()
    {
        // inject a type from a statically loaded project NLogAdapter
        ThePluginManager.InjectType(typeof(NLogWrapper));

        // inject all dynamically loaded assemblies
        ThePluginManager.CompleteConfiguration();
    }
    ...
}
App.axaml에는 기본 테마의 스타일과 UniDock 프레임워크가 작동하는 스타일이 포함되어 있습니다.
<Application.Styles>
    <StyleInclude Source="avares://Avalonia.Themes.Default/Accents/BaseLight.xaml"/>
    <StyleInclude Source="avares://Avalonia.Themes.Default/DefaultTheme.xaml"/>
    <StyleInclude Source="avares://NP.Avalonia.Visuals/Themes/CustomWindowStyles.axaml"/>
    <StyleInclude Source="avares://NP.Avalonia.UniDock/Themes/DockStyles.axaml"/>
</Application.Styles>
가장 흥미로운 코드는 MainWindow.axaml 파일 에 있습니다 .
우선 Window태그 내에서 일부 XML 네임스페이스를 정의해야 합니다.
<Window ...
		xmlns:utils="clr-namespace:NP.Utilities.PluginUtils;assembly=NP.Utilities"
		xmlns:basicServices="clr-namespace:NP.Utilities.BasicServices;assembly=NP.Utilities"
		xmlns:np="https://np.com/visuals"
		xmlns:local="clr-namespace:PluginsTest"
        ...
        >
XML 네임스페이스 np:는 Gidon의 코드를 포함하여 모든 Avalonia 관련 기능에 사용되는 가장 중요한 것입니다.
그런 다음 UniDock 프레임워크를 사용하려면 를 DockManagerAvalonia XAML 리소스로 정의해야 합니다.
<Window.Resources>
    <np:DockManager x:Key="TheDockManager"/>
</Window.Resources>
그런 다음 인증 플러그인을 표시하기 위한 패널과 일부 텍스트를 보내고 표시하기 위한 다른 플러그인을 포함하는 도킹 가능한 패널을 표시하기 위한 Grid패널이 있습니다 .PluginControlGrid
<Grid>
    <np:PluginControl x:Name="AuthenticationPluginControl"
                      TheContainer="{x:Static local:App.TheContainer}">
        ...
    </np:PluginControl>
    <Grid x:Name="DockContainer"
          .../>
</Grid>
한 번에 해당 항목 중 하나만 볼 수 있습니다. 사용자가 인증되지 않은 경우 인증이 PluginControl표시되고, 그렇지 않으면 텍스트 전송 및 표시를 위한 플러그인이 포함된 도킹 가능한 패널이 표시됩니다.
인증에 먼저 초점을 맞추겠습니다 PluginControl.
<np:PluginControl x:Name="AuthenticationPluginControl"
                  TheContainer="{x:Static local:App.TheContainer}">
    <np:PluginControl.PluginInfo>
        <utils:VisualPluginInfo ViewModelType="{x:Type utils:IPlugin}"
                                ViewModelKey="AuthenticationVM"
                                ViewDataTemplateResourcePath=
                               "avares://AuthenticationViewPlugin/Views/AuthenticationView.axaml"
                                ViewDataTemplateResourceKey="AuthenticationViewDataTemplate"/>
    </np:PluginControl.PluginInfo>
</np:PluginControl>
PluginControlGidon 프레임 워크에서 나옵니다. 그것은 ( 위에서 설명한 것처럼 View Model을 View로 바꾸는 것과 ContentPresenter동일 )에서 파생됩니다. ContentPresenter파생된 기능 외에도 에는 PluginControl몇 가지 유용한 Styled속성이 정의되어 있습니다( StyledAvalonia의 속성은 WPF의 종속성 속성과 매우 유사함).
TheContainerStyled속성을 사용하면 뷰 모델 및 뷰 플러그인(및 의존하는 모든 플러그인)을 가져와야 하는IoCContainer것을 지정할 수 있습니다 .PluginControlPluginInfoStyled속성을 사용하면 컨테이너에서 보기 모델 개체(PluginControl.Content속성을 채우는 데 사용됨) 및View개체(속성을 채우는 데 사용됨 ) 를 검색하는 방법을 지정하는 정보를 전달할 수 있습니다 .PluginControl.ContentTemplate이것은 패키지 내에 정의된PluginInfo유형입니다 .VisualPluginInfoNP.Utilities
TheContainer인증 플러그인 컨트롤의 속성은 마크업 확장을 App.TheContainer static통해 속성 에 연결됩니다 x:Static.
두 개의 첫 번째 속성 ViewModelType및 ViewModelKey객체 VisualPluginInfo는 View Model 플러그인을 검색하는 데 사용됩니다. ViewModelType와 같습니다 typeof(IPlugin). 매우 일반적이기 때문에 IPlugin(거의 모든 뷰 모델 플러그인이 이를 구현함) 인증 뷰 모델 싱글톤 플러그인을 구체적으로 식별하기 위해 ViewModelKeyset to string도 사용합니다."AuthenticationVM"
AuthenticationViewModel해당 프로젝트에서 플러그인이 정의된 방식은 다음과 같습니다 AuthenticationViewModelPlugin.
[RegisterType(typeof(IPlugin), resolutionKey:"AuthenticationVM", isSingleton:true)]
public class AuthenticationViewModel : VMBase, IPlugin
{
...
}
의 마지막 두 속성은 VisualPluginInfo보기를 지정하는 데 사용됩니다(Gidon의 경우 단순히 DataTemplate.
속성은 ViewDataTemplateResourcePath를 포함하는 XAML 리소스 파일에 대한 URL을 지정합니다 DataTemplate(이 경우 " avares://AuthenticationViewPlugin/Views/AuthenticationView.axaml "). 속성은 ViewDataTemplateResourceKeyView DataTemplate에 대한 리소스 키를 지정합니다(이 경우 " AuthenticationViewDataTemplate"). 실제로 프로젝트의 " Views " 프로젝트 폴더 에 있는 " AuthenticationView.axaml " 파일을 확인할 수 있으며 거기에 정의된 " "을 볼 수 있습니다 .AuthenticationViewPluginAuthenticationViewDataTemplate
우리 인증의 가시성은 View PluginControl를 통해 관리됩니다 .PluginControlPluginControl
이제 <Grid x:Name="DockContainer" ... />. 여기에는 UniDock두 개의 도킹 계층 구조가 DockItems포함되어 있습니다. 하나는 텍스트 입력 및 전송을 위한 뷰 모델/뷰 플러그인을 포함하는 왼쪽에 있고, 전송된 텍스트를 표시하기 위한 오른쪽에는 하나가 있습니다.
<Grid x:Name="DockContainer"
      IsVisible="{Binding Path=(np:PluginAttachedProperties.PluginDataContext).IsAuthenticated,
                          RelativeSource={RelativeSource Self}}"
      np:PluginAttachedProperties.TheContainer="{x:Static local:App.TheContainer}">
    <np:PluginAttachedProperties.PluginVmInfo>
        <utils:ViewModelPluginInfo ViewModelType=
                                   "{x:Type basicServices:IAuthenticationService}"/>
    </np:PluginAttachedProperties.PluginVmInfo>
    <np:RootDockGroup TheDockManager="{StaticResource TheDockManager}">
        <np:StackDockGroup TheOrientation="Horizontal">
            <np:DockItem Header="Enter Text">
                <np:PluginControl x:Name="EnterTextPluginControl"
                                  TheContainer="{x:Static local:App.TheContainer}">
                    <np:PluginControl.PluginInfo>
                        <utils:VisualPluginInfo ViewModelType="{x:Type utils:IPlugin}"
                                                ViewModelKey="EnterTextViewModel"
                                                ViewDataTemplateResourcePath=
                                      "avares://EnterTextViewPlugin/Views/EnterTextView.axaml"
                                                ViewDataTemplateResourceKey="EnterTextView"/>
                    </np:PluginControl.PluginInfo>
                </np:PluginControl>
            </np:DockItem>
            <np:DockItem Header="Received Text">
                <np:PluginControl x:Name="ReceiveTextPluginControl"
                                  TheContainer="{x:Static local:App.TheContainer}">
                    <np:PluginControl.PluginInfo>
                        <utils:VisualPluginInfo ViewModelType="{x:Type utils:IPlugin}"
                                                ViewModelKey="ReceiveTextViewModel"
                                                ViewDataTemplateResourcePath=
                                   "avares://ReceiveTextViewPlugin/Views/ReceiveTextView.axaml"
                                                ViewDataTemplateResourceKey="ReceiveTextView"/>
                    </np:PluginControl.PluginInfo>
                </np:PluginControl>
            </np:DockItem>
        </np:StackDockGroup>
    </np:RootDockGroup>
</Grid>
내부는 PluginControls인증 DockItems이 설정된 방식과 매우 유사한 방식으로 설정되며 PluginControl, 단지 서로 다른 View Model 및 View 플러그인을 가리키므로 여기에서 논의하는 데 시간을 할애하지 않을 것입니다(해당 플러그인에 대해서는 아래에서 설명하겠습니다). RootDockGroup, UniDock 프레임워크 개체입니다 StackDockGroup.DockItem
RootDockGroup모든 도킹 계층의 최상위에 있는 도킹 그룹입니다.StackDockGroup자식을 수직 또는 수평으로 정렬합니다(우리의 경우TheOrientantion속성이 로 설정되어 있기 때문에 수평으로Horizontal).DockItem실제로는 헤더와 콘텐츠가 있는 도킹/부동 창입니다.
패널 에 대해 설명해야 할 것은 <Grid x:Name="DockContainer" ...>사용자의 인증 여부에 따라 표시 여부를 전환하는 방법입니다. 관련 코드는 다음과 같습니다.
<Grid x:Name="DockContainer"
      IsVisible="{Binding Path=(np:PluginAttachedProperties.PluginDataContext).IsAuthenticated,
                          RelativeSource={RelativeSource Self}}"
      np:PluginAttachedProperties.TheContainer="{x:Static local:App.TheContainer}">
    <np:PluginAttachedProperties.PluginVmInfo>
        <utils:ViewModelPluginInfo ViewModelType=
                                   "{x:Type basicServices:IAuthenticationService}"/>
    </np:PluginAttachedProperties.PluginVmInfo>
    ...
</Grid>
PluginAttachedProperties여기서는 프로젝트 클래스 내에서 정의된 Avalonia 첨부 속성에 의존합니다 NP.Avalonia.Gidon. 태그 확장을 사용하여 PluginAttachedProperties.TheContainer연결된 속성을 속성으로 설정합니다 .App.TheContainer staticx:Static
np:PluginAttachedProperties.TheContainer="{x:Static local:App.TheContainer}"
그런 다음 연결된 속성을 PluginAttachedProperties.PluginVmInfo다음과 같이 설정합니다.
<utils:ViewModelPluginInfo ViewModelType="{x:Type basicServices:IAuthenticationService}"/>
ViewModelPluginInfo의 보기 모델 부분만 포함합니다 VisualPluginInfo. IAuthenticationService우리의 경우, 단일 유형의 구현을 검색하고 있습니다 ( 컨테이너 내에 유형의 개체가 하나만 있으므로 MockAuthenticationService필요하지 않음 ).ViewModelKeyIAuthenticationService
두 개의 연결된 속성이 우리 에 설정되면 동일한 Grid연결된 속성이 컨테이너에서 검색된 유형의 개체를 포함하도록 설정됩니다 . 이 개체에는 변경 알림이 있는 속성이 있습니다( 속성 변경 시 이벤트 발생).PluginAttachedProperties.PluginDataContextGridIAuthenticationServiceIsAuthenticatedINotifyPropertyChanged.PropertyChanged
이제 우리가 해야 할 일은 IsVisible연결된 속성에 포함된 개체에 정의된 속성의 Grid경로에 속성을 바인딩하는 것입니다 .IsAuthenticatedPluginAttachedProperties.PluginDataContext
<Grid x:Name="DockContainer"
      IsVisible="{Binding Path=(np:PluginAttachedProperties.PluginDataContext).IsAuthenticated,
                          RelativeSource={RelativeSource Self}}"
  ...
  >
인증 플러그인 및 서비스
인증 보기 모델 플러그인
AuthenticationViewModelPlugin인증 보기 모델 플러그인은 프로젝트 내에서 정의됩니다 .
[RegisterType(typeof(IPlugin), resolutionKey: "AuthenticationVM", isSingleton: true)]
public class AuthenticationViewModel : VMBase, IPlugin
{
    [Inject(typeof(IAuthenticationService))]
    // Authentication service that comes from the container
    public IAuthenticationService? TheAuthenticationService
    {
        get;
        private set;
    }

    ...
    // notifiable property
    public string? UserName { get {...}  set {...} }

    ...
    // notifiable property
    public string? Password { get {...}  set {...} }

    // change notification fires when either UserName or Password change
    public bool CanAuthenticate =>
        (!string.IsNullOrEmpty(UserName)) && (!string.IsNullOrEmpty(Password));

    // method to call in order to try to authenticate a user
    public void Authenticate()
    {
        TheAuthenticationService?.Authenticate(UserName, Password);

        OnPropertyChanged(nameof(IsAuthenticated));
    }

    // method to exit the application
    public void ExitApplication()
    {
        Environment.Exit(0);
    }

    // IsAuthenticated property
    // whose change notification fires within Authenticate() method
    public bool IsAuthenticated => TheAuthenticationService?.IsAuthenticated ?? false;
}
MockAuthenticationService
인증 보기 모델 플러그인이 사용하는 것은 프로젝트 내에서 IAuthenticationService구현되며 매우 간단합니다.MockAuthenticationServiceMockAuthentication
[RegisterType(typeof(IAuthenticationService), IsSingleton = true)]
public class MockAuthenticationService : VMBase, IAuthenticationService
{
    ...
    // notifiable property
    public string? CurrentUserName { get {...} set {...} }

    // Is authenticated is true if and only if the CurrentUserName is not zero
    public bool IsAuthenticated => CurrentUserName != null;

    // will only authenticate if userName="nick" and password="1234"
    public bool Authenticate(string userName, string password)
    {
        if (IsAuthenticated)
        {
            throw new Exception("Already Authenticated");
        }

        CurrentUserName =
                (userName == "nick" && password == "1234") ? userName : null;

        ...

        return IsAuthenticated;
    }

    public void Logout()
    {
        if (!IsAuthenticated)
        {
            throw new Exception("Already logged out");
        }

        CurrentUserName = null;
    }
}
인증 보기
위에서 언급한 바와 같이 기돈의 견해는 다음과 같이 정의되어야 한다 DataTemplates. 인증 보기는 프로젝트 내의 Views/AuthenticationView.axaml 파일 DataTemplate내의 리소스 로 정의됩니다 .AuthenticationViewPlugin
<DataTemplate x:Key="AuthenticationViewDataTemplate">
    <Grid Background="{DynamicResource WindowBackgroundBrush}"
            RowDefinitions="*, Auto"
            IsVisible="{Binding Path=IsAuthenticated,
                        Converter={x:Static np:BoolConverters.Not}}">
        <Control.Styles>
            <StyleInclude Source="avares://NP.Avalonia.Visuals/Themes/ThemeStyles.axaml"/>
        </Control.Styles>
        <StackPanel HorizontalAlignment="Center"
                    VerticalAlignment="Center"
                    Margin="10">
            <np:LabeledControl x:Name="EnterUserNameControl"
                                Text="Enter User Name: "
                                Classes="Bla"
                                HorizontalAlignment="Center">
                <np:LabeledControl.ContainedControlTemplate>
                    <ControlTemplate>
                        <TextBox Width="150"
                                    Text="{Binding Path=UserName, Mode=TwoWay}"/>
                    </ControlTemplate>
                </np:LabeledControl.ContainedControlTemplate>
            </np:LabeledControl>

            <np:LabeledControl x:Name="EnterPasswordControl"
                                Text="Enter Password: "
                                HorizontalAlignment="Center"
                                Margin="0,15,0,0">
                <np:LabeledControl.ContainedControlTemplate>
                    <ControlTemplate>
                        <TextBox Width="150"
                                    Text="{Binding Path=Password, Mode=TwoWay}"/>
                    </ControlTemplate>
                </np:LabeledControl.ContainedControlTemplate>
            </np:LabeledControl>
        </StackPanel>
        <StackPanel Orientation="Horizontal"
                    Margin="10"
                    Grid.Row="1"
                    HorizontalAlignment="Right"
                    VerticalAlignment="Center">
            <Button Content="Exit"
                    np:CallAction.TheEvent="{x:Static Button.ClickEvent}"
                    np:CallAction.MethodName="ExitApplication"/>
            <Button Content="Login"
                    Margin="10,0,0,0"
                    IsEnabled="{Binding Path=CanAuthenticate}"
                    np:CallAction.TheEvent="{x:Static Button.ClickEvent}"
                    np:CallAction.MethodName="Authenticate"/>
        </StackPanel>
    </Grid>
</DataTemplate>
하나 LabeledControl는 사용자 이름을 입력하기 위한 것이고 다른 하나는 암호를 입력하기 위한 것입니다. Text내부의 속성은 View Model 플러그인에 정의된 및 에 TextBoxes따라 양방향 바인딩됩니다 .UserNamePassword string
" 종료 " 및 " 로그인 " 버튼은 프로젝트 CallAction의 동작을 사용하여 NP.Avalonia.Visuals해당 버튼을 클릭할 때 모델 보기 메서드를 호출합니다 ExitApplication().Authenticate()
텍스트 플러그인 및 서비스 입력 및 수신
TextService
TextService텍스트 입력 및 수신 보기 모델 플러그인은 구현 인터페이스 를 통해 서로 통신합니다 ITextService.
[RegisterType(typeof(ITextService), IsSingleton = true)]
public class TextService : ITextService
{
    public event Action<string>? SentTextEvent;

    public void Send(string text)
    {
        SentTextEvent?.Invoke(text);
    }
}
구현은 매우 간단합니다. 텍스트를 전달하는 Send(string text)메소드 가 하나 있습니다 . SendTextEvent텍스트 입력 뷰 모델은 Send(string text)메서드를 호출하고 텍스트 수신 뷰 모델은 SentTextEvent텍스트 가져오기를 처리하고 이를 자체 알림 가능 Text속성에 할당합니다.
텍스트 보기 모델 플러그인 입력
이 플러그인은 하나의 간단한 클래스로 구성됩니다 EnterTextViewModel.
[RegisterType(typeof(IPlugin), partKey: nameof(EnterTextViewModel), isSingleton: true)]
public class EnterTextViewModel : VMBase, IPlugin
{
    // ITextService implementation
    [Inject(typeof(ITextService))]
    public ITextService? TheTextService { get; private set; }

    #region Text Property
    private string? _text;

    // notifiable property with getter and setter
    public string? Text { ... }
    #endregion Text Property

    // change notified the Text changes
    public bool CanSendText => !string.IsNullOrWhiteSpace(this._text);

    // method to send the text via TextService
    public void SendText()
    {
        if (!CanSendText)
        {
            throw new Exception("Cannot send text, this method should not have been called.");
        }

        TheTextService!.Send(Text!);
    }
}
텍스트 보기 플러그인 입력
이 플러그인은 프로젝트의 Views/EnterTextView.axaml 파일 내에 있습니다 EnterTextViewPlugin.
<DataTemplate x:Key="EnterTextView">
    <Grid RowDefinitions="*, Auto">
        <Control.Styles>
            <StyleInclude Source="avares://NP.Avalonia.Visuals/Themes/ThemeStyles.axaml"/>
        </Control.Styles>
        <np:LabeledControl Text="Enter Text: ">
            <ControlTemplate>
                <TextBox Text="{Binding Path=Text, Mode=TwoWay}"
                         Width="150"/>
            </ControlTemplate>
        </np:LabeledControl>
        <Button Content="Send"
                Grid.Row="1"
                IsEnabled="{Binding Path=CanSendText}"
                np:CallAction.TheEvent="{x:Static Button.ClickEvent}"
                np:CallAction.MethodName="SendText"
                ...
                />
    </Grid>
</DataTemplate>
뷰 모델의 속성 TextBox에 바인딩된 양방향 텍스트를 입력하기 위한 가 있습니다 . View Model을 클릭했을 때 메소드를 Text호출하는 버튼도 있습니다 .SentText()
텍스트 보기 모델 플러그인 받기
프로젝트 에 위치 ReceiveTextViewModel:
[RegisterType(typeof(IPlugin), resolutionKey: nameof(ReceiveTextViewModel), isSingleton: true)]
public class ReceiveTextViewModel : VMBase, IPlugin
{
    ITextService? _textService;

    // ITextService implementation
    [Inject(typeof(ITextService))]
    public ITextService? TheTextService
    {
        get => _textService;
        private set
        {
            if (_textService == value)
                return;

            if (_textService != null)
            {
                // disconnect old service's SentTextEvent
                _textService.SentTextEvent -= _textService_SentTextEvent;
            }

            _textService = value;

            if (_textService != null)
            {   // connect the handler to the service's
                // SentTextEvent
                _textService.SentTextEvent += _textService_SentTextEvent;
            }
        }
    }

    // set Text property when receives it from TheTextService
    // via SentTextEvent
    private void _textService_SentTextEvent(string text)
    {
        Text = text;
    }

    #region Text Property
    private string? _text;
    // notifiable property
    public string? Text { get {...} private set {...} }
    #endregion Text Property
}
텍스트 보기 플러그인 받기
<DataTemplate x:Key="ReceiveTextView">
    <Grid>
        <Control.Styles>
            <StyleInclude Source="avares://NP.Avalonia.Visuals/Themes/ThemeStyles.axaml"/>
        </Control.Styles>
        <np:LabeledControl Text="The Received Text is:"
                           HorizontalAlignment="Center"
                           VerticalAlignment="Center"
                           Margin="10">
            <ControlTemplate>
                <TextBlock Text="{Binding Path=Text, Mode=OneWay}"
                           FontWeight="Bold"/>
            </ControlTemplate>
        </np:LabeledControl>
    </Grid>
</DataTemplate>
본질적으로 - 보기 모델의 속성에 양방향으로 바인딩된 속성이 TextBox있는 a만 포함합니다 .TextText
Gidon Framework로 Prototype Driven Development 실습하기
나는 최근 PDD(Prototype Driven Development ) 기사 에서 프로토타입 주도 개발(PDD)에 대해 설명했습니다.
필요한 기능이 포함된 프로토타입을 먼저 만드는 개발 유형입니다. 그런 다음 재사용 가능한 기능을 이 프로토타입에서 일반 프로젝트로 옮기고 마지막으로 기본 애플리케이션 프로젝트에서 해당 기능을 사용합니다.

플러그인 아키텍처는 PDD에 이상적으로 적합합니다. 실제로 기본 프로젝트는 일반적으로 플러그인(대신 동적으로 로드됨)에 정적으로 의존하지 않습니다. 이는 런타임 유연성에는 편리하지만 개발에는 적합하지 않습니다.
Prototypes/AuthenticationPluginTest 폴더 아래에 있는 AuthenticationPluginTest.sln 솔루션을 살펴보십시오 .
여기에는 인증 관련 플러그인과 MockAuthentication 서비스만 포함됩니다.

그러나 이제 주요 프로젝트는 및 프로젝트에 AuthenticationViewPlugin의존 AuthenticationViewModelPlugin합니다 MockAuthentication.
이렇게 하면 플러그인과 기본 프로젝트를 별도로 다시 컴파일하는 대신 한 번만 다시 컴파일할 수 있습니다. 또한 응용 프로그램 내의 모든 플러그인이 아니라 세 가지 플러그인(View Model, View 및 서비스)만 다루게 되므로 프로젝트가 훨씬 더 가벼워집니다. 또한 일부 동적 어셈블리는 변경될 것으로 예상했을 때 변경되지 않았기 때문에 발생할 수 있는 실수를 방지합니다.
일반적으로 PDD 다음에 프로토타입의 기본 프로젝트 내에서 인증 플러그인 기능을 먼저 만들 수 있습니다. 그런 다음 View Model을 로 이동하고 AuthenticationViewModelPluginView를 AuthenticationViewPlugin프로토타입의 기본 프로젝트가 종속된 프로젝트로 이동합니다.
마지막으로 기능을 다듬고 제대로 작동하는지 확인한 후 플러그인 어셈블리를 플러그인 폴더 에 복사하도록 설정 하고 다른 프로토타입 또는 기본 애플리케이션 내에서 동적으로 로드된 플러그인으로 테스트할 수 있습니다.
또한 플러그인을 수정하거나 디버깅해야 하는 경우 플러그인이 정적으로 로드되는 프로토타입 내에서 이를 수행할 수 있으며 플러그인이 동적으로 로드되는 프로젝트에 대해 수정이 자동으로 작동합니다.
---------------------------------


Gidon - Avalonia based MVVM Plugin IoC Container
Introduction
Gidon IoC/MVVM Framework for Avalonia
In this article, I present a new Gidon IoC/MVVM framework being built for a great multiplatform WPF-like package Avalonia on top of my own IoCy inversion-of-control/dependency-injection container. To the best of my knowledge, it is the first IoC/MVVM framework for Avalonia even though I understand that there were some previous attempts (not sure successful or not) to port Prism/MEF for Avalonia.
So the reasonable question is why don't you just port Prism (or use its previous port) instead of building a new framework?
In my view, Prism and MEF which it is often used with are too complex, allow using some older paradigms that should never be used with WPF and Avalonia (for example, the Event Aggregation) and very underdocumented.
The purpose of Gidon is to provide very simple API and implementation, yet covering all the needed features.
Note, that Gidon framework is already quite operable (as the samples of this article are going to show). Still many new and great features will be added to it in the near future.
Refresher on Model-View-ViewModel (MVVM) Pattern
What is MVVM
MVVM patterns consists of three parts:
- Model - the non-visual data that comes from the backend
- View Model - also non-visual objects that contain the data but also provide non-visual properties to reflect the visual functionality and method to be called by visual buttons, menu items, etc.
- View - visual objects representing the visuals of your application
View Model is aware of the model, but not vice versa.
View is built around the view model and so it has some knowledge about it but view model should not know anything about the view.
View is usually passive - it simply mimics its View Model and calls the View Model's methods. View is only aware about its own View Model - all communications between different Views are usually done via their respective View Models.
Important Note: Two sided communications between the View and its View Model do not mean that the View Model knows anything about the View: communication from the View Model to the View are achieved via a binding or an event.
The main advantage of the MVVM pattern is that very complex visual objects of the view are simply mimicking much simpler non-visual objects of the View Model. The non-visual View Model objects are much easier to create, extend, test and debug and since all the business logic is located within the View Model, an MVVM application becomes much easier to build and maintain.
MVVM pattern was originally invented for WPF development because of WPF's superb binding capabilities, but later was adopted also by other tools and frameworks. Of course, every XAML framework (including Avalonia, UWP, Xamarin and others) are MVVM enabled, but also Angular and Knockout JavaScript packages are essentially MVVM frameworks.
Adhering to the MVVM pattern in your code, in general does not require any Inversion of Control or Dependency Injection.
Important Note: In my extensive practice, the models are needed very rarely - the backend data can be deserialized straight into the View Model classes. So I mostly practice View-View Model (VVM) pattern without the models, but for simplicity sake, I'll be calling both approaches as MVVM.
To find out more about MVVM pattern, you can read my article MVVM Pattern Made Simple or Data Templates and View Models.
Avalonia Tools for MVVM
The best way in Avalonia to turn a non-visual View Model into a visual View is by using ContentPresenter and ItemsPresenter controls (in WPF, that would be ContentControl and ItemsControl correspondingly).
ContentPresenter is ideal for turning a single non-visual object into a visual object by so to say 'marrying' a View Model object passed to its Content property to a DataTemplate passed to its ContenTemplate property:
ItemsPresenter is good for turning a collection of non-visual View Model objects (stored within its Items property) into a collection of visuals by applying a DataTemplate stored in its ItemTemplate property to each one of them. The visuals in the resulting collection are arranged according to an Avalonia Panel provided by ItemsPresenter.ItemsPanel property (by default, they are stacked vertically, one on top of the next one).
Refresher on the Inversion of Control (IoC) Containers (without MVVM)
MVVM and IoC do not have to go together. There are many plain Inversion of Control (plugin) containers which have nothing to do with the MVVM or any visual frameworks. Among them are:
- MEF
- Autofac
- Unity
- Ninject
- Castle Windsor
- IoCy - my own simple IoC container available at IoCy.
The main purpose of such frameworks is to facilitate splitting the functionality into loosely coupled plugins (some statically and some dynamically loaded) in order to improve the separation of concerns within the application.
This will lead to the following benefits:
- Plugin independence - modifying implementation of one plugin should not trigger changes in other plugins
- Easier testability and debugging - one should be able to easily test, debug and modify each plugin individually (together with the plugins that it depends on) and the fixed plugin should be working with the rest of the application without any changes to other plugins.
- Improved extensibility of the product - when you need new functionality, you know which plugin to modify for that particular extension, or if needed you can add a new plugin to the already existing plugins with modifications only in the places where the new APIs might be used.
I saw many projects (not designed and started by me) using only the last advantage from those listed above - extending the application by adding plugins to it. On the other hand, their plugins were so intermingled and interdependent that one could not take out one of them without affecting the others. This is a very important error - in order to reap the benefits of the good plugin architecture the interdependence between different plugins should be minimal and it is the architect's task to make sure that this is the case.
In a sense, a plugin is similar to a hardware card, while the plugin interface is very much like a slot for inserting a card.
Important Note: Replacing, adding or removing a plugin should be as easy as replacing, adding or removing a computer card in an already uncovered computer. If this is not the case, your plugin architecture, needs additional work.
Testing a plugin should be as easy as placing a card into a hardware Tester, sending some inputs and checking the corresponding outputs within the Tester. Of course, one should build a tester for the plugin first.
In general, however, software plugins have the following advantages over the hardware cards:
- The cost of producing a plugin object in software is much smaller than of a card in hardware, because of that using multiple plugin objects of the same type will not increase the cost of the application. Also, different objects of the same type are guaranteed to behave in the same way - the software defects are per type not per object.
- Plugins can be hierarchical, i.e., a plugin itself can be composed of different sub-plugins (hardware plugins can also have some sub-plugins, but in software the hierarchy can consist of as many levels as needed).
- Some plugins can be singletons - same plugin used in many different places (which is of course impossible in hardware).
Note that while plugin hierarchy is ok, the plugins should never be cross dependent or peer dependent. Meaning if plugins are logical peers, they should not depend on each other - a common functionality should be factored out into a different plugin or a non-plugin DLL.
Why IoC and MVVM Together?
It was already stated above that MVVM can be practiced without IoC and IoC can be practiced without MVVM so why do we need a framework that would be doing both? The reason is that the Views and their corresponding View Models are good candidates for being built as plugins. In that case, each developer can work on his own View/View Model combination, test them separately from the rest of the team, then bring them together as plugins and ideally everything will work.
Of course, sometimes View Models are not completely independent - they need to communicate with each other. The communication mechanism can be wired via non-visual singleton plugins called services or sometimes even built into the framework.
There are several well known IoC/MVVM frameworks usually built around Microsoft's MEF or Unity IoC containers some can even work with both. All were originally created for WPF but then also adapted for Xamarin and UWP. Among them are:
- Prism
- Caliburn/Caliburn.Micro
- Cinch
Refresher on the IoCy Container
Here, I am describing the functionality of my IoCy simple, and powerful container. I added to it all the features I liked from MEF, Autofac and Ninject while at the same time skipping the features which are not widely used.
The main principle of IoC and DI (dependency injection) implementation is that injectable objects are not created by calling their constructor but instead by calling some method on the container that creates or finds the objects to return. The container is created before to return the correct implementations of the objects. Every injectable object might have some properties that are also injectable. In that case, those properties are also populated from the same container and so on recursively.
Here is the most important functionality of IoCy:
Creating a Container
IoCContainer container = new IoCContainer();
You can pass a unique container name to the constructor, otherwise, it will generate a unique name.
Create a Mapping between an Interface (or Superclass) and an Implementation (or a Subclass)
container.RegisterType<IPerson, Person>();
Sets the mapping between IPerson interface and Person implementation of IPerson, so that every time
IPerson person = container.Resolve<IPerson>();
method is called, it will create and return a new Person object.
Note that one can also create a different mapping for IPerson interface, e.g., to class SuperPerson, but in order for both mappings to exist at the same time, one should pass some object as mapping id to Map(object id = null) method and then also pass the same id to the corresponding Resolve(object id = null) method:
container.RegisterType<IPerson, Person>(1);
IPerson superPerson = container.Resolve<IPerson>(1);
In the above code, the id is an integer and equals 1.
Note that all other mapping and resolving methods also accept id arguments.
Create a Singleton Mapping between an Interface (or Superclass) and an Implementation (or a Subclass)
Unlike the previous case when for every Resolve<...>() method invocation you are getting a newly created object, Singleton mapping will return the same object every time.
Here is how you do the Singleton mapping:
container.RegisterSingletonType<ILog, FileLog>();
Resolving a Singleton is exactly the same as before, only the same object is returned every time.
There is another way to set up a singleton mapping, if you want an already existing object to be the Singleton, you simply pass it to RegisterSingletonInstance(...) method:
ConsoleLog consoleLog = new ConsoleLog();
// change the mapping of ILog to ConsoleLog (instead of FileLog)
childContainer.RegisterSingletonInstance<ILog, ConsoleLog>(consoleLog);
Creating a MultiMapping
Multimapping creates a collection of items of certain type mapped to a key. For each call to MapMultiType(...) it adds an item to the collection. For example:
container.RegisterMultiCellType<ILog, FileLog>("MyLogs");
container.RegisterMultiCellType<ILog, ConsoleLog>("MyLogs");
will add two objects one of type FileLog and the other of type ConsoleLog to the container internal collection. Correspondingly, calling MultiResolve() method on the container will return this two item collection as IEnumerable<ILog>:
IEnumerable<ILog> logs = container.MultiResolve<ILog>("MyLogs");
Using Attributes for Composition
Same as in MEF, IoCy allows using attributes for composing objects within the container. For example:
[RegisterType]
public class Person : IPerson
{
    public string PersonName { get; set; }

    [Inject]
    public IAddress Address { get; set; }
}
[RegisterType] attribute at the top means that this implementation maps into some type. Since exact type into which it maps is not specified as a parameter to the attribute, by default, it maps into the base class of the current class (if the base class is NOT object); if the base class is object, it maps to the first interface that the class implements. Since there is no base class to our class Person, it will map into the first interface (IPerson). So the above code would be equivalent to container.RegisterType<IPerson, Person>();. It is however recommended that you pass the class to map to as first parameter TypeToResolve to the attribute so that the changes to the class (e.g., change in the order of the interfaces that the class implements) will not affect the composition.
The following attribute declaration: [RegisterType(typeof(IPerson))], is better than the one used above.
[Inject] attribute above Address property means that the Address object is also injectable (coming from the container). Note, the injected property does not have any idea whether the object it injects is a singleton or is created each time anew - it is up to the container how to populate it.
For Multi implementations, one should use [RegisterMultiCellType(...)] attribute above the class and usual [Inject] attribute above the property, e.g.,
[RegisterMultiCellType(typeof(IPlugin), "ThePlugins")]
public class PluginOne : IPlugin
{
    public void PrintMessage()
    {
        Console.WriteLine("I am PluginOne!!!");
    }
}

[RegisterMultiCellType(typeof(IPlugin), "ThePlugins")]
public class PluginTwo : IPlugin
{
    public void PrintMessage()
    {
        Console.WriteLine("I am PluginTwo!!!");
    }
}

[RegisterType(typeof(IPluginAccumulator))]
public class PluginAccumulator : IPluginAccumulator
{
    [Inject(typeof(IEnumerable<IPlugin>)]
    public IEnumerable<IPlugin> Plugins { get; set; }
}
Correspondingly, there are several IoCContainer methods that allow composing the container from whole assemblies statically or dynamically loaded, or even from all DLL assemblies located under a certain path. Here is the list:
public class IoCContainer
{
    ...

    // injects an already loaded assembly
    public void InjectAssembly(Assembly assembly){...}

    // loads and injects a dynamic assembly by path to its dll
    public void InjectDynamicAssemblyByFullPath(string assemblyPath){...}

    // loads and injects all dll files located at assemblyFolderPath
    // whose name matches the regex
    public void InjectPluginsFromFolder
           (string assemblyFolderPath, Regex? matchingFileName = null){...}

    // loads and injects assemblies that match the rejex
    // from all direct sub-folders of folder specified
    // by baseFolderPath argument.
    public void InjectPluginsFromSubFolders
           (string baseFolderPath, Regex? matchingFileName = null){...}
}
Gidon Samples
Code Location
At this point, in order to run Gidon samples, you have to download the whole Gidon code from Gidon.
To achieve that, you should be using the git command with recursive submodules:
git clone https://github.com/npolyak/NP.Avalonia.Gidon.git --recursive NP.Avalonia.Gidon
Or, if you forgot the user '--recursive' option during cloning, you can always use the following command within the repository after the clone:
git submodule update --init
The following are the subfolders of the repository's base directory:
- Prototypes - contains the Gidon's samples, some of which will be discussed in this article below
- src - contains Gidon's code
- SubModules - contain code from other repositories pulled as sub-modules that Gidon depends on
- Tests - contain the code that is being used across multiple prototypes. In particular, I place test plugins and services here.
PluginsTest
Solution Location and Structure
PluginsTest solution is located under Prototypes/PluginsTest folder. Open the solution (you will need VS2022 for that).
Make PluginsTest project to be the startup project of the solution.
Here is the solution folder/project structure:
Right click on PluginsTest project and choose Rebuild. Note that the plugins are dynamically loaded into the application, and the main project does not depend on them directly. In order to build all the plugins, you have to right click on "TestAndMocks" solution folder within the solution and choose Rebuild.
The plugins/services projects will be re-built and their compiled assemblies will be copied (via post build events) into bin/Debug/net6.0 folder under current solution. From that folder, the plugins will be dynamically loaded by Gidon framework. Here is the folder structure of the plugins installed under <CurrentSolution>/bin/Debug/net6.0:
Running the PluginsTest Project
Try to run the application, here is what you should see:
Pressing "Exit" button will exit the application.
User "nick" for the user name and "1234" for the password. Press "Login" button (it should become enabled) and here is what you will see:
These are two dockable/floating panes which you can pull by their headers out of the main window. There is a connection between them via a service - if you type anything within "Enter Text" TextBox and press button "Send" (it will become enabled), the test will appear in the other dockable pane:
Code of the Main Project PluginsTest
Explanation of the Code
Now let us take a look at the code.
Gidon Code to Load the Plugins
The code to load the plugins is located within App.axaml.cs file within the App constructor:
public class App : Application
{
    /// defined the Gidon plugin manager
    /// use the following paths (relative to the PluginsTest.exe executable)
    /// to dynamically load the plugins and services:
    /// "Plugins/Services" - to load the services (non-visual singletons)
    /// "Plugins/ViewModelPlugins" - to load view model plugins
    /// "Plugins/ViewPlugins" - to load view plugins
    public static PluginManager ThePluginManager { get; } =
        new PluginManager
        (
            "Plugins/Services",
            "Plugins/ViewModelPlugins",
            "Plugins/ViewPlugins");

    // expose the IoC container
    public static IoCContainer TheContainer => ThePluginManager.TheContainer;

    public App()
    {
        // inject a type from a statically loaded project NLogAdapter
        ThePluginManager.InjectType(typeof(NLogWrapper));

        // inject all dynamically loaded assemblies
        ThePluginManager.CompleteConfiguration();
    }
    ...
}
App.axaml includes the styles from the default theme and also styles for the UniDock framework to work:
<Application.Styles>
    <StyleInclude Source="avares://Avalonia.Themes.Default/Accents/BaseLight.xaml"/>
    <StyleInclude Source="avares://Avalonia.Themes.Default/DefaultTheme.xaml"/>
    <StyleInclude Source="avares://NP.Avalonia.Visuals/Themes/CustomWindowStyles.axaml"/>
    <StyleInclude Source="avares://NP.Avalonia.UniDock/Themes/DockStyles.axaml"/>
</Application.Styles>
The most interesting code is located within MainWindow.axaml file.
First of all, we need to define some of the XML namespaces within the Window tag:
<Window ...
		xmlns:utils="clr-namespace:NP.Utilities.PluginUtils;assembly=NP.Utilities"
		xmlns:basicServices="clr-namespace:NP.Utilities.BasicServices;assembly=NP.Utilities"
		xmlns:np="https://np.com/visuals"
		xmlns:local="clr-namespace:PluginsTest"
        ...
        >
XML namespace np: is the most important one - used for all Avalonia related functionality including Gidon's code.
Then in order to use the UniDock framework, we need to define a DockManager as an Avalonia XAML resource:
<Window.Resources>
    <np:DockManager x:Key="TheDockManager"/>
</Window.Resources>
Then, we have a Grid panel that a PluginControl for displaying the Authentication plugin and a Grid for displaying dockable panels containing the other plugins for sending and displaying some text:
<Grid>
    <np:PluginControl x:Name="AuthenticationPluginControl"
                      TheContainer="{x:Static local:App.TheContainer}">
        ...
    </np:PluginControl>
    <Grid x:Name="DockContainer"
          .../>
</Grid>
Only one of those items can be visible at a time: if the user is not authenticated, than the authentication PluginControl is visible, otherwise the dockable panels containing plugins for sending and displaying text are visible.
Let us focus first on the Authentication PluginControl:
<np:PluginControl x:Name="AuthenticationPluginControl"
                  TheContainer="{x:Static local:App.TheContainer}">
    <np:PluginControl.PluginInfo>
        <utils:VisualPluginInfo ViewModelType="{x:Type utils:IPlugin}"
                                ViewModelKey="AuthenticationVM"
                                ViewDataTemplateResourcePath=
                               "avares://AuthenticationViewPlugin/Views/AuthenticationView.axaml"
                                ViewDataTemplateResourceKey="AuthenticationViewDataTemplate"/>
    </np:PluginControl.PluginInfo>
</np:PluginControl>
PluginControl coming from Gidon framework. It is derived from ContentPresenter (the same ContentPresenter that turns a View Model into a View as we explained above). On top of the derived functionality, the PluginControl has several useful Styled Properties defined (Styled Property in Avalonia is very similar to the Dependency Property in WPF):
TheContainerStyledProperty allows to specify theIoCContainerthat thePluginControlneeds to get its View Model and View plugins from (as well as all the plugins that they depend on).PluginInfoStyledProperty allows to pass the information that specifies how to retrieve the View Model object (used to populatePluginControl.Contentproperty) and theViewobject (used to populatePluginControl.ContentTemplateproperty) from the container. ThisPluginInfois of typeVisualPluginInfodefined withinNP.Utilitiespackages.
TheContainer property on our authentication plugin control is connected to the App.TheContainer static property via x:Static markup extension.
The two first properties ViewModelType and ViewModelKey of our VisualPluginInfo object are used for retrieving the View Model plugin. ViewModelType equals to typeof(IPlugin). Because IPlugin is very common (almost every view model plugin implements it), we also use ViewModelKey set to "AuthenticationVM" string to identify specifically the authentication View Model singleton plugin.
Here is how the AuthenticationViewModel plugin defined in the corresponding AuthenticationViewModelPlugin project:
[RegisterType(typeof(IPlugin), resolutionKey:"AuthenticationVM", isSingleton:true)]
public class AuthenticationViewModel : VMBase, IPlugin
{
...
}
The last two properties of VisualPluginInfo are used to specify the View (which in case of Gidon should be simply a DataTemplate.
Property ViewDataTemplateResourcePath specifies the URL to the XAML Resource file that contains the DataTemplate (in our case, it is "avares://AuthenticationViewPlugin/Views/AuthenticationView.axaml"). Property ViewDataTemplateResourceKey specifies the resource key for the View DataTemplate (in our case, it is "AuthenticationViewDataTemplate"). And indeed you can check the file "AuthenticationView.axaml" located within "Views" project folder of AuthenticationViewPlugin project and you will see the "AuthenticationViewDataTemplate" defined there.
The visibility of our authentication PluginControl is managed via its View (in a sense, it is whatever is inside the PluginControl that become invisible if a user is authenticated and not the PluginControl itself.
Now take a look at the <Grid x:Name="DockContainer" ... />. It contains the UniDock docking hierarchy with two DockItems - one on the left containing a View Model/View plugins for entering and sending a text and one on the right for displaying the text that had been sent:
<Grid x:Name="DockContainer"
      IsVisible="{Binding Path=(np:PluginAttachedProperties.PluginDataContext).IsAuthenticated,
                          RelativeSource={RelativeSource Self}}"
      np:PluginAttachedProperties.TheContainer="{x:Static local:App.TheContainer}">
    <np:PluginAttachedProperties.PluginVmInfo>
        <utils:ViewModelPluginInfo ViewModelType=
                                   "{x:Type basicServices:IAuthenticationService}"/>
    </np:PluginAttachedProperties.PluginVmInfo>
    <np:RootDockGroup TheDockManager="{StaticResource TheDockManager}">
        <np:StackDockGroup TheOrientation="Horizontal">
            <np:DockItem Header="Enter Text">
                <np:PluginControl x:Name="EnterTextPluginControl"
                                  TheContainer="{x:Static local:App.TheContainer}">
                    <np:PluginControl.PluginInfo>
                        <utils:VisualPluginInfo ViewModelType="{x:Type utils:IPlugin}"
                                                ViewModelKey="EnterTextViewModel"
                                                ViewDataTemplateResourcePath=
                                      "avares://EnterTextViewPlugin/Views/EnterTextView.axaml"
                                                ViewDataTemplateResourceKey="EnterTextView"/>
                    </np:PluginControl.PluginInfo>
                </np:PluginControl>
            </np:DockItem>
            <np:DockItem Header="Received Text">
                <np:PluginControl x:Name="ReceiveTextPluginControl"
                                  TheContainer="{x:Static local:App.TheContainer}">
                    <np:PluginControl.PluginInfo>
                        <utils:VisualPluginInfo ViewModelType="{x:Type utils:IPlugin}"
                                                ViewModelKey="ReceiveTextViewModel"
                                                ViewDataTemplateResourcePath=
                                   "avares://ReceiveTextViewPlugin/Views/ReceiveTextView.axaml"
                                                ViewDataTemplateResourceKey="ReceiveTextView"/>
                    </np:PluginControl.PluginInfo>
                </np:PluginControl>
            </np:DockItem>
        </np:StackDockGroup>
    </np:RootDockGroup>
</Grid>
The PluginControls within the DockItems are set in a way very similar to how the authentication PluginControl had been set, only they point to different View Model and View plugins, so we are not going to spend time discussing them here (although we shall explain those plugins below). RootDockGroup, StackDockGroup and DockItem are UniDock framework objects:
RootDockGroupis an docking group at the top of every docking hierarchy.StackDockGrouparranges its children vertically or horizontally (in our case horizontally, because itsTheOrientantionproperty is set toHorizontal.DockItemare actually the docking/floating panes with header and content.
What we need to explain about our <Grid x:Name="DockContainer" ...> panel is how we toggle its visibility depending on whether the user is authenticated or not. Here is the relevant code:
<Grid x:Name="DockContainer"
      IsVisible="{Binding Path=(np:PluginAttachedProperties.PluginDataContext).IsAuthenticated,
                          RelativeSource={RelativeSource Self}}"
      np:PluginAttachedProperties.TheContainer="{x:Static local:App.TheContainer}">
    <np:PluginAttachedProperties.PluginVmInfo>
        <utils:ViewModelPluginInfo ViewModelType=
                                   "{x:Type basicServices:IAuthenticationService}"/>
    </np:PluginAttachedProperties.PluginVmInfo>
    ...
</Grid>
Here, we rely on Avalonia attached properties defined within PluginAttachedProperties class of NP.Avalonia.Gidon project. We set the PluginAttachedProperties.TheContainer Attached Property to our App.TheContainer static property by using x:Static markup extension:
np:PluginAttachedProperties.TheContainer="{x:Static local:App.TheContainer}"
Then we set the attached property PluginAttachedProperties.PluginVmInfo to:
<utils:ViewModelPluginInfo ViewModelType="{x:Type basicServices:IAuthenticationService}"/>
ViewModelPluginInfo contains only the View Model part of VisualPluginInfo. In our case, we are retrieving the implementation of IAuthenticationService which is a singleton of type MockAuthenticationService (we do not need the ViewModelKey since there is only one object of type IAuthenticationService within our container).
Once both attached properties are set on our Grid, the attached property PluginAttachedProperties.PluginDataContext on the same Grid will be set to contain the object of type IAuthenticationService retrieved from the container. This object has IsAuthenticated property with change notification (firing INotifyPropertyChanged.PropertyChanged event on property change).
Now all we need to do is to bind IsVisible property on our Grid to the path to IsAuthenticated property defined on the object contained by our attached PluginAttachedProperties.PluginDataContext property:
<Grid x:Name="DockContainer"
      IsVisible="{Binding Path=(np:PluginAttachedProperties.PluginDataContext).IsAuthenticated,
                          RelativeSource={RelativeSource Self}}"
  ...
  >
Authentication Plugins and Services
Authentication View Model Plugin
Authentication View Model Plugin is defined within AuthenticationViewModelPlugin project:
[RegisterType(typeof(IPlugin), resolutionKey: "AuthenticationVM", isSingleton: true)]
public class AuthenticationViewModel : VMBase, IPlugin
{
    [Inject(typeof(IAuthenticationService))]
    // Authentication service that comes from the container
    public IAuthenticationService? TheAuthenticationService
    {
        get;
        private set;
    }

    ...
    // notifiable property
    public string? UserName { get {...}  set {...} }

    ...
    // notifiable property
    public string? Password { get {...}  set {...} }

    // change notification fires when either UserName or Password change
    public bool CanAuthenticate =>
        (!string.IsNullOrEmpty(UserName)) && (!string.IsNullOrEmpty(Password));

    // method to call in order to try to authenticate a user
    public void Authenticate()
    {
        TheAuthenticationService?.Authenticate(UserName, Password);

        OnPropertyChanged(nameof(IsAuthenticated));
    }

    // method to exit the application
    public void ExitApplication()
    {
        Environment.Exit(0);
    }

    // IsAuthenticated property
    // whose change notification fires within Authenticate() method
    public bool IsAuthenticated => TheAuthenticationService?.IsAuthenticated ?? false;
}
MockAuthenticationService
The IAuthenticationService that Authentication View Model Plugin uses, is implemented as MockAuthenticationService within MockAuthentication project and is also very simple:
[RegisterType(typeof(IAuthenticationService), IsSingleton = true)]
public class MockAuthenticationService : VMBase, IAuthenticationService
{
    ...
    // notifiable property
    public string? CurrentUserName { get {...} set {...} }

    // Is authenticated is true if and only if the CurrentUserName is not zero
    public bool IsAuthenticated => CurrentUserName != null;

    // will only authenticate if userName="nick" and password="1234"
    public bool Authenticate(string userName, string password)
    {
        if (IsAuthenticated)
        {
            throw new Exception("Already Authenticated");
        }

        CurrentUserName =
                (userName == "nick" && password == "1234") ? userName : null;

        ...

        return IsAuthenticated;
    }

    public void Logout()
    {
        if (!IsAuthenticated)
        {
            throw new Exception("Already logged out");
        }

        CurrentUserName = null;
    }
}
Authentication View
As was mentioned above, views in Gidon should be defined as DataTemplates. Authentication View is defined as a DataTemplate resource within Views/AuthenticationView.axaml file inside AuthenticationViewPlugin project:
<DataTemplate x:Key="AuthenticationViewDataTemplate">
    <Grid Background="{DynamicResource WindowBackgroundBrush}"
            RowDefinitions="*, Auto"
            IsVisible="{Binding Path=IsAuthenticated,
                        Converter={x:Static np:BoolConverters.Not}}">
        <Control.Styles>
            <StyleInclude Source="avares://NP.Avalonia.Visuals/Themes/ThemeStyles.axaml"/>
        </Control.Styles>
        <StackPanel HorizontalAlignment="Center"
                    VerticalAlignment="Center"
                    Margin="10">
            <np:LabeledControl x:Name="EnterUserNameControl"
                                Text="Enter User Name: "
                                Classes="Bla"
                                HorizontalAlignment="Center">
                <np:LabeledControl.ContainedControlTemplate>
                    <ControlTemplate>
                        <TextBox Width="150"
                                    Text="{Binding Path=UserName, Mode=TwoWay}"/>
                    </ControlTemplate>
                </np:LabeledControl.ContainedControlTemplate>
            </np:LabeledControl>

            <np:LabeledControl x:Name="EnterPasswordControl"
                                Text="Enter Password: "
                                HorizontalAlignment="Center"
                                Margin="0,15,0,0">
                <np:LabeledControl.ContainedControlTemplate>
                    <ControlTemplate>
                        <TextBox Width="150"
                                    Text="{Binding Path=Password, Mode=TwoWay}"/>
                    </ControlTemplate>
                </np:LabeledControl.ContainedControlTemplate>
            </np:LabeledControl>
        </StackPanel>
        <StackPanel Orientation="Horizontal"
                    Margin="10"
                    Grid.Row="1"
                    HorizontalAlignment="Right"
                    VerticalAlignment="Center">
            <Button Content="Exit"
                    np:CallAction.TheEvent="{x:Static Button.ClickEvent}"
                    np:CallAction.MethodName="ExitApplication"/>
            <Button Content="Login"
                    Margin="10,0,0,0"
                    IsEnabled="{Binding Path=CanAuthenticate}"
                    np:CallAction.TheEvent="{x:Static Button.ClickEvent}"
                    np:CallAction.MethodName="Authenticate"/>
        </StackPanel>
    </Grid>
</DataTemplate>
It has two LabeledControl objects arranged one on top of the other - one for entering the user name and the other - password. The Text properties inside their TextBoxes are two-way bound to correspondingly UserName and Password strings defined on the View Model plugin.
The buttons "Exit" and "Login" are using CallAction behavior from NP.Avalonia.Visuals project to call correspondingly ExitApplication() and Authenticate() View Model methods when the button is clicked.
Enter and Receive Text Plugins and Services
TextService
Enter and Receive text View Model plugins communicate with each other via the TextService that implements ITextService interface:
[RegisterType(typeof(ITextService), IsSingleton = true)]
public class TextService : ITextService
{
    public event Action<string>? SentTextEvent;

    public void Send(string text)
    {
        SentTextEvent?.Invoke(text);
    }
}
Its implementation is very simple - it has one method Send(string text) which fires SendTextEvent passing to it the text. Enter text View Model calls the Send(string text) method and Receive text View Model handles the SentTextEvent getting the text and assigning it to its own notifiable Text property.
Enter Text View Model Plugin
This plugin consists of one simple class - EnterTextViewModel:
[RegisterType(typeof(IPlugin), partKey: nameof(EnterTextViewModel), isSingleton: true)]
public class EnterTextViewModel : VMBase, IPlugin
{
    // ITextService implementation
    [Inject(typeof(ITextService))]
    public ITextService? TheTextService { get; private set; }

    #region Text Property
    private string? _text;

    // notifiable property with getter and setter
    public string? Text { ... }
    #endregion Text Property

    // change notified the Text changes
    public bool CanSendText => !string.IsNullOrWhiteSpace(this._text);

    // method to send the text via TextService
    public void SendText()
    {
        if (!CanSendText)
        {
            throw new Exception("Cannot send text, this method should not have been called.");
        }

        TheTextService!.Send(Text!);
    }
}
Enter Text View Plugin
This plugin is located within Views/EnterTextView.axaml file of EnterTextViewPlugin project:
<DataTemplate x:Key="EnterTextView">
    <Grid RowDefinitions="*, Auto">
        <Control.Styles>
            <StyleInclude Source="avares://NP.Avalonia.Visuals/Themes/ThemeStyles.axaml"/>
        </Control.Styles>
        <np:LabeledControl Text="Enter Text: ">
            <ControlTemplate>
                <TextBox Text="{Binding Path=Text, Mode=TwoWay}"
                         Width="150"/>
            </ControlTemplate>
        </np:LabeledControl>
        <Button Content="Send"
                Grid.Row="1"
                IsEnabled="{Binding Path=CanSendText}"
                np:CallAction.TheEvent="{x:Static Button.ClickEvent}"
                np:CallAction.MethodName="SendText"
                ...
                />
    </Grid>
</DataTemplate>
There is a TextBox for entering the text two way bound to the Text property on the View Model. There is also a button for calling SentText() method on the View Model when it is clicked.
Receive Text View Model Plugin
Located in ReceiveTextViewModel project:
[RegisterType(typeof(IPlugin), resolutionKey: nameof(ReceiveTextViewModel), isSingleton: true)]
public class ReceiveTextViewModel : VMBase, IPlugin
{
    ITextService? _textService;

    // ITextService implementation
    [Inject(typeof(ITextService))]
    public ITextService? TheTextService
    {
        get => _textService;
        private set
        {
            if (_textService == value)
                return;

            if (_textService != null)
            {
                // disconnect old service's SentTextEvent
                _textService.SentTextEvent -= _textService_SentTextEvent;
            }

            _textService = value;

            if (_textService != null)
            {   // connect the handler to the service's
                // SentTextEvent
                _textService.SentTextEvent += _textService_SentTextEvent;
            }
        }
    }

    // set Text property when receives it from TheTextService
    // via SentTextEvent
    private void _textService_SentTextEvent(string text)
    {
        Text = text;
    }

    #region Text Property
    private string? _text;
    // notifiable property
    public string? Text { get {...} private set {...} }
    #endregion Text Property
}
Receive Text View Plugin
<DataTemplate x:Key="ReceiveTextView">
    <Grid>
        <Control.Styles>
            <StyleInclude Source="avares://NP.Avalonia.Visuals/Themes/ThemeStyles.axaml"/>
        </Control.Styles>
        <np:LabeledControl Text="The Received Text is:"
                           HorizontalAlignment="Center"
                           VerticalAlignment="Center"
                           Margin="10">
            <ControlTemplate>
                <TextBlock Text="{Binding Path=Text, Mode=OneWay}"
                           FontWeight="Bold"/>
            </ControlTemplate>
        </np:LabeledControl>
    </Grid>
</DataTemplate>
Essentially - it only contains a TextBox with its Text property two-way bound to the Text property on the View Model.
Practicing Prototype Driven Development with Gidon Framework
I recently described Prototype Driven Development or PDD in Prototype Driven Development (PDD) article.
This is a type of development where you first create a prototype containing the functionality that you need. Then move the re-usable functionality from this prototype to the generic projects and finally use that functionality in your main application project:
Plugin architecture is ideally suited for PDD. Indeed the main project is usually not statically dependent on the plugins (which are dynamically loaded instead). This is convenient for the run time flexibility, but not for the development.
Take a look at AuthenticationPluginTest.sln solution located under Prototypes/AuthenticationPluginTest folder.
It contains only Authentication related plugins and MockAuthentication service:
But the main project now depends on AuthenticationViewPlugin, AuthenticationViewModelPlugin and MockAuthentication projects.
This will allow you to recompile only once instead of recompiling plugins and the main project separately. Also, it will make the project much lighter since you'll be dealing only with three plugins (View Model, View and a service) and not with all the plugins within the application). Furthermore, it will avoid dealing with possible mistakes because some dynamic assemblies did not change when you expected them to change..
In general following the PDD, one can first create the Authentication plugin functionality within the main project of the prototype. Then move the View Model to the AuthenticationViewModelPlugin and the View over to the AuthenticationViewPlugin projects which the main project of the prototype is dependent from.
Finally, after polishing the functionality and making sure that it works properly, you can set the plugin assemblies to be copied to the plugin folders and test them as dynamically loaded plugins within another prototype or within the main application.
Moreover, when you need to modify or debug the plugins, you'll be able to do it within the prototype where the plugins are statically loaded and the modifications will be working automatically for the projects where the plugins are loaded dynamically.
[출처] https://www.codeproject.com/Articles/5325733/Gidon-Avalonia-based-MVVM-Plugin-IoC-Container
광고 클릭에서 발생하는 수익금은 모두 웹사이트 서버의 유지 및 관리, 그리고 기술 콘텐츠 향상을 위해 쓰여집니다.
