
- 전체
- android studio
- Android SDK
- Android NDK
- Android ADK
- Android Etc. Lib.
- Android dalvik VM
- Android 보안
- PhoneGap
- AOSP 개발
- MIT App Inventor 2
- kivy (python)
- ionic framework
- Kotlin (코틀린)
- React Native
Android SDK [Android] Layout XML - layout_weight
2016.04.30 16:29
[Android] Layout XML - layout_weight
안드로이드에서 레이아웃을 구성할때 layout_weight 속성은 많은 일을 할 수 있게 해줍니다.
레이아웃을 자동으로 늘리고 줄이고 채우는 일들을 해주기 때문에,
layout_weight 속성을 사용하면 해상도가 다양한 여러 기기들에 깨지지 않는 UI를 제공해 줄 수 있습니다.
숫자로 지정해 버리면 테스트했던 디바이스가 아닌, 해상도가 다른 디바이스에서 보았을 때,
개발자가 원하지 않는 UI가 나올수 있는데, layout_weight 속성은 이런점을 해결해줄 수 있습니다.
| 기본개념 |
android:layout_weight 는 기본적으로 비율을 나타내는 속성입니다.
예를 들어 6개의 LinearLayout 이 있을 때,
이 여섯개의 레이아웃 크기가 모두 fill_parent(또는 match_parent)로 되어있다고 해 봅시다.
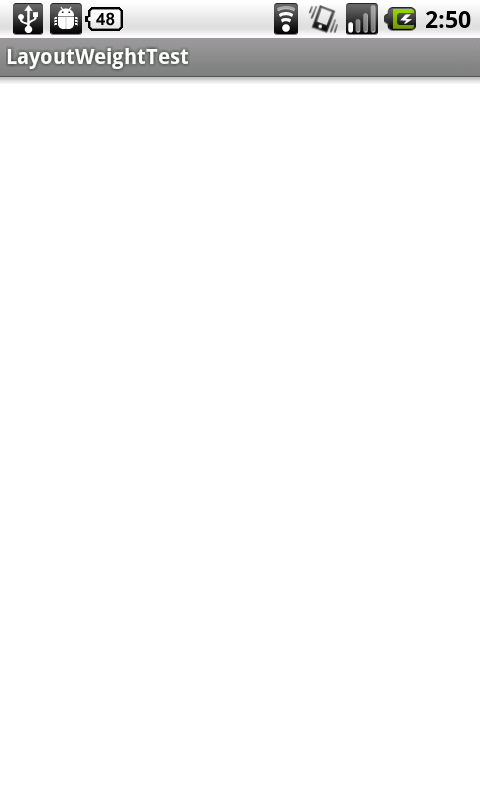
layout_weight 속성이 없다면, 첫번째 LinearLayout이 화면을 꽉 채우고 다른 레이아웃들은 화면에 보이지 않게 됩니다.
화면은 아래와 같이 나올것입니다.
1. 6개의 LinearLayout, 모두의 크기가 fill_parent 일 때, layout_weight 를 사용하지 않은 경우
- 아래와 같이 하나의 레이아웃만 출력
|
|
|
1
2
3
4
5
6
7
8
9
10
11
12
13
14
15
16
17
18
19
20
21
22
23
24
25
26
27
28
29
30
31
32
33
34
35
36
37
|
<?xml version="1.0" encoding="utf-8"?> android:orientation="vertical" android:layout_width="fill_parent" android:layout_height="fill_parent" > <LinearLayout android:layout_width="fill_parent" android:layout_height="fill_parent" android:background="#fff"> </LinearLayout> <LinearLayout android:layout_width="fill_parent" android:layout_height="fill_parent" android:background="#000"> </LinearLayout> <LinearLayout android:layout_width="fill_parent" android:layout_height="fill_parent" android:background="#321"> </LinearLayout> <LinearLayout android:layout_width="fill_parent" android:layout_height="fill_parent" android:background="#512"> </LinearLayout> <LinearLayout android:layout_width="fill_parent" android:layout_height="fill_parent" android:background="#811"> </LinearLayout> <LinearLayout android:layout_width="fill_parent" android:layout_height="fill_parent" android:background="#312"> </LinearLayout></LinearLayout> |
기본적으로는 비율로 나누지 않았을 때, 레이아웃들은 자신의 속성에 설정된 크기를 가지게 되고,
순서대로 화면에 출력되게 됩니다.
이때, 먼저 코딩된 레이아웃 부터 출력이 되고, 이에 따라 나머지 레이아웃은 출력되지 않을수도 있습니다.
이제 layout_weight의 설정을 6개의 LinearLayout 여섯개에 각각 추가해 봅니다.
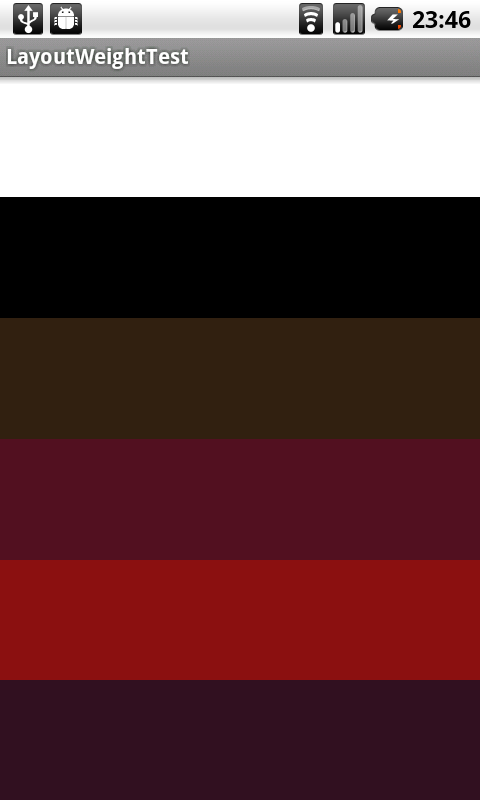
2. 6개의 LinearLayout, 모두의 크기가 fill_parent 일 때, layout_weight에 모두 1을 사용한 경우
- 아래와 같이 같은 크기로 6개의 레이아웃 모두 출력
|
|
|
1
2
3
4
5
6
7
8
9
10
11
12
13
14
15
16
17
18
19
20
21
22
23
24
25
26
27
28
29
30
31
32
33
34
35
36
37
38
39
40
41
42
43
|
<?xml version="1.0" encoding="utf-8"?> android:orientation="vertical" android:layout_width="fill_parent" android:layout_height="fill_parent" > <LinearLayout android:layout_width="fill_parent" android:layout_height="fill_parent" android:layout_weight="1" android:background="#fff"> </LinearLayout> <LinearLayout android:layout_width="fill_parent" android:layout_height="fill_parent" android:layout_weight="1" android:background="#000"> </LinearLayout> <LinearLayout android:layout_width="fill_parent" android:layout_height="fill_parent" android:layout_weight="1" android:background="#321"> </LinearLayout> <LinearLayout android:layout_width="fill_parent" android:layout_height="fill_parent" android:layout_weight="1" android:background="#512"> </LinearLayout> <LinearLayout android:layout_width="fill_parent" android:layout_height="fill_parent" android:layout_weight="1" android:background="#811"> </LinearLayout> <LinearLayout android:layout_width="fill_parent" android:layout_height="fill_parent" android:layout_weight="1" android:background="#312"> </LinearLayout></LinearLayout> |
여섯개의 LinearLayout 6개의 부모레이아웃의 크기는 fill_parent 입니다.
즉, 화면 전체를 채운다는 의미입니다.
이때 자식 레이아웃, 6개의 LinearLayout 의 layout_weight는 각각 1로 설정되어있습니다.
이렇게 되어있을때, 자식 레이아웃들의 layout_weight 값들의 합(여기서는 6)이 부모 레이아웃 전체가 되는 것이고,
자식들은 그 전체에서 자신이 가진 layout_weight 만큼을 자신의 영역으로 가질 수 있습니다.
아래는 6개의 LinearLayout 에 layout_weight 속성을 순서대로 1, 2, 3, 4, 5, 6 을 준 결과입니다.
| 응용 |
마의 기술 layout_weight="0"에 대해서 알아봅시다.
layout_weight에 0의 값을 준다면, 이 레이아웃은 절대적으로,
배정받은 크기만큼의 영역을 차지하겠다 라고 선포하는 것입니다.
만약 크기가 fill_parent 로 되어있다면 그만큼은 반드시 차지하게 되어있고,
wrap_content라면 또 그만큼은 반드시 차지하게 되어있습니다.
예를들어 80dp 의 값을 가지고 있다면, 그만큼의 영역을 반드시 차지합니다.
이제부터는 layout_weight="0"과 layout_weight="1" 만을 사용한 응용입니다.
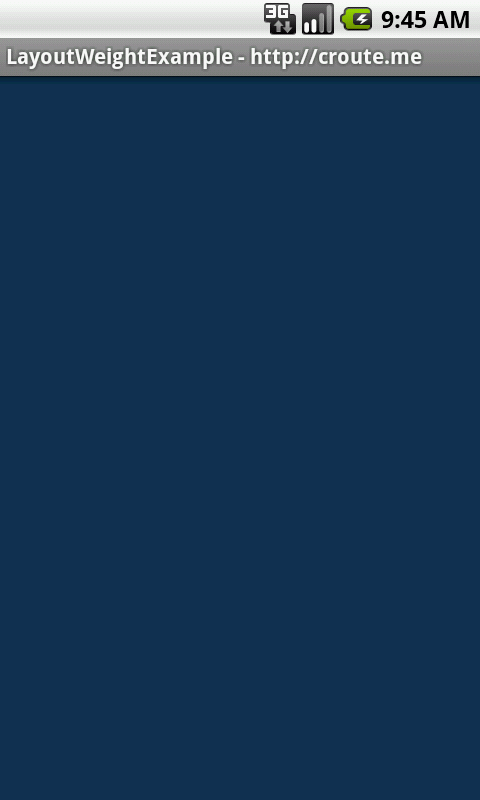
먼저 layout_weight 속성을 사용하지 않은 기존의 경우입니다.
(왼쪽에 있는 레이아웃에만 layout_weight 0을 준 결과와 같습니다.)
|
1
2
3
4
5
6
7
8
9
10
11
12
13
14
15
16
17
18
19
20
|
<?xml version="1.0" encoding="utf-8"?> android:orientation="horizontal" android:layout_width="fill_parent" android:layout_height="fill_parent" > <LinearLayout android:layout_width="fill_parent" android:layout_height="fill_parent" android:background="#123456"> </LinearLayout> <LinearLayout android:layout_width="fill_parent" android:layout_height="fill_parent" android:background="#987654"> </LinearLayout> </LinearLayout> |
|
|
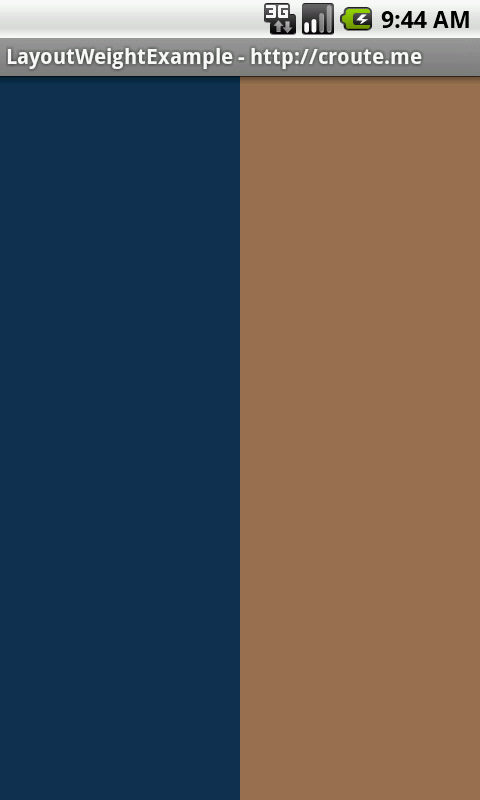
두 LinearLayout 모두에게 layout_weight 1을 사용한 경우입니다.
|
1
2
3
4
5
6
7
8
9
10
11
12
13
14
15
16
17
18
19
20
21
22
|
<?xml version="1.0" encoding="utf-8"?> android:orientation="horizontal" android:layout_width="fill_parent" android:layout_height="fill_parent" > <LinearLayout android:layout_width="fill_parent" android:layout_height="fill_parent" android:layout_weight="1" android:background="#123456"> </LinearLayout> <LinearLayout android:layout_width="fill_parent" android:layout_height="fill_parent" android:layout_weight="1" android:background="#987654"> </LinearLayout> </LinearLayout> |
|
|
이번에는 오른쪽에 있는 LinearLayout 에게만 layout_weight 0을 사용한 경우입니다.
|
1
2
3
4
5
6
7
8
9
10
11
12
13
14
15
16
17
18
19
20
21
22
|
<?xml version="1.0" encoding="utf-8"?> android:orientation="horizontal" android:layout_width="fill_parent" android:layout_height="fill_parent" > <LinearLayout android:layout_width="fill_parent" android:layout_height="fill_parent" android:layout_weight="1" android:background="#123456"> </LinearLayout> <LinearLayout android:layout_width="fill_parent" android:layout_height="fill_parent" android:layout_weight="0" android:background="#987654"> </LinearLayout> </LinearLayout> |
|
|
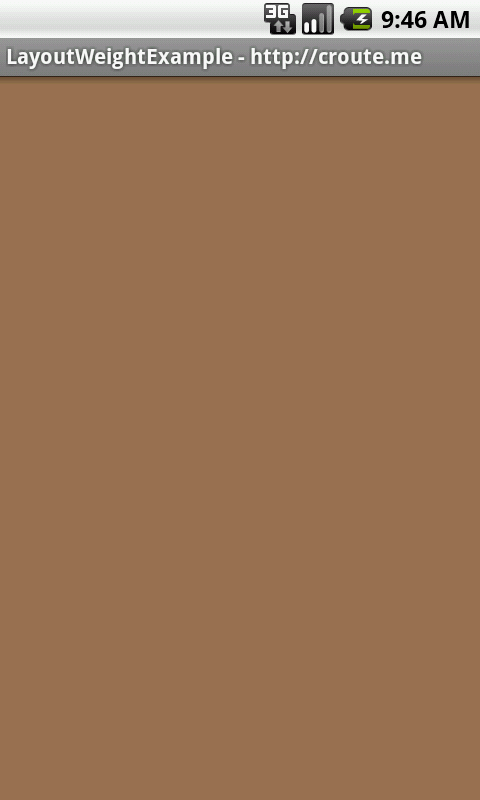


layout_weight 0 을 사용하면, 자신에게 할당된 만큼의 영역을 반드시 가질 수 있도록 되어있습니다.
(상황에 따라서 다르긴 하지만, 특별하지 않은 대부분의 경우엔 할당받을 수 있다.)
이를 이용해서 오른쪽에 있는 레이아웃이 자신의 영역을 반드시 가진 후에, 왼쪽에 있는 레이아웃이
나머지 영역을 전부 채우는 방법입니다.
|
1
2
3
4
5
6
7
8
9
10
11
12
13
14
15
16
17
18
19
20
21
22
|
<?xml version="1.0" encoding="utf-8"?> android:orientation="horizontal" android:layout_width="fill_parent" android:layout_height="fill_parent" > <LinearLayout android:layout_width="fill_parent" android:layout_height="fill_parent" android:layout_weight="1" android:background="#123456"> </LinearLayout> <LinearLayout android:layout_width="80dp" android:layout_height="fill_parent" android:layout_weight="0" android:background="#987654"> </LinearLayout> </LinearLayout> |
|
|
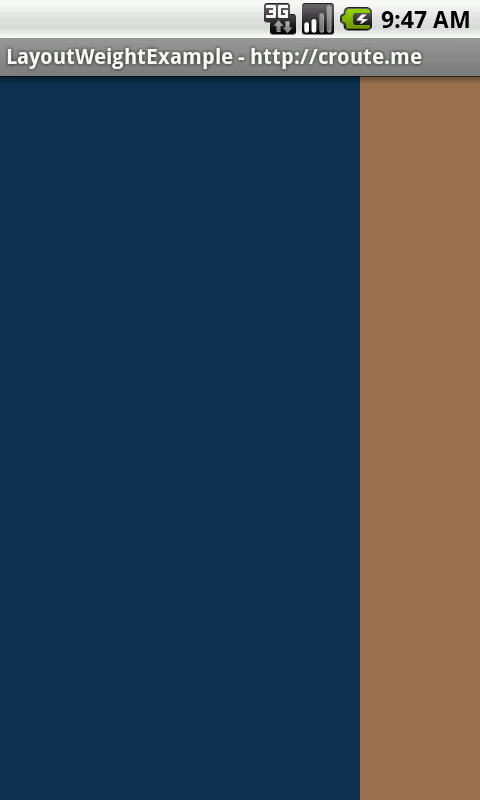
이제 마지막으로
지금까지 사용했던 LinearLayout 두개를 LinearLayout 으로 감싸고
그 아래에 LinearLayout을 만들어 보겠습니다. 이렇게 했을 경우 위의 LinearLayout은 fill_parent의 값을 가지고 있지만,
아래의 LinearLayout 에 layout_weight 0을 주어 영역을 반드시 차지하도록 하면 레이아웃을 원하는데로 구성할 수 있습니다.
|
1
2
3
4
5
6
7
8
9
10
11
12
13
14
15
16
17
18
19
20
21
22
23
24
25
26
27
28
29
30
31
32
33
34
35
36
|
<?xml version="1.0" encoding="utf-8"?> android:orientation="vertical" android:layout_width="fill_parent" android:layout_height="fill_parent" > <LinearLayout android:layout_width="fill_parent" android:layout_height="fill_parent" android:layout_weight="1" android:orientation="horizontal"> <LinearLayout android:layout_width="fill_parent" android:layout_height="fill_parent" android:layout_weight="1" android:background="#123456"> </LinearLayout> <LinearLayout android:layout_width="80dp" android:layout_height="fill_parent" android:layout_weight="0" android:background="#987654"> </LinearLayout> </LinearLayout> <LinearLayout android:layout_width="fill_parent" android:layout_height="100dp" android:layout_weight="0" android:background="#777111"> </LinearLayout> </LinearLayout> |
|
|

사실상 layout_weight="0" 과 layout_weight="1" 만을 사용해도 충분히 원하는 레이아웃을 구성할 수 있습니다.
잘만 활용한다면, 상당히 간편하게 원하는데로 레이아웃을 컨트롤 할 수 있게됩니다.
GooD LucK~
[출처] http://croute.me/334
본 웹사이트는 광고를 포함하고 있습니다.
광고 클릭에서 발생하는 수익금은 모두 웹사이트 서버의 유지 및 관리, 그리고 기술 콘텐츠 향상을 위해 쓰여집니다.
광고 클릭에서 발생하는 수익금은 모두 웹사이트 서버의 유지 및 관리, 그리고 기술 콘텐츠 향상을 위해 쓰여집니다.
댓글 0
| 번호 | 제목 | 글쓴이 | 날짜 | 조회 수 |
|---|---|---|---|---|
| 13 |
빠르게배우는 안드로이드 Fragment-4(Fragment간 에 데이터전달)
 | 졸리운_곰 | 2020.09.19 | 155 |
| 12 |
빠르게배우는 안드로이드 Fragment-3(Fragment기초 실습)
| 졸리운_곰 | 2020.09.19 | 209 |
| 11 | 빠르게배우는 안드로이드 Fragment-2(Activity-> Fragment로 쉽게 변경) | 졸리운_곰 | 2020.09.19 | 236 |
| 10 |
빠르게배우는 안드로이드 Fragment -1 (배경)
| 졸리운_곰 | 2020.09.19 | 194 |
| 9 |
안드로이드 스튜디오 - 새로 생성한 Activity Class를 쉽게 Manifest에 등록하기.
| 졸리운_곰 | 2020.08.08 | 252 |
| 8 |
Android Studio Build시 failed linking references 해결방법
| 졸리운_곰 | 2020.05.05 | 648 |
| 7 |
[안드로이드 스튜디오] COULD NOT FIND COM.ANDROID.TOOLS.BUILD:GRADLE:3.0.0-BETA6
| 졸리운_곰 | 2020.05.05 | 125 |
| 6 |
Android Sync SQLite Database with Server using PHP and MySQL
| 졸리운_곰 | 2019.02.25 | 7762 |
| 5 |
안드로이드의 MVC, MVP, MVVM 종합 안내서
| 졸리운_곰 | 2019.01.06 | 370 |
| 4 |
Getting Started: WebView-based Applications for Web Developers
| 졸리운_곰 | 2018.09.03 | 410 |
| 3 |
Android Asynchronous Http Client
| 졸리운_곰 | 2017.07.03 | 709 |
| 2 |
android studio 2.3 의 안드로이드 레이아웃 배치 법 : Layout Editor로 UI 빌드
| 졸리운_곰 | 2017.03.09 | 534 |
| 1 |
Android Studio 2.2에서 Layout Preview 한글 깨짐 현상 해결 방법
| 졸리운_곰 | 2017.03.08 | 568 |