
- 전체
- Sample DB
- database modeling
- [표준 SQL] Standard SQL
- G-SQL
- 10-Min
- ORACLE
- MS SQLserver
- MySQL
- SQLite
- postgreSQL
- 데이터아키텍처전문가 - 국가공인자격
- 데이터 분석 전문가 [ADP]
- [국가공인] SQL 개발자/전문가
- NoSQL
- hadoop
- hadoop eco system
- big data (빅데이터)
- stat(통계) R 언어
- XML DB & XQuery
- spark
- DataBase Tool
- 데이터분석 & 데이터사이언스
- Engineer Quality Management
- [기계학습] machine learning
- 데이터 수집 및 전처리
- 국가기술자격 빅데이터분석기사
- 암호화폐 (비트코인, cryptocurrency, bitcoin)
[기계학습] machine learning Quick Start to TensorFlow in Docker with a GUI
2019.05.05 20:47
Quick Start to TensorFlow in Docker with a GUI


As you may be aware, artificial intelligence is becoming ever more pervasive in today’s technological culture. It turns out that these machine learning algorithms can be applied to almost anything. We didn’t simply arrive here though; it’s taken many years of research.
How can the average developer partake in the fun without getting a Ph.D.? This is where TensorFlow comes in. It’s an open source library for machine intelligence, with plenty of articles and videos about how to use it already available. Therefore, here we focus on how to get your development environment up and running easily.
Docker Container Setup
In case you’re not familiar with Docker, a Docker container is a lightweight virtual machine that runs on your computer. You can set up a container with just the right requirements to run your application. There’s download & setup instructions here. There’s a few base Docker images for Tensorflow already published, but these are set up with project files already in them.
To begin, open a terminal (on Windows, use PowerShell). Make a directory for development, and enter it.
mkdir dev
cd dev
For an example, we’ll download the project code from one of Google’s TensorFlow code labs.
git clone https://github.com/martin-gorner/tensorflow-mnist-tutorial
Next, create a Dockerfile (just a text file without any filename extension), and paste the following into your Dockerfile.
FROM ubuntu:16.04
RUN apt-get update && apt-get upgrade -y \
        python3-pip \
        python3-tk
RUN apt-get install -y net-tools
RUN pip3 install --upgrade pip
RUN pip3 install \
        matplotlib \
        numpy \
        scipy \
        sklearn
RUN python3 -V
# Install TensorFlow CPU version from central repo
RUN pip3 install tensorflow
ADD tensorflow-mnist-tutorial /root/tensorflow-mnist-tutorial
WORKDIR /root/tensorflow-mnist-tutorial
CMD ["/bin/bash"]
As you can see, this Dockerfile will install TensorFlow for Python3. All we have to do now is build the container, without worrying about figuring out things like environment variables and dependencies. It also adds the directory that we just downloaded, to the container.
Build the container with
docker build -t tensor .
Now that the container has been built, run and connect to it with
docker run -it --name t1 tensor
It’s that easy! Now you can run any of your code from the Linux OS inside of the container. Let’s try an example from this code we have already.
Inside of the container, run
python3 mnist_1.0_softmax.py
All is well, right? Well no. You may have noticed an error like this:
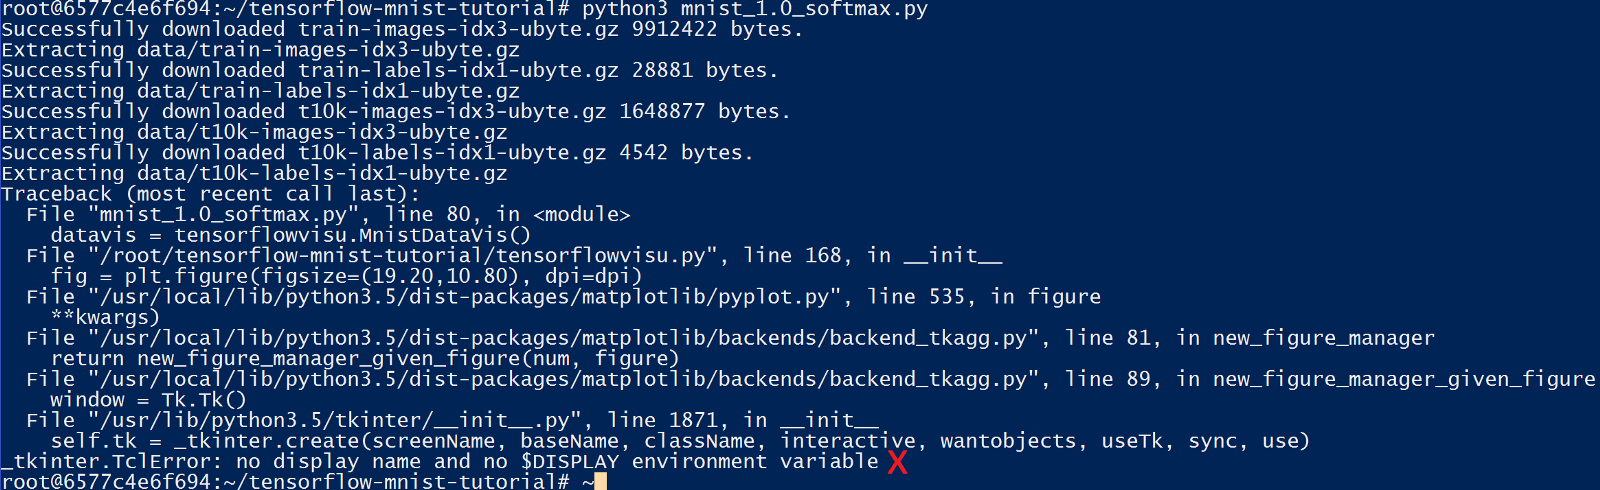
This particular program was looking for a screen to display the UI on, but since it’s running in a container, no display was found. Thankfully though, we have a simple workaround.
Displaying Graphics from within the Container
To view an application’s GUI, something called “X11 Forwarding” is needed. Getting this to work is slightly different for each operating system.


Windows users, you’ll want to download Xming from https://sourceforge.net/projects/xming/ . Once installed, open the Xming folder in the Start Menu, and choose XLaunch. Select the settings similar to the screenshot here, or to your liking. Click Next, and then click on “Start no client.”

When you get to the “Specify Parameter Settings”, make sure to check the “No Access Control” box.
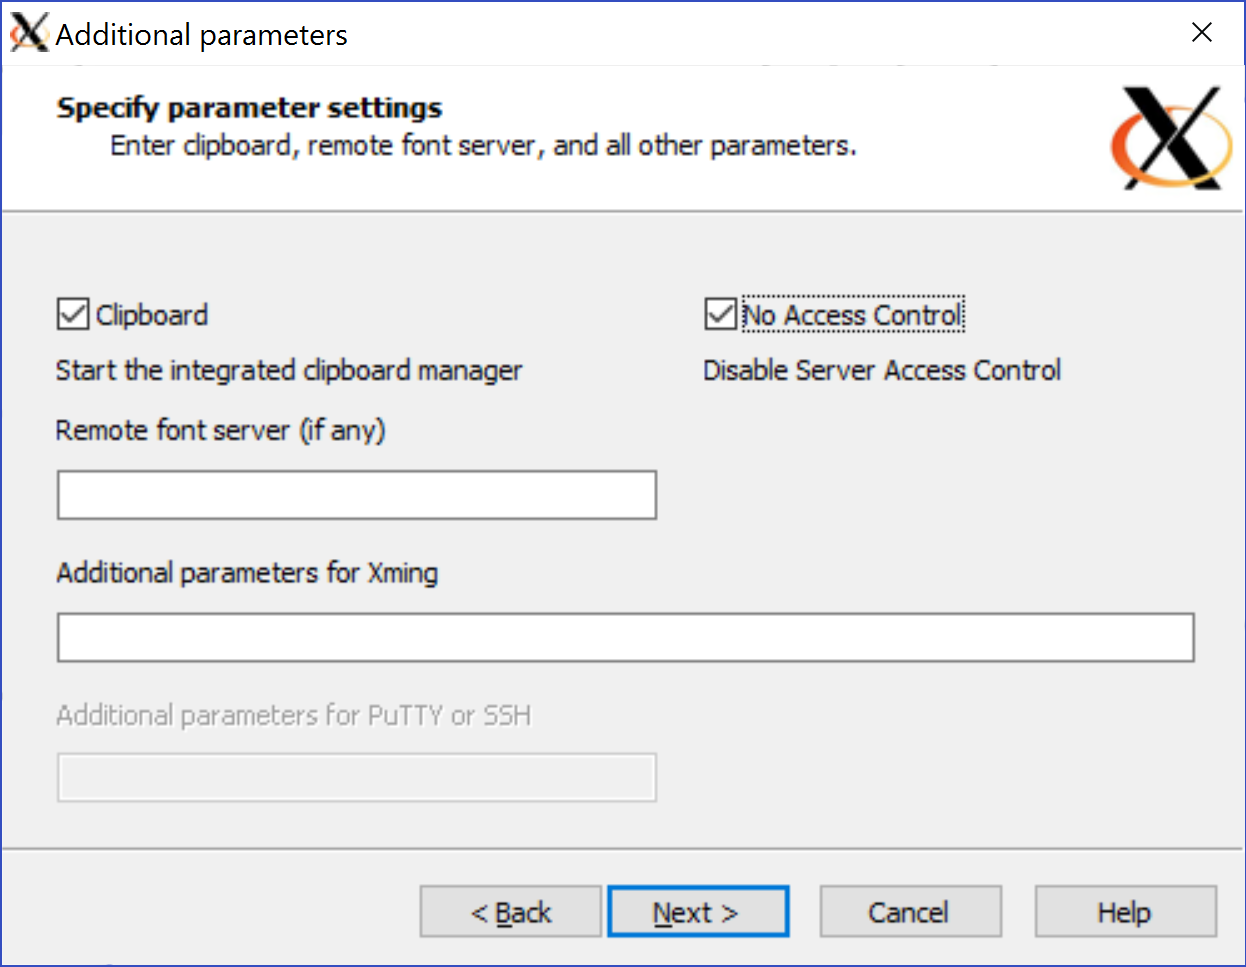
Click “Next” and continue to “Finish”.
Now we must find the local IP address of the Windows PC host so that the container can know to where to send the display output. To find the IP address, run (in PowerShell) the ipconfig command. The output should look similar to the following, and you’ll be interested in the “Ethernet adapter vEthernet (DockerNAT)” section. Use the IPv4 address, which most likely will be “10.0.75.1”.
Windows IP Configuration
Ethernet adapter vEthernet (DockerNAT):
Connection-specific DNS Suffix  . :
   IPv4 Address. . . . . . . . . . . : 10.0.75.1
   Subnet Mask . . . . . . . . . . . : 255.255.255.0
   Default Gateway . . . . . . . . . :
Assuming you chose a Display Number of 0 earlier, the docker run command will now be:
docker run -it -e DISPLAY=10.0.75.1:0.0 --name t2 tensor
Inside of the container, run the first example.
python3 mnist_1.0_softmax.py
The output in the terminal should be showing training accuracy results,
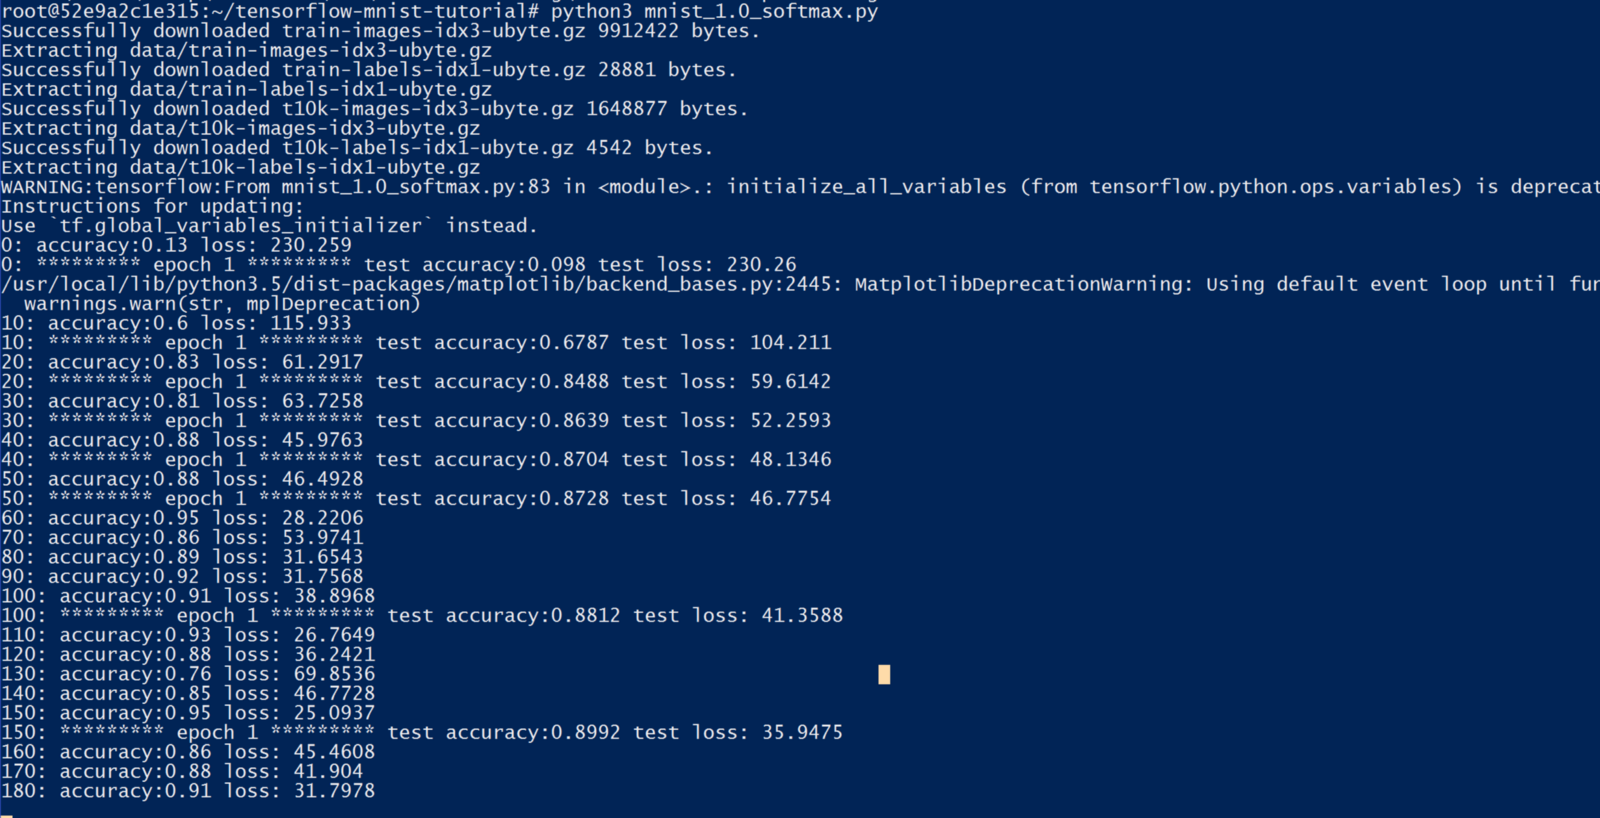
while the XLaunch Window will have the graphical output.
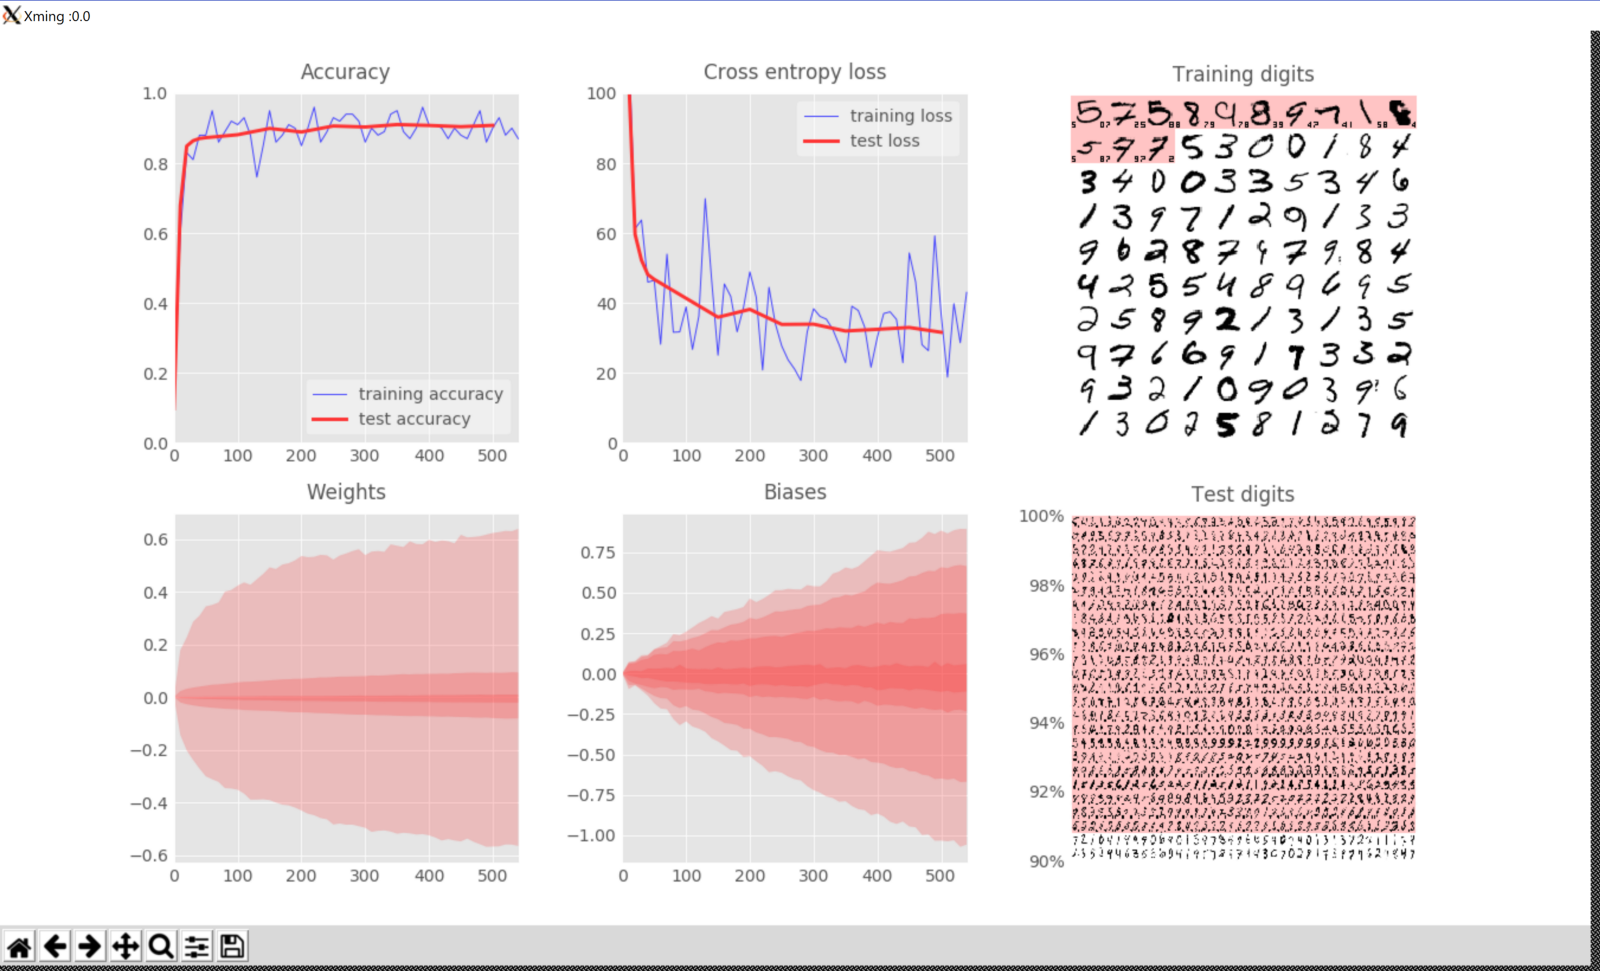
Concluding Thoughts
There you have it! As you can see, it’s ultimately not too hard to get started with TensorFlow in a Docker container. Now the real fun can begin, with learning how to take full advantage of TensorFlow.
P.S. — The GUI setup on a Mac is supposedly more complicated due to how Docker is currently implemented. I may do a post explaining this next. See https://docs.docker.com/docker-for-mac/networking/ for more details.
[출처] https://medium.com/@cswiggz/quick-start-to-tensorflow-in-docker-with-a-gui-39414245251f
광고 클릭에서 발생하는 수익금은 모두 웹사이트 서버의 유지 및 관리, 그리고 기술 콘텐츠 향상을 위해 쓰여집니다.
댓글 0
| 번호 | 제목 | 글쓴이 | 날짜 | 조회 수 |
|---|---|---|---|---|
| 공지 | 오라클 기본 샘플 데이터베이스 | 졸리운_곰 | 2014.01.02 | 86307 |
| 공지 | [SQL컨셉] 서적 "SQL컨셉"의 샘플 데이타 베이스 SAMPLE DATABASE of ORACLE | 가을의 곰을... | 2013.02.10 | 78760 |
| 공지 | [G_SQL] Sample Database | 가을의 곰을... | 2012.05.20 | 95507 |