
- 전체
- HTML
- Web Design (웹디자인)
- XE 응용 개발
- wordpress plugin dev
- Javascript & JavaScript Application
- MEAN Stack : full stack javascript
- angular js & ionic framework
- bootstrap
- WebGL, Three.js and Babylon.js
- restful api design
- mobile web
- node.js 응용
- Cloud Service 응용
- 웹 어셈블리 개발 [WASM, WebAssembly]
- 마이크로서비스, MSA (microservice architecture)
- WebGL / WebGPU
- next.js 개발
- micro frontend (마이크로프론트앤드)
- 전자상거래/쇼핑몰
- 서버 클라우드 (aws, azure, google)
next.js 개발 [next.js 개발] How to use fetch API in Next.js?
2024.03.05 17:08
[next.js 개발] How to use fetch API in Next.js?
JavaScript is extensively used in almost all the fields of Computer Sciences. One of its areas of use is the Web, where it utilizes browser APIs to support dynamic websites. JavaScript also offers a wide variety of frameworks and libraries to help the coding process easier, simpler, and more efficient.
In this piece, we will look at how to use the fetch API in Next.js. So without any further ado, let’s jump in!
Next.js
It is a web framework built on top of React.js. Next.js extends the capabilities of React.js by providing the developers with features like server-side rendering, static site generation, incremental static generation, a working REST API, file-system-based routing, dynamic routing, etc. It provides better optimization, additional structure, and features to your application.
Since it extends React.js, you can start by writing all the React.js code and eventually add Next.js features to your application. You can render the application server-side, so all the data has been pre-fetched before loading the web app in the browser. Afterward, you can write a simple REST API without setting up a Node.js server.
Use fetch API
Let’s do it in steps to make things simpler.
→ STEP #1
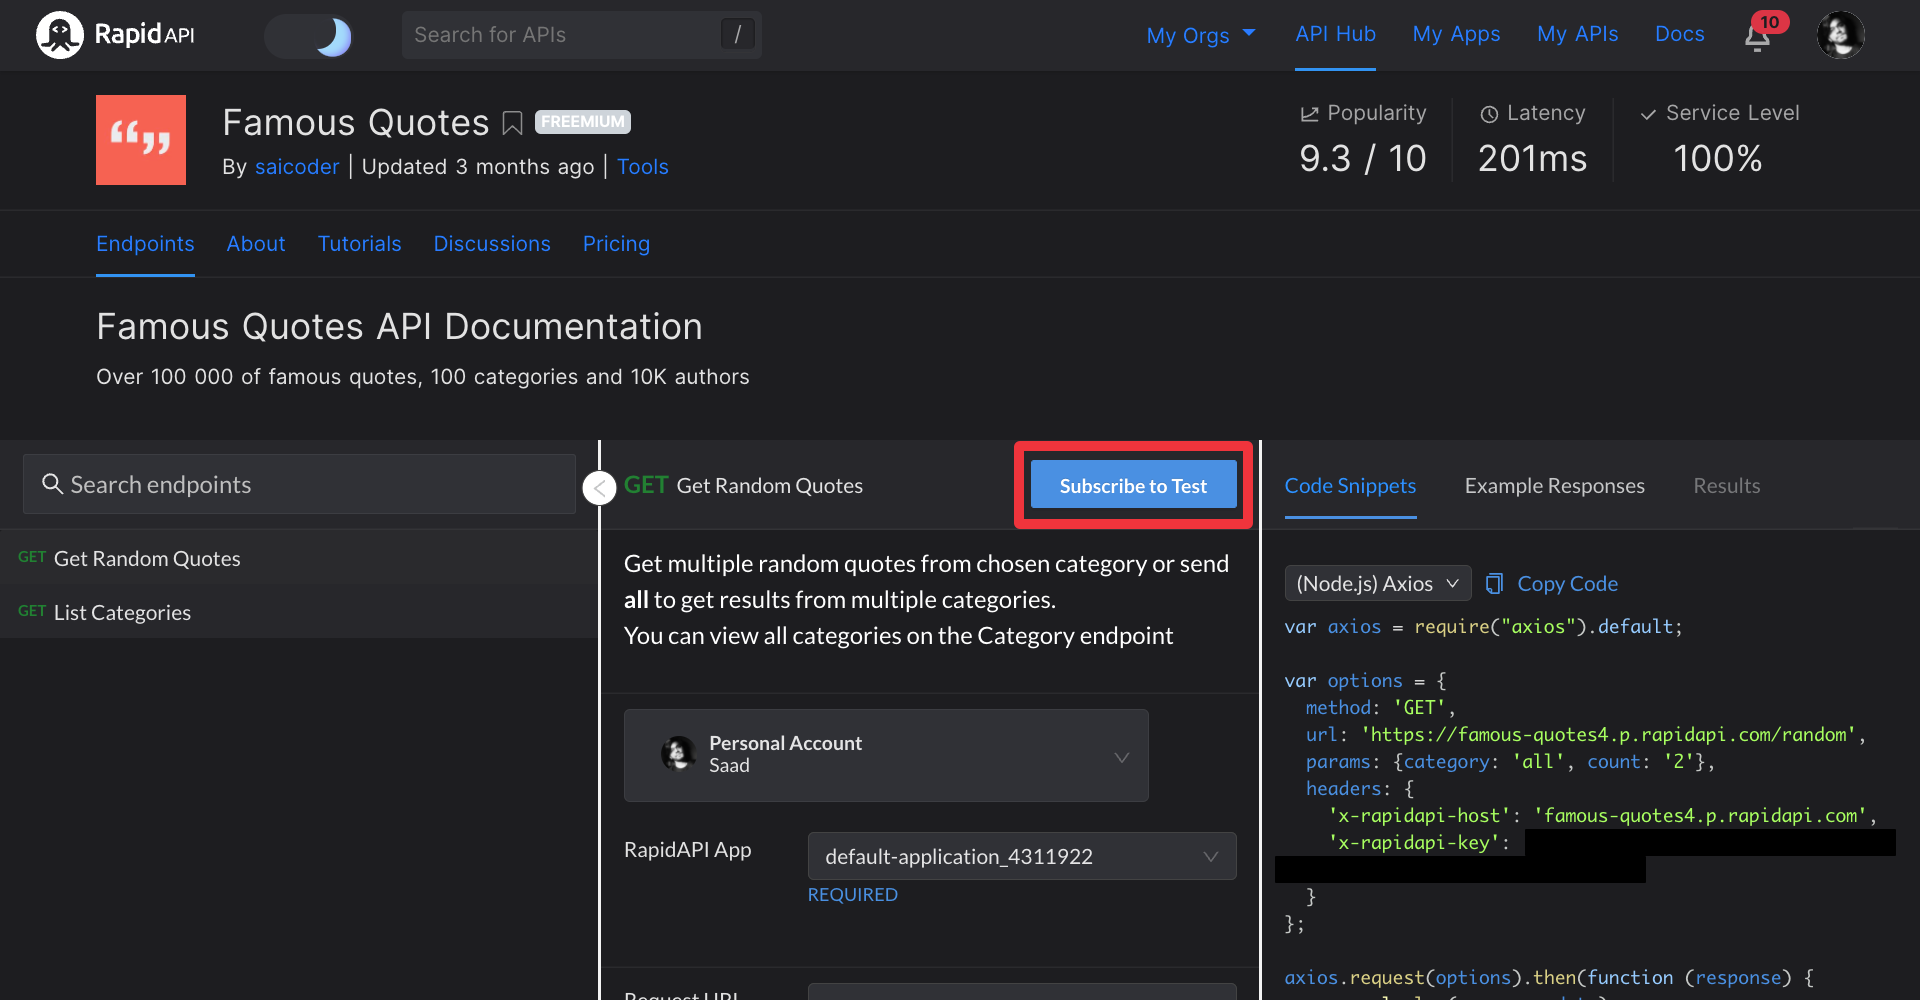
We need an API that we can call to learn how to use the fetch API in Next.js. For this, we will use RapidAPI Hub, which provides over 35,000+ APIs.
We will use the Famous Quotes API from RapidAPI Hub, so please go ahead and subscribe to it.
→ STEP #2
Now we need to set up a Next.js application. The simplest way to do it is by running the following command in your terminal:
npx create-next-app next-appThe command will create a Next.js project called next-app. If you want to change the name, you can just replace next-app with what you want.
→ STEP #3
Now open this directory in your preferred code editor. Afterward, run the application running the following command in your project terminal:


npm run devIt will start the development environment of your Next.js application.
→ STEP #4
Once you are done, open the index.js file inside the pages directory and delete all the code. Now copy and paste the following inside this file:
import styles from '../styles/Home.module.css';export default function Home() {const callAPI = async () => {};return (<div className={styles.container}><main className={styles.main}><button onClick={callAPI}>Make API call</button></main></div>);}The above code will render a button that will execute callAPI function when clicked.
We will use our fetch API inside the callAPI function to call APIs. Let’s learn how to do this.
const callAPI = async () => {try {const res = await fetch(`https://famous-quotes4.p.rapidapi.com/random?category=all&count=2`,{method: 'GET',headers: {'X-RapidAPI-Key': 'your-rapidapi-key','X-RapidAPI-Host': 'famous-quotes4.p.rapidapi.com',},});const data = await res.json();console.log(data);} catch (err) {console.log(err);}};The fetch API is asynchronous, so we need to await it. It is a function that takes the API endpoint as its first parameter. The second parameter of the fetch API is an object that contains data like HTTP method, request headers, request body, etc.
We have made a GET request in the above code snippet. If you want to make a POST request, you can just replace GET with POST. Here is a sample code snippet of how you can make a POST request using fetch API in Next.js.
const res = await fetch(`API-ENDPOINT`, {method: 'POST',body: {},});const data = await res.json();console.log(data);You can see that the method is POST with a body key holding an object. This object will contain the request body that is sent along with a POST API request.
Here is the final code that you can just copy and paste into your index.js file:
import styles from '../styles/Home.module.css';export default function Home() {const callAPI = async () => {try {const res = await fetch(`https://famous-quotes4.p.rapidapi.com/random?category=all&count=2`,{method: 'GET',headers: {'X-RapidAPI-Key': 'your-rapidapi-key','X-RapidAPI-Host': 'famous-quotes4.p.rapidapi.com',},});const data = await res.json();console.log(data);} catch (err) {console.log(err);}};return (<div className={styles.container}><main className={styles.main}><button onClick={callAPI}>Make API call</button></main></div>);}We are calling the callAPI function on the onClick event handler of the button. It makes an API call using fetch API in a Next.js app.
Wrap Up
That’s all, folks! I hope you now understand how to use the fetch API inside the Next.js app to call other APIs.
[출처] https://rapidapi.com/guides/how-to-use-fetch-api-in-next-js
광고 클릭에서 발생하는 수익금은 모두 웹사이트 서버의 유지 및 관리, 그리고 기술 콘텐츠 향상을 위해 쓰여집니다.
댓글 0
| 번호 | 제목 | 글쓴이 | 날짜 | 조회 수 |
|---|---|---|---|---|
| 1 |
jQuery Mobile Form Example
 | 졸리운_곰 | 2018.09.04 | 428 |