
- 전체
- HTML
- Web Design (웹디자인)
- XE 응용 개발
- wordpress plugin dev
- Javascript & JavaScript Application
- MEAN Stack : full stack javascript
- angular js & ionic framework
- bootstrap
- WebGL, Three.js and Babylon.js
- restful api design
- mobile web
- node.js 응용
- Cloud Service 응용
- 웹 어셈블리 개발 [WASM, WebAssembly]
- 마이크로서비스, MSA (microservice architecture)
- WebGL / WebGPU
- next.js 개발
- micro frontend (마이크로프론트앤드)
- 전자상거래/쇼핑몰
- 서버 클라우드 (aws, azure, google)
Javascript & JavaScript Application Single Page Application using AngularJs Tutorial
2016.11.20 14:59
Single Page Application using AngularJs Tutorial

AngularJs is a powerful javascript framework for building dynamic web applications. It became insanely popular nowadays. The good thing about Angular is that it has a set of ready-to-use modules to simplify building of single page applications.
In this tutorial, we will show you how to build a simple single page application. Even though we will build a small app, you will learn the concepts and will be able to build larger apps.
Single Page Application
Single page application (SPA) is a web application that fits on a single page. All your code (JS, HTML, CSS) is retrieved with a single page load. And navigation between pages performed without refreshing the whole page.
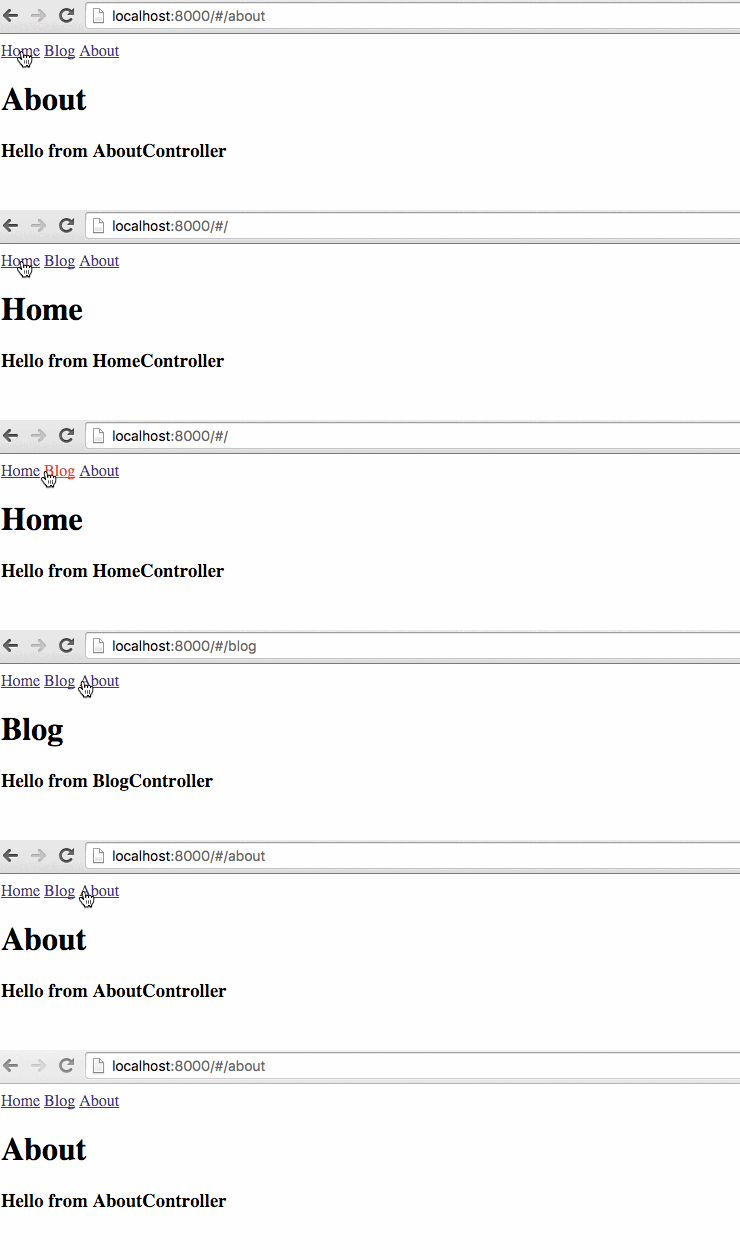
Pros
No page refresh
When you are using SPA, you don’t need to refresh the whole page, just load the part of the page which needs to be changed. Angular allows you to pre-load and cache all your pages, so you don’t need extra requests to download them.
Better user experience
SPA feels like a native application: fast and responsive.
Ability to work offline
Even if user loses internet connection, SPA can still work because all the pages are already loaded.
Cons
More complex to build
You need to write pretty much javascript, handle shared state between pages, manage permissions, etc.
SEO
To index your SPA app, search engine crawlers should be able to execute javascript. Only recently Google and Bing started indexing Ajax-based pages by executing JavaScript during crawling. You need to create static HTML snapshots specially for search engines.
Initial load is slow
SPA needs to download more resources when you open it.
Client should have javascript enabled
Of course, SPA requires javascript. But fortunately, almost everyone has javascript enabled.
Angular Application
Every angular application starts from creating a module. Module is a container for the different parts of your application: controllers, service, etc.
var app = angular.module('myApp', []);
Lets define a simple controller:
app.controller('HomeController', function($scope) {
  $scope.message = 'Hello from HomeController';
});
After we created module and controller, we need to use them in our HTML.
First of all, we need to include angular script and app.js that we built.
Then need to specify our module in ng-app attribute and controller in ng-controller attribute
<!doctype html>
<html ng-app="myApp">
  <head>
    <script src="https://cdnjs.cloudflare.com/ajax/libs/angular.js/1.4.7/angular.min.js"></script>
  </head>
  <body ng-controller="HomeController">
    <h1>{{message}}</h1>
    <script src="app.js"></script>
  </body>
</html>
If you done this correctly, you should see:
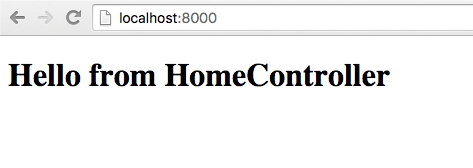
Since we have our module and controller set up and we know that Angular is working properly, we will start working on adding single page application support.
ngRoute
Since we are making a single page application and we don’t want any page refreshes, we’ll use Angular’s routing capabilities.
We will use ngRoute module for that.
The ngRoute module provides routing, deeplinking services and directives for angular apps.
We need to include angular-route script after the main angular script.


<script src="https://cdnjs.cloudflare.com/ajax/libs/angular.js/1.4.7/angular.min.js"></script>
<script src="https://cdnjs.cloudflare.com/ajax/libs/angular.js/1.4.7/angular-route.min.js"></script>
Then we need to specify that our module depends on ngRoute module to be able to use it.
var app = angular.module('myApp', ['ngRoute']);
The next thing is to distinguish common HTML for every page. This HTML will be layout of the website.
Then we need to specify the place where HTML of each page will be placed in our layout. There is a ng-view directive for that.
ng-view is an Angular directive that will include the template of the current route (for example, /blog or /about) in the main layout file.
In plain words, it takes the file we specified for current route and injects it into the layout in the place of ng-view directive.
<!doctype html>
<html ng-app="myApp">
  <head>
    <script src="https://cdnjs.cloudflare.com/ajax/libs/angular.js/1.4.7/angular.min.js"></script>
    <script src="https://cdnjs.cloudflare.com/ajax/libs/angular.js/1.4.7/angular-route.min.js"></script>
  </head>
  <body>

    <div ng-view></div>

    <script src="app.js"></script>
  </body>
</html>
When HTML is ready, we need to configure our routes. We will use $routeProvider service from the ngRoute module.
For each route, we need to specify templateUrl and controller.
If user will try to go to the route that does not exist, we can handle this by using otherwise function. In our case, we will redirect user to the “/” route:
var app = angular.module('myApp', ['ngRoute']);

app.config(function($routeProvider) {
  $routeProvider

  .when('/', {
    templateUrl : 'pages/home.html',
    controller  : 'HomeController'
  })

  .when('/blog', {
    templateUrl : 'pages/blog.html',
    controller  : 'BlogController'
  })

  .when('/about', {
    templateUrl : 'pages/about.html',
    controller  : 'AboutController'
  })

  .otherwise({redirectTo: '/'});
});
Then we need to build controllers for every route (we already specified their names in routeProvider):
app.controller('HomeController', function($scope) {
  $scope.message = 'Hello from HomeController';
});

app.controller('BlogController', function($scope) {
  $scope.message = 'Hello from BlogController';
});

app.controller('AboutController', function($scope) {
  $scope.message = 'Hello from AboutController';
});
Our pages will be simple:
home.html
<h1>Home</h1>

<h3>{{message}}</h3>
blog.html
<h1>Blog</h1>

<h3>{{message}}</h3>
about.html
<h1>About</h1>

<h3>{{message}}</h3>
Note that we don’t need to use html, head, body tags in our page. This pages will always be used inside layout as partial HTML.
Lets add links that will switch our pages. The final HTML looks like this:
<!doctype html>
<html ng-app="myApp">
  <head>
    <script src="https://cdnjs.cloudflare.com/ajax/libs/angular.js/1.4.7/angular.min.js"></script>
    <script src="https://cdnjs.cloudflare.com/ajax/libs/angular.js/1.4.7/angular-route.min.js"></script>
  </head>
  <body>
    <a href="#/">Home</a>
    <a href="#/blog">Blog</a>
    <a href="#/about">About</a>

    <div ng-view></div>

    <script src="app.js"></script>
  </body>
</html>
Browsers don’t support loading resources from disk using ajax, so you can use any HTTP server to serve static HTMLs.
python -m SimpleHTTPServer
If you don’t want to do this, you can include your partial HTMLs to index.html using script tag with type text/ng-template.
When angular see this templates, it will load its content to the template cache and will not perform ajax request to get their content.
<!doctype html>
<html ng-app="myApp">
  <head>
    <script src="https://cdnjs.cloudflare.com/ajax/libs/angular.js/1.4.7/angular.min.js"></script>
    <script src="https://cdnjs.cloudflare.com/ajax/libs/angular.js/1.4.7/angular-route.min.js"></script>
  </head>
  <body>
    <script type="text/ng-template" id="pages/home.html">
      <h1>Home</h1>
      <h3>{{message}}</h3>
    </script>
    <script type="text/ng-template" id="pages/blog.html">
      <h1>Blog</h1>
      <h3>{{message}}</h3>
    </script>
    <script type="text/ng-template" id="pages/about.html">
      <h1>About</h1>
      <h3>{{message}}</h3>
    </script>

    <a href="#/">Home</a>
    <a href="#/blog">Blog</a>
    <a href="#/about">About</a>

    <div ng-view></div>

    <script src="app.js"></script>
  </body>
</html>
Conclusion
In this tutorial, you learned how to build a single page application using Angular. Now you can go ahead and create more complex single page apps.
Demo
http://plnkr.co/edit/ClBmOH3ljAWueRBdKGKR?p=preview
[출처] https://tests4geeks.com/single-page-application-using-angularjs-tutorial/
광고 클릭에서 발생하는 수익금은 모두 웹사이트 서버의 유지 및 관리, 그리고 기술 콘텐츠 향상을 위해 쓰여집니다.
