
- 전체
- Sample DB
- database modeling
- [표준 SQL] Standard SQL
- G-SQL
- 10-Min
- ORACLE
- MS SQLserver
- MySQL
- SQLite
- postgreSQL
- 데이터아키텍처전문가 - 국가공인자격
- 데이터 분석 전문가 [ADP]
- [국가공인] SQL 개발자/전문가
- NoSQL
- hadoop
- hadoop eco system
- big data (빅데이터)
- stat(통계) R 언어
- XML DB & XQuery
- spark
- DataBase Tool
- 데이터분석 & 데이터사이언스
- Engineer Quality Management
- [기계학습] machine learning
- 데이터 수집 및 전처리
- 국가기술자격 빅데이터분석기사
- 암호화폐 (비트코인, cryptocurrency, bitcoin)
[기계학습] machine learning A step by Step Guide to Install Tensorflow GPU on Ubuntu 18.04 LTS
2018.06.25 13:56
A step by Step Guide to Install Tensorflow GPU on Ubuntu 18.04 LTS

I wanted to note down what I did to get tensorflow-gpu working with my fresh Ubuntu 18.04 LTS install.I thought it will be helpfull if i share that here There isn’t any official downloads for Ubuntu 18.04 yet from NVIDIA, but you can use the files for Ubuntu 17.04.
1.Nvidia driver
The first we should check is that we have an Nvidia driver installed for our graphics card. Our graphics card must support at least Nvidia compute 3.0 to install tensorflow-gpu.
check here the compute capability https://developer.nvidia.com/cuda-gpus
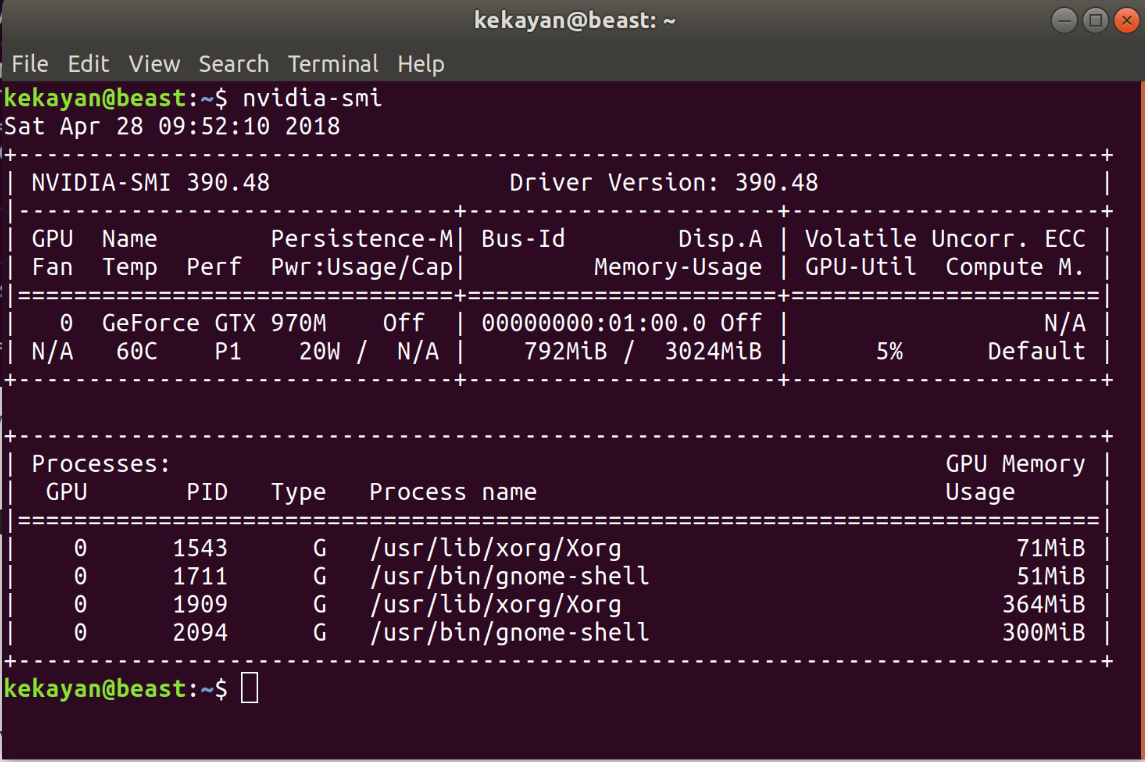
we can check what graphics driver we have installed with thenvidia-smicommand. we should see some output like the following:
2.CUDA Toolkit 9.0
Got to https://developer.nvidia.com/cuda-toolkit-archive in the Archived Releases select CUDA Toolkit 9.0 (Sept 2017).Then download the runfile for Ubuntu 17.04.

Once you’ve finished downloading that file, navigate to where the file was downloaded in your terminal.usually it ll be in your downloads directory.So navigate to the download directory and right click there and click open terminal.
In the terminal execute following two commands one by one
sudo chmod +x cuda_9.0.176_384.81_linux.run
./cuda_9.0.176_384.81_linux.run --override
Accept the terms and conditions, say yes to installing with an unsupported configuration.and no to “Install NVIDIA Accelerated Graphics Driver for Linux-x86_64 384.81?”. Make sure you don’t agree to install the new driver.Follow the prompts to install the toolkit using the default install locations.
3.CUDA post-install actions
So Tensorflow can find our CUDA installation and use it properly, we need to add these lines to the end of you ~/.bashrc
first in our terminal type following command to open ~/.bashrc :
nano ~/.bashrc
Then add following paths at the end of the file ~/.bashrc
export PATH=/usr/local/cuda-9.0/bin${PATH:+${PATH}}
export LD_LIBRARY_PATH=/usr/local/cuda/lib64:${LD_LIBRARY_PATH:+${LD_LIBRARY_PATH}
finally In order to activate the installation, we should source the ~/.bashrc file:
source ~/.bashrc
4.CUDNN 7.0
Now visit https://developer.nvidia.com/cudnn to get CUDNN 7.0. Go to the downloads archive page again and find version 7.0 for CUDA 9.0 that we just installed. Download the link that says “cuDNN v7.0.5 Library for Linux”. This will download an archive that we can unpack and move the contents the correct locations.

Once downloaded,we are going to unpack the archive and move it the contents into the directory where we installed CUDA 9.0:
execute following commands in terminal of the download directory


# Unpack the archive
tar -zxvf cudnn-9.0-linux-x64-v7.tgz
# Move the unpacked contents to your CUDA directory
sudo cp -P cuda/lib64/* /usr/local/cuda-9.0/lib64/
sudo cp  cuda/include/* /usr/local/cuda-9.0/include/
# Give read access to all users
sudo chmod a+r /usr/local/cuda-9.0/include/cudnn.h
5.Install libcupti
simply execute following command
sudo apt-get install libcupti-dev
6.Installing Anaconda
The best way to install Anaconda is to download the latest Anaconda installer bash script, verify it, and then run it.
Navigate download directory.Now we can run the script:
bash Anaconda3-5.0.1-Linux-x86_64.sh
follow all prompts an install.Once it’s complete we’ll receive the following output:
...
installation finished.
Do you wish the installer to prepend the Anaconda3 install location
to PATH in your /home/kekayan/.bashrc ? [yes|no]
[no] >>>
Type yes so that we can use the conda command.
In order to activate the installation, you should source the ~/.bashrc file:
source ~/.bashrc
Once we have done that, you can verify our installation by making use of the conda command, for example with list:
conda list
Let’s create our virtual environment.so we can install tensorflow there
conda create --name tf
tf is the name i have for my environment.
Then we can activate it by
source activate tf
Next we intsall pip by following command
easy_install -U pip
finally install tensorflow gpu by issuing following command
pip3 install --upgrade tensorflow-gpu
follow link to check how to validate
[source] https://medium.com/codezillas/step-by-step-guide-to-install-tensorflow-gpu-on-ubuntu-18-04-lts-6feceb0df5c0
광고 클릭에서 발생하는 수익금은 모두 웹사이트 서버의 유지 및 관리, 그리고 기술 콘텐츠 향상을 위해 쓰여집니다.
댓글 0
| 번호 | 제목 | 글쓴이 | 날짜 | 조회 수 |
|---|---|---|---|---|
| 공지 | 오라클 기본 샘플 데이터베이스 | 졸리운_곰 | 2014.01.02 | 86308 |
| 공지 | [SQL컨셉] 서적 "SQL컨셉"의 샘플 데이타 베이스 SAMPLE DATABASE of ORACLE | 가을의 곰을... | 2013.02.10 | 78760 |
| 공지 | [G_SQL] Sample Database | 가을의 곰을... | 2012.05.20 | 95507 |