
- 전체
- HTML
- Web Design (웹디자인)
- XE 응용 개발
- wordpress plugin dev
- Javascript & JavaScript Application
- MEAN Stack : full stack javascript
- angular js & ionic framework
- bootstrap
- WebGL, Three.js and Babylon.js
- restful api design
- mobile web
- node.js 응용
- Cloud Service 응용
- 웹 어셈블리 개발 [WASM, WebAssembly]
- 마이크로서비스, MSA (microservice architecture)
- WebGL / WebGPU
- next.js 개발
- micro frontend (마이크로프론트앤드)
- 전자상거래/쇼핑몰
- 서버 클라우드 (aws, azure, google)
HTML [Javascript] jQuery 달력 위젯 datepicker 사용하기
2024.08.13 19:22
[Javascript] jQuery 달력 위젯 datepicker 사용하기
datepicker란 jQuery에서 제공하는 위젯 중 하나이다.
사용법은
1. import
<script src="https://code.jquery.com/jquery-1.12.4.js"></script>
<script src="https://code.jquery.com/ui/1.12.1/jquery-ui.js"></script>
<link rel="stylesheet" href="http://code.jquery.com/ui/1.8.18/themes/base/jquery-ui.css">
2. script
<script>
$(document).ready(function() {
    $("#datepicker").datepicker();
});
</script>
3. html
<body>
    날짜 선택: <input type="text" id="datepicker">
</body>
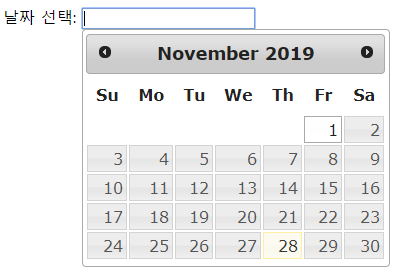
가장 기본 형태의 datepicke이다.
여기서 옵션을 추가할 수 있다.
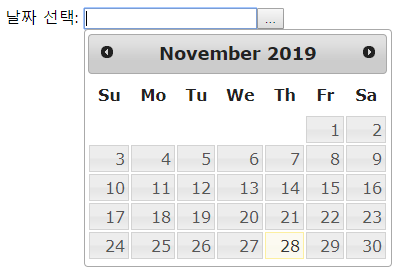
1. showOn
showOn: "button" ->button 클릭 시 날짜 위젯을 보여준다.
showOn:"both" => button이나 text상자 클릭 시 날짜 위젯을 보여준다.
    $("#datepicker").datepicker({
        showOn:"button"
    });
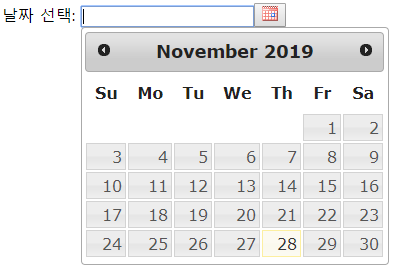
2. buttonImage
버튼 이미지
    $("#datepicker").datepicker({
        showOn:"button"
        , buttonImage: "http://jqueryui.com/resources/demos/datepicker/images/calendar.gif"
    });
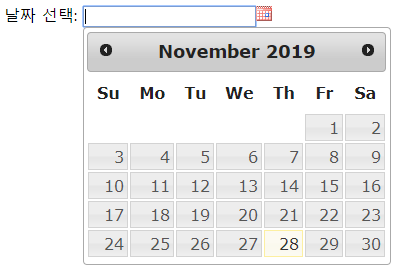
3. buttonImageOnly
버튼 이미지만 보이게 하기
    $("#datepicker").datepicker({
        showOn:"button"
        , buttonImage: "http://jqueryui.com/resources/demos/datepicker/images/calendar.gif"
        ,buttonImageOnly: true
    });
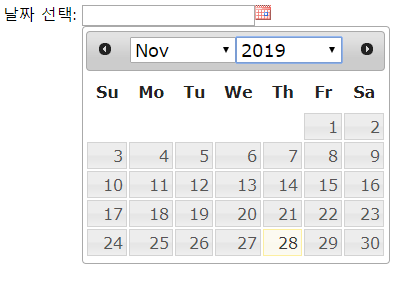
4. changeMonth, changeYear
년, 월을 셀렉트박스로 변경
 $("#datepicker").datepicker({
        showOn:"button"
        , buttonImage: "http://jqueryui.com/resources/demos/datepicker/images/calendar.gif"
        ,buttonImageOnly: true
        ,changeMonth:true
        ,changeYear:true
    });
5. yearRange
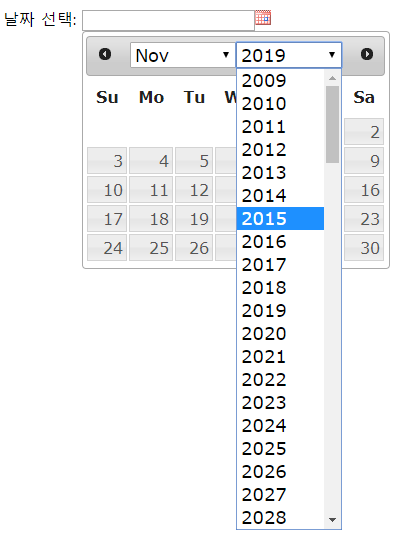
연도의 선택 범위
$("#datepicker").datepicker({
        showOn:"button"
        , buttonImage: "http://jqueryui.com/resources/demos/datepicker/images/calendar.gif"
        ,buttonImageOnly: true
        ,changeMonth:true
        ,changeYear:true
        ,yearRange:"-10:+100" /*2009 ~ 2119*/
        ,yearRange:"2009:9999" /*2009 ~ 9999*/
         /*위의 방식 아래 방식 둘다 가능*/
    });


6. nextText, prevText
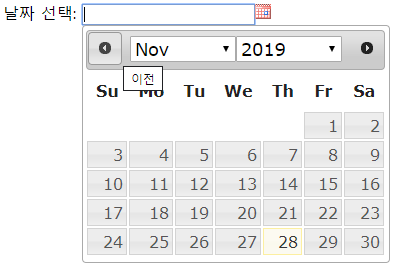
화살표의 툴팁내용
$("#datepicker").datepicker({
        showOn:"button"
        , buttonImage: "http://jqueryui.com/resources/demos/datepicker/images/calendar.gif"
        ,buttonImageOnly: true
        ,changeMonth:true
        ,changeYear:true
        ,nextText:"다음"
        ,prevText:"이전"

    });
7. numberOfMonths:[n,m]
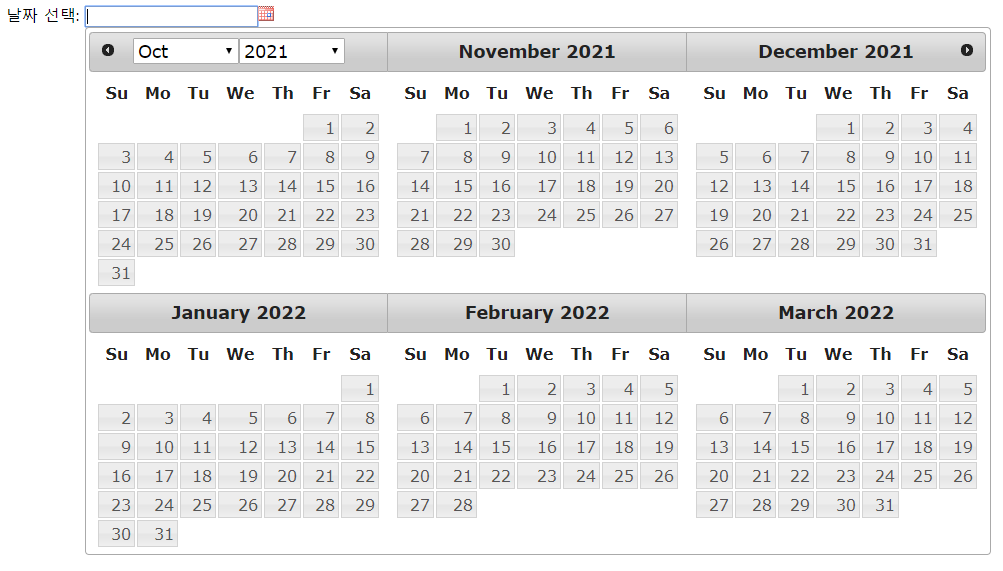
n X m 으로 달력을 보여줌
$(document).ready(function() {
    $("#datepicker").datepicker({
        showOn:"button"
        , buttonImage: "http://jqueryui.com/resources/demos/datepicker/images/calendar.gif"
        ,buttonImageOnly: true
        ,changeMonth:true
        ,changeYear:true
        ,nextText:"다음"
        ,prevText:"이전"
        ,numberOfMonths:[2,3]
    });
});
8. dateFormat
날짜 형식
$("#datepicker").datepicker({
        showOn:"button"
        , buttonImage: "http://jqueryui.com/resources/demos/datepicker/images/calendar.gif"
        ,buttonImageOnly: true
        ,changeMonth:true
        ,changeYear:true
        ,dateFormat:"dd-mm-yy"
    });

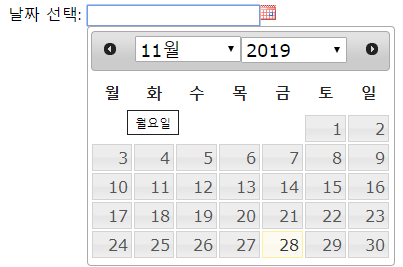
9. dayNames, dayNamesMin,monthNamesShort
dayNames: 요일 툴팁
dayNamesMin: 표시되는 요일
monthNamesShort : 표시되는 월
 $("#datepicker").datepicker({
        showOn:"button"
        , buttonImage: "http://jqueryui.com/resources/demos/datepicker/images/calendar.gif"
        ,buttonImageOnly: true
        ,changeMonth:true
        ,changeYear:true
        ,dateFormat:"dd-mm-yy"
        ,dayNames : ['월요일','화요일','수요일','목요일','금요일','토요일','일요일']
        ,dayNamesMin : ['월','화','수','목','금','토','일']
        ,monthNamesShort:  [ "1월", "2월", "3월", "4월", "5월", "6월","7월", "8월", "9월", "10월", "11월", "12월" ]
    });
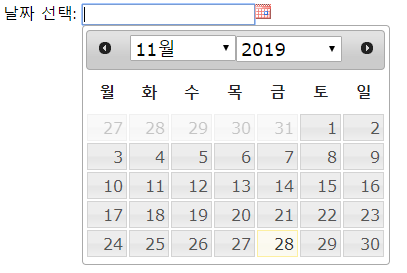
10. showOtherMonths
이전달, 다음달의 날짜 표시여부
$("#datepicker").datepicker({
        showOn:"button"
        , buttonImage: "http://jqueryui.com/resources/demos/datepicker/images/calendar.gif"
        ,buttonImageOnly: true
        ,changeMonth:true
        ,changeYear:true
        ,dateFormat:"dd-mm-yy"
        ,dayNames : ['월요일','화요일','수요일','목요일','금','토','일']
        ,dayNamesMin : ['월','화','수','목','금','토','일']
        ,monthNamesShort:  [ "1월", "2월", "3월", "4월", "5월", "6월","7월", "8월", "9월", "10월", "11월", "12월" ]
        ,showOtherMonths:true
    });
이 외에도 여러가지 옵션들이 있으니, 직접 실행해보면 된다.
[출처] https://beautifulhill.tistory.com/12
본 웹사이트는 광고를 포함하고 있습니다.
광고 클릭에서 발생하는 수익금은 모두 웹사이트 서버의 유지 및 관리, 그리고 기술 콘텐츠 향상을 위해 쓰여집니다.
광고 클릭에서 발생하는 수익금은 모두 웹사이트 서버의 유지 및 관리, 그리고 기술 콘텐츠 향상을 위해 쓰여집니다.
