
- 전체
- HTML
- Web Design (웹디자인)
- XE 응용 개발
- wordpress plugin dev
- Javascript & JavaScript Application
- MEAN Stack : full stack javascript
- angular js & ionic framework
- bootstrap
- WebGL, Three.js and Babylon.js
- restful api design
- mobile web
- node.js 응용
- Cloud Service 응용
- 웹 어셈블리 개발 [WASM, WebAssembly]
- 마이크로서비스, MSA (microservice architecture)
- WebGL / WebGPU
- next.js 개발
- micro frontend (마이크로프론트앤드)
- 전자상거래/쇼핑몰
- 서버 클라우드 (aws, azure, google)
node.js 응용 [node.js 응용] Node.js | MySQL과 연동(mysql모듈) - CRUD 1/2
2023.03.31 20:34
[node.js 응용] Node.js | MySQL과 연동(mysql모듈) - CRUD 1/2
MySQL 기본은 아래 링크를 참조
설치 https://velog.io/@virtualplastic/MySQL-%EC%84%A4%EC%B9%98
기본 https://velog.io/@virtualplastic/MySQL-%EC%8B%9C%EC%9E%91
Node.js와 연동
npm install mysql로 mysql 모듈을 설치.
express 서버를 구성할 때 아래 코드들을 적절히 넣어 짜게 된다.
basic.js
//모듈 추출
var mysql = require('mysql');

//데이터베이스와 연결
var client = mysql.createConnection({
  user: 'root',
  password: '비밀번호',
  database:'company'
});

//데이터베이스 쿼리 사용
//client.query('USE Company');

client.query('insert into products (name, modelnumber, series) values(?,?,?)', ['Name', 'Model Number', 'Series'], function(error, results, fields){

})

client.query('select * from products', function(error, result, fields){
  if(error){
    console.log('쿼리 문장 오류');
  }else{
    console.log(result);
  }
})
mysql 모듈로 CRUD 구현
CREATE
모듈 다 설치하고 실행하는 거 잊지 말자.
create.js
// 모듈 추출
var express = require('express');
var ejs = require('ejs');
var mysql = require('mysql');
var bodyParser = require('body-parser');
var fs = require('fs');

//서버 생성
var app = express();

var client = mysql.createConnection({
  user:'root',
  password:'비밀번호',
  database:'company'
})

app.use(bodyParser.urlencoded({extended:false}));

app.listen(52273, function(){
  console.log('Server running at http://127.0.0.1:52273');
});

//라우터 미들웨어 설정
app.get('/', function(request, response){
  //파일 읽기
  fs.readFile('list.html', 'utf8', function(error, data){
    //데이터베이스 쿼리 실행
    client.query('select * from products', function(error, results){
      //응답
      response.send(ejs.render(data, {
        data: results
      }));
    });
  });
});
app.get('/delete/:id', function (request, response) { });
app.get('/insert', function (request, response) { });
app.post('/insert', function (request, response) { });
app.get('/edit/:id', function (request, response) { });
app.post('/edit', function (request, response) { });
list.html


<!DOCTYPE html>
<html>
<head>
    <title>List Page</title>
</head>
<body>
    <h1>List Page</h1>
    <a href="/insert">INSERT DATA</a>
    <hr />
    <table width="100%" border="1">
        <tr>
            <th>DELETE</th>
            <th>EDIT</th>
            <th>ID</th>
            <th>Name</th>
            <th>Model Number</th>
            <th>Series</th>
        </tr>
        <% data.forEach(function (item, index) { %>
        <tr>
            <td><a href="/delete/<%= item.id %>">DELETE</a></td>
            <td><a href="/edit/<%= item.id %>">EDIT</a></td>
            <td><%= item.id %></td>
            <td><%= item.name %></td>
            <td><%= item.modelnumber %></td>
            <td><%= item.series %></td>
        </tr>
        <% }); %>
    </table>
</body>
</html>
실행 화면
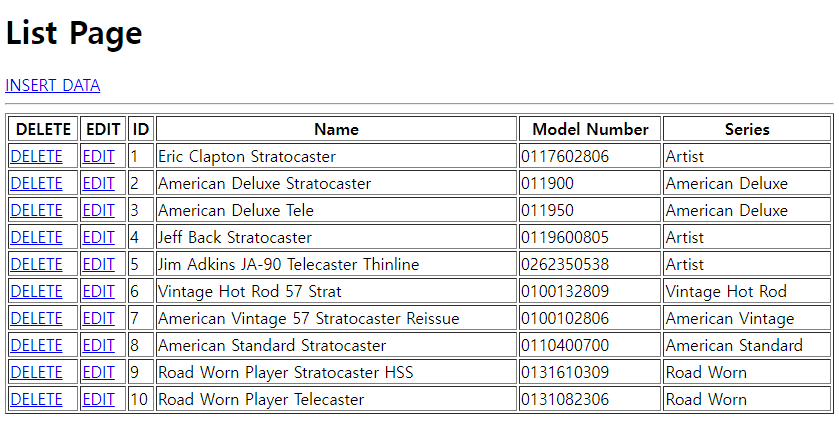
오류
TypeError: ...
Cannot read properties of undefined (reading 'forEach')
at eval (eval at compile (C:\work\node.jsworkspace\example\node_modules\ejs\lib\ejs.js:673:12), <anonymous>:12:13)
위와 같은 오류가 떴을 때
MySQL에ALTER USER 'root'@'localhost' IDENTIFIED WITH mysql_native_password BY '1234';입력해 해결한다. 참고: https://its-blog.tistory.com/99
또는 cmd창에CREATE USER 'root'@'%' IDENTIFIED BY '1234'; GRANT ALL PRIVILEGES ON company.* TO 'root'@'%'; FLUSH PRIVILEGES;
[출처] https://velog.io/@virtualplastic/Node.js-MySQL%EA%B3%BC-%EC%97%B0%EB%8F%99mysql%EB%AA%A8%EB%93%88-CRUD
본 웹사이트는 광고를 포함하고 있습니다.
광고 클릭에서 발생하는 수익금은 모두 웹사이트 서버의 유지 및 관리, 그리고 기술 콘텐츠 향상을 위해 쓰여집니다.
광고 클릭에서 발생하는 수익금은 모두 웹사이트 서버의 유지 및 관리, 그리고 기술 콘텐츠 향상을 위해 쓰여집니다.
댓글 0
| 번호 | 제목 | 글쓴이 | 날짜 | 조회 수 |
|---|---|---|---|---|
| 13 | [Next.js 개발] pm2 로 Next.js 실행하기 | 졸리운_곰 | 2025.07.01 | 532 |
| 12 | [Next.js 개발] NextAuth.js 를 이용한 자체 로그인 구현 | 졸리운_곰 | 2024.03.09 | 602 |
| 11 |
[Next.js 개발] Using Next.js Version 13
 | 졸리운_곰 | 2024.03.09 | 426 |
| 10 |
[Next.js 개발] Common Errors in Next.js and How to Resolve Them
| 졸리운_곰 | 2024.03.09 | 511 |
| 9 | [Next.js 개발] [Javascript] 현재 날짜, 시간 구하기 | 졸리운_곰 | 2024.03.09 | 483 |
| 8 |
[Next.js 개발] Using Next.js Version 13 : Next.js 버전 13 사용
| 졸리운_곰 | 2024.03.07 | 528 |
| 7 |
[Next.js 개발] [React] useEffect에서 async/await
| 졸리운_곰 | 2024.03.06 | 369 |
| 6 |
[next.js 개발] How to use fetch API in Next.js?
| 졸리운_곰 | 2024.03.05 | 387 |
| 5 | [next.js 개발] Next.js14에 Mysql연결하기 | 졸리운_곰 | 2024.03.05 | 485 |
| 4 |
[next.js 개발] How To Connect MySQL And Auth To A Next.js App
| 졸리운_곰 | 2024.03.05 | 351 |
| 3 |
[next.js 개발] Next.js 소개와 14 버전 변경사항 – React 인기 라이브러리
| 졸리운_곰 | 2024.03.05 | 573 |
| 2 | [next.js 개발] next.js API 호출시 - 수신부따로 호출하고 await 붙일것 | 졸리운_곰 | 2024.03.05 | 589 |
| 1 | [next.js 개발] [Next.js] Fetch POST body에 json 형태로 데이터 주고받기 (json형 / object형 차이) | 졸리운_곰 | 2024.03.05 | 482 |