
- 전체
- 게임 일반 (make game basics)
- 모바일 기획 및 디자인
- GameMaker Studio
- Unity3D
- Cocos2D
- 3D Engine OGRE
- 3D Engine irrlicht
- copperCube
- corona SDK
- Windows Basic Game
- BaaS (Mobile Backend)
- phnegap & cordova
- ionic & anguler
- parse (backend)
- firebase (backend)
- Game Backend Server / Opt
- web assembly
- Smart Makers
- pyGame & Ren'Py
- 머드(MUD) 게임 만들기
- Xamarin(자마린)
- flutter (플루터 앱 개발)
- construct 2 / 3
- pocketbase
- RPG Maker 시리즈
- godot engine
- playmaker(unity)
- react native
[GameMaker Studio] Neural Network in Game Maker Studio – part 2
Now that our neural net is set up we have to process the input and use the result to control our agent. On this part of the series, we are going to feed the neural net input data and then use the output data to allow our tiny arrow head to move towards a target object.
Feed Forward Script
First, we’ll create a script and name it scr_nn_feedforward. This script will perform the computation for our neural net. Feed forward, is a term describing an element or pathway within a control system that passes a controlling signal from a source to a load (source: Wikipedia).
To get the output value, we are going to pass the weighted sum of each input node to the neurons in the hidden layer. Apply an activation function and then do the same process for the output nodes.
///scr_nn_feedforward()

//Hidden Layer
    for(var i=0; i<array_length_1d(neurons); i++){
        neurons[i] = 0;
        for(var j=0; j<array_length_1d(inputs); j++){
            neurons[i] += inputs[j]*weights[i, j];
        }

        //Activation function
        neurons[i] = tanh(neurons[i]);
    }

//Output Nodes
    for(var i=0; i<array_length_1d(outputs); i++){
        outputs[i] = 0;
        for(var j=0; j<array_length_1d(neurons); j++){
            outputs[i] += neurons[j]*output_weights[i, j];
        }

        //Activation function
        outputs[i] = tanh(outputs[i]);
    }
Activation Function
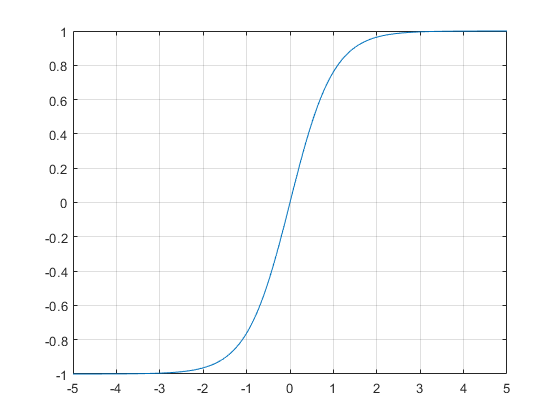
We will also need to create a script tanh(). Hyperbolic tangent is an activation function. Activation functions makes our neural net non linear enabling it to solve more complex problems. They basically converts the input signal of a neuron into an output signal which will be used by another layer, in our case, the output layer as an input signal.
There’s a variety of function we can use such as Sigmoid, Rectified Linear Unit, or Leaky ReLU. Which performs differently — each provides different output ranges.
tanh(x) script
///tanh(x)

var _x = argument0;
var _e = 2.718281828459;
var _ans = (power(_e, 2*_x)-1)/(power(_e, 2*_x)+1);

return(_ans);
In the code above, we are using the variable “_e” which hold the value for Euler’s Number. Game Maker has a built-in function for it called “exp()” but the problem is that it does not work properly with negative integers which results in an incorrect return value. So instead, we are going to do it this way.
Because of its range (-1 to 1) it can be also used for the output neuron and to turn the arrow head left or right by multiplying the output to the agent’s turn speed.
Arrow head object
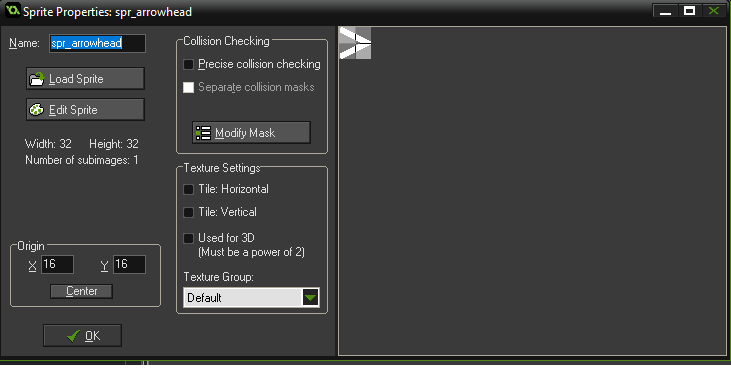
Next, we will create our arrow head object. We’ll name it obj_arrowhead. Create and add a sprite for it. I prefer to make a simple 32px v-shaped arrow.
Make sure it’s tip is is pointing to the right (0 degree) and set the origin at the center.
On create event, we are going to use the scripts we created in part 1 to initialize the neural net:
///Initialize the neural net
   scr_nn_create();

//Initialize weights
   scr_nn_initialize();
On the step event, we are going to set the input values on neural net which is the degree the arrow should turn in order to point towards our target. Then we will execute the feed forward script we created earlier:
var target = obj_target;

//Give input
   inputs[0] = angle_difference(image_angle, point_direction(x, y, target.x, target.y));

//Feed forward
   scr_nn_feedforward();
Next, on the same step event, we’ll make the arrow head turn left or right — rotating it by adding the product of outputs[0] and turn_speed to the image_angle of the arrow head.
var turn_speed = 3; //How fast it turn
var move_speed = 5; //How fast the arrow head move

    //Turn
        var left = 0, right = 0;
        image_angle += turn_speed*(outputs[0]);

    //Move
        x += lengthdir_x(move_speed, image_angle);
        y += lengthdir_y(move_speed, image_angle);
Target Object
For the target object. We’ll create an object obj_target and then add a sprite (set the origin of the sprite to center).
Step Event:
//Move self to mouse pos on click
    if(mouse_check_button_pressed(mb_left)){
        x = mouse_x;
        y = mouse_y;
    }
Main Controller Object
For the main controller object, obj_nn_main, we just want it to create a number of arrow head objects in the room and save the instance id of each one in an array for later use.
Create event:
randomize();

//Create multiple arrow heads
    for(var i=0; i<10; i++){
        nn_obj[i] = instance_create(x, y, obj_arrowhead);
    }
Setting up the Room
• Place obj_nn_main at the middle of a room.
• Place obj_target anywhere.
Run the game. If your arrow heads behave like this, it’s time to celebrate. It’s a success:


As you can see, some of the agents are able to follow the target already. The simplicity of the task makes it easy for the neural network to get the correct set of w
eights on first try. But hey, we will start simple and then use the neural net for more complicated task later on.
By now, the neural net is complete and it is able to perform an action. But we are not completely done yet. We still haven’t done anything to train it yet.
On the next part of this series, we are going to train our neural net using genetic algorithm. See you on the next post!
[출처] https://highleapstudios.wordpress.com/2019/10/05/neural-network-in-game-maker-studio-2/
광고 클릭에서 발생하는 수익금은 모두 웹사이트 서버의 유지 및 관리, 그리고 기술 콘텐츠 향상을 위해 쓰여집니다.
댓글 0
| 번호 | 제목 | 글쓴이 | 날짜 | 조회 수 |
|---|---|---|---|---|
| 3 |
[pocketbase] 포켓 베이스(Pocket Base) 빠르게 입문하기(CRUD)
 | 졸리운_곰 | 2024.08.20 | 342 |
| 2 |
[pocketbase] Flutter 및 Dart용 PocketBase 백엔드 : A PocketBase backend for Flutter and Dart
| 졸리운_곰 | 2024.08.18 | 397 |
| 1 |
[pocketbase] A PocketBase backend for Flutter and Dart : Flutter 및 Dart용 PocketBase 백엔드
| 졸리운_곰 | 2024.06.19 | 288 |