
How to create interactive terminal like website?
2020.11.08 16:09
How to create interactive terminal like website?
You can create a static website or portfolio, that looks like terminal. But it’s much better if someone that visits the webpage, can actually type some commands and get the output like in real styled terminal.
Those real terminals are usually used on GNU/Linux systems or Mac OSX but also Windows users can use PowerShell cmd.exec or on Windows 10 WSL (Windows Subsystem for Linux) which is just Linux on Windows. It’s the most used tool for any system administrators or more advanced users.
Creating such terminal styled website is easy if you have a library that will give you the look and feel of the terminal emulator, with nice API to create commands, so you don’t need to create it from scratch. We will use JavaScript library jQuery Terminal, which gives a simple, but powerful API to create interactive terminals on any website. This article will show you, how to create simple web based, interactive terminal on any html webpage.
First, you need to create basic html page where you’ll include all dependencies:
<!DOCTYPE html>
<html>
<head>
<script src="https://code.jquery.com/jquery-3.3.1.min.js"></script>
<script src="https://unpkg.com/jquery.terminal/js/jquery.terminal.min.js"></script>
<link rel="stylesheet" href="https://unpkg.com/jquery.terminal/css/jquery.terminal.min.css"/>
</head>
<body>
</body>
</html>
Then in body tag you can create your first terminal with the first command:
<script>
$('body').terminal({
    hello: function(what) {
        this.echo('Hello, ' + what +
                  '. Wellcome to this terminal.');
    }
}, {
    greetings: 'My First Terminal'
});
</script>
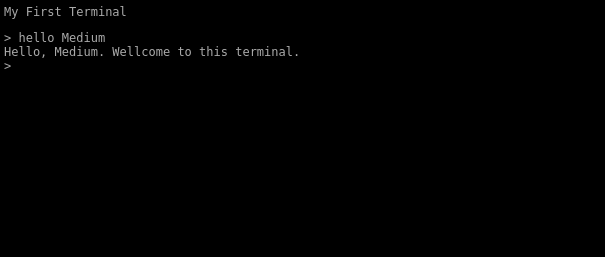
The output, if you type “hello Medium”, looks like this:

Another example command you can add to your terminal themed website, is to display an image. Following code will add command “cat”, that will display image of a kitten.
$('body').terminal({
    cat: function() {
        this.echo($('<img src="https://placekitten.com/408/287">'));
    }
});
You can also add arguments to the commands. You can add two arguments that will make specific size of the image (that will in turn create different image, this is how placekitten.com works).
$('body').terminal({
    cat: function(width, height) {
        const img = $('<img src="https://placekitten.com/' +
                      width + '/' + height + '">');
        this.echo(img);
    }
});
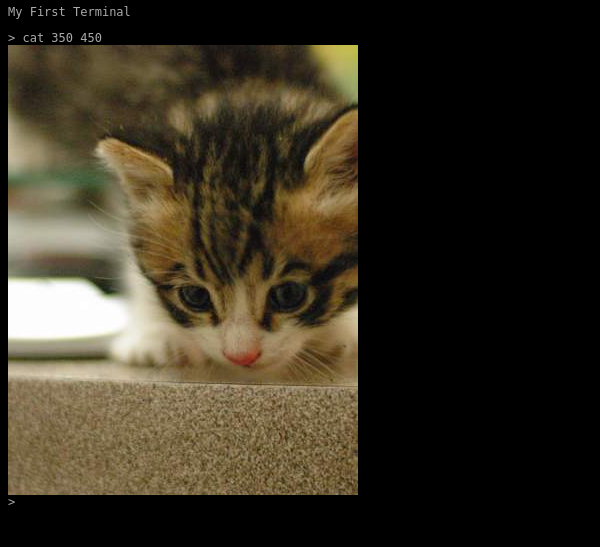
This will give you this output if you type command “cat” with specific size:

Note: make notice that there is jQuery $() call wrapper, you don’t echo just html text but you echo jQuery object. This limitation is because of security reasons. You can also use, as second argument to echo, option object with {raw: true}.
Some commands are asynchronous and take a while to calculate. Loading of the image is not instant, especially on slow networks. So you can pause the terminal while the command is processing async requests.
$('body').terminal({
    cat: function(width, height) {
        const img = $('<img src="https://placekitten.com/' +
                      width + '/' + height + '">');
        img.on('load', this.resume);
        this.pause();
        this.echo(img);
    }
}, {
    greetings: 'My First Terminal\n'
});
Another option is to return a promise from the function:
function get_image(url) {
    return new Promise(function(resolve, reject) {
        const img = $('<img src="' + url + '"'/>');
        img.on('load', () => resolve(img));
        img.on('error', reject);
    });
}$('body').terminal({
    cat: function(width, height) {
        return get_image('https://placekitten.com/' + width +
                         '/' + height);
    }
}, {
    greetings: 'My First Terminal\n'
});
And you don’t need to echo anything terminal will handle the promise. Because of this feature, you can use fetch and get output of AJAX call:
$('body').terminal({
    title: function() {
        return fetch('https://terminal.jcubic.pl')
            .then(r => r.text())
            .then(html => html.match(/<title>([^>]+)<\/title>/)[1]);
    }
}, {
    greetings: 'My First Terminal\n'
});
This command will display library’s home page title.
NOTE: if you want nice looking ASCII Art as your welcome message you can use figlet.js library see this CodePen demo.
If you want to have the same commands like in GNU/Linux or MacOSX terminal emulator, where you can add optional arguments and options, you can use function that will parse options and return nice object. The following code will show you how to do that.


$('body').terminal({
    title: function(...args) {
        const options = $.terminal.parse_options(args);
        return fetch(options.url || 'https://terminal.jcubic.pl')
            .then(r => r.text())
            .then(html => html.match(/<title>([^>]+)<\/title>/)[1]);
    }
}, {
    checkArity: false,
    greetings: 'My First Terminal\n'
});
checkArity options is important. Without this option terminal will throw error when function has any number of arguments larger than zero (this is how ES6 variable arguments works, tree dots, terminal think that the function accept 0 arguments).
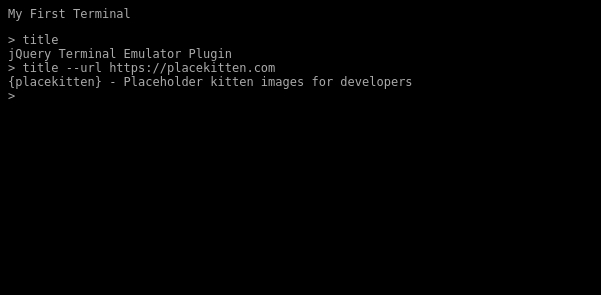
The output of this command looks like this:

Of course, you don’t need to parse options if you have just one optional argument like in this case, you can just use one argument url:
$('body').terminal({
    title: function(url) {
        return fetch(url || 'https://terminal.jcubic.pl')
            .then(r => r.text())
            .then(html => html.match(/<title>([^>]+)<\/title>/)[1]);
    }
}, {
    checkArity: false,
    greetings: 'My First Terminal\n'
});
But parsing options are useful if you need more complex commands. You can use long options in GNU style like in previous example but also short options like -u it will be accessible in options.u variable. You can read more about parsing commands and options at this wiki page.
One more feature that you want to add is tab completion. If you set up the terminal like this (there are other options that you can find in documentation) all you need is one option:
$('body').terminal({
    title: function(...args) {
        const options = $.terminal.parse_options(args);
        return fetch(options.url || 'https://terminal.jcubic.pl')
            .then(r => r.text())
            .then(html => html.match(/<title>([^>]+)<\/title>/)[1]);
    }
}, {
    checkArity: false,
    completion: true,
    greetings: 'My First Terminal\n'
});
Now when you type “t” and press tab key on your keyboard it will complete the command “title” so you don’t need to type the whole command by hand.
You probably also want some “help” command that will list available commands.
And this is it. With this as base, you should be able to write simple terminal of your own. Features of jQuery Terminal library not discussed in this article include:
- Formatting and Syntax Highlighting.
- JSON-RPC where everything is on the server (found in Interpreter section on the wiki).
- Changing prompt.
- Masking passwords.
- Authentication.
- Combining commands with Pipe operator like in unix terminal. See Demo.
- Keyboard shortcuts (list of build in you can find here).
- Reading text from users.
- Handling Emoji (if system don’t do that out of the box like Windows10), see Demo.
- Executing commands from JavaScript.
- Invoking commands and terminal methods from Server.
- Updating lines.
- Saving state in URL hash and execute saved commands.
You can also take a look at the big list of creative examples and websites or single webpages that use the library in Examples Page. That include for example animations or 404 page that give commands that you can explore (like Wikipedia articles or Jargon File: also known as Hacker Dictionary, when in printed form, or as hackers would say dead tree version).
And at the end, I want to show you a demo, that give you vintage looking terminal, like the old CRT displays from beginning of computers.

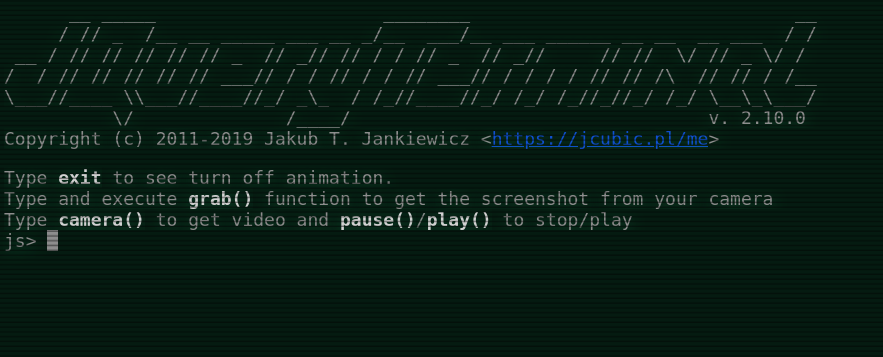
You can find the code in this CodPen Demo. You can also create the terminal in window, it don’t need to be full screen.
[출처] https://itnext.io/how-to-create-interactive-terminal-like-website-888bb0972288
광고 클릭에서 발생하는 수익금은 모두 웹사이트 서버의 유지 및 관리, 그리고 기술 콘텐츠 향상을 위해 쓰여집니다.
