
Let’s look at the small, yet powerful JavaScript UI library ReactJS in action, as we build a basic web application. This app is powered by Python 3 and the Flask framework in the back-end and React in the front. In addition, we will use gulp.js (task runner), bower (front-end package manager), and Browserify (JavaScript dependency bundler).
- Part 1 – getting started (current)
- Part 2 – developing a dynamic search tool
Updates:
- 05/22/2016: Upgraded to the latest version of React (v15.0.1).
React Explained
React is a library, not a framework. Unlike client-side MVC frameworks, like Backbone, Ember, and AngularJS, it makes no assumptions about your tech stack so you can easily integrate it into a new or legacy code base. It’s often used to manage specific areas of an application’s UI, rather than the entire UI.
React’s only concern is with the user interface (the ‘V’ in MVC), which is defined by a hierarchy of modular view Components that couple static markup with dynamic JavaScript. If you’re familiar with Angular, these Components are similar to Directives. Components use an XML-like syntax called JSX that transcompiles down to vanilla JavaScript.
Since Components are defined in a hierarchical order, you don’t have to re-render the entire DOM when a state changes. Instead, it uses a Virtual DOM that only re-renders the individual Components after the state has changed, at blazingly fast speeds!
Be sure to review the Getting Started guide and the excellent Why did we build React? blog post from the official React documentation.
Project Setup
Let’s start with what we know: Flask.
Download the boilerplate code from the repository, extract the files, create then activate a virtualenv, and install the requirements: pip install -r requirements.txt
Finally, let’s run the app and start the show:
1
|
|
React – round one
Let’s look at a simple Component to get our feet wet.
The Component: Moving from Static to React
We are going to add this JSX script to our hello.html. Take a minute to check it out.
1 2 3 4 5 6 7 8 9 10 11 12 13 14 15 16 |
|
What’s going on?
- We created a Component by calling
createClass(), then assigned it to the variablerealPython.React.createClass()takes a single argument, an object. - Inside this object we added a
render()function that declaratively updates the DOM when called. - Next comes a return value of
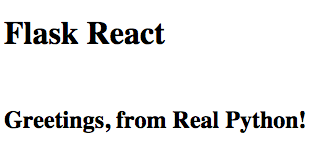
<h2>Greetings, from Real Python!</h2>, in JSX, which represents the actual HTML element that will be added to the DOM. - Finally,
ReactDOM.render()instantiates therealPythonComponent and injects the markup into a DOM element with anIDselector ofcontent.
Refer to the official docs for more info.
The Transformation
What’s next? Well, we need to “transform”, or transcompile, the JSX to vanilla JavaScript. This is easy. Update hello.html like so:
1 2 3 4 5 6 7 8 9 10 11 12 13 14 15 16 17 18 19 20 21 22 23 24 25 26 27 28 29 30 31 32 33 34 35 36 |
|
Here we addded the helloWorld Component to the template along with the following scripts-
1 2 3 |
|
-the latter of which, JSXTransformer.js, searches for <script> tags with type="text/jsx" and then “transforms” the JSX syntax into vanilla JavaScript within the browser. Please note that this tool is deprecated and has been replaced by Browserify, which we will set up later on.
Notice how we did not add jQuery since it is not required for React.
That’s it. Run the Flask development server and check out the results in the browser at http://localhost:5000/hello.
Bower
Instead of using the pre-built JavaScript files, from the CDN, let’s use bower to better (IMHO) manage those dependencies. Bower is a powerful package manager for front-end dependencies – i.e., jQuery, Bootstrap, React, Angular, Backbone.
Make sure you have Node and npm installed before moving on.
Initialization
Install bower with npm:


1
|
|
npm is another package manager used to manage Node modules. Unlike PyPI/pip, the default behavior of npm is to install dependencies at the local level. The -g flag is used to override that behavior to install bower globally since you will probably use bower for a number of projects.
bower.json
Bower uses a file called bower.json to define project dependencies, which is similar to a requirements.txt file. Run the following command to interactively create this file:
1
|
|
Just accept the defaults for now. Once done, your bower.json file should look something like this:
1 2 3 4 5 6 7 8 9 10 11 12 13 14 15 16 17 |
|
For more on the bower.json and the
initcommand, check out the official documentation.
npm
Like the bower.json file, npm utilizes a similar file, called package.json to define project-specific dependencies. You can also create it interactively:
1
|
|
Againm, accept the defaults:
1 2 3 4 5 6 7 8 9 10 11 12 13 14 15 16 17 18 19 |
|
Now, let’s add bower to the npm dependency file:
1
|
|
Configuration
Along with the bower.json file, we can define configuration settings in a file called .bowerrc. Create the file now within the project root. Your project structure should now look like this:
1 2 3 4 5 6 7 8 9 10 11 12 13 14 |
|
The standard behavior is for bower to install packages in a directory called “bower_components” in the project root. We need to override this behavior since Flask needs access to the packages within the static directory. Thus, add the following JSON to the file so that bower automatically installs the file in the correct directory:
1 2 3 |
|
Installation
Let’s install Bootstrap and React. This can be done in one of two ways:
- Run
bower install <package_name> --savefor each package (the--saveflag adds the dependencies (name and version) to the bower.json file.). - Update the bower.json file directly with each dependency (again, name and version) and then run
bower installto install all dependencies from the file.
Since we (err, I) know the versions already, let’s use the second method. Update the bower.json file like so-
1 2 3 4 5 6 7 8 9 10 11 12 13 14 15 16 17 18 19 20 21 |
|
-and then run bower install:
1 2 3 4 5 6 7 8 9 10 11 12 13 14 15 16 17 |
|
You should now see the “project/static/bower_components” directory.
Now you can pull in all the required dependencies with pip, npm, and bower after cloning the repo:
1 2 3 |
|
Test
Update the React scripts in hello.html:
1 2 |
|
Test out the app to make sure it still works.
Next Steps
With the tools set up, we’ll move back to React and develop a more robust app in the second part. Cheers!
[출처] https://realpython.com/blog/python/the-ultimate-flask-front-end/
