
- 전체
- android studio
- Android SDK
- Android NDK
- Android ADK
- Android Etc. Lib.
- Android dalvik VM
- Android 보안
- PhoneGap
- AOSP 개발
- MIT App Inventor 2
- kivy (python)
- ionic framework
- Kotlin (코틀린)
- React Native
android studio 안드로이드의 MVC, MVP, MVVM 종합 안내서
2019.01.06 14:03
안드로이드의 MVC, MVP, MVVM 종합 안내서
MVC vs. MVP vs. MVVM
안드로이드 앱을 논리적 구성 요소로 체계화하려는 베스트 프랙티스 접근법은 최근 몇 년간 지속적으로 발전했습니다. 모델 뷰 컨트롤러(Model View Controller, MVC) 패턴을 초석으로 보다 모듈화되고 테스트 가능한 패턴으로 발전해 왔죠.
모델 뷰 프리젠터(Model View Presenter, MVP)와 모델 뷰 뷰모델(Model View ViewModel, MVVM)은 MVC을 대체하기 위해 가장 많이 쓰이는 두 가지 대안책입니다. 하지만 개발자들은 어떤 것이 안드로이드에 더 적합한지 의견을 일치하지 못했습니다. 이 중 한 쪽을 강하게 지지하는 많은 블로그 포스트가 있지만 객관적인 기준에 대한 의견의 논증으로 바뀌기 일쑤였습니다. 따라서 이 글은 어떤 접근 방식이 좋을지 독자들이 객관적 정보에 입각한 결정을 내릴 수 있도록 모든 세 패턴의 가치와 잠재적 문제점에 대해 다루겠습니다.
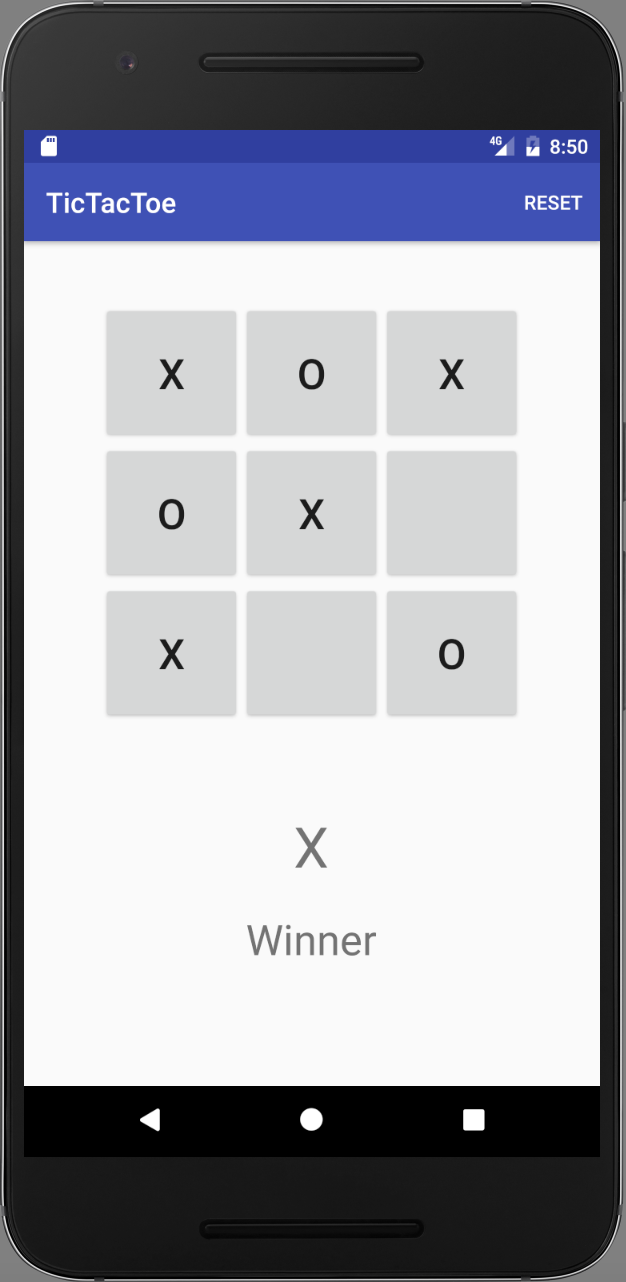
MVC, MVP, MVVM 패턴을 순서대로 설명하면서 간단한 Tic-Tac-Toe 게임을 예로 들어 각 패턴을 실제로 사용하는 방법을 보여드리겠습니다. 각 섹션 첫머리에서 주요 구성 요소와 책임에 대한 공통 정의부터 시작해서 이들이 Tic-Tac-Toe 게임에 어떻게 적용되는지 살펴볼 예정입니다.
데모 소스코드는 GitHub에서 볼 수 있습니다. git checkout mvc, git checkout mvp, git checkout mvvm와 같이 섹션 브랜치로 체크아웃해서 예제 코드를 확인하세요.
MVC
모델, 뷰, 컨트롤러 접근 방식은 애플리케이션을 매크로 수준에서 세 가지 책임 집합으로 분리합니다.
모델(Model)
모델은 Tic-Tac-Toe 앱의 데이터 + 상태 + 비즈니스 로직 입니다. 말하자면 앱의 두뇌 역할이죠. 뷰나 컨트롤러에 묶이지 않으므로 많은 곳에서 재사용할 수 있습니다.
뷰(View)
뷰는 모델의 표현 입니다. UI를 그리고 사용자가 앱과 상호작용할 때 컨트롤러와 통신하는 책임을 맡습니다. MVC 구조에서 뷰는 하위 모델에 대한 지식이나 상태에 대한 이해가 없고, 사용자가 버튼을 클릭하거나 값을 입력하는 등의 행동을 할 때 무엇을 해야 하는지 모른다는 점에서 상당히 “멍청합니다”. 그 이유는 뷰가 덜 알수록 모델에 종속되지 않으므로 보다 변화에 유연할 수 있기 때문이죠.
컨트롤러(Controller)
컨트롤러는 앱을 묶어주는 접착제 입니다. 애플리케이션에서 발생하는 일을 담당하는 마스터 컨트롤러 역할이죠. 뷰가 컨트롤러에게 사용자가 버튼을 눌렀다고 알리면, 컨트롤러는 그에 따라 어떻게 모델과 상호작용할지 결정합니다. 모델에서 데이터가 변화되는 것에 따라 컨트롤러는 뷰의 상태를 적절하게 업데이트하도록 결정할 수 있습니다. 안드로이드 앱에서는 컨트롤러가 주로 액티비티나 프래그먼트로 표현됩니다.
Tic-Tac-Toe 앱의 상위 레벨과 각 부분을 담당하는 클래스는 다음과 같습니다.
컨트롤러를 더 자세히 들여다 볼까요?
public class TicTacToeActivity extends AppCompatActivity {

    private Board model;

    /* View Components referenced by the controller */
    private ViewGroup buttonGrid;
    private View winnerPlayerViewGroup;
    private TextView winnerPlayerLabel;

    /**
     * In onCreate of the Activity we lookup & retain references to view components
     * and instantiate the model.
     */
    @Override
    protected void onCreate(Bundle savedInstanceState) {
        super.onCreate(savedInstanceState);
        setContentView(R.layout.tictactoe);
        winnerPlayerLabel = (TextView) findViewById(R.id.winnerPlayerLabel);
        winnerPlayerViewGroup = findViewById(R.id.winnerPlayerViewGroup);
        buttonGrid = (ViewGroup) findViewById(R.id.buttonGrid);

        model = new Board();
    }

    /**
     * Here we inflate and attach our reset button in the menu.
     */
    @Override
    public boolean onCreateOptionsMenu(Menu menu) {
        MenuInflater inflater = getMenuInflater();
        inflater.inflate(R.menu.menu_tictactoe, menu);
        return true;
    }
    /**
     *  We tie the reset() action to the reset tap event.
     */
    @Override
    public boolean onOptionsItemSelected(MenuItem item) {
        switch (item.getItemId()) {
            case R.id.action_reset:
                reset();
                return true;
            default:
                return super.onOptionsItemSelected(item);
        }
    }

    /**
     *  When the view tells us a cell is clicked in the tic tac toe board,
     *  this method will fire. We update the model and then interrogate it's state
     *  to decide how to proceed.  If X or O won with this move, update the view
     *  to display this and otherwise mark the cell that was clicked.
     */
    public void onCellClicked(View v) {

        Button button = (Button) v;

        int row = Integer.valueOf(tag.substring(0,1));
        int col = Integer.valueOf(tag.substring(1,2));

        Player playerThatMoved = model.mark(row, col);

        if(playerThatMoved != null) {
            button.setText(playerThatMoved.toString());
            if (model.getWinner() != null) {
                winnerPlayerLabel.setText(playerThatMoved.toString());
                winnerPlayerViewGroup.setVisibility(View.VISIBLE);
            }
        }

    }

    /**
     * On reset, we clear the winner label and hide it, then clear out each button.
     * We also tell the model to reset (restart) it's state.
     */
    private void reset() {
        winnerPlayerViewGroup.setVisibility(View.GONE);
        winnerPlayerLabel.setText("");

        model.restart();

        for( int i = 0; i < buttonGrid.getChildCount(); i++ ) {
            ((Button) buttonGrid.getChildAt(i)).setText("");
        }
    }
}
평가
MVC는 훌륭하게 모델과 뷰를 분리해줍니다. 모델이 어디에도 종속되지 않으며, 뷰는 유닛 테스트 레벨에서 그다지 테스트할 것이 거의 없어서 쉽게 모델을 테스트할 수 있습니다. 하지만 컨트롤러에 몇 가지 문제점이 존재합니다.
컨트롤러 문제점
- 테스트 용이성 - 컨트롤러가 안드로이드 API에 깊게 종속되므로 유닛 테스트가 어렵습니다.
- 모듈화 및 유연성 - 컨트롤러가 뷰에 단단히 결합되며, 뷰의 확장일 수도 있습니다. 뷰를 변경하면 컨트롤러로 돌아가서 변경해야 합니다.
- 유지 보수 - 시간이 지남에 따라 보다 많은 코드가 컨트롤러로 모이면서 비대해지고 문제가 발생하기 쉬워집니다. 특히 anemic models 모델을 사용하는 앱에서라면 더욱 그렇습니다.
어떻게 이런 문제를 해결할 수 있을까요? MVP가 해결책이 될 수 있을까요?
MVP
MVP는 컨트롤러의 책임에 묶이지 않고도 뷰와 액티비티가 자연스럽게 결합하도록 합니다. 더 자세한 내용은 이후에 다루도록 하고, 먼저 MVC와 대비되는 공통 책임 정의부터 시작하겠습니다.
모델(Model)
MVC와 동일하며 변화가 없습니다.
뷰(View)
유일한 변화는 액티비티/프래그먼트가 이제 뷰의 일부로 간주된다는 것입니다. 따라서 이들이 서로에게 연관되는 자연스러운 현상을 극복할 필요가 없습니다. 액티비티가 뷰 인터페이스를 구현해서 프리젠터가 코드를 만들 인터페이스를 갖도록 하는 것이 좋습니다. 이렇게 하면 특정 뷰와 결합되지 않고 가상 뷰를 구현해서 간단한 유닛 테스트를 실행할 수 있죠.
프리젠터(Presenter)
본질적으로는 MVC의 컨트롤러와 같지만, 뷰에 연결되는 것이 아니라 그냥 인터페이스라는 점이 다릅니다. 이에 따라 MVC가 가진 테스트 가능성 문제와 함께 모듈화/유연성 문제 역시 해결합니다. 사실 극단적으로 MVP를 따르는 사람들은 프리젠터가 절대로 어떤 안드로이드 API나 코드라도 참조해서는 안된다고 주장합니다.
실제 앱에서는 어떤 모습인지 살펴 볼까요?
아래 코드에서 프리젠터를 살펴보면, 각 행동의 의도가 더 단순하고 명확해진 것을 볼 수 있습니다. 뷰에게 무언가를 표시하는 방법을 지시하는 대신, 표시할 내용만 전달합니다.


public class TicTacToePresenter implements Presenter {

    private TicTacToeView view;
    private Board model;

    public TicTacToePresenter(TicTacToeView view) {
        this.view = view;
        this.model = new Board();
    }

    // Here we implement delegate methods for the standard Android Activity Lifecycle.
    // These methods are defined in the Presenter interface that we are implementing.
    public void onCreate() { model = new Board(); }
    public void onPause() { }
    public void onResume() { }
    public void onDestroy() { }

    /**
     * When the user selects a cell, our presenter only hears about
     * what was (row, col) pressed, it's up to the view now to determine that from
     * the Button that was pressed.
     */
    public void onButtonSelected(int row, int col) {
        Player playerThatMoved = model.mark(row, col);

        if(playerThatMoved != null) {
            view.setButtonText(row, col, playerThatMoved.toString());

            if (model.getWinner() != null) {
                view.showWinner(playerThatMoved.toString());
            }
        }
    }

    /**
     *  When we need to reset, we just dictate what to do.
     */
    public void onResetSelected() {
        view.clearWinnerDisplay();
        view.clearButtons();
        model.restart();
    }
}
액티비티를 프리젠터에 묶지 않고 이 작업을 수행하려면 액티비티가 구현할 인터페이스를 생성해야 합니다. 테스트에서는 이 인터페이스를 기반으로 한 가상 객체를 만들어서 프리젠터의 뷰와의 상호작용을 테스트합니다.
public interface TicTacToeView {
    void showWinner(String winningPlayerDisplayLabel);
    void clearWinnerDisplay();
    void clearButtons();
    void setButtonText(int row, int col, String text);
}
평가
MVC 보다 깔끔한 형태입니다. 안드로이드 고유의 뷰와 API에 연결되지 않으므로 TicTacToeView 인터페이스를 구현했다면 어떤 뷰와도 작업할 수 있어서 프리젠터 로직을 쉽게 테스트할 수 있습니다.
프리젠터 문제점
- 유지 보수 - 컨트롤러처럼 프리젠터에도 시간이 지남에 따라 추가 비즈니스 로직이 모이는 경향이 있습니다. 시간이 흐른 후 개발자는 거대하고 다루기 어려운데다 문제가 발생하기 쉽고 분리하기도 어려운 프리젠터를 발견하게 돼죠.
물론 신중한 개발자라면 세월에 따른 앱의 변화에 맞춰 이 문제를 지속적으로 해결해나갈 수 있을 겁니다. 하지만 MVVM은 시작할 때부터 이 문제를 해결하도록 도움을 줄 수 있습니다.
MVVM
안드로이드의 데이터 바인딩을 사용하는 MVVM은 테스트와 모듈화가 쉽고 뷰와 모델을 연결하기 위해 사용해야 하는 연결 코드를 줄일 수 있다는 장점이 있습니다.
MVVM의 구성 요소를 살펴보겠습니다.
모델(Model)
MVC와 동일하며 변화가 없습니다.
뷰(View)
뷰는 뷰모델에 의해 보여지는 옵저버블 변수와 액션에 유연하게 바인딩됩니다. 자세한 내용은 이후에 살펴보죠.
뷰모델(ViewModel)
뷰모델은 모델을 래핑하고 뷰에 필요한 옵저버블 데이터를 준비합니다. 또한 뷰가 모델에 이벤트를 전달할 수 있도록 훅(hook)을 준비합니다. 그러면서도 뷰모델이 뷰에 종속되지는 않습니다.
Tic Tac Toe에서 상위 구조를 살펴볼까요?
뷰모델부터 시작해서 어떤 부분이 이동했는지 자세히 보겠습니다.
public class TicTacToeViewModel implements ViewModel {

    private Board model;

    /*
     * These are observable variables that the viewModel will update as appropriate
     * The view components are bound directly to these objects and react to changes
     * immediately, without the ViewModel needing to tell it to do so. They don't
     * have to be public, they could be private with a public getter method too.
     */
    public final ObservableArrayMap<String, String> cells = new ObservableArrayMap<>();
    public final ObservableField<String> winner = new ObservableField<>();

    public TicTacToeViewModel() {
        model = new Board();
    }

    // As with presenter, we implement standard lifecycle methods from the view
    // in case we need to do anything with our model during those events.
    public void onCreate() { }
    public void onPause() { }
    public void onResume() { }
    public void onDestroy() { }

    /**
     * An Action, callable by the view.  This action will pass a message to the model
     * for the cell clicked and then update the observable fields with the current
     * model state.
     */
    public void onClickedCellAt(int row, int col) {
        Player playerThatMoved = model.mark(row, col);
        cells.put("" + row + col, playerThatMoved == null ?
                                                     null : playerThatMoved.toString());
        winner.set(model.getWinner() == null ? null : model.getWinner().toString());
    }

    /**
     * An Action, callable by the view.  This action will pass a message to the model
     * to restart and then clear the observable data in this ViewModel.
     */
    public void onResetSelected() {
        model.restart();
        winner.set(null);
        cells.clear();
    }

}
뷰에서 몇몇 요약본을 살펴보면서 이들 변수와 동작이 어떻게 결합되는지 알아보겠습니다.
<!--
    With Data Binding, the root element is <layout>.  It contains 2 things.
    1. <data> - We define variables to which we wish to use in our binding expressions and
                import any other classes we may need for reference, like android.view.View.
    2. <root layout> - This is the visual root layout of our view.  This is the root xml tag in the MVC and MVP view examples.
-->
<layout xmlns:android="http://schemas.android.com/apk/res/android"
    xmlns:tools="http://schemas.android.com/tools"
    xmlns:app="http://schemas.android.com/apk/res-auto">

    <!-- We will reference the TicTacToeViewModel by the name viewModel as we have defined it here. -->
    <data>
        <import type="android.view.View" />
        <variable name="viewModel" type="com.acme.tictactoe.viewmodel.TicTacToeViewModel" />
    </data>
    <LinearLayout...>
        <GridLayout...>
            <!-- onClick of any cell in the board, the button clicked will invoke the onClickedCellAt method with its row,col -->
            <!-- The display value comes from the ObservableArrayMap defined in the ViewModel  -->
            <Button
                style="@style/tictactoebutton"
                android:onClick="@{() -> viewModel.onClickedCellAt(0,0)}"
                android:text='@{viewModel.cells["00"]}' />
            ...
            <Button
                style="@style/tictactoebutton"
                android:onClick="@{() -> viewModel.onClickedCellAt(2,2)}"
                android:text='@{viewModel.cells["22"]}' />
        </GridLayout>

        <!-- The visibility of the winner view group is based on whether or not the winner value is null.
             Caution should be used not to add presentation logic into the view.  However, for this case
             it makes sense to just set visibility accordingly.  It would be odd for the view to render
             this section if the value for winner were empty.  -->
        <LinearLayout...
            android:visibility="@{viewModel.winner != null ? View.VISIBLE : View.GONE}"
            tools:visibility="visible">

            <!-- The value of the winner label is bound to the viewModel.winner and reacts if that value changes -->
            <TextView
                ...
                android:text="@{viewModel.winner}"
                tools:text="X" />
            ...
        </LinearLayout>
    </LinearLayout>
</layout>
Pro Tip: tools 속성을 많이 사용하세요. 위 예제에서는 winner와 visibility 설정에 사용했습니다. 이를 설정하지 않으면 디자인 타임에 일어나는 일을 파악하기 어려울 수 있습니다.
MVVM과 데이터 바인딩에 대한 추가 설명: 데이터 바인딩으로 할 수 있는 일은 더 많습니다. 안드로이드 데이터 바인딩(영문)문서를 꼭 확인하시고 이 강력한 도구를 배우시길 추천합니다. 글 마지막에서 MVVM과 데이터 바인딩의 예제를 보여주는 Google Android Architecture Blueprints 프로젝트 페이지의 링크를 소개드리겠습니다.
평가
뷰에 대한 의존성이 전혀 없으므로 유닛 테스트가 더 쉬워집니다. MVP 패턴에서처럼 테스트를 위한 가상 뷰를 만들 필요 없이, 테스트할 때 모델이 변경되는 시점에 옵저버블 변수가 제대로 설정됐는지 확인하면 됩니다.
MVVM 문제점
- 유지 관리 - 뷰가 변수와 표현식 모두에 바인딩될 수 있으므로 시간이 지남에 따라 관계없는 프리젠테이션 로직이 늘어나 XML에 코드를 추가하게 될 수 있습니다. 이를 방지하려면 뷰 바인딩 표현식에서 값을 계산하거나 파생하지 말고 항상 뷰모델에서 직접 값을 가져오는 것이 좋습니다. 이 방식으로 계산을 유닛 테스트할 수 있습니다.
결론
MVC에 비해 MVP와 MVVM은 앱을 보다 모듈화하고 구성 요소를 단일 용도로 분해한다는 점에서 발전된 모습이지만, 이 구조 때문에 앱이 더 복잡해질 수도 있습니다. 한 두 개의 화면으로만 구성된 간단한 앱이라면 MVC만으로도 충분합니다. 한편 데이터 바인딩을 사용하는 MVVM은 보다 반응이 빠른 프로그래밍 모델을 따르고 적은 코드를 사용한다는 점에서 매력적입니다.
그렇다면 어떤 패턴이 여러분에게 적합할까요? MVP와 MVVM 중 하나를 고른다면 개인 취향에 따른 많은 결정 사항이 있겠지만, 장단점을 파악하기 위해서는 실용적인 관점에서 보는 것이 좋습니다.
실제 개발에서 사용하는 MVP와 MVVM 예제를 더 보고 싶다면 Google Architecture Blueprints 프로젝트를 방문해 보세요. 또한 적절하게 MVP를 구현하는 것에 대해 자세히 다루는 블로그 포스트도 많이 있습니다.
[출처] https://academy.realm.io/kr/posts/eric-maxwell-mvc-mvp-and-mvvm-on-android/
광고 클릭에서 발생하는 수익금은 모두 웹사이트 서버의 유지 및 관리, 그리고 기술 콘텐츠 향상을 위해 쓰여집니다.