
- 게임이나 물리학 시뮬레이션처럼 계산 집약적인 애플리케이션을 위해 기기의 성능을 조금이라도 더 짜내야 하는 경우
- 자신이나 다른 개발자의 C 또는 C++ 라이브러리를 재사용해야 하는 경우
- 전체
- android studio
- Android SDK
- Android NDK
- Android ADK
- Android Etc. Lib.
- Android dalvik VM
- Android 보안
- PhoneGap
- AOSP 개발
- MIT App Inventor 2
- kivy (python)
- ionic framework
- Kotlin (코틀린)
- React Native
android studio Android 에서 Opencv 설치하고 간단한 예제 실행해보기!!
2020.10.31 19:07
Android 에서 Opencv 설치하고 간단한 예제 실행해보기!!
http://webnautes.tistory.com/1054
블로그에 있는 포스팅을 따라 하면서 opencv 를 설치하겠습니다.
들어가기 전에 용어를 정리하겠습니다~
NDK : NDK(Native Development Kit)는 Android 앱에서 C 및 C++ 코드를 활용할 수 있게 해주는 도구 집합입니다. NDK를 사용하여 자신의 소스 코드로 앱을 빌드하거나 기존의 미리 빌드된 라이브러리를 이용할 수 있습니다.
NDK는 대부분의 초보 Android 프로그래머에게는 알맞지 않고, 대부분의 Android 앱 유형에는 별다른 가치가 없습니다. NDK를 사용하면 개발 프로세스가 불가피하게 복잡해지는데, 그런 단점을 감수하고 굳이 NDK를 사용하지 않아도 되는 경우가 많습니다. 하지만 다음과 같이 하려는 경우에는 유용할 수 있습니다.
OpenCV는 c/c++ or python 을 이용하기 때문에, c/c++ library를 가져오기 위해서 NDK 가 필요합니다.
CMake : CMake(Cross Platform Make)는 멀티플랫폼으로 사용할 수 있는 Make의 대용품을 만들기 위한 오픈소스 프로젝트로 키트웨어와 인사이트 콘솔티엄에서 만들었다. 스스로 기존의 Make의 과정을 수행하지는 않고 지정한 운영 체제에 맞는 Make 파일(마이크로소프트 윈도에서는 솔루션 파일)의 생성만을 수행하기 때문에 Meta Make라고도 불린다. 가장 큰 이점은 유닉스 계열 OS 중심이던 기존의 Make와는 달리 한번 작성해 두면 유닉스 계열은 물론, 마이크로소프트 윈도 계열의 프로그래밍 도구도 지원한다는 것이다.
- 설치 시작
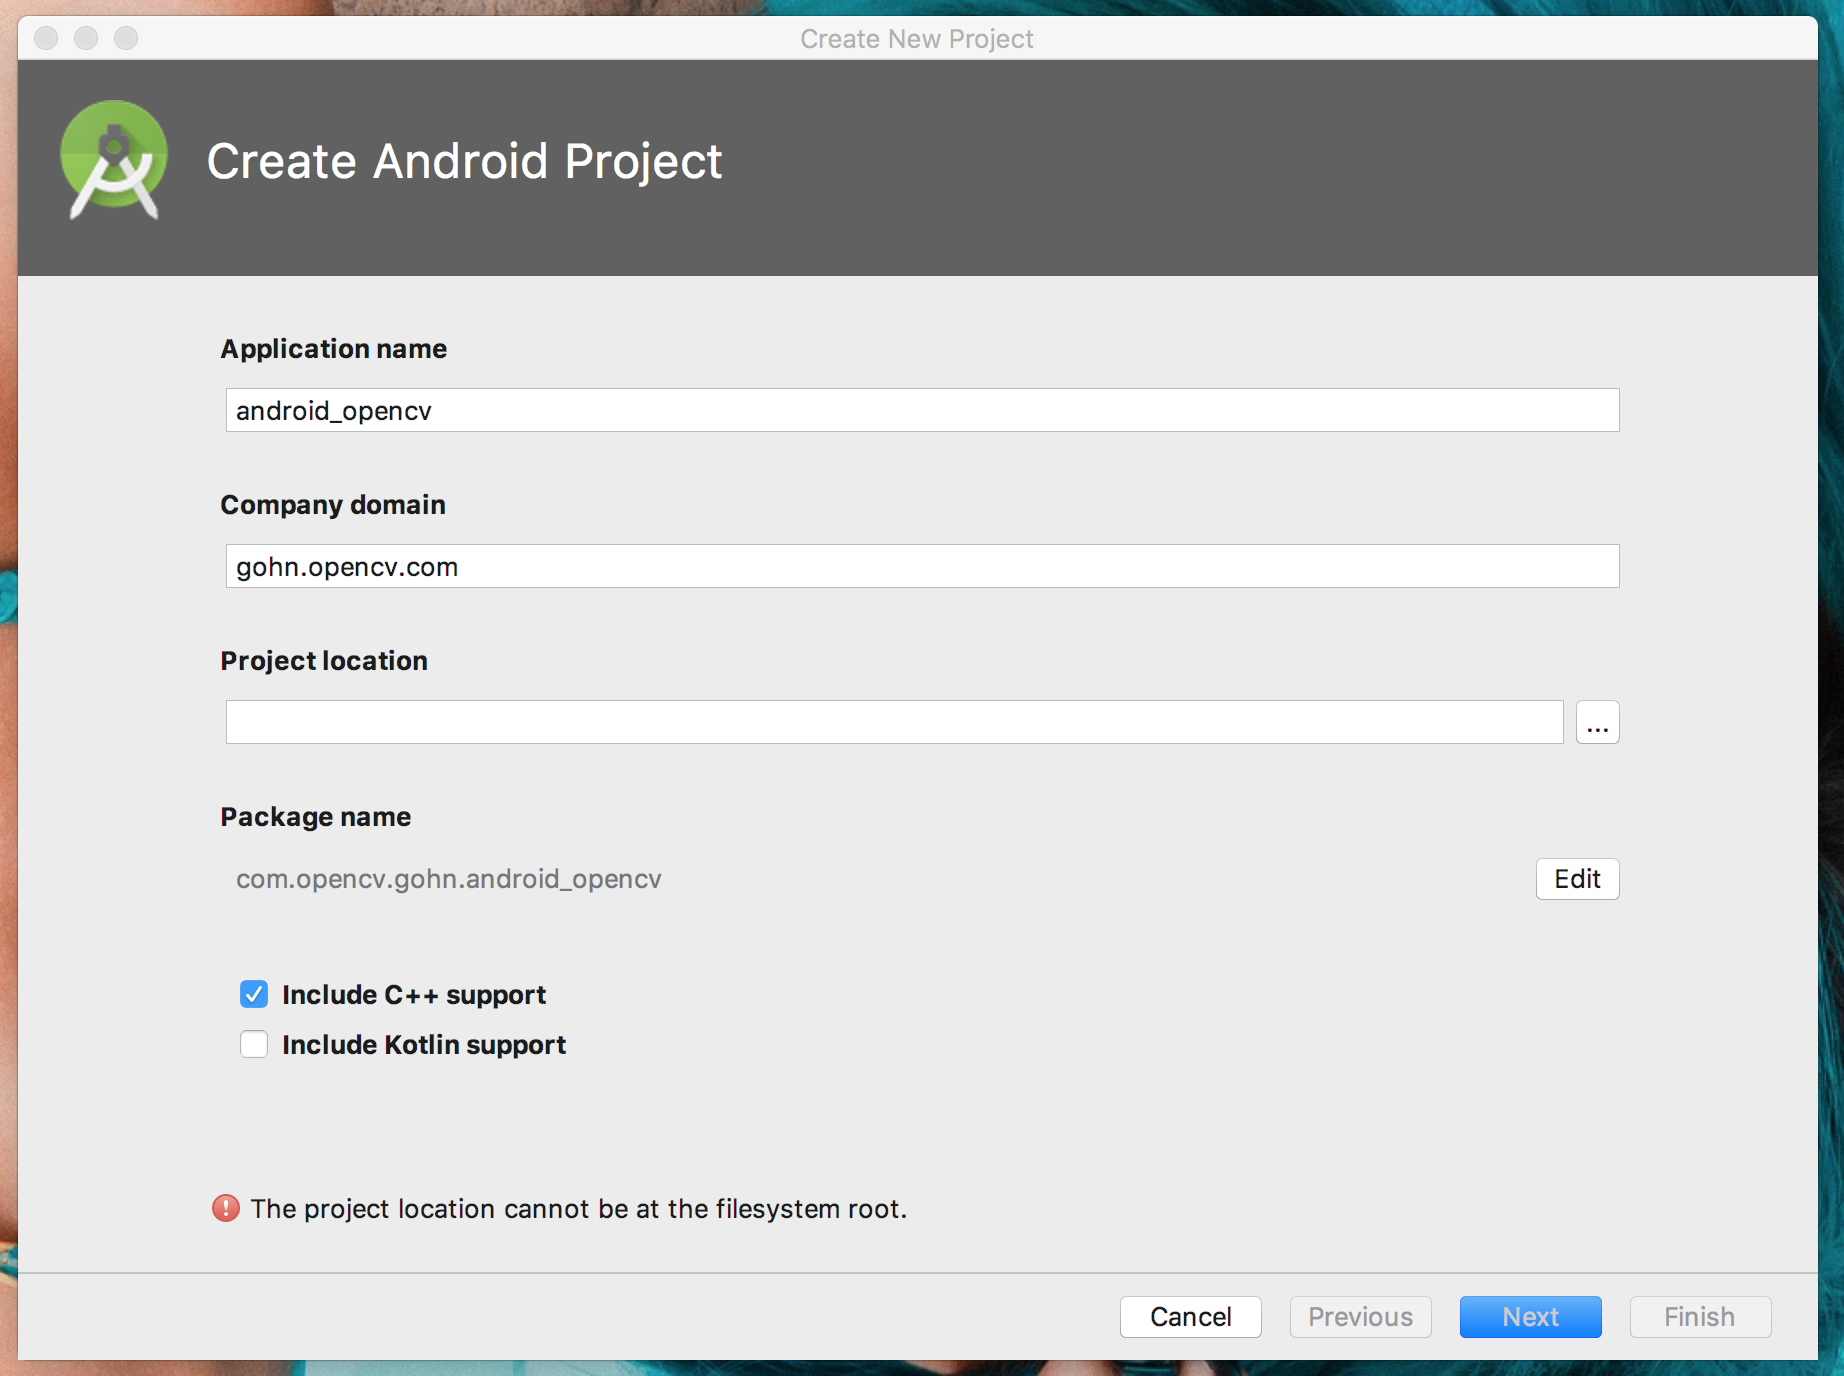
프로젝트 생성을 하면서 Include C++ support 를 체크합니다.

플랫폼은 14 이상이 필요하다고 합니다.
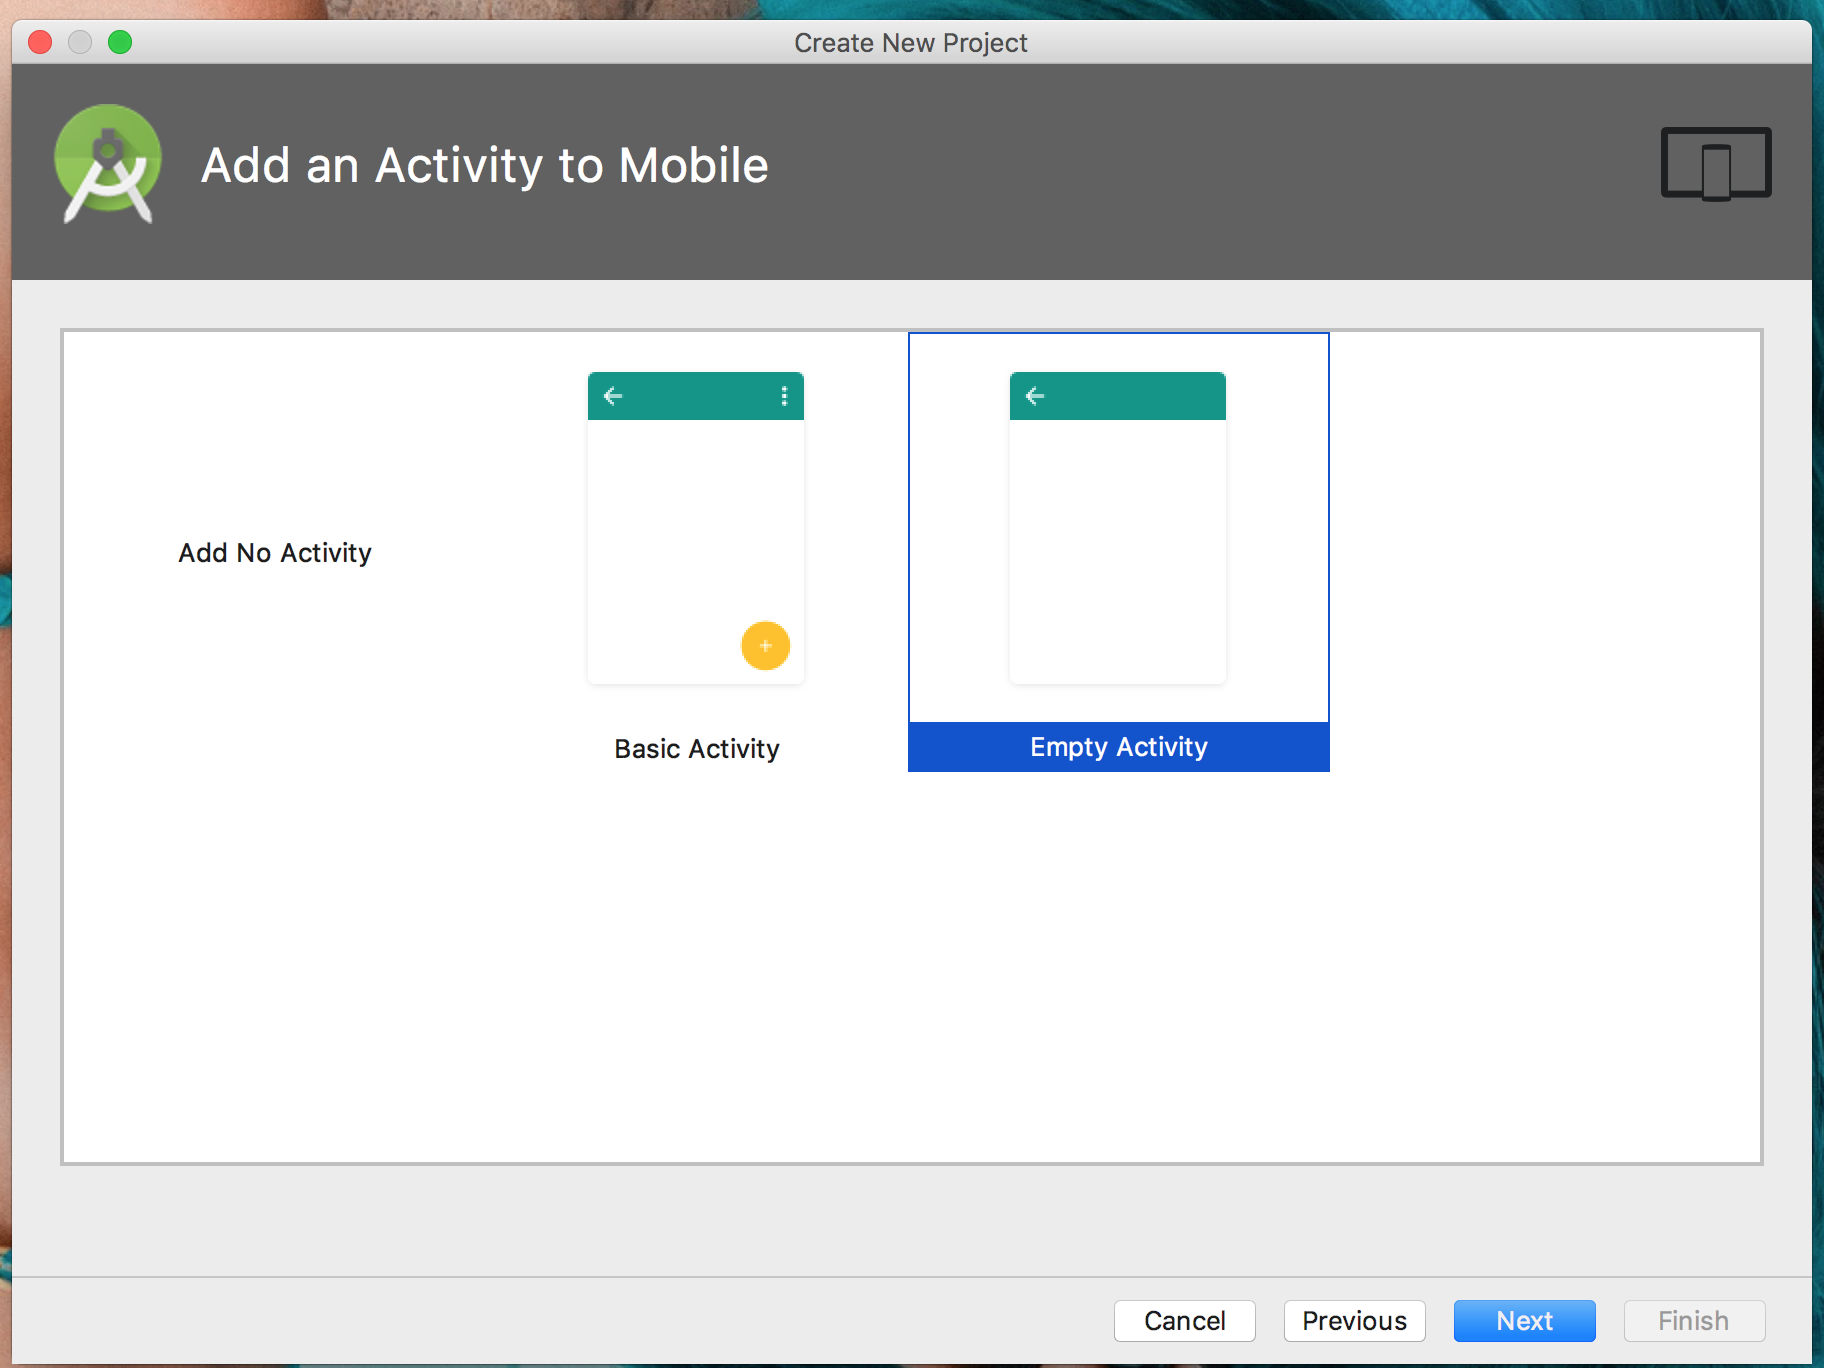
Empty Activity 를 생성한다.
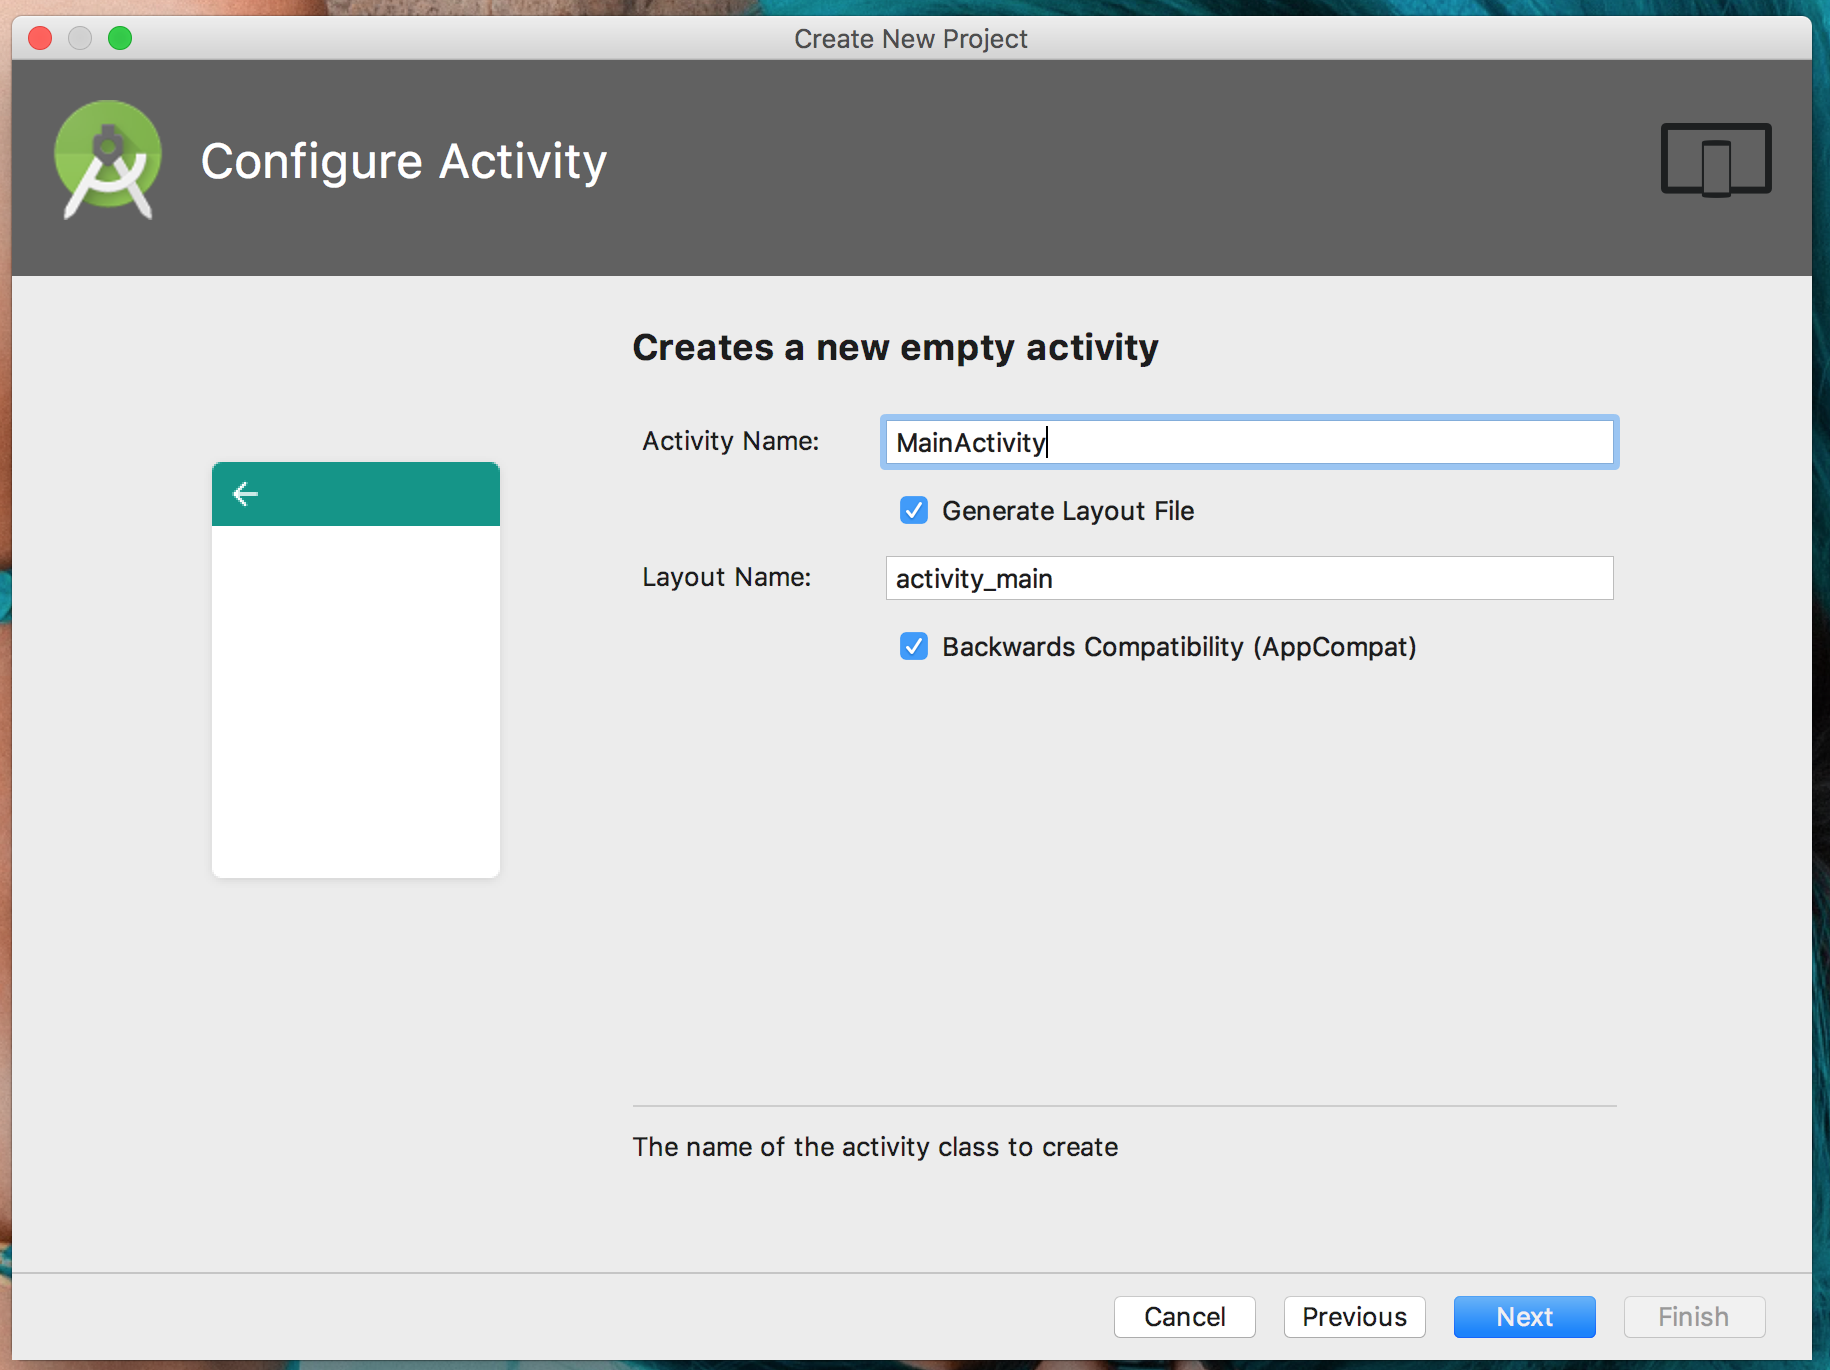
default 값으로 두고 Next
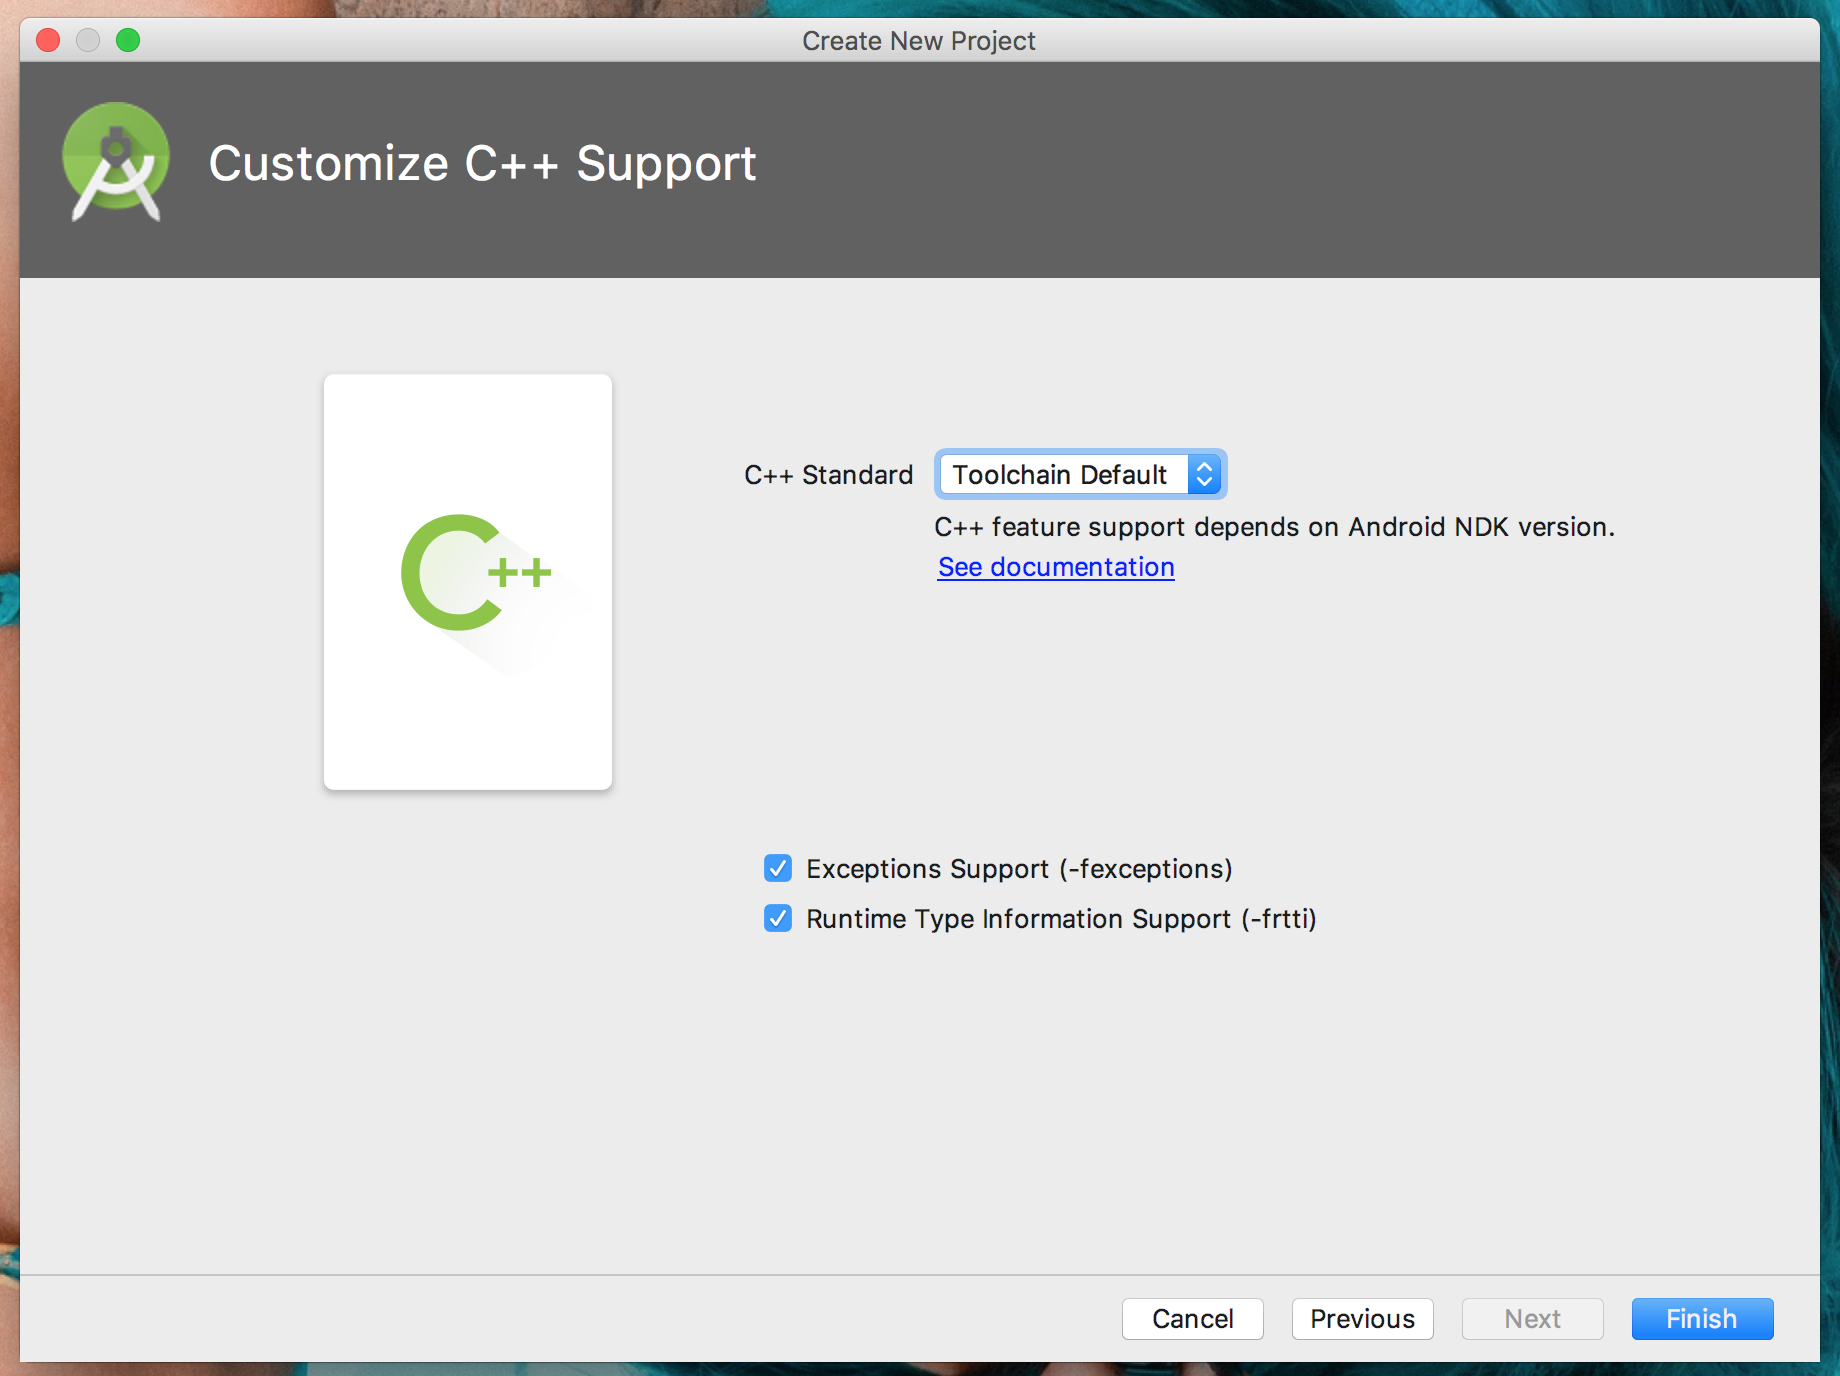
모두 체크해주고 다음으로~ 가면 컴포넌트들을 설치합니다.
용량이 커서 오래 걸리기 때문에 기다립니다
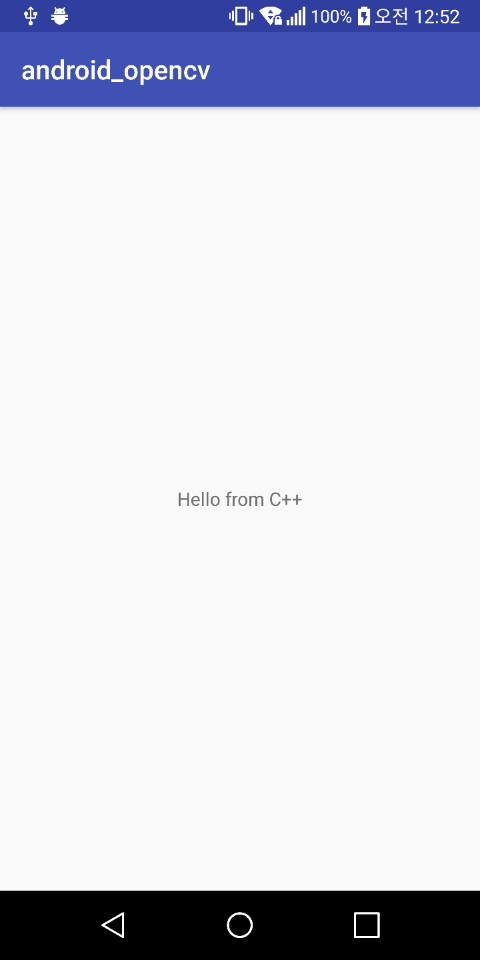
설치가 된 상태에서 바로 빌드하면 아래와 같은 결과물이 나오게 됩니다.
Hello from c++ 이 나오게 되네요.
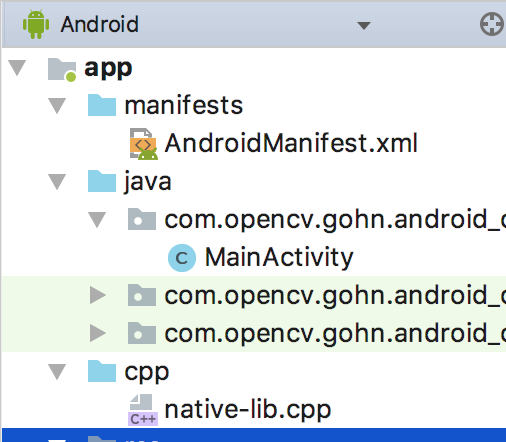
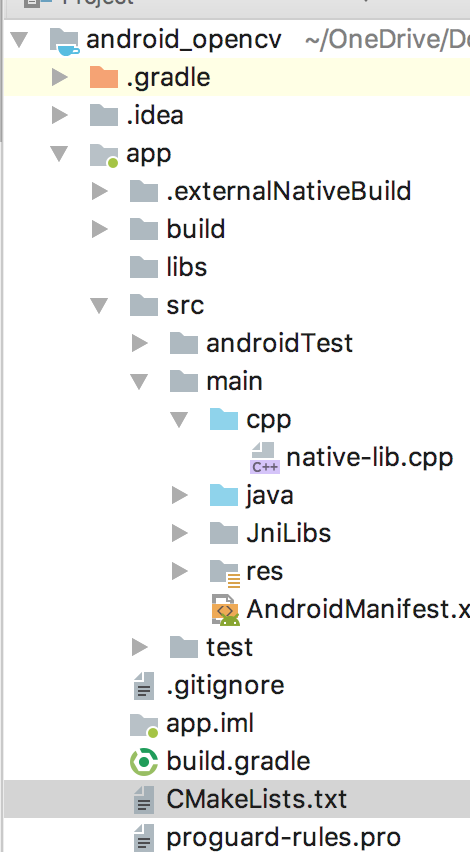
안드로이드의 구조를 보면 cpp 폴더가 하나 더 생겼습니다.
멈춤보단 천천히라도 안드로이드 스튜디오에서 CMake를 사용하여 C/C++ 코드를 컴파일 및 디버그하기 위해서는 다음 3가지가 필요합니다.
-
The Android Native Development Kit (NDK)
안드로이드에서 JAVA 코드와 C/C++ 코드를 같이 사용할 수 있게 해줍니다.
-
CMake
C/C++ 코드를 컴파일하여 네이티브 라이브러리 파일로 만들기 위해 사용됩니다.
-
LLDB
C/C++ 코드를 디버그하기 위해 사용되는 디버거입니다. 설치해주면 예전에 잡히지 않았던 에러나
예외상황이 검출되며 에러 발생한 C/C++ 코드 위치를 알려줍니다.
제가 설치를 동일하게 진행한 블로그에서 설명하는 바로는 3개의 파일이 필요하다고 합니다.
Tools -> SDK Manager 에서 Android SDK -> SDK Tools
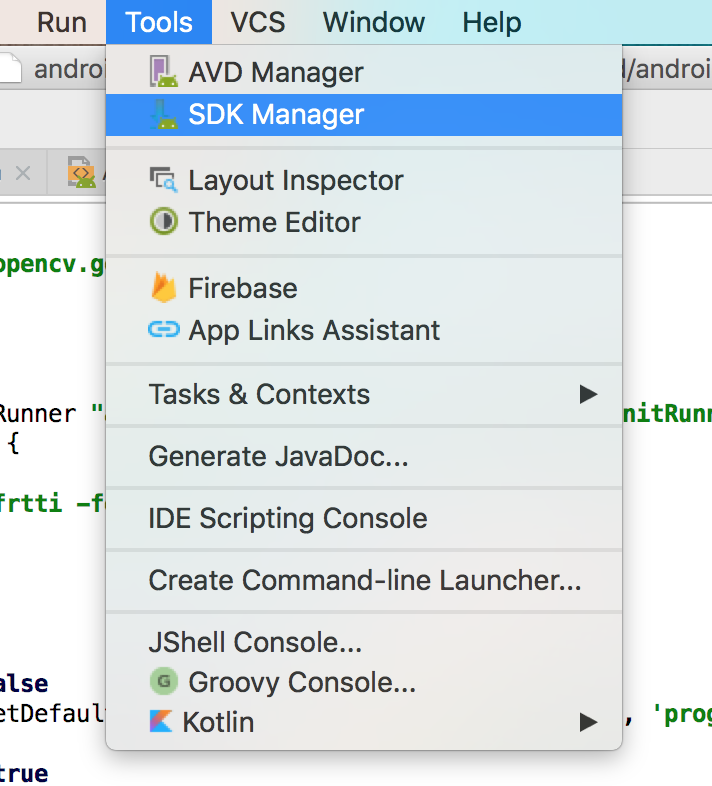
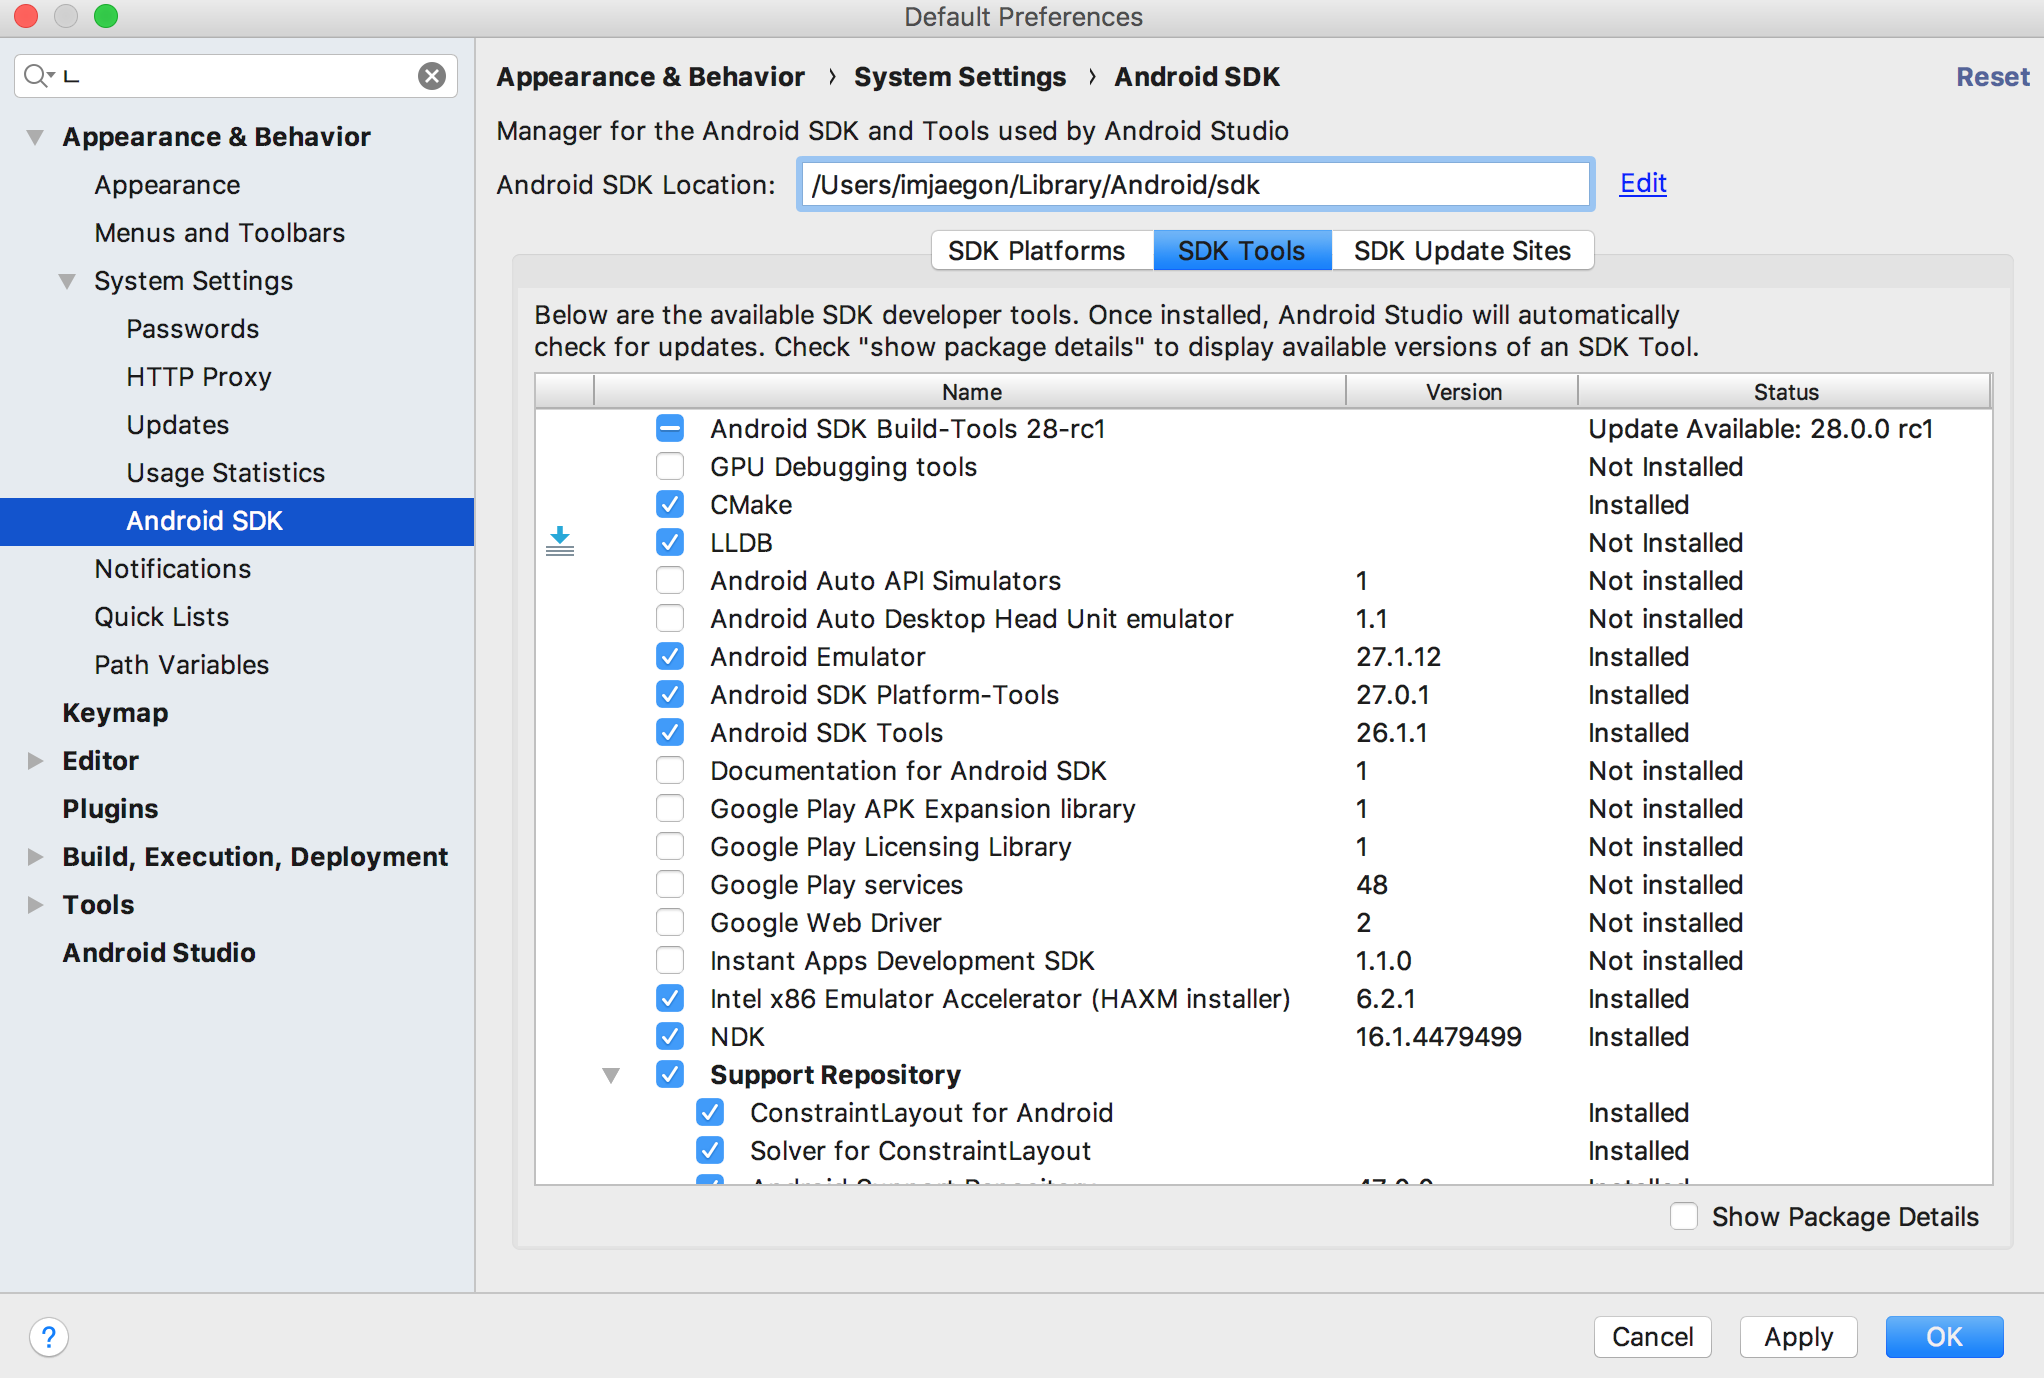
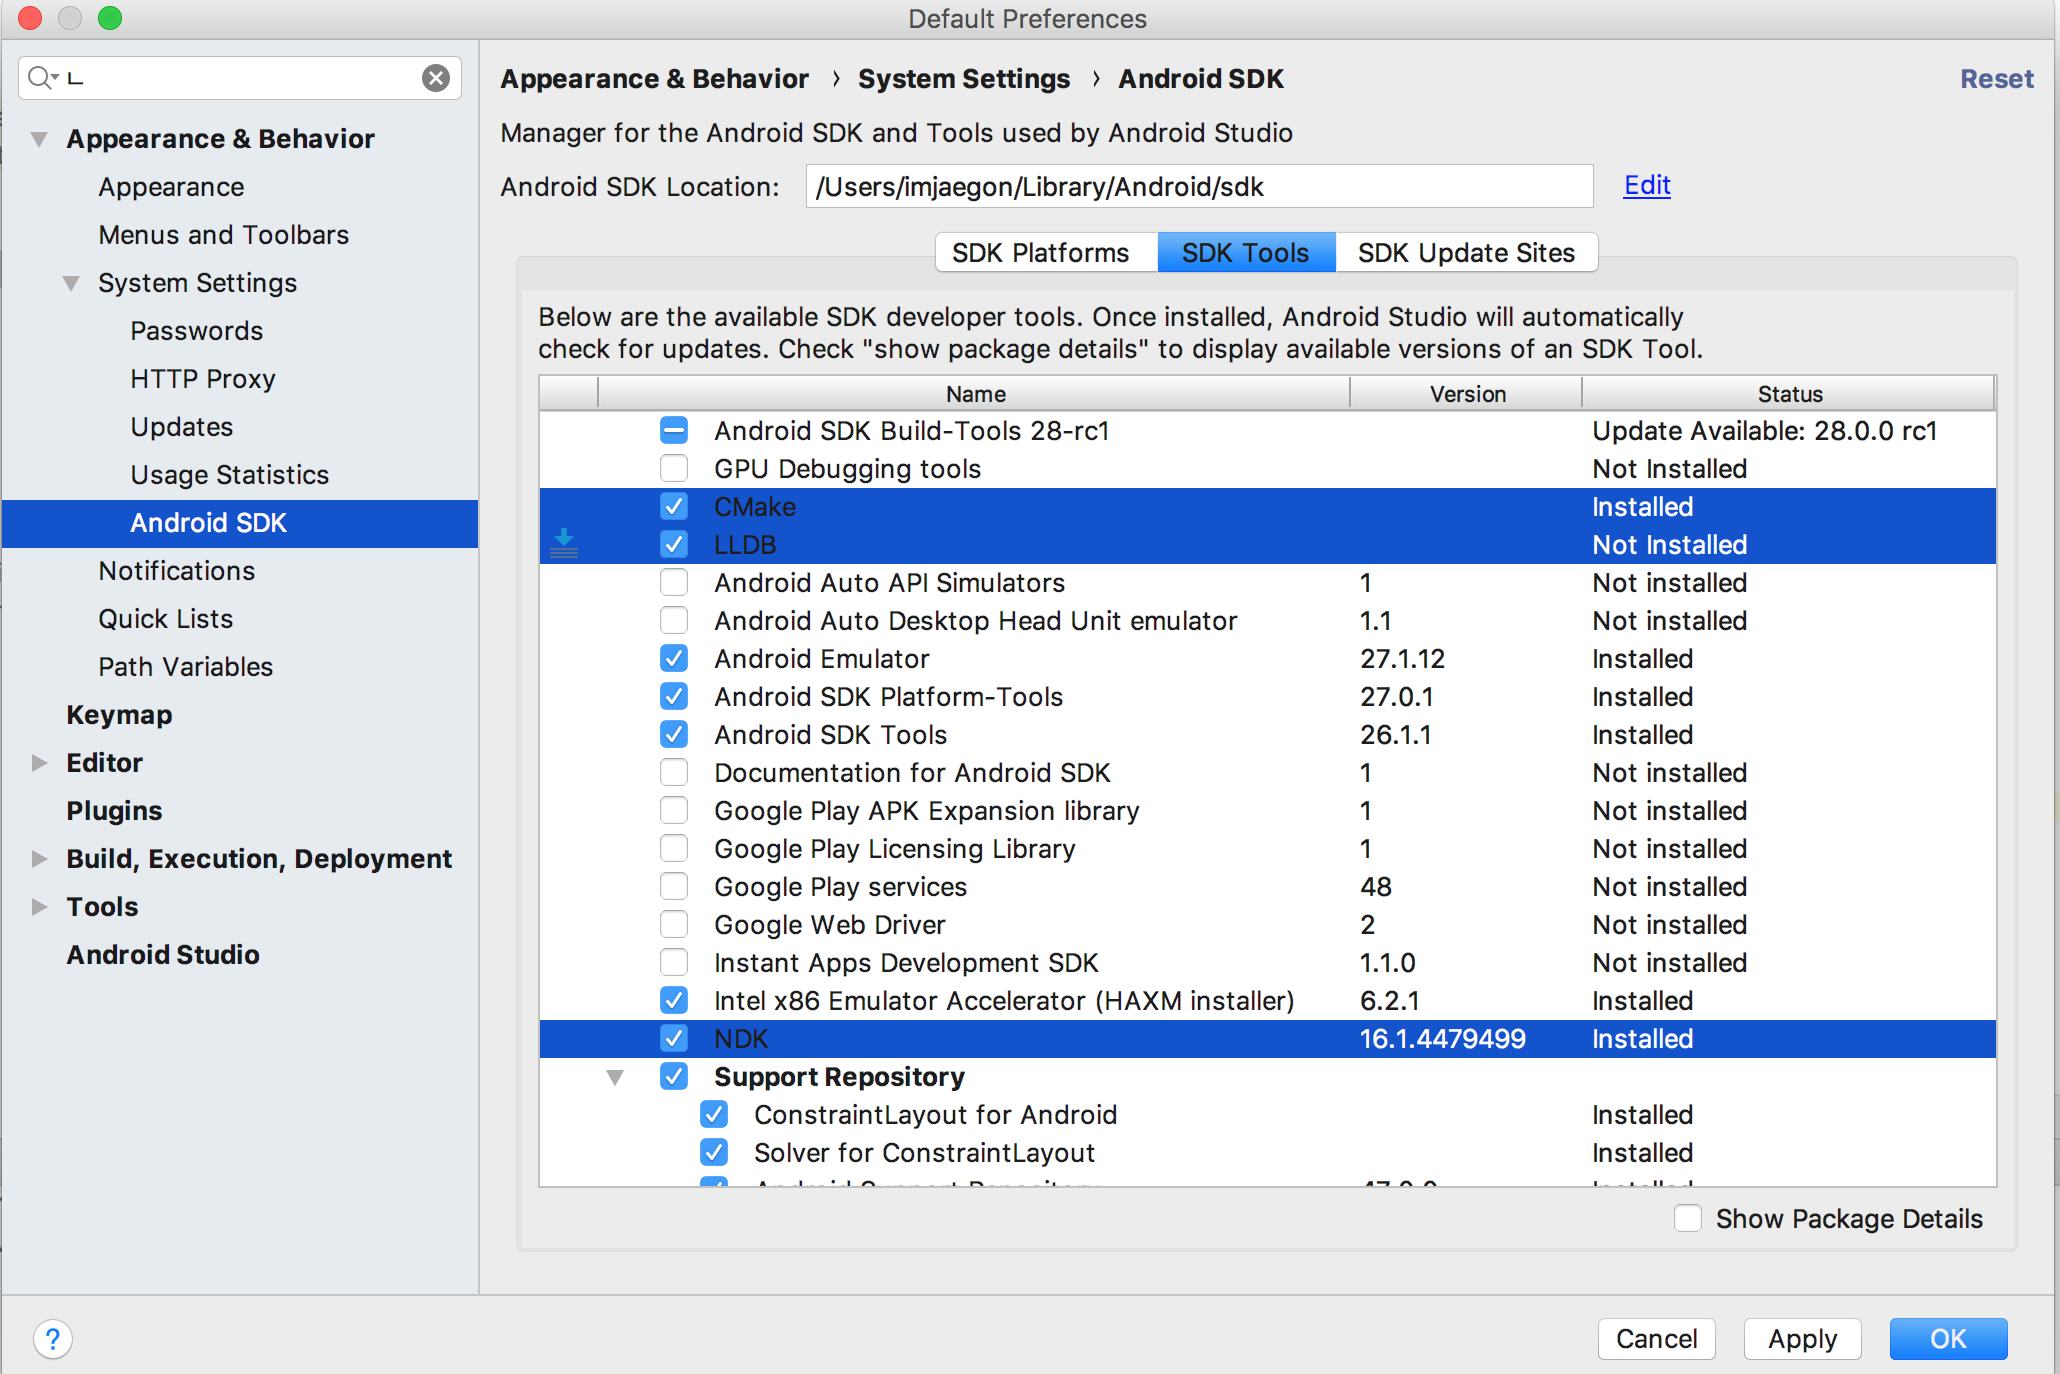
3가지를 선택해서 설치가 되지 않은 경우 설치를 진행해줍니다.
이제 프로젝트에 OpenCV의 라이브러리를 추가해야 합니다.
https://github.com/opencv/opencv/releases 에서 OpenCV 라이브러리를 다운로드 받습니다
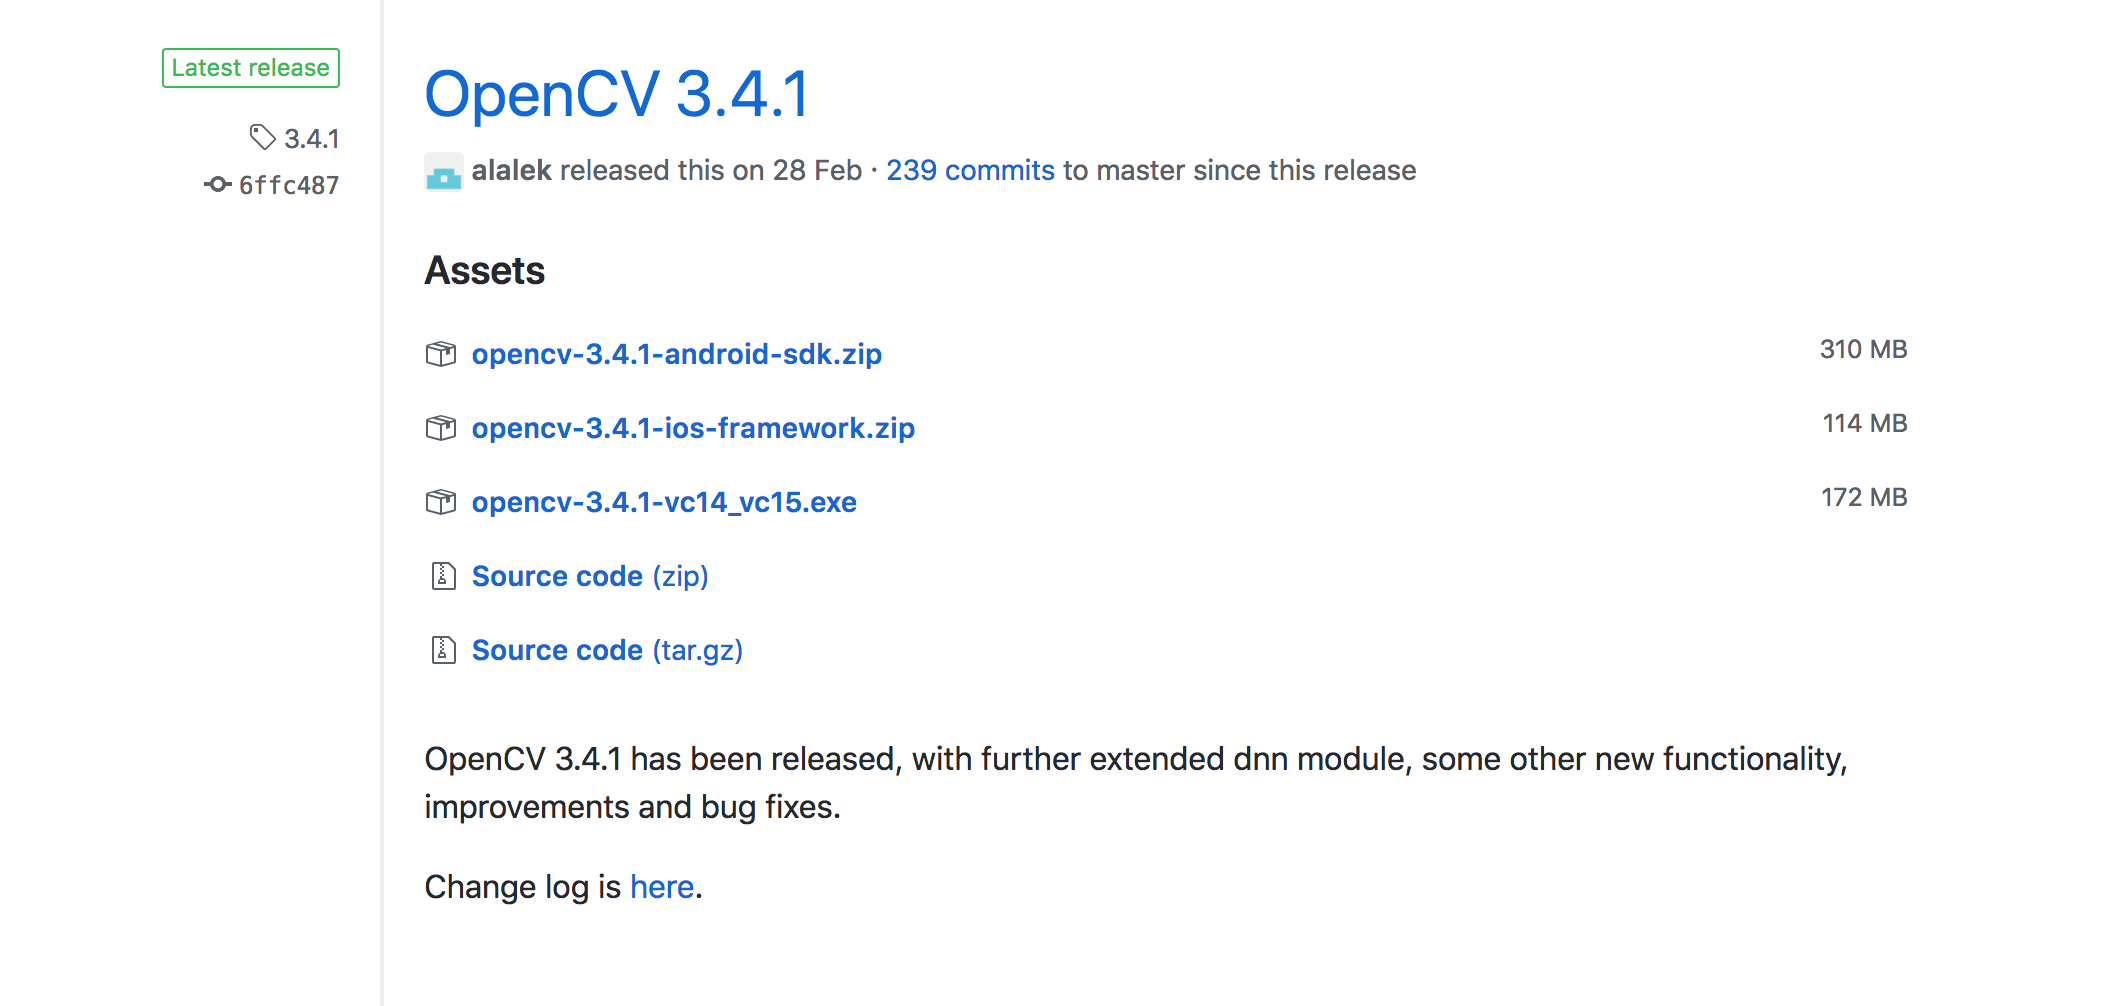
제가 설치할 때의 버전은 3.4.1 입니다.
맨 위에 있는 opencv-3.4.1-android-sdk.zip 을 설치합니다.
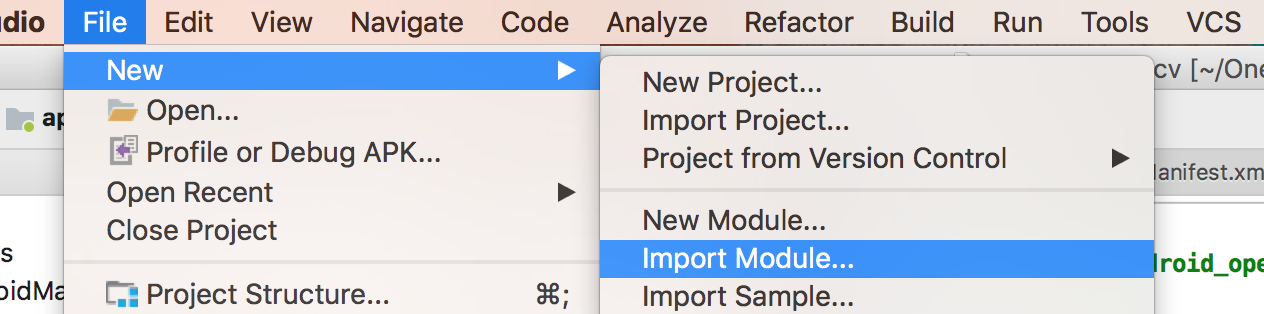
File -> New -> Import Module.. 에 들어가서
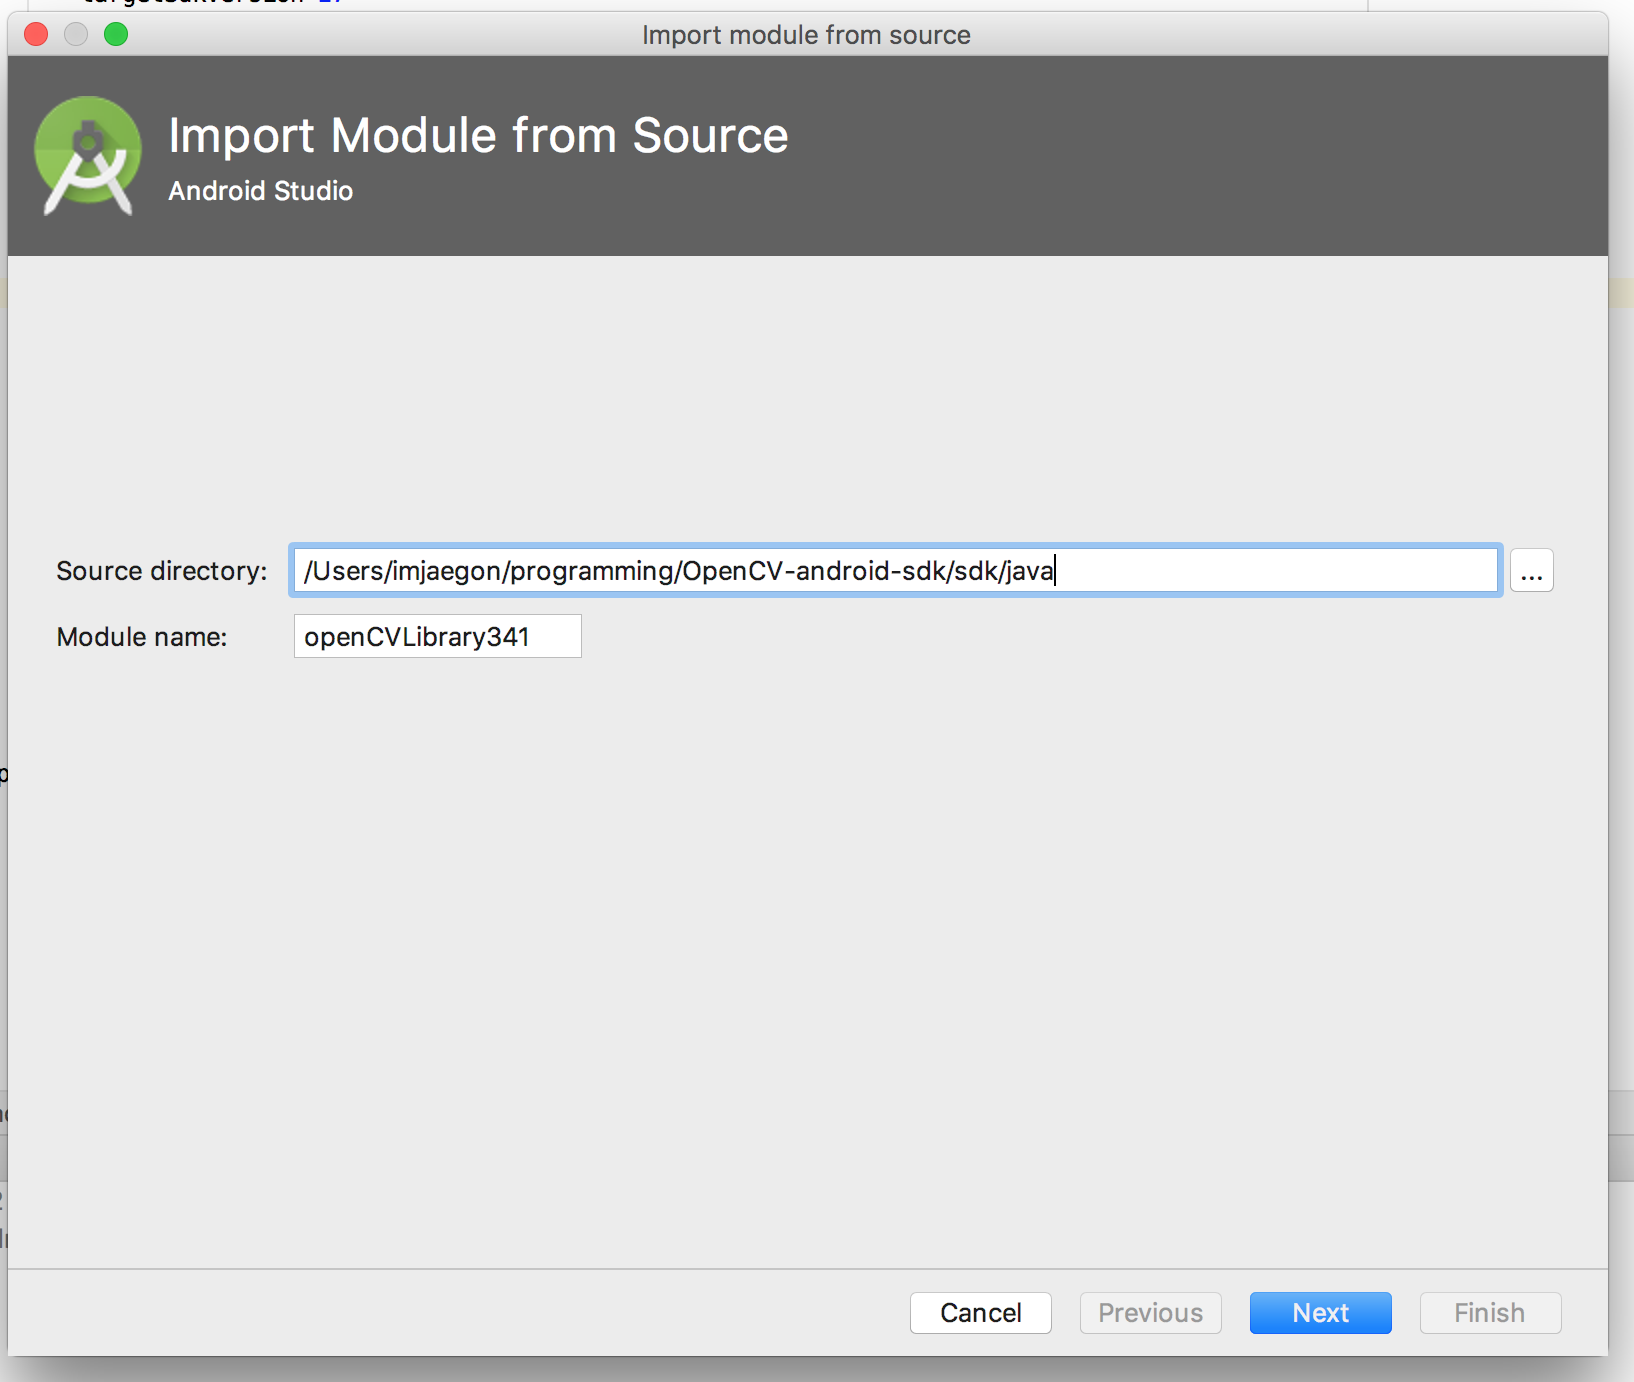
파일이 다운로드 된 디렉토리에 가서 /sdk/java 폴더를 선택합니다.
제대로 선택하면 Module name 이 자동으로 생성됩니다.
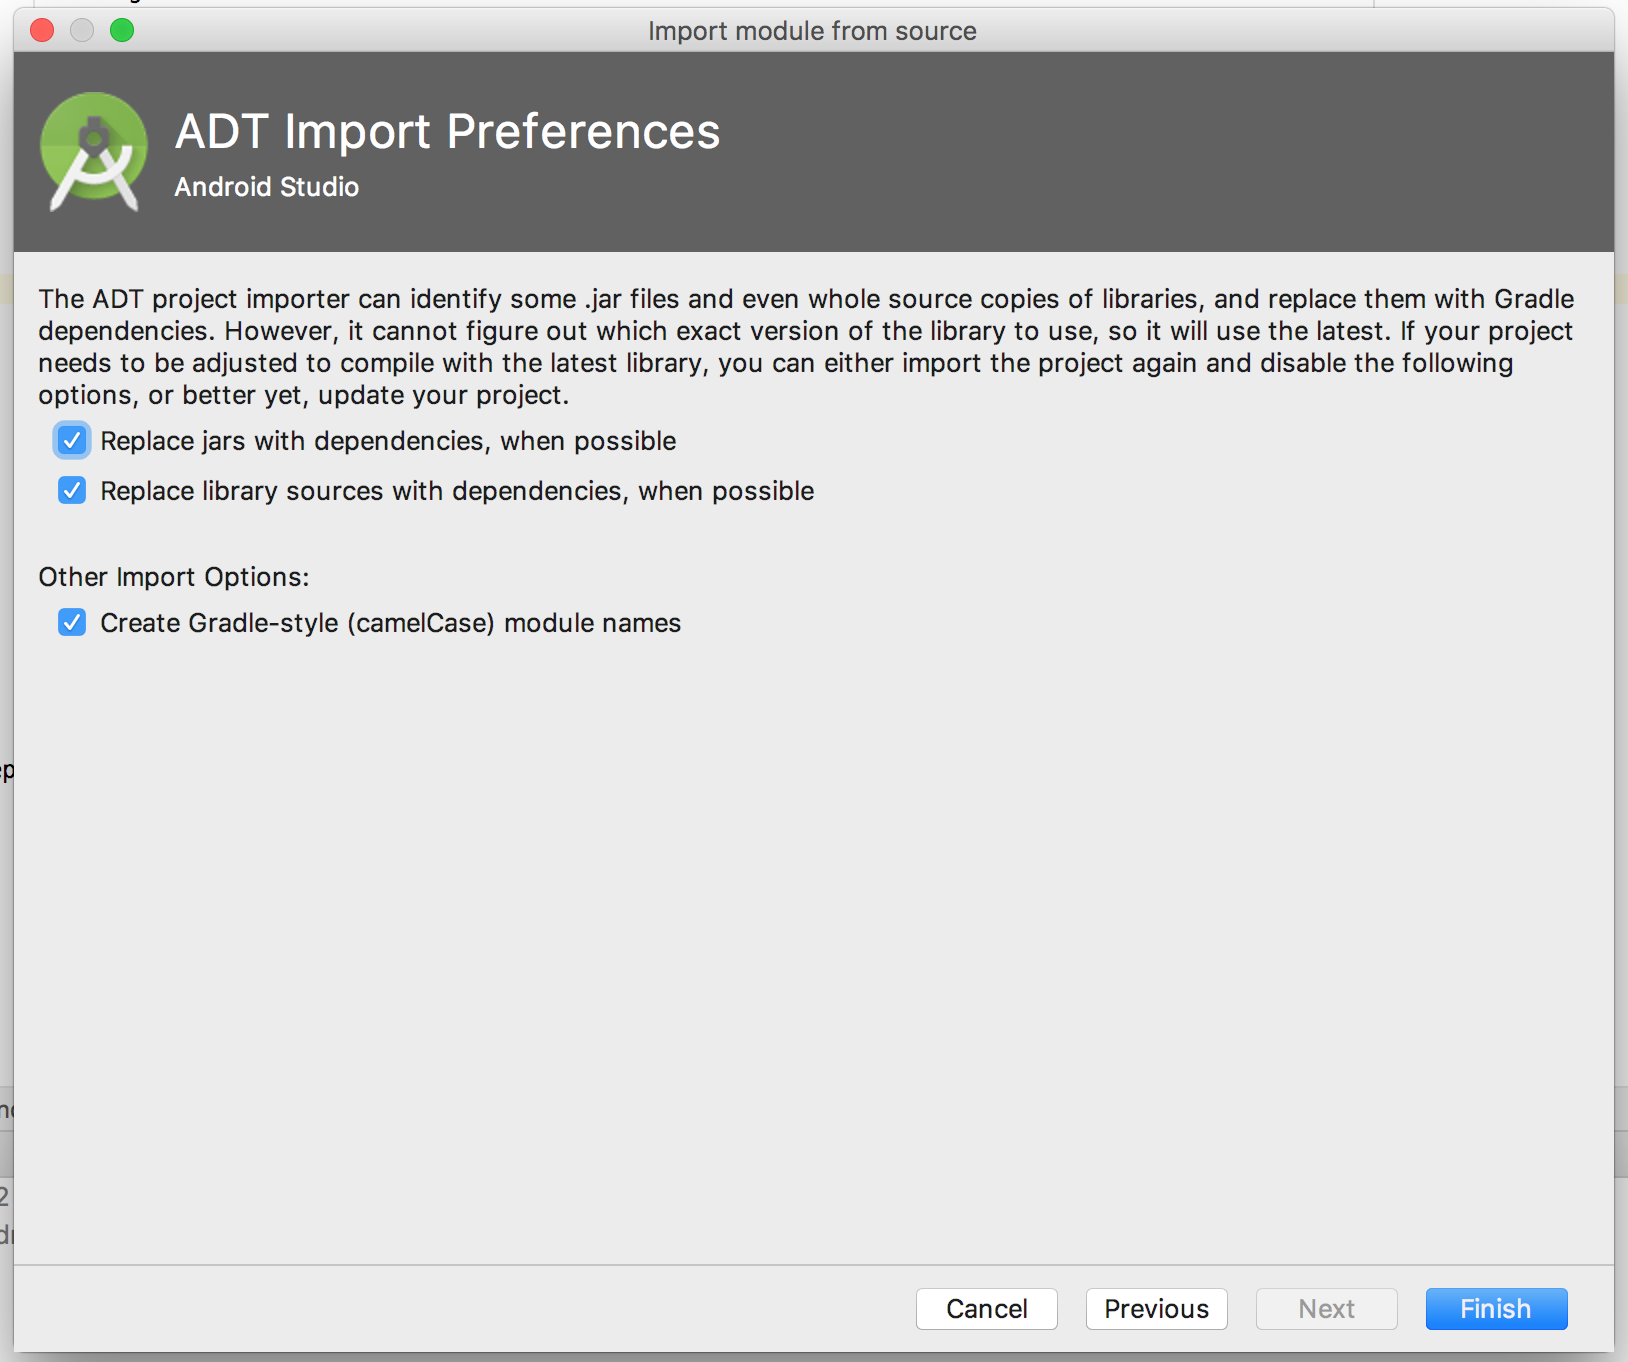
모두 default 상태로 놓고 Finish를 클릭합니다.
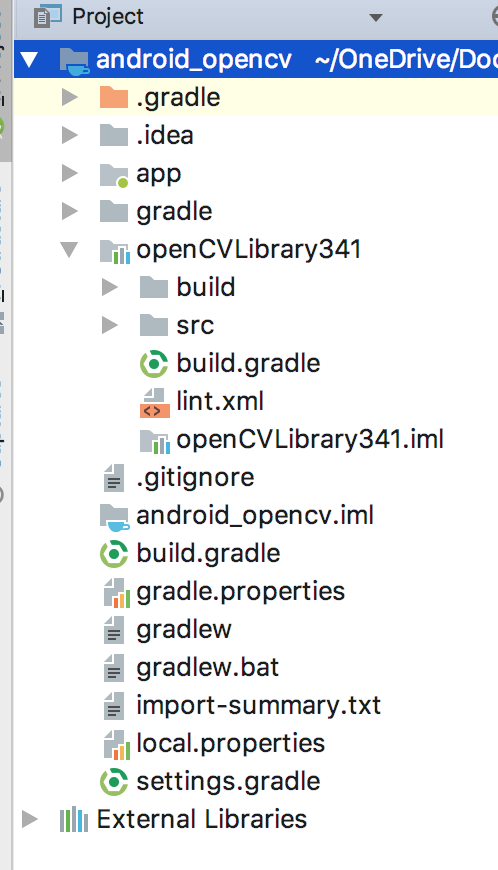
설정을 Project 패널은 Project로 하면 openCVLibarary341이 추가된 것을 확인할 수 있다.
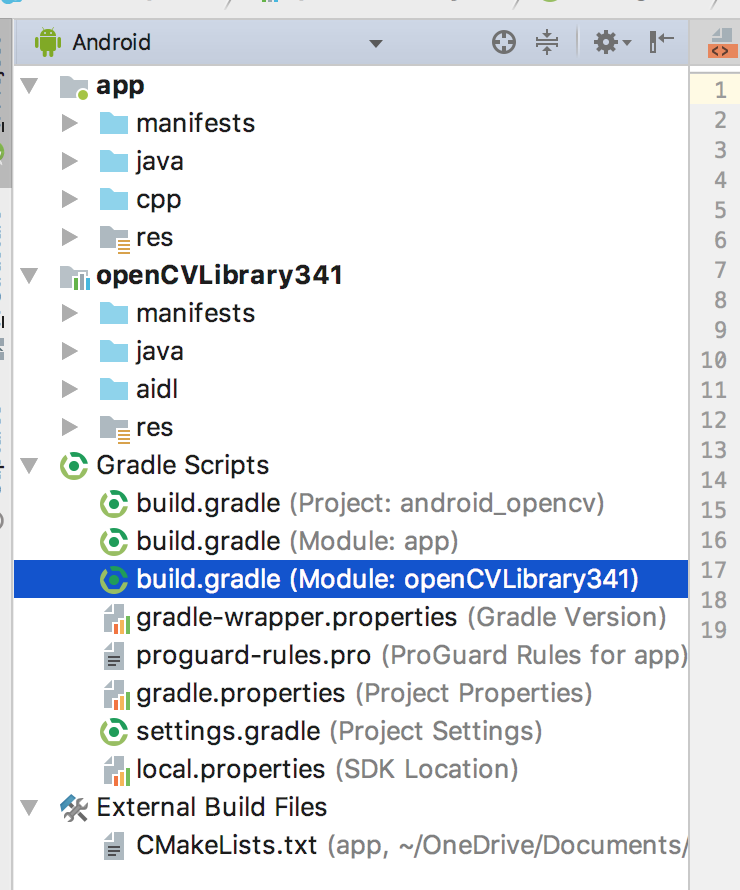
다시 Project 패널을 Android로 해도 openCVLibrary를 확인할 수 있다.
gradle도 추가되었다.
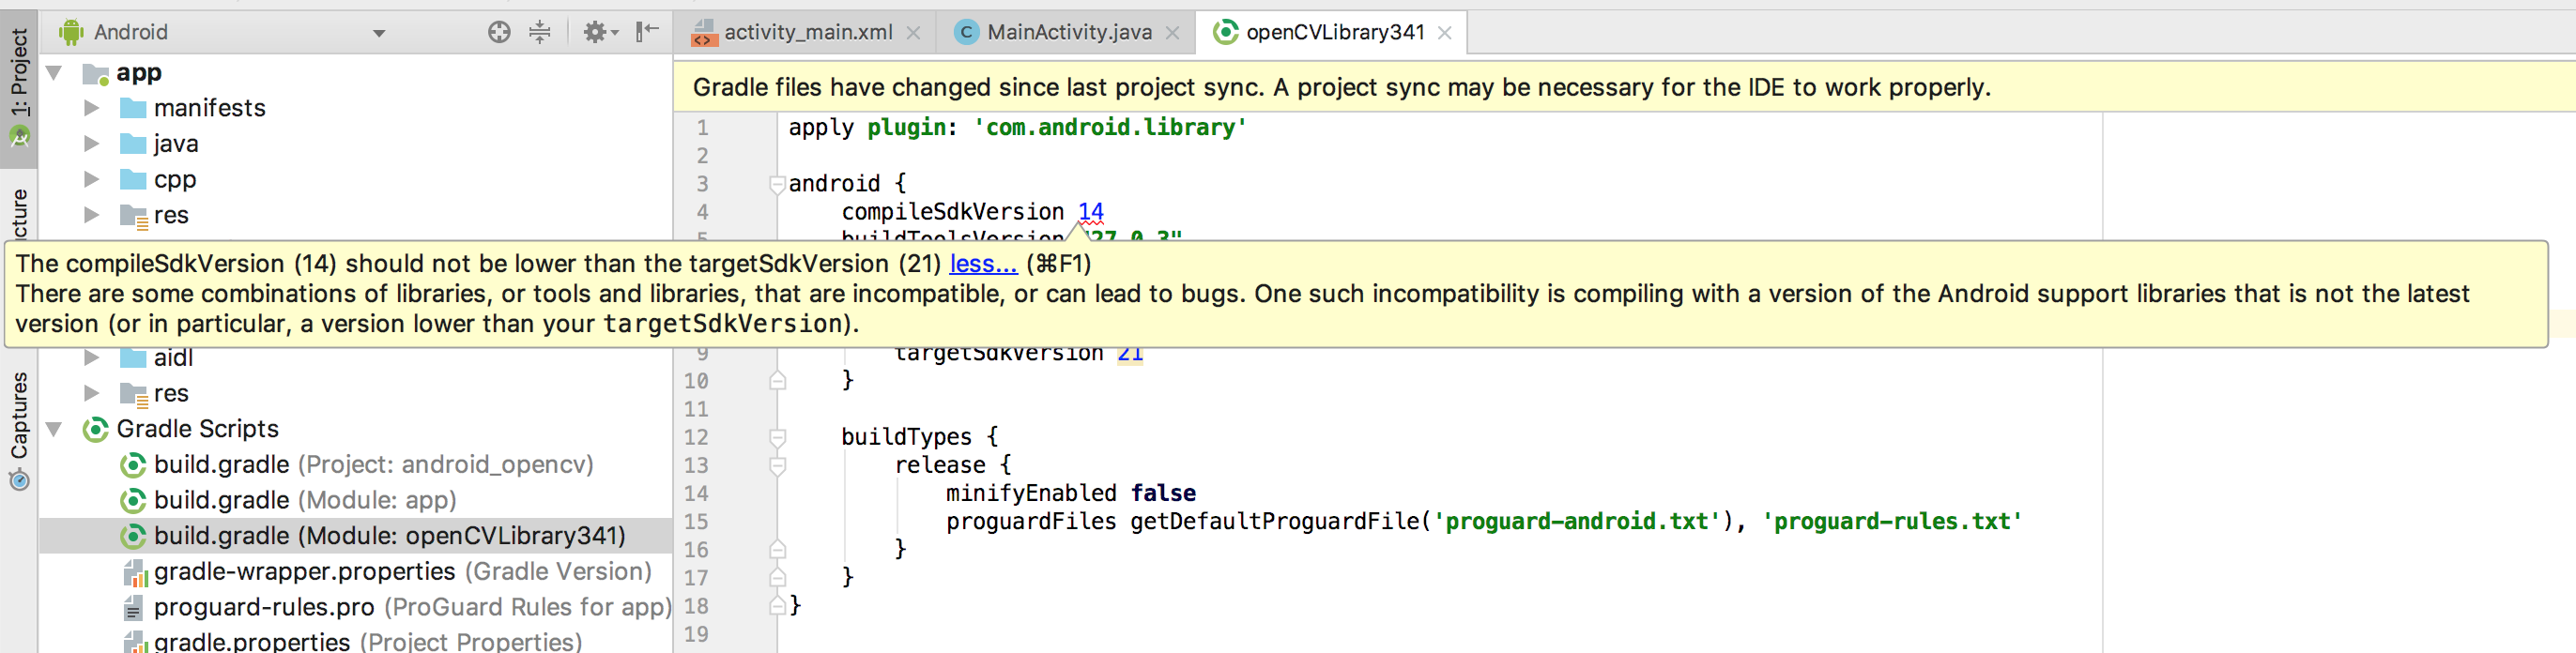
openCVLibrary341 에 보면 compileSdkVersion 을 최소 21로 하는 것을 권장한다.

SdkVersion 21 은 안드로이드 5.0 버전인데, 현재는 7.0 누가폰을 많이 사용합니다.
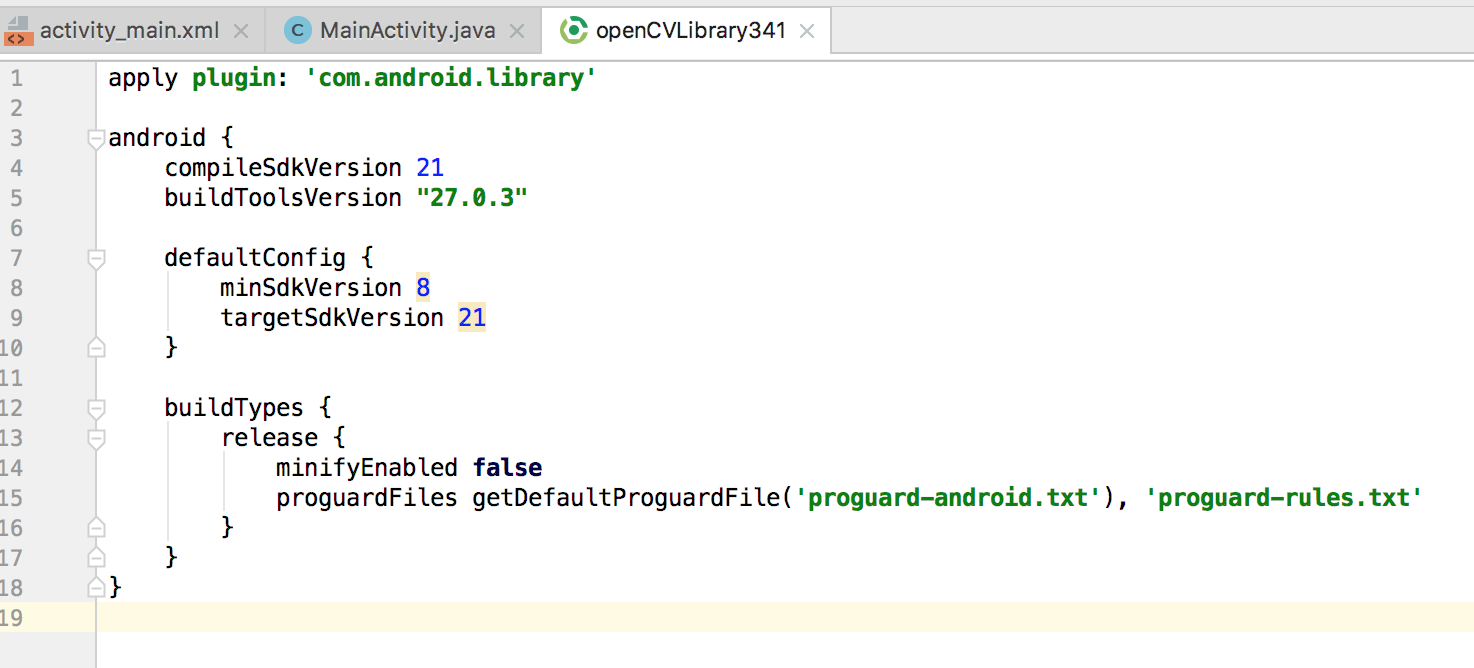
그냥 21로 바꿔줘도 무리 없을 듯 해서 변경했습니다.
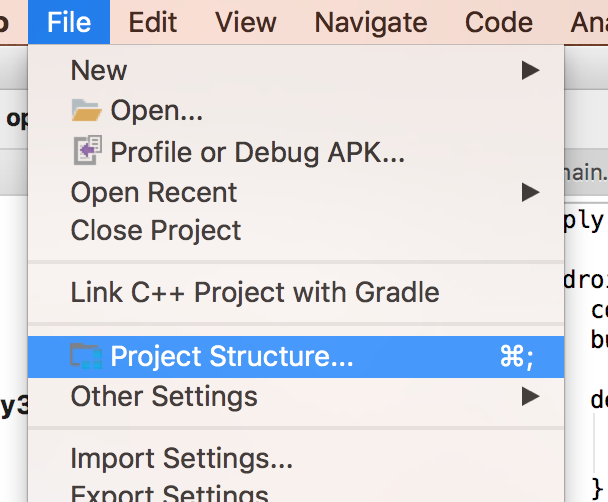
File -> Project Structure 를 클릭합니다.

app -> Dependencies 에서 + 버튼을 눌러서 Module dependency 를 클릭합니다.
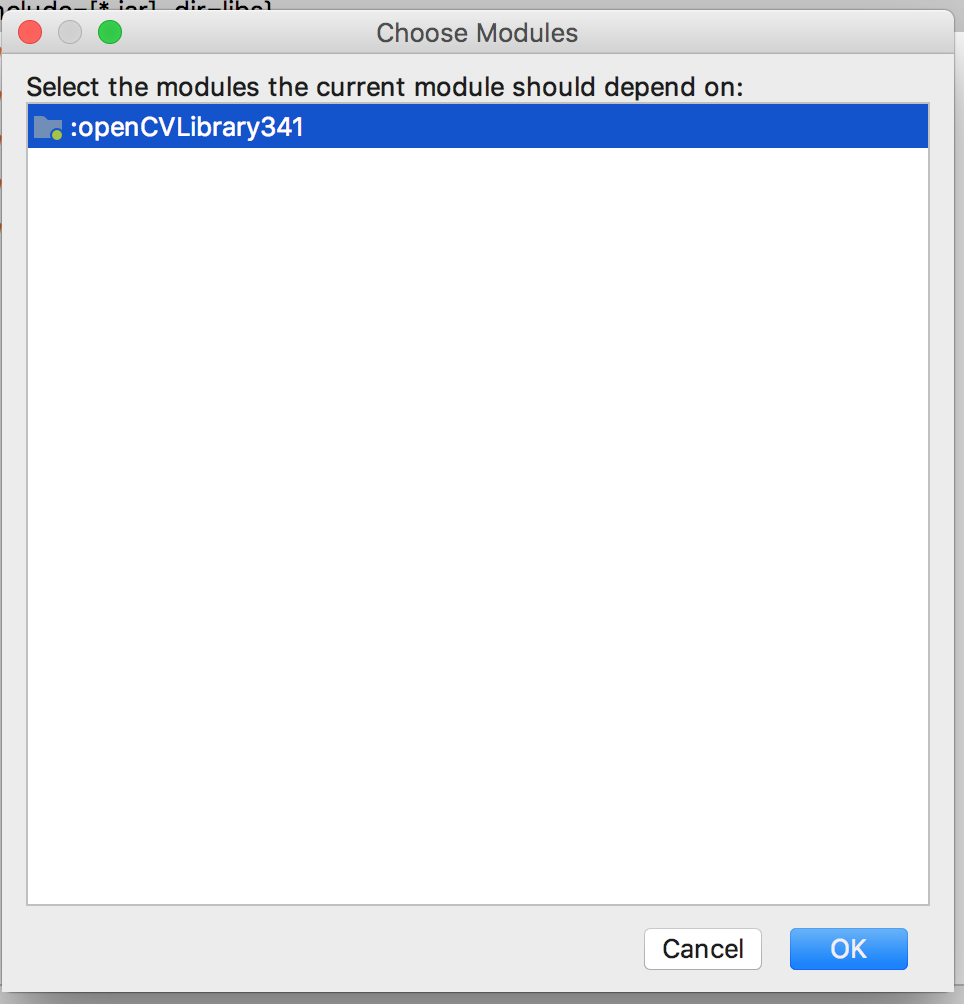
openCVLibrary가 하나 있습니다 ! 클릭해주세요 !

이제 openCV 모듈을 사용할 수 있습니다 !!


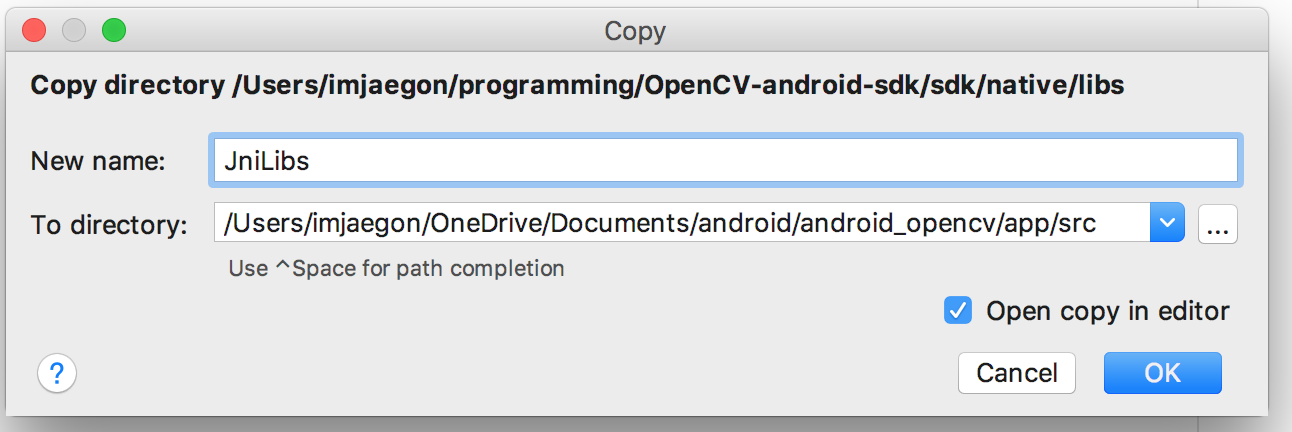
Project 패널을 project 로 설정합니다.
아까 설치한 OpenCV 라이브러리에서 OpenCV-android-sdk/sdk/native/libs 폴더를 복사해서
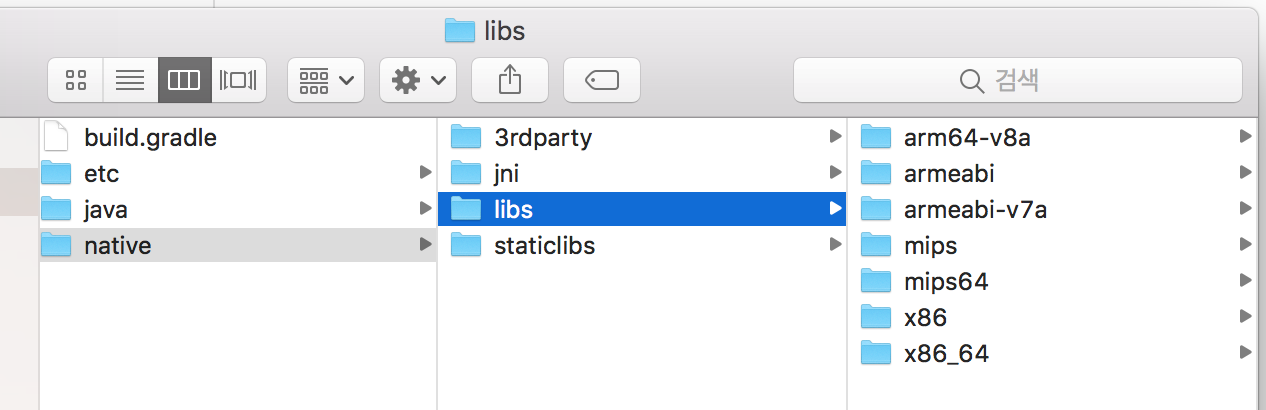
app/src 폴더 채로 JniLibs라는 이름으로 설정하여 붙여넣습니다.
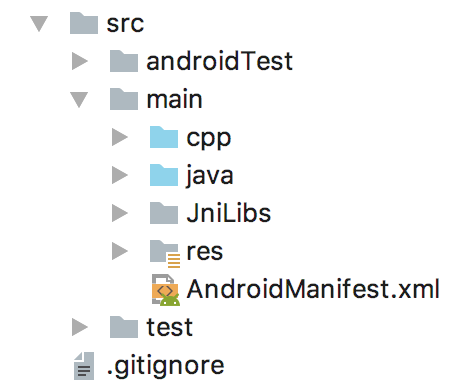
이제 기본적인 설정은 다 끝났습니다!!
res/values/styles.xml 의 기본 설정은 아래와 같습니다.
<resources>

    <!-- Base application theme. -->
    <style name="AppTheme" parent="Theme.AppCompat.Light.DarkActionBar">
        <!-- Customize your theme here. -->
        <item name="colorPrimary">@color/colorPrimary</item>
        <item name="colorPrimaryDark">@color/colorPrimaryDark</item>
        <item name="colorAccent">@color/colorAccent</item>
    </style>

</resources>
아래와 같이 변경해줍니다.
<resources>

    <!-- Base application theme. -->
    <style name="AppTheme" parent="Theme.AppCompat.Light.NoActionBar">
        <!-- Customize your theme here. -->
        <item name="colorPrimary">@color/colorPrimary</item>
        <item name="colorPrimaryDark">@color/colorPrimaryDark</item>
        <item name="colorAccent">@color/colorAccent</item>
    </style>

</resources>
다음으로는 AndroidManifest.xml 입니다. 아래와 같은 소스를
<?xml version="1.0" encoding="utf-8"?>
<manifest xmlns:android="http://schemas.android.com/apk/res/android"
    package="com.opencv.gohn.android_opencv">

    <application
        android:allowBackup="true"
        android:icon="@mipmap/ic_launcher"
        android:label="@string/app_name"
        android:roundIcon="@mipmap/ic_launcher_round"
        android:supportsRtl="true"
        android:theme="@style/AppTheme">
        <activity android:name=".MainActivity">
            <intent-filter>
                <action android:name="android.intent.action.MAIN" />

                <category android:name="android.intent.category.LAUNCHER" />
            </intent-filter>
        </activity>
    </application>

</manifest>
분홍색 소스코드를 추가해서 아래와 같이 만들어줍니다.
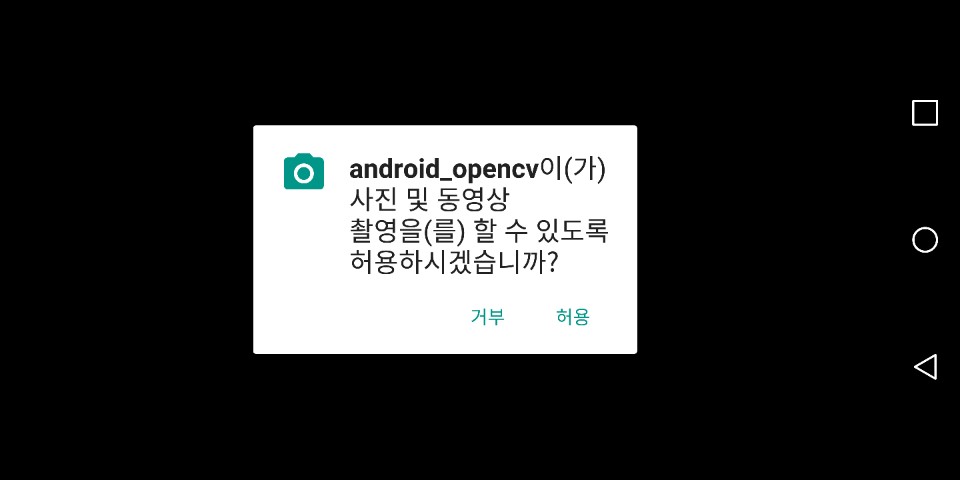
카메라에 대한 퍼미션과 조건을 설정해주는 단계입니다.
<?xml version="1.0" encoding="utf-8"?>
<manifest xmlns:android="http://schemas.android.com/apk/res/android"
    package="com.opencv.gohn.android_opencv">

    <uses-permission android:name="android.permission.CAMERA"/>
    <uses-feature android:name="android.hardware.camera" android:required="false"/>
    <uses-feature android:name="android.hardware.camera.autofocus" android:required="false"/>
    <uses-feature android:name="android.hardware.camera.front" android:required="false"/>
    <uses-feature android:name="android.hardware.camera.front.autofocus"  android:required="false"/>

    <supports-screens android:resizeable="true"
        android:smallScreens="true"
        android:normalScreens="true"
        android:largeScreens="true"
        android:anyDensity="true" />

    <application
        android:allowBackup="true"
        android:icon="@mipmap/ic_launcher"
        android:label="@string/app_name"
        android:roundIcon="@mipmap/ic_launcher_round"
        android:supportsRtl="true"
        android:theme="@style/AppTheme">
        <activity android:name=".MainActivity"
            android:screenOrientation="landscape"
            android:configChanges="keyboardHidden|orientation">
            <intent-filter>
                <action android:name="android.intent.action.MAIN" />

                <category android:name="android.intent.category.LAUNCHER" />
            </intent-filter>
        </activity>
    </application>

</manifest>
다음은 activity_main.xml 입니다.
<?xml version="1.0" encoding="utf-8"?>
<android.support.constraint.ConstraintLayout xmlns:android="http://schemas.android.com/apk/res/android"
    xmlns:app="http://schemas.android.com/apk/res-auto"
    xmlns:tools="http://schemas.android.com/tools"
    android:layout_width="match_parent"
    android:layout_height="match_parent"
    tools:context=".MainActivity">

    <TextView
        android:id="@+id/sample_text"
        android:layout_width="wrap_content"
        android:layout_height="wrap_content"
        android:text="Hello World!"
        app:layout_constraintBottom_toBottomOf="parent"
        app:layout_constraintLeft_toLeftOf="parent"
        app:layout_constraintRight_toRightOf="parent"
        app:layout_constraintTop_toTopOf="parent" />

</android.support.constraint.ConstraintLayout>
위와 같은 코드를 아래와 같이 변경해줍니다.
<?xml version="1.0" encoding="utf-8"?>
<android.support.constraint.ConstraintLayout xmlns:android="http://schemas.android.com/apk/res/android"
    xmlns:app="http://schemas.android.com/apk/res-auto"
    xmlns:tools="http://schemas.android.com/tools"
    android:layout_width="match_parent"
    android:layout_height="match_parent"
    tools:context=".MainActivity">

    <org.opencv.android.JavaCameraView
        android:layout_width="match_parent"
        android:layout_height="match_parent"
        android:id="@+id/activity_surface_view" />

</android.support.constraint.ConstraintLayout>
다음으로는 MainActivity.java를 수정하겠습니다. 아래는 원래의 파일입니다.
무작정 복사 하는 것 보다는 하나 하나 따라하는 것이 조금 더 편하실 겁니다. ( 밑에 전체 소스가 있습니다. )
package com.opencv.gohn.android_opencv;

import android.support.v7.app.AppCompatActivity;
import android.os.Bundle;
import android.widget.TextView;

public class MainActivity extends AppCompatActivity {

    // Used to load the 'native-lib' library on application startup.
    static {
        System.loadLibrary("native-lib");
    }

    @Override
    protected void onCreate(Bundle savedInstanceState) {
        super.onCreate(savedInstanceState);
        setContentView(R.layout.activity_main);

        // Example of a call to a native method
        TextView tv = (TextView) findViewById(R.id.sample_text);
        tv.setText(stringFromJNI());
    }

    /**
     * A native method that is implemented by the 'native-lib' native library,
     * which is packaged with this application.
     */
    public native String stringFromJNI();
}
public class MainActivity extends AppCompatActivityimplements CameraBridgeViewBase.CvCameraViewListener2
implements CameraBridgeViewBase.CvCameraViewListener2 를 먼저 메인 class 에 추가해준다.
경고 표시가 나오면 추가해준 인터페이스를 import 해주고,
구현해준 인터페이스에 필요한 아래의 메소드들을 상속받는다.
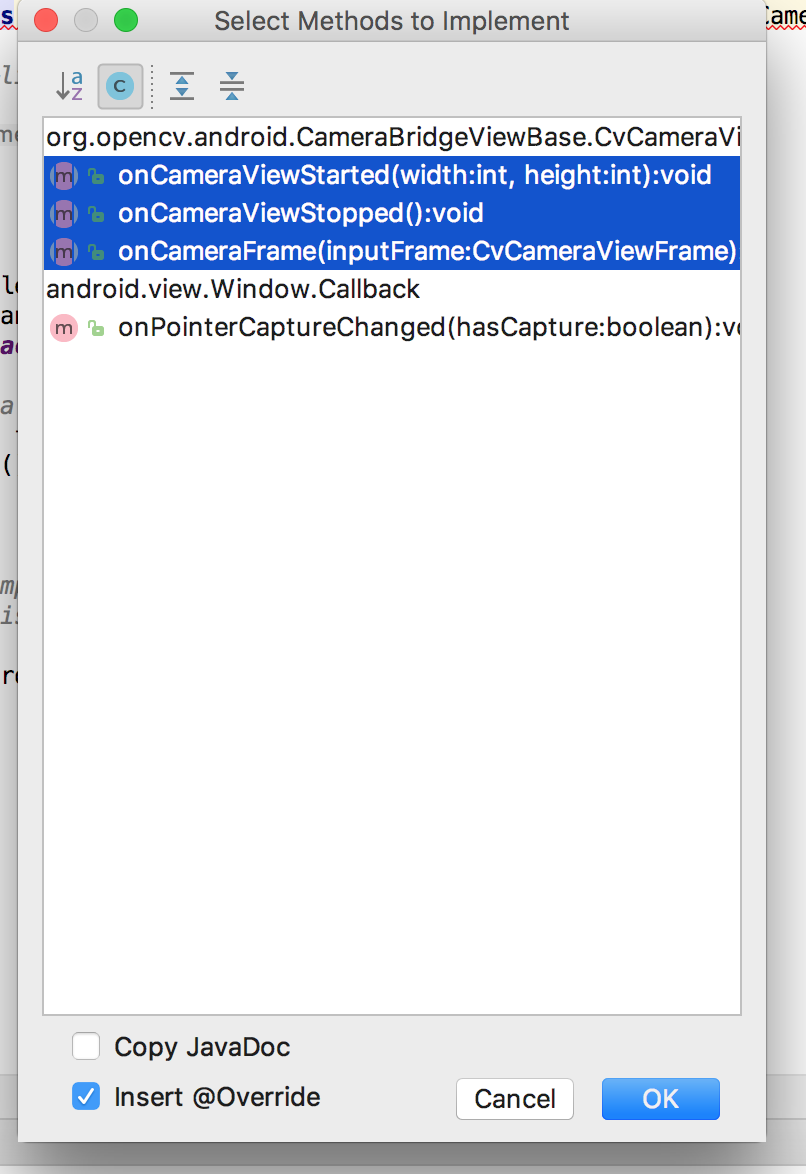
public class MainActivity extends AppCompatActivity implements CameraBridgeViewBase.CvCameraViewListener2{private static final String TAG = "opencv"; private CameraBridgeViewBase mOpenCvCameraView; private Mat matInput; private Mat matResult; public native void ConvertRGBtoGray(long matAddrInput, long matAddrResult); // Used to load the 'native-lib' library on application startup. static { System.loadLibrary("opencv_java3");System.loadLibrary("native-lib");}
-- 표시가 있는 부분을 제외하고, 새로운 멤버 변수들을 추가해줍니다.
@Override protected void onCreate(Bundle savedInstanceState) { super.onCreate(savedInstanceState); setContentView(R.layout.activity_main);getWindow().setFlags(WindowManager.LayoutParams.FLAG_FULLSCREEN, WindowManager.LayoutParams.FLAG_FULLSCREEN); getWindow().setFlags(WindowManager.LayoutParams.FLAG_KEEP_SCREEN_ON, WindowManager.LayoutParams.FLAG_KEEP_SCREEN_ON); setContentView(R.layout.activity_main); if (Build.VERSION.SDK_INT >= Build.VERSION_CODES.M) { //퍼미션 상태 확인 if (!hasPermissions(PERMISSIONS)) { //퍼미션 허가 안되어있다면 사용자에게 요청 requestPermissions(PERMISSIONS, PERMISSIONS_REQUEST_CODE); } } mOpenCvCameraView = (CameraBridgeViewBase)findViewById(R.id.activity_surface_view); mOpenCvCameraView.setVisibility(SurfaceView.VISIBLE); mOpenCvCameraView.setCvCameraViewListener(this); mOpenCvCameraView.setCameraIndex(0); // front-camera(1), back-camera(0) mLoaderCallback.onManagerConnected(LoaderCallbackInterface.SUCCESS); }
onCreate 함수에서 위의 요소들을 추가해줍니다.
private BaseLoaderCallback mLoaderCallback = new BaseLoaderCallback(this) {
    @Override
    public void onManagerConnected(int status) {
        switch (status) {
            case LoaderCallbackInterface.SUCCESS:
            {
                mOpenCvCameraView.enableView();
            } break;
            default:
            {
                super.onManagerConnected(status);
            } break;
        }
    }
};
바로 아래에 위와 같은 메소드를 설정해줍니다.
@Override
public void onPause()
{
    super.onPause();
    if (mOpenCvCameraView != null)
        mOpenCvCameraView.disableView();
}

@Override
public void onResume()
{
    super.onResume();

    if (!OpenCVLoader.initDebug()) {
        Log.d(TAG, "onResume :: Internal OpenCV library not found.");
        OpenCVLoader.initAsync(OpenCVLoader.OPENCV_VERSION_3_2_0, this, mLoaderCallback);
    } else {
        Log.d(TAG, "onResum :: OpenCV library found inside package. Using it!");
        mLoaderCallback.onManagerConnected(LoaderCallbackInterface.SUCCESS);
    }
}

public void onDestroy() {
    super.onDestroy();

    if (mOpenCvCameraView != null)
        mOpenCvCameraView.disableView();
}
위의 요소들을 추가해줍니다.
필요한 요소들을 import 해줍니다.
@Override public Mat onCameraFrame(CameraBridgeViewBase.CvCameraViewFrame inputFrame) {matInput = inputFrame.rgba(); if ( matResult != null ) matResult.release(); matResult = new Mat(matInput.rows(), matInput.cols(), matInput.type()); ConvertRGBtoGray(matInput.getNativeObjAddr(), matResult.getNativeObjAddr()); return matResult;}
onCameraFrame 함수는 아까 맨 처음에 인터페이스를 구현했을 때, 상속받은 메소드입니다.
위의 요소들을 추가해줍니다.
//여기서부턴 퍼미션 관련 메소드
static final int PERMISSIONS_REQUEST_CODE = 1000;
String[] PERMISSIONS  = {"android.permission.CAMERA"};


private boolean hasPermissions(String[] permissions) {
    int result;

    //스트링 배열에 있는 퍼미션들의 허가 상태 여부 확인
    for (String perms : permissions){

        result = ContextCompat.checkSelfPermission(this, perms);

        if (result == PackageManager.PERMISSION_DENIED){
            //허가 안된 퍼미션 발견
            return false;
        }
    }

    //모든 퍼미션이 허가되었음
    return true;
}

@Override
public void onRequestPermissionsResult(int requestCode, @NonNull String[] permissions, @NonNull int[] grantResults) {
    super.onRequestPermissionsResult(requestCode, permissions, grantResults);

    switch(requestCode){
        case PERMISSIONS_REQUEST_CODE:
            if (grantResults.length > 0) {
                boolean cameraPermissionAccepted = grantResults[0]
                        == PackageManager.PERMISSION_GRANTED;

                if (!cameraPermissionAccepted)
                    showDialogForPermission("앱을 실행하려면 퍼미션을 허가하셔야합니다.");
            }
            break;
    }
}

@TargetApi(Build.VERSION_CODES.M)
private void showDialogForPermission(String msg) {

    AlertDialog.Builder builder = new AlertDialog.Builder( MainActivity.this);
    builder.setTitle("알림");
    builder.setMessage(msg);
    builder.setCancelable(false);
    builder.setPositiveButton("예", new DialogInterface.OnClickListener() {
        public void onClick(DialogInterface dialog, int id){
            requestPermissions(PERMISSIONS, PERMISSIONS_REQUEST_CODE);
        }
    });
    builder.setNegativeButton("아니오", new DialogInterface.OnClickListener() {
        public void onClick(DialogInterface arg0, int arg1) {
            finish();
        }
    });
    builder.create().show();
}
해당 소스는 새로 추가해야 할 메소드들 입니다.
다 해주면 아래와 같은 소스코드가 나오게 됩니다. ( package랑 import만 빼고 나머지는 다 가져와도 될 것 같긴 하지만, 버전 별로 상이할 수 있기 때문에 하나씩 복사 하는 것이 가장 좋은 것 같습니다. )
package com.opencv.gohn.android_opencv;

import android.annotation.TargetApi;
import android.content.DialogInterface;
import android.content.pm.PackageManager;
import android.os.Build;
import android.support.annotation.NonNull;
import android.support.v4.content.ContextCompat;
import android.support.v7.app.AlertDialog;
import android.support.v7.app.AppCompatActivity;
import android.os.Bundle;
import android.util.Log;
import android.view.SurfaceView;
import android.view.WindowManager;
import android.widget.TextView;

import org.opencv.android.BaseLoaderCallback;
import org.opencv.android.CameraBridgeViewBase;
import org.opencv.android.LoaderCallbackInterface;
import org.opencv.android.OpenCVLoader;
import org.opencv.core.Mat;

public class MainActivity extends AppCompatActivity implements CameraBridgeViewBase.CvCameraViewListener2{

    private static final String TAG = "opencv";
    private CameraBridgeViewBase mOpenCvCameraView;
    private Mat matInput;
    private Mat matResult;

    public native void ConvertRGBtoGray(long matAddrInput, long matAddrResult);

    // Used to load the 'native-lib' library on application startup.
    static {
        System.loadLibrary("opencv_java3");
        System.loadLibrary("native-lib");
    }


    @Override
    protected void onCreate(Bundle savedInstanceState) {
        super.onCreate(savedInstanceState);
        setContentView(R.layout.activity_main);

        getWindow().setFlags(WindowManager.LayoutParams.FLAG_FULLSCREEN,
                WindowManager.LayoutParams.FLAG_FULLSCREEN);
        getWindow().setFlags(WindowManager.LayoutParams.FLAG_KEEP_SCREEN_ON,
                WindowManager.LayoutParams.FLAG_KEEP_SCREEN_ON);
        setContentView(R.layout.activity_main);

        if (Build.VERSION.SDK_INT >= Build.VERSION_CODES.M) {
            //퍼미션 상태 확인
            if (!hasPermissions(PERMISSIONS)) {
                //퍼미션 허가 안되어있다면 사용자에게 요청
                requestPermissions(PERMISSIONS, PERMISSIONS_REQUEST_CODE);
            }
        }

        mOpenCvCameraView = (CameraBridgeViewBase)findViewById(R.id.activity_surface_view);
        mOpenCvCameraView.setVisibility(SurfaceView.VISIBLE);
        mOpenCvCameraView.setCvCameraViewListener(this);
        mOpenCvCameraView.setCameraIndex(0); // front-camera(1),  back-camera(0)
        mLoaderCallback.onManagerConnected(LoaderCallbackInterface.SUCCESS);
    }


    private BaseLoaderCallback mLoaderCallback = new BaseLoaderCallback(this) {
        @Override
        public void onManagerConnected(int status) {
            switch (status) {
                case LoaderCallbackInterface.SUCCESS:
                {
                    mOpenCvCameraView.enableView();
                } break;
                default:
                {
                    super.onManagerConnected(status);
                } break;
            }
        }
    };


    @Override
    public void onPause()
    {
        super.onPause();
        if (mOpenCvCameraView != null)
            mOpenCvCameraView.disableView();
    }

    @Override
    public void onResume()
    {
        super.onResume();

        if (!OpenCVLoader.initDebug()) {
            Log.d(TAG, "onResume :: Internal OpenCV library not found.");
            OpenCVLoader.initAsync(OpenCVLoader.OPENCV_VERSION_3_2_0, this, mLoaderCallback);
        } else {
            Log.d(TAG, "onResum :: OpenCV library found inside package. Using it!");
            mLoaderCallback.onManagerConnected(LoaderCallbackInterface.SUCCESS);
        }
    }


    public void onDestroy() {
        super.onDestroy();

        if (mOpenCvCameraView != null)
            mOpenCvCameraView.disableView();
    }

    /**
     * A native method that is implemented by the 'native-lib' native library,
     * which is packaged with this application.
     */
    public native String stringFromJNI();

    @Override
    public void onCameraViewStarted(int width, int height) {

    }

    @Override
    public void onCameraViewStopped() {

    }

    @Override
    public Mat onCameraFrame(CameraBridgeViewBase.CvCameraViewFrame inputFrame) {
        matInput = inputFrame.rgba();
        if ( matResult != null ) matResult.release();
        matResult = new Mat(matInput.rows(), matInput.cols(), matInput.type());

        ConvertRGBtoGray(matInput.getNativeObjAddr(), matResult.getNativeObjAddr());

        return matResult;
    }

    //여기서부턴 퍼미션 관련 메소드
    static final int PERMISSIONS_REQUEST_CODE = 1000;
    String[] PERMISSIONS  = {"android.permission.CAMERA"};


    private boolean hasPermissions(String[] permissions) {
        int result;

        //스트링 배열에 있는 퍼미션들의 허가 상태 여부 확인
        for (String perms : permissions){

            result = ContextCompat.checkSelfPermission(this, perms);

            if (result == PackageManager.PERMISSION_DENIED){
                //허가 안된 퍼미션 발견
                return false;
            }
        }

        //모든 퍼미션이 허가되었음
        return true;
    }

    @Override
    public void onRequestPermissionsResult(int requestCode, @NonNull String[] permissions, @NonNull int[] grantResults) {
        super.onRequestPermissionsResult(requestCode, permissions, grantResults);

        switch(requestCode){
            case PERMISSIONS_REQUEST_CODE:
                if (grantResults.length > 0) {
                    boolean cameraPermissionAccepted = grantResults[0]
                            == PackageManager.PERMISSION_GRANTED;

                    if (!cameraPermissionAccepted)
                        showDialogForPermission("앱을 실행하려면 퍼미션을 허가하셔야합니다.");
                }
                break;
        }
    }

    @TargetApi(Build.VERSION_CODES.M)
    private void showDialogForPermission(String msg) {

        AlertDialog.Builder builder = new AlertDialog.Builder( MainActivity.this);
        builder.setTitle("알림");
        builder.setMessage(msg);
        builder.setCancelable(false);
        builder.setPositiveButton("예", new DialogInterface.OnClickListener() {
            public void onClick(DialogInterface dialog, int id){
                requestPermissions(PERMISSIONS, PERMISSIONS_REQUEST_CODE);
            }
        });
        builder.setNegativeButton("아니오", new DialogInterface.OnClickListener() {
            public void onClick(DialogInterface arg0, int arg1) {
                finish();
            }
        });
        builder.create().show();
    }


}

과정을 전부 마치고 나면 ConvertRGBtoGray 에 빨갛게 표시가 됩니다.
함수를 생성해주기 위해서 빨간 전구를 눌러서 아래의 버튼을 눌러줍니다.

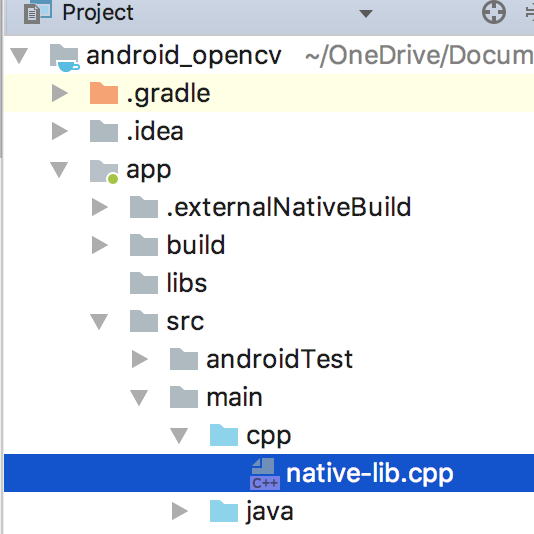
메소드 생성을 누르면 자동으로 android_opencv/app/src/main/cpp/native-lib.cpp 로 이동합니다.
아래의 분홍색 글자의 내용을 추가해줍니다.
#include <jni.h>
#include <string>
#include <opencv2/core/core.hpp>
#include <opencv2/imgproc/imgproc.hpp>

using namespace cv;

extern "C" JNIEXPORT jstring

JNICALL
Java_com_opencv_gohn_android_1opencv_MainActivity_stringFromJNI(
        JNIEnv *env,
        jobject /* this */) {
    std::string hello = "Hello from C++";
    return env->NewStringUTF(hello.c_str());
}
extern "C"
JNIEXPORT void JNICALL
Java_com_opencv_gohn_android_1opencv_MainActivity_ConvertRGBtoGray(JNIEnv *env, jobject instance,
                                                                   jlong matAddrInput,
                                                                   jlong matAddrResult) {

    // TODO
    Mat &matInput = *(Mat *)matAddrInput;
    Mat &matResult = *(Mat *)matAddrResult;

    cvtColor(matInput, matResult, CV_RGBA2GRAY);
}
TODO 밑에 추가한 코드는 RGBA 이미지를 GRAY 이미지로 변환하는 코드입니다.
작성을 하면 아직 opencv2를 인식하지 못합니다.

해결해봅시다!!
다음으로는 android_opencv/app/CMakeLists.txt를 수정해 주어야 합니다.
초록부분은 그대로 복사해서 넣으시면 됩니다.
분홍 글씨와 주황색 부분은 주의하셔야합니다.
분홍 글씨는 그대로 사용하지만, 주황색 부분은 각자의 OpenCV와 프로젝트의 경로에 따라서 변경해야합니다.
pathOpenCV에 OpenCV 라이브러리 경로, pathProject에 안드로이드 프로젝트 경로를 틀리지 않도록 조심해야 합니다.
# For more information about using CMake with Android Studio, read the
# documentation: https://d.android.com/studio/projects/add-native-code.html

# Sets the minimum version of CMake required to build the native library.

cmake_minimum_required(VERSION 3.4.1)


set(pathOPENCV /Users/imjaegon/programming/OpenCV-android-sdk)
set(pathPROJECT /Users/imjaegon/OneDrive/Documents/android/android_opencv)
set(pathLIBOPENCV_JAVA ${pathPROJECT}/app/src/main/JniLibs/${ANDROID_ABI}/libopencv_java3.so)

set(CMAKE_VERBOSE_MAKEFILE on)
set(CMAKE_CXX_FLAGS "${CMAKE_CXX_FLAGS} -std=gnu++11")

include_directories(${pathOPENCV}/sdk/native/jni/include)


# Creates and names a library, sets it as either STATIC
# or SHARED, and provides the relative paths to its source code.
# You can define multiple libraries, and CMake builds them for you.
# Gradle automatically packages shared libraries with your APK.

add_library( # Sets the name of the library.
             native-lib

             # Sets the library as a shared library.
             SHARED

             # Provides a relative path to your source file(s).
             src/main/cpp/native-lib.cpp )

# Searches for a specified prebuilt library and stores the path as a
# variable. Because CMake includes system libraries in the search path by
# default, you only need to specify the name of the public NDK library
# you want to add. CMake verifies that the library exists before
# completing its build.


add_library( lib_opencv SHARED IMPORTED )
set_target_properties(lib_opencv PROPERTIES IMPORTED_LOCATION ${pathLIBOPENCV_JAVA})


find_library( # Sets the name of the path variable.
              log-lib

              # Specifies the name of the NDK library that
              # you want CMake to locate.
              log )

# Specifies libraries CMake should link to your target library. You
# can link multiple libraries, such as libraries you define in this
# build script, prebuilt third-party libraries, or system libraries.

target_link_libraries( # Specifies the target library.
                       native-lib

                       lib_opencv

                       # Links the target library to the log library
                       # included in the NDK.
                       ${log-lib} )
이제 끝!!!
빌드해봅니다!!
사진이 흑백 사진으로 잘 바뀌어서 나옵니다 !!!!


- 출처 -
http://humble.tistory.com/39
https://developer.android.com/ndk/index.html?hl=ko
위키백과
[출처] http://melonicedlatte.com/android/2018/04/07/032920.html
본 웹사이트는 광고를 포함하고 있습니다.
광고 클릭에서 발생하는 수익금은 모두 웹사이트 서버의 유지 및 관리, 그리고 기술 콘텐츠 향상을 위해 쓰여집니다.
광고 클릭에서 발생하는 수익금은 모두 웹사이트 서버의 유지 및 관리, 그리고 기술 콘텐츠 향상을 위해 쓰여집니다.