- 전체
- 게임 일반 (make game basics)
- 모바일 기획 및 디자인
- GameMaker Studio
- Unity3D
- Cocos2D
- 3D Engine OGRE
- 3D Engine irrlicht
- copperCube
- corona SDK
- Windows Basic Game
- BaaS (Mobile Backend)
- phnegap & cordova
- ionic & anguler
- parse (backend)
- firebase (backend)
- Game Backend Server / Opt
- web assembly
- Smart Makers
- pyGame & Ren'Py
- 머드(MUD) 게임 만들기
- Xamarin(자마린)
- flutter (플루터 앱 개발)
- construct 2 / 3
- pocketbase
- RPG Maker 시리즈
- godot engine
- playmaker(unity)
phnegap & cordova [phonegap & cordova] Cordova - Overview 코도바 튜터리얼
2023.02.08 22:34
[phonegap & cordova] Cordova - Overview 코도바 튜터리얼
Cordova - Overview
Cordova is a platform for building hybrid mobile applications using HTML, CSS and JavaScript.
The official documentation gives us the definition of the Cordova −
"Apache Cordova is an open-source mobile development framework. It allows you to use standard web technologies such as HTML5, CSS3, and JavaScript for crossplatform development, avoiding each mobile platform native development language. Applications execute within wrappers targeted to each platform, and rely on standards-compliant API bindings to access each device's sensors, data, and network status."
Cordova Features
Let us now understand the features of Cordova in brief.
Command Line Interface (Cordova CLI)
This tool can be used for starting projects, building processes for different platforms, installing plugins and lot of other useful things that make the development process easier. You will learn how to use the Command Line Interface in the subsequent chapters.
Cordova Core Components
Cordova offers a set of core components that every mobile application needs. These components will be used for creating base of the app so we can spend more time to implement our own logic.
Cordova Plugins
Cordova offers API that will be used for implementing native mobile functions to our JavaScript app.
License
Cordova is licensed under the Apache License, Version 2.0. Apache and the Apache feather logos are trademarks of The Apache Software Foundation.
Cordova Advantages
We will now discuss the advantages of Cordova.
-
Cordova offers one platform for building hybrid mobile apps so we can develop one app that will be used on different mobile platforms – IOS, Android, Windows Phone, Amazon-fireos, blackberry, Firefox OS, Ubuntu and tizien.
-
It is faster to develop hybrid app then native app so Cordova can save on the development time.
-
Since we are using JavaScript when working with Cordova, we don't need to learn platform specific programming languages.
-
There are many community add-ons that can be used with Cordova, these have several libraries and frameworks, which are optimized for working with it.
Cordova Limitations
Following are the limitations of Cordova.
-
Hybrid apps are slower than native ones so it is not optimal to use Cordova for large apps that require lots of data and functionality.
-
Cross browser compatibility can create lots of issues. Most of the time we are building apps for different platforms so the testing and optimizing can be time consuming since we need to cover large number of devices and operating systems.
-
Some plugins have compatibility issues with different devices and platforms. There are also some native APIs that are not yet supported by Cordova.
Cordova - Environment Setup
In this chapter, we will understand the Environment Setup of Cordova. To begin with the setup, we need to first install a few components. The components are listed in the following table.
| S.No | Software & Description |
|---|---|
| 1 |
NodeJS and NPM NodeJS is the platform needed for Cordova development. Check out our NodeJS Environment Setup for more details. |
| 2 |
Android SDK For Android platform, you need to have Android SDK installed on your machine. Check out Android Environment Setup for more details. |
| 3 |
XCode For iOS platform, you need to have xCode installed on your machine. Check out iOS Environment Setup for more details |
Installing Cordova
Before we start, you need to know that we will use Windows command prompt in our tutorial.
Step 1 - Installing git
Even if you don't use git, it should be installed since Cordova is using it for some background processes. You can download git here. After you install git, open your environment variable.
- Right-Click on Computer
- Properties
- Advanced System settings
- Environment Variables
- System Variables
- Edit
Copy the following at the end of the variable value field. This is default path of the git installation. If you installed it on a different path you should use that instead of our example code below.
;C:\Program Files (x86)\Git\bin;C:\Program Files (x86)\Git\cmd
Now you can type git in your command prompt to test if the installation is successful.
Step 2 - Installing Cordova
This step will download and install Cordova module globally. Open the command prompt and run the following −
C:\Users\username>npm install -g cordova
You can check the installed version by running −
C:\Users\username>cordova -v
This is everything you need to start developing the Cordova apps on Windows operating system. In our next tutorial, we will show you how to create first application.
Cordova - First Application
We have understood how to install Cordova and set up the environment for it. Once everything is ready, we can create our first hybrid Cordova application.
Step 1 - Creating App
Open the directory where you want the app to be installed in command prompt. We will create it on desktop.
C:\Users\username\Desktop>cordova
   create CordovaProject io.cordova.hellocordova CordovaApp
-
CordovaProject is the directory name where the app is created.
-
io.cordova.hellocordova is the default reverse domain value. You should use your own domain value if possible.
-
CordovaApp is the title of your app.
Step 2 - Adding Platforms
You need to open your project directory in the command prompt. In our example, it is the CordovaProject. You should only choose platforms that you need. To be able to use the specified platform, you need to have installed the specific platform SDK. Since we are developing on windows, we can use the following platforms. We have already installed Android SDK, so we will only install android platform for this tutorial.
C:\Users\username\Desktop\CordovaProject>cordova platform add android
There are other platforms that can be used on Windows OS.
C:\Users\username\Desktop\CordovaProject>cordova platform add wp8
C:\Users\username\Desktop\CordovaProject>cordova platform add amazon-fireos
C:\Users\username\Desktop\CordovaProject>cordova platform add windows
C:\Users\username\Desktop\CordovaProject>cordova platform add blackberry10
C:\Users\username\Desktop\CordovaProject>cordova platform add firefoxos
If you are developing on Mac, you can use −
$ cordova platform add IOS
$ cordova platform add amazon-fireos
$ cordova platform add android
$ cordova platform add blackberry10
$ cordova platform add firefoxos
You can also remove platform from your project by using −
C:\Users\username\Desktop\CordovaProject>cordova platform rm android
Step 3 - Building and Running
In this step we will build the app for a specified platform so we can run it on mobile device or emulator.
C:\Users\username\Desktop\CordovaProject>cordova build android
Now we can run our app. If you are using the default emulator you should use −
C:\Users\username\Desktop\CordovaProject>cordova emulate android
If you want to use the external emulator or real device you should use −
C:\Users\username\Desktop\CordovaProject>cordova run android
NOTE − We will use the Genymotion android emulator since it is faster and more responsive than the default one. You can find the emulator here. You can also use real device for testing by enabling USB debugging from the options and connecting it to your computer via USB cable. For some devices, you will also need to install the USB driver.
Once we run the app, it will install it on the platform we specified. If everything is finished without errors, the output should show the default start screen of the app.
In our next tutorial, we will show you how to configure the Cordova Application.
Cordova - config.xml File
The config.xml file is the place where we can change the configuration of the app. When we created our app in the last tutorial, we set reverse domain and name. The values can be changed in the config.xml file. When we create the app, the default config file will also be created.
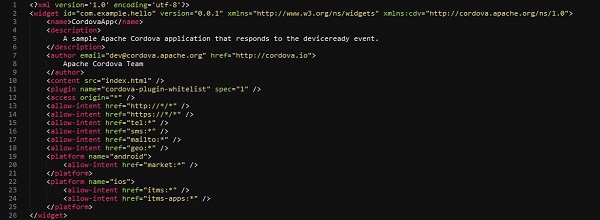
The following table explains configuration elements in config.xml.
config.xml Configuration Table
| S.No | Element & Details |
|---|---|
| 1 |
widget The app reverse domain value that we specified when creating the app. |
| 2 |
name The name of the app that we specified when creating the app. |
| 3 |
description Description for the app. |
| 4 |
author Author of the app. |
| 5 |
content The app's starting page. It is placed inside the www directory. |
| 6 |
plugin The plugins that are currently installed. |
| 7 |
access Used to control access to external domains. The default origin value is set to * which means that access is allowed to any domain. This value will not allow some specific URLs to be opened to protect information. |
| 8 |
allow-intent Allows specific URLs to ask the app to open. For example, <allow-intent href = "tel:*" /> will allow tel: links to open the dialer. |
| 9 |
platform The platforms for building the app. |
Cordova - Storage
We can use storage API available for storing data on the client apps. This will help the usage of the app when the user is offline and it can also improve performance. Since this tutorial is for beginners, we will show you how to use local storage. In one of our later tutorials, we will show you the other plugins that can be used.
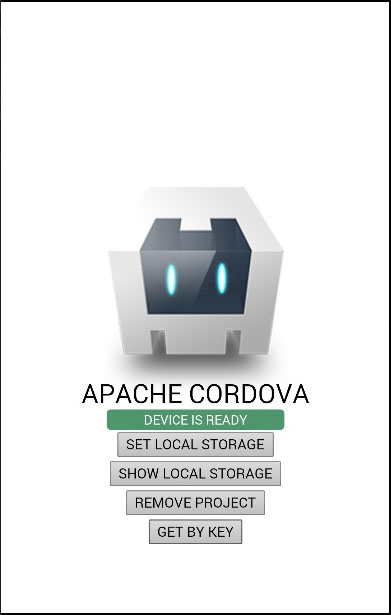
Step 1 - Adding Buttons
We will create four buttons in the index.html file. The buttons will be located inside the div class = "app" element.
<button id = "setLocalStorage">SET LOCAL STORAGE</button>
<button id = "showLocalStorage">SHOW LOCAL STORAGE</button>
<button id = "removeProjectFromLocalStorage">REMOVE PROJECT</button>
<button id = "getLocalStorageByKey">GET BY KEY</button>
It will produce the following screen −
Step 2 - Adding Event Listeners
Cordova security policy doesn't allow inline events so we will add event listeners inside index.js files. We will also assign window.localStorage to a localStorage variable that we will use later.
document.getElementById("setLocalStorage").addEventListener("click", setLocalStorage);
document.getElementById("showLocalStorage").addEventListener("click", showLocalStorage);
document.getElementById("removeProjectFromLocalStorage").addEventListener
   ("click", removeProjectFromLocalStorage);
document.getElementById("getLocalStorageByKey").addEventListener
   ("click", getLocalStorageByKey);
var localStorage = window.localStorage;
Step 3 - Creating Functions
Now we need to create functions that will be called when the buttons are tapped. First function is used for adding data to local storage.
function setLocalStorage() {
   localStorage.setItem("Name", "John");
   localStorage.setItem("Job", "Developer");
   localStorage.setItem("Project", "Cordova Project");
}
The next one will log the data we added to console.
function showLocalStorage() {
   console.log(localStorage.getItem("Name"));
   console.log(localStorage.getItem("Job"));
   console.log(localStorage.getItem("Project"));
}
If we tap SET LOCAL STORAGE button, we will set three items to local storage. If we tap SHOW LOCAL STORAGE afterwards, the console will log items that we want.

Let us now create function that will delete the project from local storage.
function removeProjectFromLocalStorage() {
   localStorage.removeItem("Project");
}
If we click the SHOW LOCAL STORAGE button after we deleted the project, the output will show null value for the project field.

We can also get the local storage elements by using the key() method which will take the index as an argument and return the element with corresponding index value.
function getLocalStorageByKey() {
   console.log(localStorage.key(0));
}
Now when we tap the GET BY KEY button, the following output will be displayed.

NOTE
When we use the key() method, the console will log the job instead of the name even though we passed argument 0 to retrieve the first object. This is because the local storage is storing data in alphabetical order.
The following table shows all the available local storage methods.
| S.No | Methods & Details |
|---|---|
| 1 |
setItem(key, value) Used for setting the item to local storage. |
| 2 |
getItem(key) Used for getting the item from local storage. |
| 3 |
removeItem(key) Used for removing the item from local storage. |
| 4 |
key(index) Used for getting the item by using the index of the item in local storage. This helps sort the items alphabetically. |
| 5 |
length() Used for retrieving the number of items that exists in local storage. |
| 6 |
clear() Used for removing all the key/value pairs from local storage. |
Cordova - Events
There are various events that can be used in Cordova projects. The following table shows the available events.
| S.No | Events & Details |
|---|---|
| 1 |
deviceReady This event is triggered once Cordova is fully loaded. This helps to ensure that no Cordova functions are called before everything is loaded. |
| 2 |
pause This event is triggered when the app is put into background. |
| 3 |
resume This event is triggered when the app is returned from background. |
| 4 |
backbutton This event is triggered when the back button is pressed. |
| 5 |
menubutton This event is triggered when the menu button is pressed. |
| 6 |
searchbutton This event is triggered when the Android search button is pressed. |
| 7 |
startcallbutton This event is triggered when the start call button is pressed. |
| 8 |
endcallbutton This event is triggered when the end call button is pressed. |
| 9 |
volumedownbutton This event is triggered when the volume down button is pressed. |
| 10 |
volumeupbutton This event is triggered when the volume up button is pressed. |
Using Events
All of the events are used almost the same way. We should always add event listeners in our js instead of the inline event calling since the Cordova Content Security Policy doesn't allow inline Javascript. If we try to call event inline, the following error will be displayed.

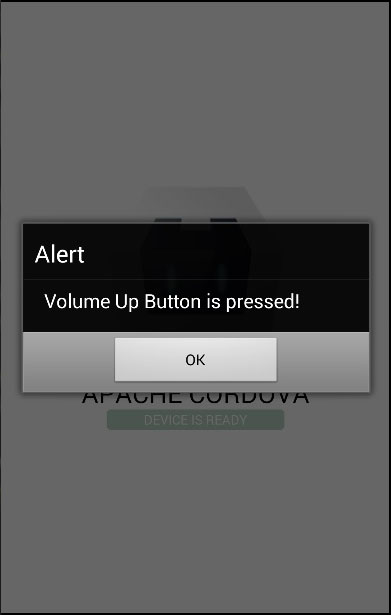
The right way of working with events is by using addEventListener. We will understand how to use the volumeupbutton event through an example.
document.addEventListener("volumeupbutton", callbackFunction, false);
function callbackFunction() {
   alert('Volume Up Button is pressed!');
}
Once we press the volume up button, the screen will display the following alert.
Handling Back Button
We should use the Android back button for app functionalities like returning to the previous screen. To implement your own functionality, we should first disable the back button that is used to exit the App.
document.addEventListener("backbutton", onBackKeyDown, false);
function onBackKeyDown(e) {
   e.preventDefault();
   alert('Back Button is Pressed!');
}
Now when we press the native Android back button, the alert will appear on the screen instead of exiting the app. This is done by using the e.preventDefault() command.
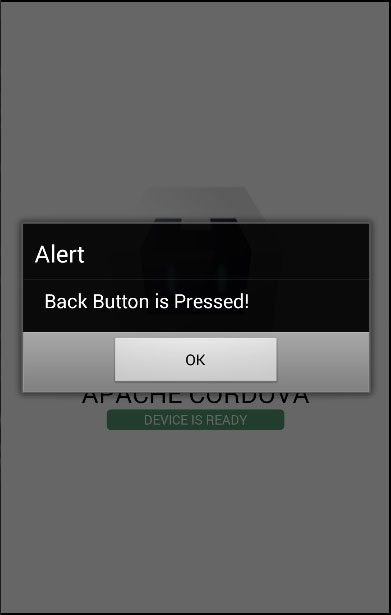
Cordova - Back Button
Handling Back Button
You will usually want to use Android back button for some app functionality like returning to previous screen. To be able to implement your own functionality, you first need to disable exiting the app when the back button is pressed.
document.addEventListener("backbutton", onBackKeyDown, false);
function onBackKeyDown(e) {
   e.preventDefault();
   alert('Back Button is Pressed!');
}
Now when we press the native Android back button, the alert will appear on the screen instead of exiting the app. This is done by using e.preventDefault().

Cordova - Plugman
Cordova Plugman is a useful command line tool for installing and managing plugins. You should use plugman if your app needs to run on one specific platform. If you want to create a cross-platform app you should use cordova-cli which will modify plugins for different platforms.
Step 1 - Installing Plugman
Open the command prompt window and run the following code snippet to install plugman.
C:\Users\username\Desktop\CordovaProject>npm install -g plugman
Step 2 - Installing Plugins
To understand how to install the Cordova plugin using plugman, we will use the Camera plugin as an example.
C:\Users\username\Desktop\CordovaProject>plugman
   install --platform android --project platforms\android
   --plugin cordova-plugin-camera
   plugman uninstall --platform android --project platforms\android
   --plugin cordova-plugin-camera
We need to consider three parameters as shown above.
-
--platform − platform that we are using (android, ios, amazon-fireos, wp8, blackberry10).
-
--project − path where the project is built. In our case, it is platforms\android directory.
-
--plugin − the plugin that we want to install.
If you set valid parameters, the command prompt window should display the following output.

Additional Methods
You can use the uninstall method in similar way.
C:\Users\username\Desktop\CordovaProject>plugman uninstall
   --platform android --project platforms\android --plugin cordova-plugin-camera
The command prompt console will display the following output.

Plugman offers some additional methods that can be used. The methods are listed in the following table.
| S.No | Method & Details |
|---|---|
| 1 |
install Used for installing Cordova plugins. |
| 2 |
uninstall Used for uninstalling Cordova plugins. |
| 3 |
fetch Used for copying Cordova plugin to specific location. |
| 4 |
prepare Used for updating configuration file to help JS module support. |
| 5 |
adduser Used for adding user account to the registry. |
| 6 |
publish Used for publishing plugin to the registry. |
| 7 |
unpublish Used for unpublishing plugin from the registry. |
| 8 |
search Used for searching the plugins in the registry. |
| 9 |
config Used for registry settings configuration. |
| 10 |
create Used for creating custom plugin. |
| 11 |
platform Used for adding or removing platform from the custom created plugin. |
Additional Commands
If you are stuck, you can always use the plugman -help command. The version can be checked by using plugman -v. To search for the plugin, you can use plugman search and finally you can change the plugin registry by using the plugman config set registry command.
NOTE
Since Cordova is used for cross platform development, in our subsequent chapters we will use Cordova CLI instead of Plugman for installing plugins.
Cordova - Battery Status
This Cordova plugin is used for monitoring device's battery status. The plugin will monitor every change that happens to device's battery.
Step 1 - Installing Battery Plugin
To install this plugin, we need to open the command prompt window and run the following code.
C:\Users\username\Desktop\CordovaProject>cordova plugin add cordova-pluginbattery-status
Step 2 - Add Event Listener
When you open the index.js file, you will find the onDeviceReady function. This is where the event listener should be added.
window.addEventListener("batterystatus", onBatteryStatus, false);
Step 3 - Create Callback Function
We will create the onBatteryStatus callback function at the bottom of the index.js file.
function onBatteryStatus(info) {
   alert("BATTERY STATUS:  Level: " + info.level + " isPlugged: " + info.isPlugged);
}
When we run the app, an alert will be triggered. At the moment, the battery is 100% charged.
When the status is changed, a new alert will be displayed. The battery status shows that the battery is now charged 99%.
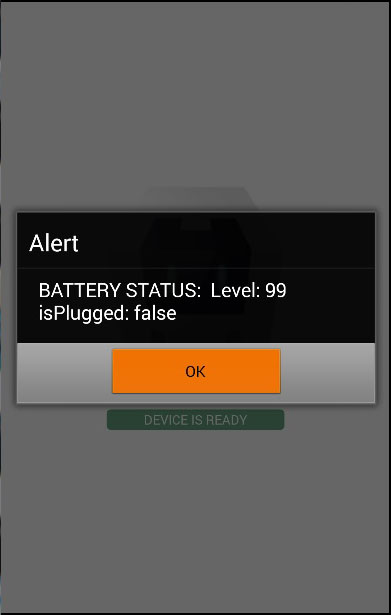
If we plug in the device to the charger, the new alert will show that the isPlugged value is changed to true.
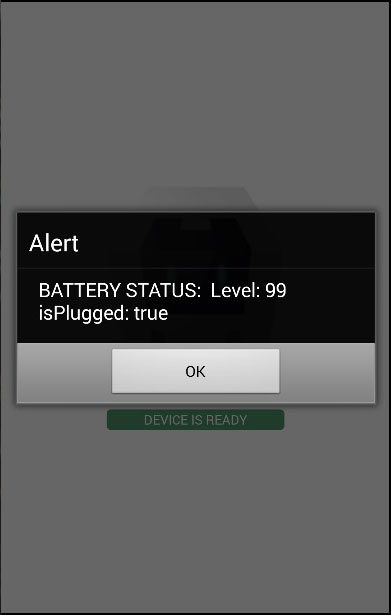
Additional Events
This plugin offers two additional events besides the batterystatus event. These events can be used in the same way as the batterystatus event.
| S.No | Event & Details |
|---|---|
| 1 |
batterylow The event is triggered when the battery charge percentage reaches low value. This value varies with different devices. |
| 2 |
batterycritical The event is triggered when the battery charge percentage reaches critical value. This value varies with different devices. |
Cordova - Camera
This plugin is used for taking photos or using files from the image gallery.
Step 1 - Install Camera Plugin
Run the following code in the command prompt window to install this plugin.
C:\Users\username\Desktop\CordovaProject>cordova plugin add cordova-plugincamera
Step 2 - Adding Button and Image
Now, we will create the button for calling the camera and img where the image will be displayed once taken. This will be added to index.html inside the div class = "app" element.
<button id = "cameraTakePicture">TAKE PICTURE</button>
<img id = "myImage"></img>
Step 3 - Adding Event Listener
The event listener is added inside the onDeviceReady function to ensure that Cordova is loaded before we start using it.
document.getElementById("cameraTakePicture").addEventListener
   ("click", cameraTakePicture);
Step 4 - Adding Functions (taking photo)
We will create the cameraTakePicture function that is passed as a callback to our event listener. It will be fired when the button is tapped. Inside this function, we will call the navigator.camera global object provided by the plugin API. If taking picture is successful, the data will be sent to the onSuccess callback function, if not, the alert with error message will be shown. We will place this code at the bottom of index.js.
function cameraTakePicture() {
   navigator.camera.getPicture(onSuccess, onFail, {
      quality: 50,
      destinationType: Camera.DestinationType.DATA_URL
   });

   function onSuccess(imageData) {
      var image = document.getElementById('myImage');
      image.src = "data:image/jpeg;base64," + imageData;
   }

   function onFail(message) {
      alert('Failed because: ' + message);
   }
}
When we run the app and press the button, native camera will be triggered.
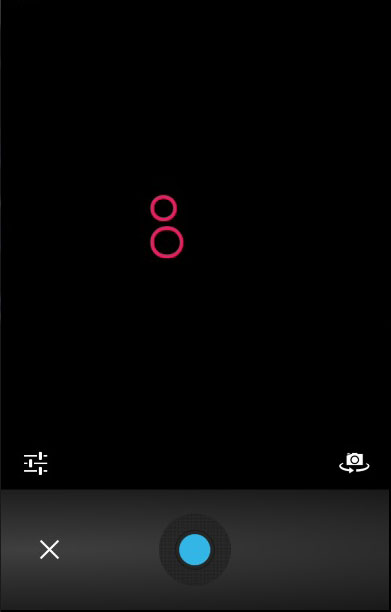
When we take and save picture, it will be displayed on screen.
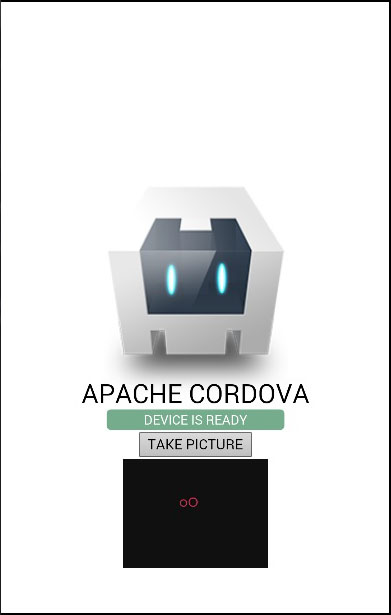
The same procedure can be used for getting image from the local file system. The only difference is the function created in the last step. You can see that the sourceType optional parameter has been added.
Step 1 B
C:\Users\username\Desktop\CordovaProject>cordova plugin add cordova-plugincamera
Step 2 B
<button id = "cameraGetPicture">GET PICTURE</button>
Step 3 B
document.getElementById("cameraGetPicture").addEventListener("click", cameraGetPicture);
Step 4 B
function cameraGetPicture() {
   navigator.camera.getPicture(onSuccess, onFail, { quality: 50,
      destinationType: Camera.DestinationType.DATA_URL,
      sourceType: Camera.PictureSourceType.PHOTOLIBRARY
   });

   function onSuccess(imageURL) {
      var image = document.getElementById('myImage');
      image.src = imageURL;
   }

   function onFail(message) {
      alert('Failed because: ' + message);
   }

}
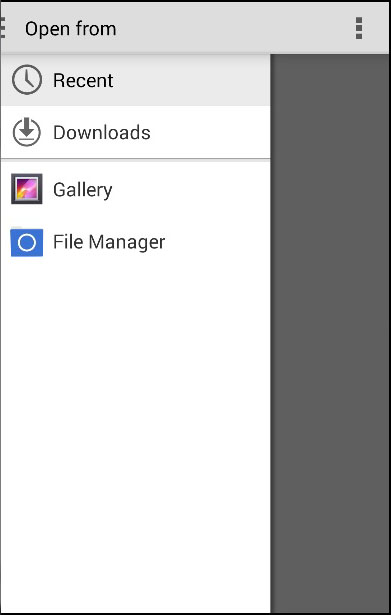
When we press the second button, the file system will open instead of the camera so we can choose the image that is to be displayed.
This plugin offers lots of optional parameters for customization.
| S.No | Parameter & Details |
|---|---|
| 1 |
quality Quality of the image in the range of 0-100. Default is 50. |
| 2 |
destinationType DATA_URL or 0 Returns base64 encoded string. FILE_URI or 1 Returns image file URI. NATIVE_URI or 2 Returns image native URI. |
| 3 |
sourceType PHOTOLIBRARY or 0 Opens photo library. CAMERA or 1 Opens native camera. SAVEDPHOTOALBUM or 2 Opens saved photo album. |
| 4 |
allowEdit Allows image editing. |
| 5 |
encodingType JPEG or 0 Returns JPEG encoded image. PNG or 1 Returns PNG encoded image. |
| 6 |
targetWidth Image scaling width in pixels. |
| 7 |
targetHeight Image scaling height in pixels. |
| 8 |
mediaType PICTURE or 0 Allows only picture selection. VIDEO or 1 Allows only video selection. ALLMEDIA or 2 Allows all media type selection. |
| 9 |
correctOrientation Used for correcting orientation of the image. |
| 10 |
saveToPhotoAlbum Used to save the image to the photo album. |
| 11 |
popoverOptions Used for setting popover location on IOS. |
| 12 |
cameraDirection FRONT or 0 Front camera. BACK or 1 Back camera. ALLMEDIA |
Cordova - Contacts
This plugin is used for accessing the contacts database of the device. In this tutorial we will show you how to create, query and delete contacts.
Step 1 - Install Contacts Plugin
C:\Users\username\Desktop\CordovaProject>cordova plugin add cordova-plugincontacts
Step 2 - Adding Buttons
The button will be used for calling the createContact function. We will place it in the div class = "app" in index.html file.
<button id = "createContact">ADD CONTACT</button>
<button id = "findContact">FIND CONTACT</button>
<button id = "deleteContact">DELETE CONTACT</button>
Step 2 - Add Event Listeners
Open index.js and copy the following code snippet into the onDeviceReady function.
document.getElementById("createContact").addEventListener("click", createContact);
document.getElementById("findContact").addEventListener("click", findContact);
document.getElementById("deleteContact").addEventListener("click", deleteContact);
Step 3A - Callback Function (navigator.contacts.create)
Now, we do not have any contacts stored on the device.
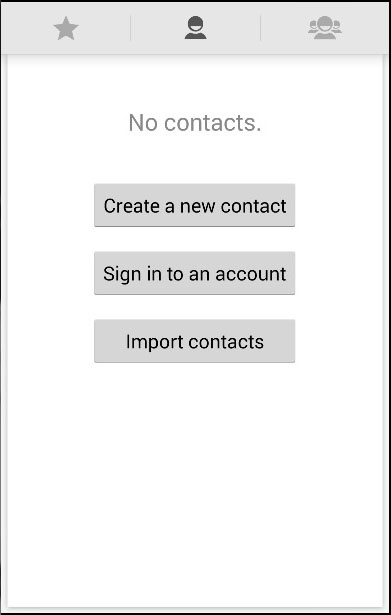
Our first callback function will call the navigator.contacts.create method where we can specify the new contact data. This will create a contact and assign it to the myContact variable but it will not be stored on the device. To store it, we need to call the save method and create success and error callback functions.
function createContact() {
   var myContact = navigator.contacts.create({"displayName": "Test User"});
   myContact.save(contactSuccess, contactError);

   function contactSuccess() {
      alert("Contact is saved!");
   }

   function contactError(message) {
      alert('Failed because: ' + message);
   }

}
When we click the ADD CONTACT button, new contact will be stored to the device contact list.
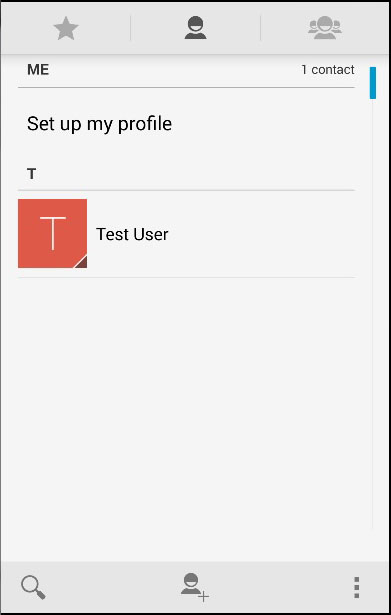
Step 3B - Callback Function (navigator.contacts.find)
Our second callback function will query all contacts. We will use the navigator.contacts.find method. The options object has filter parameter which is used to specify the search filter. multiple = true is used since we want to return all contacts from device. The field key to search contacts by displayName since we used it when saving contact.
After the options are set, we are using find method to query contacts. The alert message will be triggered for every contact that is found.
function findContacts() {
   var options = new ContactFindOptions();
   options.filter = "";
   options.multiple = true;
   fields = ["displayName"];
   navigator.contacts.find(fields, contactfindSuccess, contactfindError, options);

   function contactfindSuccess(contacts) {
      for (var i = 0; i < contacts.length; i++) {
         alert("Display Name = " + contacts[i].displayName);
      }
   }

   function contactfindError(message) {
      alert('Failed because: ' + message);
   }

}
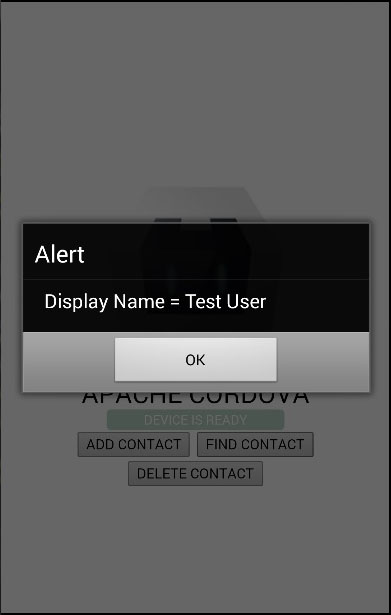
When we press the FIND CONTACT button, one alert popup will be triggered since we have saved only one contact.
Step 3C - Callback function (delete)
In this step, we will use the find method again but this time we will set different options. The options.filter is set to search that Test User which has to be deleted. After the contactfindSuccess callback function has returned the contact we want, we will delete it by using the remove method that requires its own success and error callbacks.
function deleteContact() {
   var options = new ContactFindOptions();
   options.filter = "Test User";
   options.multiple = false;
   fields = ["displayName"];
   navigator.contacts.find(fields, contactfindSuccess, contactfindError, options);

   function contactfindSuccess(contacts) {
      var contact = contacts[0];
      contact.remove(contactRemoveSuccess, contactRemoveError);

      function contactRemoveSuccess(contact) {
         alert("Contact Deleted");
      }

      function contactRemoveError(message) {
         alert('Failed because: ' + message);
      }
   }

   function contactfindError(message) {
      alert('Failed because: ' + message);
   }

}
Now, we have only one contact stored on the device. We will manually add one more to show you the deleting process.
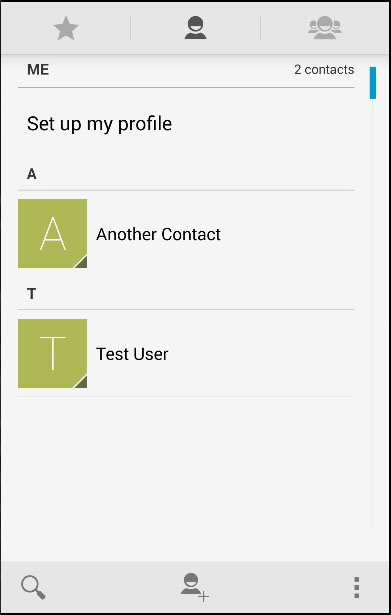
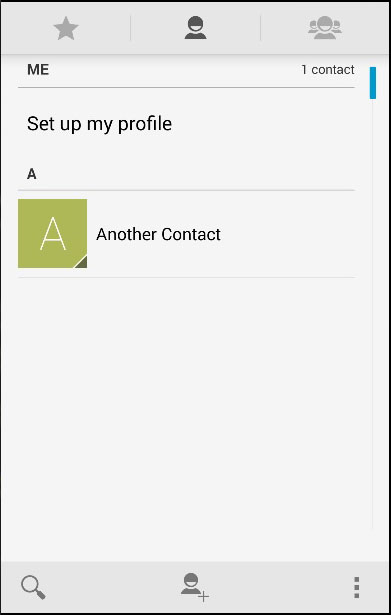
We will now click the DELETE CONTACT button to delete the Test User. If we check the contact list again, we will see that the Test User does not exist anymore.
Cordova - Device
This plugin is used for getting information about the user’s device.
Step 1 - Installing Device Plugin
To install this plugin, we need to run the following snippet in the command prompt.
C:\Users\username\Desktop\CordovaProject>cordova plugin add cordova-plugin-device
Step 2 - Adding Button
We will be using this plugin the same way we used the other Cordova plugins. Let us add a button in the index.html file. This button will be used for getting information about the device.
<button id = "cordovaDevice">CORDOVA DEVICE</button>
Step 3 - Adding Event Listener
Cordova plugins are available after the deviceready event so we will place the event listener inside the onDeviceReady function in index.js.
document.getElementById("cordovaDevice").addEventListener("click", cordovaDevice);
Step 4 - Creating Function
The following function will show how to use all possibilities the plugin provides. We will place it in index.js.
function cordovaDevice() {
   alert("Cordova version: " + device.cordova + "\n" +
      "Device model: " + device.model + "\n" +
      "Device platform: " + device.platform + "\n" +
      "Device UUID: " + device.uuid + "\n" +
      "Device version: " + device.version);
}
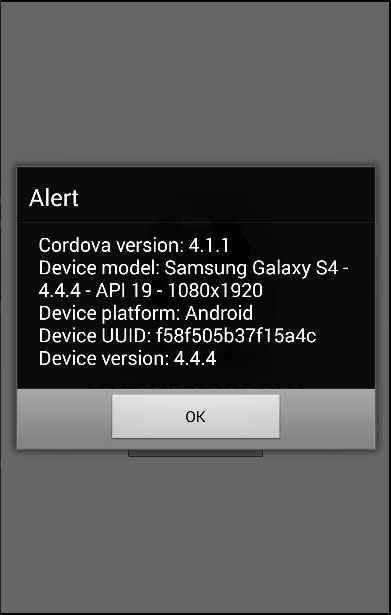
When we click the CORDOVA DEVICE button, the alert will display the Cordova version, device model, platform, UUID and device version.
Cordova - Accelerometer
The Accelerometer plugin is also called the device-motion. It is used to track device motion in three dimensions.
Step 1 - Install Accelerometer Plugin
We will install this plugin by using cordova-CLI. Type the following code in the command prompt window.
C:\Users\username\Desktop\CordovaProject>cordova plugin add cordova-plugin-device-motion
Step 2 - Add Buttons
In this step, we will add two buttons in the index.html file. One will be used for getting the current acceleration and the other will watch for the acceleration changes.
<button id = "getAcceleration">GET ACCELERATION</button>
<button id = "watchAcceleration">WATCH ACCELERATION</button>
Step 3 - Add Event Listeners
Let us now add event listeners for our buttons to onDeviceReady function inside index.js.
document.getElementById("getAcceleration").addEventListener("click", getAcceleration);
document.getElementById("watchAcceleration").addEventListener(
   "click", watchAcceleration);
Step 4 - Creating Functions
Now, we will create two functions. The first function will be used to get the current acceleration and the second function will watch the acceleration and the information about the acceleration will be triggered every three seconds. We will also add the clearWatch function wrapped by the setTimeout function to stop watching acceleration after the specified time frame. The frequency parameter is used to trigger the callback function every three seconds.
function getAcceleration() {
   navigator.accelerometer.getCurrentAcceleration(
      accelerometerSuccess, accelerometerError);

   function accelerometerSuccess(acceleration) {
      alert('Acceleration X: ' + acceleration.x + '\n' +
         'Acceleration Y: ' + acceleration.y + '\n' +
         'Acceleration Z: ' + acceleration.z + '\n' +
         'Timestamp: '      + acceleration.timestamp + '\n');
   };

   function accelerometerError() {
      alert('onError!');
   };
}

function watchAcceleration() {
   var accelerometerOptions = {
      frequency: 3000
   }
   var watchID = navigator.accelerometer.watchAcceleration(
      accelerometerSuccess, accelerometerError, accelerometerOptions);

   function accelerometerSuccess(acceleration) {
      alert('Acceleration X: ' + acceleration.x + '\n' +
         'Acceleration Y: ' + acceleration.y + '\n' +
         'Acceleration Z: ' + acceleration.z + '\n' +
         'Timestamp: '      + acceleration.timestamp + '\n');

      setTimeout(function() {
         navigator.accelerometer.clearWatch(watchID);
      }, 10000);
   };

   function accelerometerError() {
      alert('onError!');
   };

}
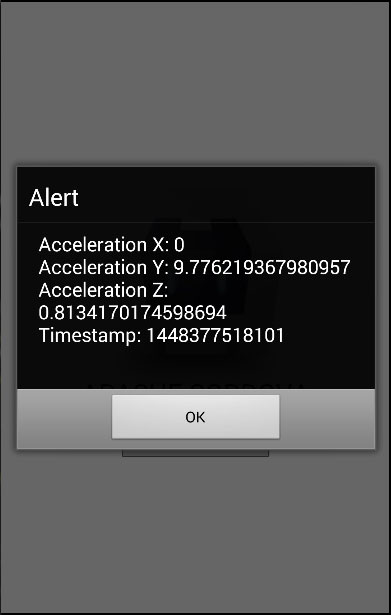
Now if we press the GET ACCELERATION button, we will get the current acceleration value. If we press the WATCH ACCELERATION button, the alert will be triggered every three seconds. After third alert is shown the clearWatch function will be called and we will not get any more alerts since we set timeout to 10000 milliseconds.
Cordova - Device Orientation
Compass is used to show direction relative to geographic north cardinal point.
Step 1 - Install Device Orientation plugin
Open the command prompt window and run the following.
C:\Users\username\Desktop\CordovaProject>cordova plugin
   add cordova-plugindevice-orientation
Step 2 - Add Buttons
This plugin is similar to the acceleration plugin. Let us now create two buttons in index.html.
<button id = "getOrientation">GET ORIENTATION</button>
<button id = "watchOrientation">WATCH ORIENTATION</button>
Step 3 - Add Event Listeners
Now, we will add event listeners inside the onDeviceReady function in index.js.
document.getElementById("getOrientation").addEventListener("click", getOrientation);
document.getElementById("watchOrientation").addEventListener("click", watchOrientation);
Step 4 - Creating Functions
We will create two functions; the first function will generate the current acceleration and the other will check on the orientation changes. You can see that we are using the frequency option again to keep a watch on changes that occur every three seconds.
function getOrientation() {
   navigator.compass.getCurrentHeading(compassSuccess, compassError);

   function compassSuccess(heading) {
      alert('Heading: ' + heading.magneticHeading);
   };

   function compassError(error) {
      alert('CompassError: ' + error.code);
   };
}

function watchOrientation(){
   var compassOptions = {
      frequency: 3000
   }
   var watchID = navigator.compass.watchHeading(compassSuccess,
      compassError, compassOptions);

   function compassSuccess(heading) {
      alert('Heading: ' + heading.magneticHeading);

      setTimeout(function() {
         navigator.compass.clearWatch(watchID);
      }, 10000);
   };

   function compassError(error) {
      alert('CompassError: ' + error.code);
   };
}
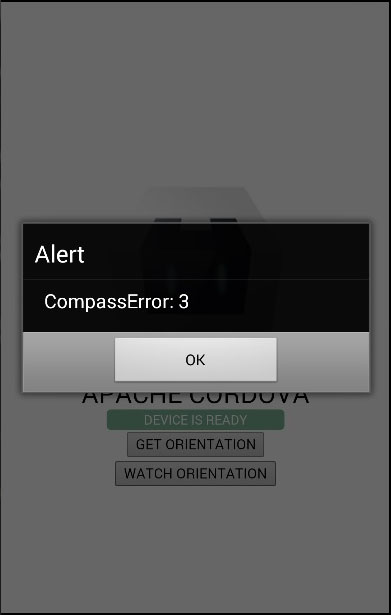
Since the compass plugin is almost the same as the acceleration plugin, we will show you an error code this time. Some devices do not have the magnetic sensor that is needed for the compass to work. If your device doesn't have it, the following error will be displayed.
Cordova - Dialogs
The Cordova Dialogs plugin will call the platform native dialog UI element.
Step 1 - Installing Dialog
Type the following command in the command prompt window to install this plugin.
C:\Users\username\Desktop\CordovaProject>cordova plugin add cordova-plugin-dialogs
Step 2 - Add Buttons
Let us now open index.html and add four buttons, one for every type of dialog.
<button id = "dialogAlert">ALERT</button>
<button id = "dialogConfirm">CONFIRM</button>
<button id = "dialogPrompt">PROMPT</button>
<button id = "dialogBeep">BEEP</button>
Step 3 - Add Event Listeners
Now we will add the event listeners inside the onDeviceReady function in index.js. The listeners will call the callback function once the corresponding button is clicked.
document.getElementById("dialogAlert").addEventListener("click", dialogAlert);
document.getElementById("dialogConfirm").addEventListener("click", dialogConfirm);
document.getElementById("dialogPrompt").addEventListener("click", dialogPrompt);
document.getElementById("dialogBeep").addEventListener("click", dialogBeep);
Step 4A - Create Alert Function
Since we added four event listeners, we will now create the callback functions for all of them in index.js. The first one is dialogAlert.
function dialogAlert() {
   var message = "I am Alert Dialog!";
   var title = "ALERT";
   var buttonName = "Alert Button";
   navigator.notification.alert(message, alertCallback, title, buttonName);

   function alertCallback() {
      console.log("Alert is Dismissed!");
   }
}
If we click the ALERT button, we will get see the alert dialog box.
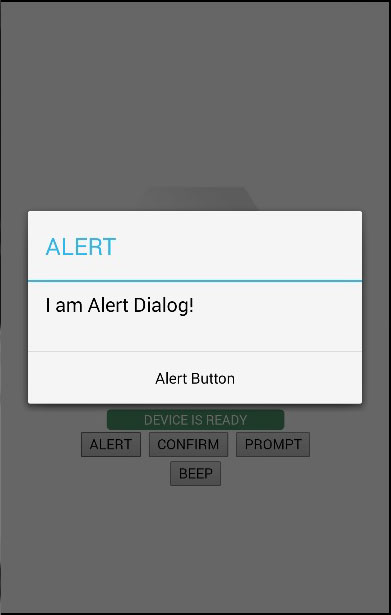
When we click the dialog button, the following output will be displayed on the console.

Step 4B - Create Confirm Function
The second function we need to create is the dialogConfirm function.
function dialogConfirm() {
   var message = "Am I Confirm Dialog?";
   var title = "CONFIRM";
   var buttonLabels = "YES,NO";
   navigator.notification.confirm(message, confirmCallback, title, buttonLabels);

   function confirmCallback(buttonIndex) {
      console.log("You clicked " + buttonIndex + " button!");
   }

}
When the CONFIRM button is pressed, the new dialog will pop up.
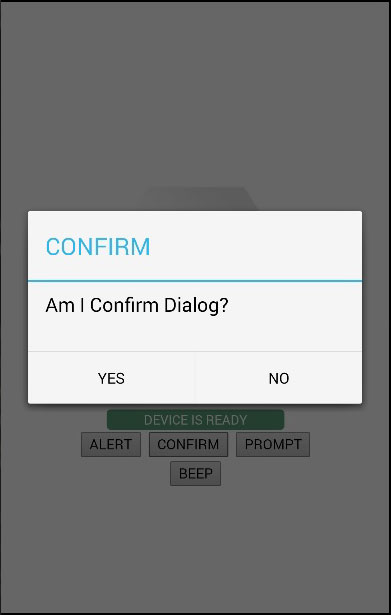
We will click the YES button to answer the question. The following output will be displayed on the console.

Step 4C - Create Prompt Function
The third function is the dialogPrompt function. This allows the users to type text into the dialog input element.
function dialogPrompt() {
   var message = "Am I Prompt Dialog?";
   var title = "PROMPT";
   var buttonLabels = ["YES","NO"];
   var defaultText = "Default"
   navigator.notification.prompt(message, promptCallback,
      title, buttonLabels, defaultText);

   function promptCallback(result) {
      console.log("You clicked " + result.buttonIndex + " button! \n" +
         "You entered " +  result.input1);
   }

}
The PROMPT button will trigger a dialog box as in the following screenshot.
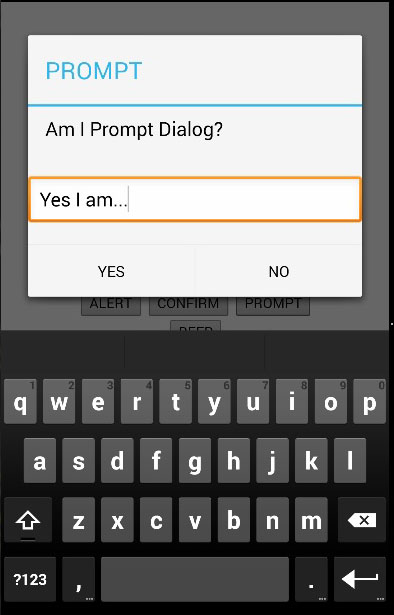
In this dialog box, we have an option to type the text. We will log this text in the console, together with a button that is clicked.

Step 4D - Create Beep Function
The last one is the dialogBeep function. This is used for calling the audio beep notification. The times parameter will set the number of repeats for the beep signal.
function dialogBeep() {
   var times = 2;
   navigator.notification.beep(times);
}
When we click the BEEP button, we will hear the notification sound twice, since the times value is set to 2.
Cordova - File System
This plugin is used for manipulating the native file system on the user's device.
Step 1 - Installing File Plugin
We need to run the following code in the command prompt to install this plugin.
C:\Users\username\Desktop\CordovaProject>cordova plugin add cordova-plugin-file
Step 2 - Add Buttons
In this example, we will show you how to create file, write to file, read it and delete it. For this reason, we will create four buttons in index.html. We will also add textarea wherein, the content of our file will be shown.
<button id = "createFile">CREATE FILE</button>
<button id = "writeFile">WRITE FILE</button>
<button id = "readFile">READ FILE</button>
<button id = "removeFile">DELETE FILE</button>
<textarea id = "textarea"></textarea>
Step 3 - Add Event Listeners
We will add event listeners in index.js inside the onDeviceReady function to ensure that everything has started before the plugin is used.
document.getElementById("createFile").addEventListener("click", createFile);
document.getElementById("writeFile").addEventListener("click", writeFile);
document.getElementById("readFile").addEventListener("click", readFile);
document.getElementById("removeFile").addEventListener("click", removeFile);
Step 4A - Create File function
The file will be created in the apps root folder on the device. To be able to access the root folder you need to provide superuser access to your folders. In our case, the path to root folder is \data\data\com.example.hello\cache. At the moment this folder is empty.
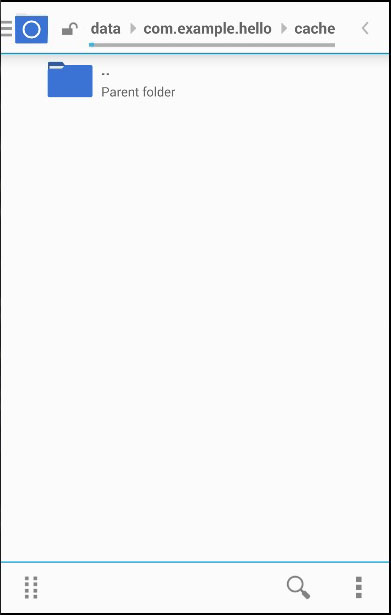
Let us now add a function that will create the log.txt file. We will write this code in index.js and send a request to the file system. This method uses WINDOW.TEMPORARY or WINDOW.PERSISTENT. The size that will be required for storage is valued in bytes (5MB in our case).
function createFile() {
   var type = window.TEMPORARY;
   var size = 5*1024*1024;
   window.requestFileSystem(type, size, successCallback, errorCallback)

   function successCallback(fs) {
      fs.root.getFile('log.txt', {create: true, exclusive: true}, function(fileEntry) {
         alert('File creation successfull!')
      }, errorCallback);
   }

   function errorCallback(error) {
      alert("ERROR: " + error.code)
   }

}
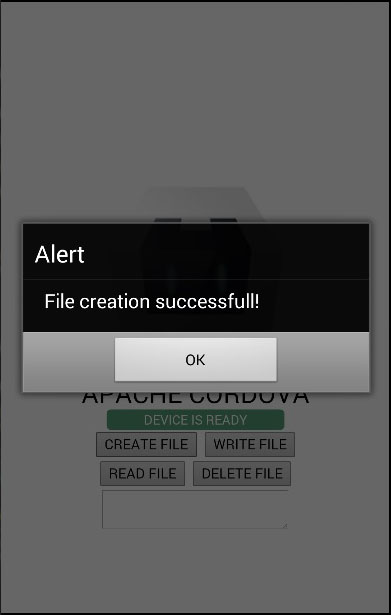
Now we can press the CREATE FILE button and the alert will confirm that we successfully created the file.
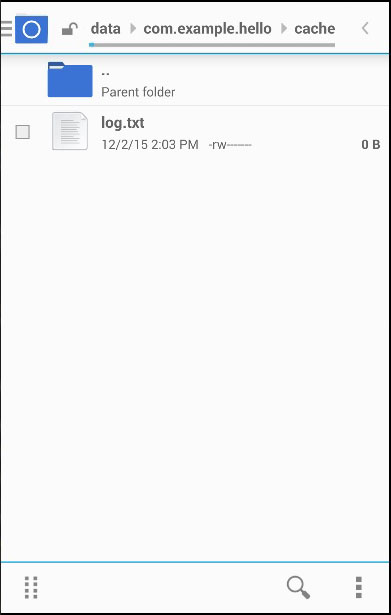
Now, we can check our apps root folder again and we can find our new file there.
Step 4B - Write File Function
In this step, we will write some text to our file. We will again send a request to the file system, and then create the file writer to be able to write Lorem Ipsum text that we assigned to the blob variable.
function writeFile() {
   var type = window.TEMPORARY;
   var size = 5*1024*1024;
   window.requestFileSystem(type, size, successCallback, errorCallback)

   function successCallback(fs) {
      fs.root.getFile('log.txt', {create: true}, function(fileEntry) {

         fileEntry.createWriter(function(fileWriter) {
            fileWriter.onwriteend = function(e) {
               alert('Write completed.');
            };

            fileWriter.onerror = function(e) {
               alert('Write failed: ' + e.toString());
            };

            var blob = new Blob(['Lorem Ipsum'], {type: 'text/plain'});
            fileWriter.write(blob);
         }, errorCallback);
      }, errorCallback);
   }

   function errorCallback(error) {
      alert("ERROR: " + error.code)
   }
}
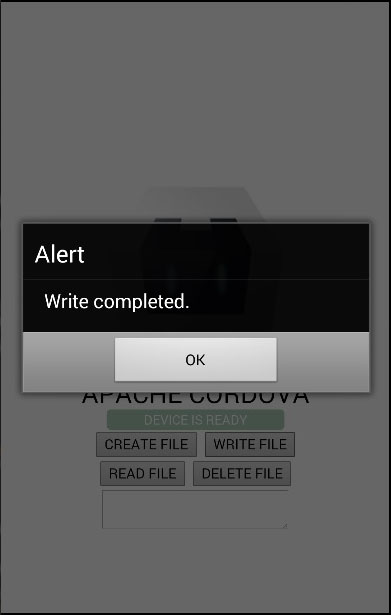
After pressing the WRITE FILE button, the alert will inform us that the writing is successful as in the following screenshot.
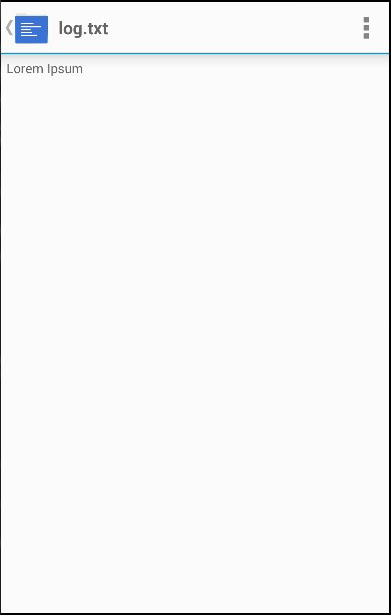
Now we can open log.txt and see that Lorem Ipsum is written inside.
Step 4C - Read File Function
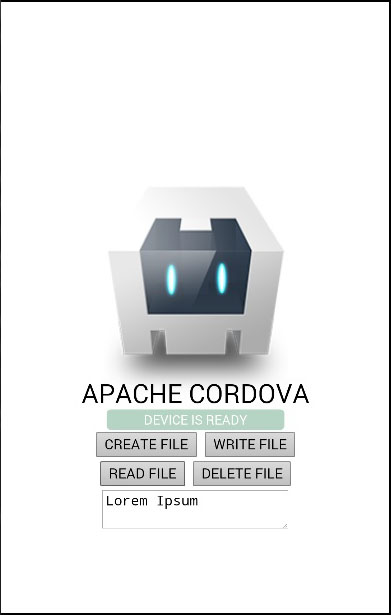
In this step, we will read the log.txt file and display it in the textarea element. We will send a request to the file system and get the file object, then we are creating reader. When the reader is loaded, we will assign the returned value to textarea.
function readFile() {
   var type = window.TEMPORARY;
   var size = 5*1024*1024;
   window.requestFileSystem(type, size, successCallback, errorCallback)

   function successCallback(fs) {
      fs.root.getFile('log.txt', {}, function(fileEntry) {

         fileEntry.file(function(file) {
            var reader = new FileReader();

            reader.onloadend = function(e) {
               var txtArea = document.getElementById('textarea');
               txtArea.value = this.result;
            };
            reader.readAsText(file);
         }, errorCallback);
      }, errorCallback);
   }

   function errorCallback(error) {
      alert("ERROR: " + error.code)
   }
}
When we click the READ FILE button, the text from the file will be written inside textarea.
Step 4D - Delete File Function
And finally we will create function for deleting log.txt file.
function removeFile() {
   var type = window.TEMPORARY;
   var size = 5*1024*1024;
   window.requestFileSystem(type, size, successCallback, errorCallback)

   function successCallback(fs) {
      fs.root.getFile('log.txt', {create: false}, function(fileEntry) {

         fileEntry.remove(function() {
            alert('File removed.');
         }, errorCallback);
      }, errorCallback);
   }

   function errorCallback(error) {
      alert("ERROR: " + error.code)
   }
}
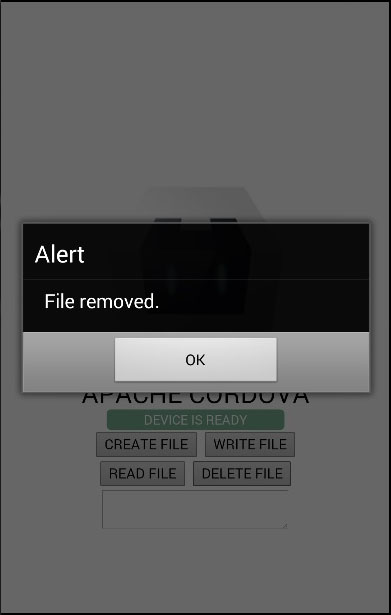
We can now press the DELETE FILE button to remove the file from the apps root folder. The alert will notify us that the delete operation is successful.
If we check the apps root folder, we will see that it is empty.

Cordova - File Transfer
This plugin is used for uploading and downloading files.
Step 1 - Installing File Transfer Plugin
We need to open command prompt and run the following command to install the plugin.
C:\Users\username\Desktop\CordovaProject>cordova plugin add cordova-plugin-file-transfer
Step 2 - Create Buttons
In this chapter, we will show you how to upload and download files. Let's create two buttons in index.html
<button id = "uploadFile">UPLOAD</button>
<button id = "downloadFile">DOWNLOAD</button>
Step 3 - Add Event Listeners
Event listeners will be created in index.js inside the onDeviceReady function. We are adding click events and callback functions.
document.getElementById("uploadFile").addEventListener("click", uploadFile);
document.getElementById("downloadFile").addEventListener("click", downloadFile);
Step 4A - Download Function
This function will be used for downloading the files from server to device. We uploaded file to postimage.org to make things more simple. You will probably want to use your own server. The function is placed in index.js and will be triggered when the corresponding button is pressed. uri is the server download link and fileURI is the path to the DCIM folder on our device.
function downloadFile() {
   var fileTransfer = new FileTransfer();
   var uri = encodeURI("http://s14.postimg.org/i8qvaxyup/bitcoin1.jpg");
   var fileURL =  "///storage/emulated/0/DCIM/myFile";

   fileTransfer.download(
      uri, fileURL, function(entry) {
         console.log("download complete: " + entry.toURL());
      },

      function(error) {
         console.log("download error source " + error.source);
         console.log("download error target " + error.target);
         console.log("download error code" + error.code);
      },

      false, {
         headers: {
            "Authorization": "Basic dGVzdHVzZXJuYW1lOnRlc3RwYXNzd29yZA=="
         }
      }
   );
}
Once we press the DOWNLOAD button, the file will be downloaded from the postimg.org server to our mobile device. We can check the specified folder and see that myFile is there.
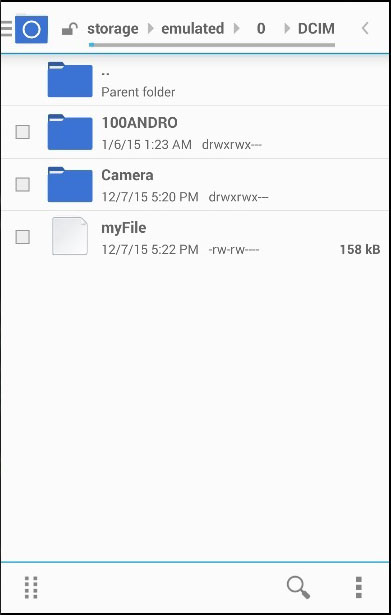
The console output will look like this −

Step 4B - Upload Function
Now let's create a function that will take the file and upload it to the server. Again, we want to simplify this as much as possible, so we will use posttestserver.com online server for testing. The uri value will be linked for posting to posttestserver.
function uploadFile() {
   var fileURL = "///storage/emulated/0/DCIM/myFile"
   var uri = encodeURI("http://posttestserver.com/post.php");
   var options = new FileUploadOptions();
   options.fileKey = "file";
   options.fileName = fileURL.substr(fileURL.lastIndexOf('/')+1);
   options.mimeType = "text/plain";

   var headers = {'headerParam':'headerValue'};
   options.headers = headers;
   var ft = new FileTransfer();
   ft.upload(fileURL, uri, onSuccess, onError, options);

   function onSuccess(r) {
      console.log("Code = " + r.responseCode);
      console.log("Response = " + r.response);
      console.log("Sent = " + r.bytesSent);
   }

   function onError(error) {
      alert("An error has occurred: Code = " + error.code);
      console.log("upload error source " + error.source);
      console.log("upload error target " + error.target);
   }

}
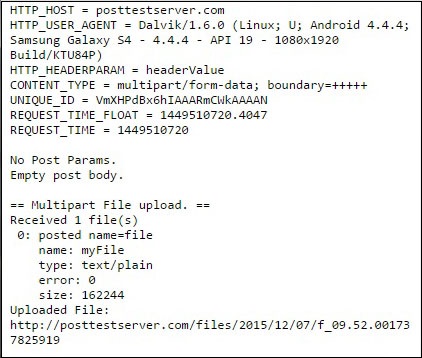
Now we can press the UPLOAD button to trigger this function. We will get a console output as confirmation that the uploading was successful.

We can also check the server to make sure that the file was uploaded.
Cordova - Geolocation
Geolocation is used for getting info about device's latitude and longitude.
Step 1 - Installing Plugin
We can install this plugin by typing the following code to command prompt window.
C:\Users\username\Desktop\CordovaProject>cordova plugin add cordova-plugin-geolocation
Step 2 - Add Buttons
In this tutorial we will show you how to get current position and how to watch for changes. We first need to create buttons that will call these functions.
<button id = "getPosition">CURRENT POSITION</button>
<button id = "watchPosition">WATCH POSITION</button>
Step 3 - Add Event Listeners
Now we want to add event listeners when the device is ready. We will add the code sample below to onDeviceReady function in index.js.
document.getElementById("getPosition").addEventListener("click", getPosition);
document.getElementById("watchPosition").addEventListener("click", watchPosition);
Step 3 - Create Functions
Two functions have to be created for two event listeners. One will be used for getting the current position and the other for watching the position.
function getPosition() {
   var options = {
      enableHighAccuracy: true,
      maximumAge: 3600000
   }
   var watchID = navigator.geolocation.getCurrentPosition(onSuccess, onError, options);

   function onSuccess(position) {
      alert('Latitude: '          + position.coords.latitude          + '\n' +
         'Longitude: '         + position.coords.longitude         + '\n' +
         'Altitude: '          + position.coords.altitude          + '\n' +
         'Accuracy: '          + position.coords.accuracy          + '\n' +
         'Altitude Accuracy: ' + position.coords.altitudeAccuracy  + '\n' +
         'Heading: '           + position.coords.heading           + '\n' +
         'Speed: '             + position.coords.speed             + '\n' +
         'Timestamp: '         + position.timestamp                + '\n');
   };

   function onError(error) {
      alert('code: '    + error.code    + '\n' + 'message: ' + error.message + '\n');
   }
}

function watchPosition() {
   var options = {
      maximumAge: 3600000,
      timeout: 3000,
      enableHighAccuracy: true,
   }
   var watchID = navigator.geolocation.watchPosition(onSuccess, onError, options);

   function onSuccess(position) {
      alert('Latitude: '          + position.coords.latitude          + '\n' +
         'Longitude: '         + position.coords.longitude         + '\n' +
         'Altitude: '          + position.coords.altitude          + '\n' +
         'Accuracy: '          + position.coords.accuracy          + '\n' +
         'Altitude Accuracy: ' + position.coords.altitudeAccuracy  + '\n' +
         'Heading: '           + position.coords.heading           + '\n' +
         'Speed: '             + position.coords.speed             + '\n' +
         'Timestamp: '         + position.timestamp                + '\n');
   };

   function onError(error) {
      alert('code: '    + error.code    + '\n' +'message: ' + error.message + '\n');
   }
}
In example above we are using two methods − getCurrentPosition and watchPosition. Both functions are using three parameters. Once we click CURRENT POSITION button, the alert will show geolocation values.
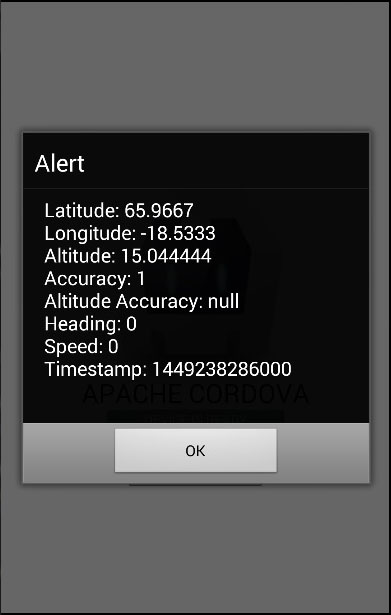
If we click WATCH POSITION button, the same alert will be triggered every three seconds. This way we can track movement changes of the user's device.
NOTE
This plugin is using GPS. Sometimes it can't return the values on time and the request will return timeout error. This is why we specified enableHighAccuracy: true and maximumAge: 3600000. This means that if a request isn't completed on time, we will use the last known value instead. In our example, we are setting maximumAge to 3600000 milliseconds.
Cordova - Globalization
This plugin is used for getting information about users’ locale language, date and time zone, currency, etc.
Step 1 - Installing Globalization Plugin
Open command prompt and install the plugin by typing the following code
C:\Users\username\Desktop\CordovaProject>cordova plugin add cordova-plugin-globalization
Step 2 - Add Buttons
We will add several buttons to index.html to be able to call different methods that we will create later.
<button id = "getLanguage">LANGUAGE</button>
<button id = "getLocaleName">LOCALE NAME</button>
<button id = "getDate">DATE</button>
<button id = "getCurrency">CURRENCY</button>
Step 3 - Add Event Listeners
Event listeners will be added inside getDeviceReady function in index.js file to ensure that our app and Cordova are loaded before we start using it.
document.getElementById("getLanguage").addEventListener("click", getLanguage);
document.getElementById("getLocaleName").addEventListener("click", getLocaleName);
document.getElementById("getDate").addEventListener("click", getDate);
document.getElementById("getCurrency").addEventListener("click", getCurrency);
Step 4A - Language Function
The first function that we are using returns BCP 47 language tag of the client's device. We will use getPreferredLanguage method. The function has two parameters onSuccess and onError. We are adding this function in index.js.
function getLanguage() {
   navigator.globalization.getPreferredLanguage(onSuccess, onError);

   function onSuccess(language) {
      alert('language: ' + language.value + '\n');
   }

   function onError(){
      alert('Error getting language');
   }
}
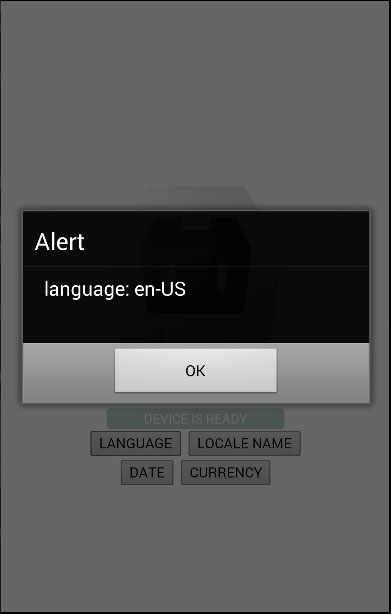
Once we press the LANGUAGE button, the alert will be shown on screen.
Step 4B - Locale Function
This function returns BCP 47 tag for the client's local settings. This function is similar as the one we created before. The only difference is that we are using getLocaleName method this time.
function getLocaleName() {
   navigator.globalization.getLocaleName(onSuccess, onError);

   function onSuccess(locale) {
      alert('locale: ' + locale.value);
   }

   function onError(){
      alert('Error getting locale');
   }
}
When we click the LOCALE button, the alert will show our locale tag.
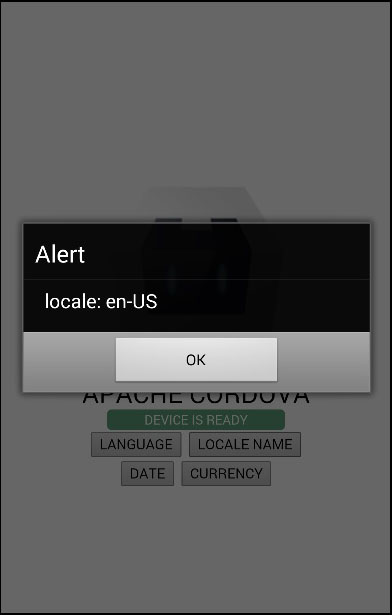
Step 4C - Date Function
This function is used for returning date according to client's locale and timezone setting. date parameter is the current date and options parameter is optional.
function getDate() {
   var date = new Date();

   var options = {
      formatLength:'short',
      selector:'date and time'
   }
   navigator.globalization.dateToString(date, onSuccess, onError, options);

   function onSuccess(date) {
      alert('date: ' + date.value);
   }

   function onError(){
      alert('Error getting dateString');
   }
}
We can now run the app and press DATE button to see the current date.
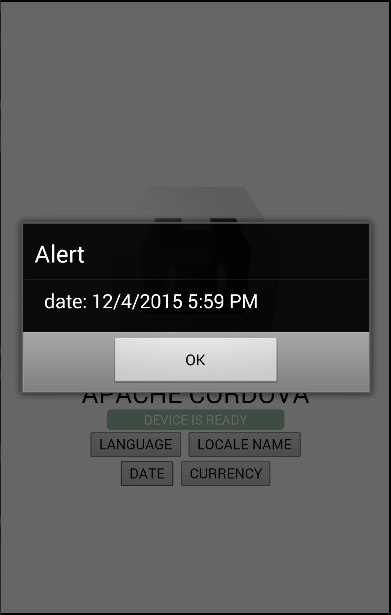
The last function that we will show is returning currency values according to client's device settings and ISO 4217 currency code. You can see that the concept is the same.
function getCurrency() {
   var currencyCode = 'EUR';
   navigator.globalization.getCurrencyPattern(currencyCode, onSuccess, onError);

   function onSuccess(pattern) {
      alert('pattern: '  + pattern.pattern  + '\n' +
         'code: '     + pattern.code     + '\n' +
         'fraction: ' + pattern.fraction + '\n' +
         'rounding: ' + pattern.rounding + '\n' +
         'decimal: '  + pattern.decimal  + '\n' +
         'grouping: ' + pattern.grouping);
   }

   function onError(){
      alert('Error getting pattern');
   }
}
The CURRENCY button will trigger alert that will show users currency pattern.
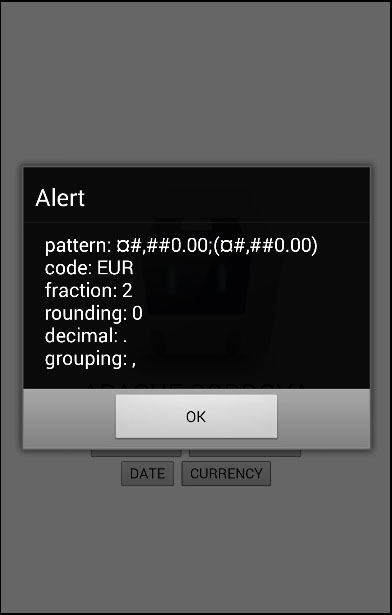
This plugin offers other methods. You can see all of it in the table below.
| method | parameters | details |
|---|---|---|
| getPreferredLanguage | onSuccess, onError | Returns client's current language. |
| getLocaleName | onSuccess, onError | Returns client's current locale settings. |
| dateToString | date, onSuccess, onError, options | Returns date according to client's locale and timezone. |
| stringToDate | dateString, onSuccess, onError, options | Parses a date according to client's settings. |
| getCurrencyPattern | currencyCode, onSuccess, onError | Returns client's currency pattern. |
| getDatePattern | onSuccess, onError, options | Returns client's date pattern. |
| getDateNames | onSuccess, onError, options | Returns an array of names of the months, weeks or days according to client's settings. |
| isDayLightSavingsTime | date, successCallback, errorCallback | Used to determine if the daylight saving time is active according to client's time zone and calendar. |
| getFirstDayOfWeek | onSuccess, onError | Returns the first day of the week according to client settings. |
| numberToString | number, onSuccess, onError, options | Returns number according to client's settings. |
| stringToNumber | string, onSuccess, onError, options | Parses a number according to client's settings. |
| getNumberPattern | onSuccess, onError, options | Returns the number pattern according to client's settings. |
Cordova - InAppBrowser
This plugin is used for opening web browser inside Cordova app.
Step 1 - Installing Plugin
We need to install this plugin in command prompt window before we are able to use it.
C:\Users\username\Desktop\CordovaProject>cordova plugin add cordova-plugin-inappbrowser
Step 2 - Add button
We will add one button that will be used for opening inAppBrowser window in index.html.
Step 3 - Add Event Listener
Now let's add event listener for our button in onDeviceReady function in index.js.
document.getElementById("openBrowser").addEventListener("click", openBrowser);
Step 4 - Create Function
In this step we are creating function that will open browser inside our app. We are assigning it to the ref variable that we can use later to add event listeners.
function openBrowser() {
   var url = 'https://cordova.apache.org';
   var target = '_blank';
   var options = "location = yes"
   var ref = cordova.InAppBrowser.open(url, target, options);

   ref.addEventListener('loadstart', loadstartCallback);
   ref.addEventListener('loadstop', loadstopCallback);
   ref.addEventListener('loaderror', loaderrorCallback);
   ref.addEventListener('exit', exitCallback);

   function loadstartCallback(event) {
      console.log('Loading started: '  + event.url)
   }

   function loadstopCallback(event) {
      console.log('Loading finished: ' + event.url)
   }

   function loaderrorCallback(error) {
      console.log('Loading error: ' + error.message)
   }

   function exitCallback() {
      console.log('Browser is closed...')
   }
}
If we press BROWSER button, we will see the following output on screen.
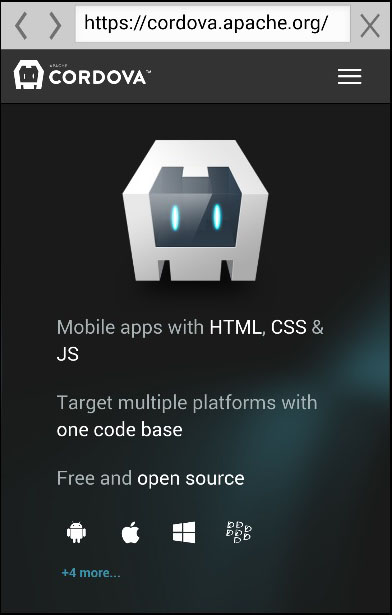
Console will also listen to events. loadstart event will fire when URL is started loading and loadstop will fire when URL is loaded. We can see it in console.

Once we close the browser, exit event will fire.

There are other possible options for InAppBrowser window. We will explain it in the table below.
| S.No | option & details |
|---|---|
| 1 |
location Used to turn the browser location bar on or off. Values are yes or no. |
| 2 |
hidden Used to hide or show inAppBrowser. Values are yes or no. |
| 3 |
clearCache Used to clear browser cookie cache. Values are yes or no. |
| 4 |
clearsessioncache Used to clear session cookie cache. Values are yes or no. |
| 5 |
zoom Used to hide or show Android browser's zoom controls. Values are yes or no. |
| 6 |
hardwareback yes to use the hardware back button to navigate back through the browser history. no to close the browser once back button is clicked. |
We can use ref (reference) variable for some other functionalities. We will show you just quick examples of it. For removing event listeners we can use −
ref.removeEventListener(eventname, callback);
For closing InAppBrowser we can use −
ref.close();
If we opened hidden window, we can show it −
ref.show();
Even JavaScript code can be injected to the InAppBrowser −
var details = "javascript/file/url"
ref.executeScript(details, callback);
The same concept can be used for injecting CSS −
var details = "css/file/url"
ref.inserCSS(details, callback);
Cordova - Media
Cordova media plugin is used for recording and playing audio sounds in Cordova apps.
Step 1 - Installing Media Plugin
Media plugin can be installed by running the following code in command prompt window.
C:\Users\username\Desktop\CordovaProject>cordova plugin add cordova-plugin-media
Step 2 - Add Buttons
In this tutorial, we will create simple audio player. Let's create buttons that we need in index.html.
<button id = "playAudio">PLAY</button>
<button id = "pauseAudio">PAUSE</button>
<button id = "stopAudio">STOP</button>
<button id = "volumeUp">VOLUME UP</button>
<button id = "volumeDown">VOLUME DOWN</button>
Step 3 - Add Event Listeners
Now we need to add event listeners for our buttons inside onDeviceReady function inside index.js.
document.getElementById("playAudio").addEventListener("click", playAudio);
document.getElementById("pauseAudio").addEventListener("click", pauseAudio);
document.getElementById("stopAudio").addEventListener("click", stopAudio);
document.getElementById("volumeUp").addEventListener("click", volumeUp);
document.getElementById("volumeDown").addEventListener("click", volumeDown);
Step 4A - Play Function
The first function that we are going to add is playAudio. We are defining myMedia outside of the function because we want to use it in functions that are going to be added later (pause, stop, volumeUp and volumeDown). This code is placed in index.js file.
var myMedia = null;
function playAudio() {
   var src = "/android_asset/www/audio/piano.mp3";

   if(myMedia === null) {
      myMedia = new Media(src, onSuccess, onError);

      function onSuccess() {
         console.log("playAudio Success");
      }

      function onError(error) {
         console.log("playAudio Error: " + error.code);
      }
   }
   myMedia.play();
}
We can click PLAY button to start the piano music from the src path.
Step 4B - Pause and Stop Functions
The next functions that we need is pauseAudio and stopAudio.
function pauseAudio() {
   if(myMedia) {
      myMedia.pause();
   }
}

function stopAudio() {
   if(myMedia) {
      myMedia.stop();
   }
   myMedia = null;
}
Now we can pause or stop the piano sound by clicking PAUSE or STOP buttons.
Step 4C - Volume Functions
To set the volume, we can use setVolume method. This method takes parameter with values from 0 to 1. We will set starting value to 0.5.
var volumeValue = 0.5;
function volumeUp() {
   if(myMedia && volumeValue < 1) {
      myMedia.setVolume(volumeValue += 0.1);
   }
}

function volumeDown() {
   if(myMedia && volumeValue > 0) {
      myMedia.setVolume(volumeValue -= 0.1);
   }
}
Once we press VOLUME UP or VOLUME DOWN we can change the volume value by 0.1.
The following table shows other methods that this plugin provides.
| S.No | Method & Details |
|---|---|
| 1 |
getCurrentPosition Returns current position of an audio. |
| 2 |
getDuration Returns duration of an audio. |
| 3 |
play Used for starting or resuming audio. |
| 4 |
pause Used for pausing audio. |
| 5 |
release Releases the underlying operating system's audio resources. |
| 6 |
seekTo Used for changing position of an audio. |
| 7 |
setVolume Used for setting volume for audio. |
| 8 |
startRecord Start recording an audio file. |
| 9 |
stopRecord Stop recording an audio file. |
| 10 |
stop Stop playing an audio file. |
Cordova - Media Capture
This plugin is used for accessing device's capture options.
Step 1 - Installing Media Capture Plugin
To install this plugin, we will open command prompt and run the following code −
C:\Users\username\Desktop\CordovaProject>cordova plugin add cordova-plugin-media-capture
Step 2 - Add Buttons
Since we want to show you how to capture audio, image and video, we will create three buttons in index.html.
<button id = "audioCapture">AUDIO</button>
<button id = "imageCapture">IMAGE</button>
<button id = "videoCapture">VIDEO</button>
Step 3 - Add Event Listeners
The next step is adding event listeners inside onDeviceReady in index.js.
document.getElementById("audioCapture").addEventListener("click", audioCapture);
document.getElementById("imageCapture").addEventListener("click", imageCapture);
document.getElementById("videoCapture").addEventListener("click", videoCapture);
Step 4A - Capture Audio Function
The first callback function in index.js is audioCapture. To start sound recorder, we will use captureAudio method. We are using two options − limit will allow recording only one audio clip per single capture operation and duration is number of seconds of a sound clip.
function audioCapture() {
   var options = {
      limit: 1,
      duration: 10
   };
   navigator.device.capture.captureAudio(onSuccess, onError, options);

   function onSuccess(mediaFiles) {
      var i, path, len;
      for (i = 0, len = mediaFiles.length; i < len; i += 1) {
         path = mediaFiles[i].fullPath;
         console.log(mediaFiles);
      }
   }

   function onError(error) {
      navigator.notification.alert('Error code: ' + error.code, null, 'Capture Error');
   }
}
When we press AUDIO button, sound recorder will open.
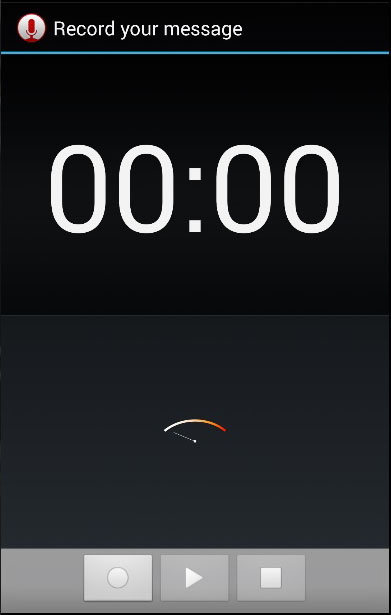
Console will show returned array of objects that users captured.
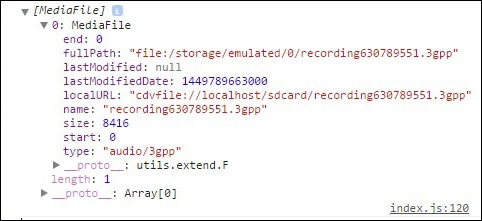
Step 4B - Capture Image Function
The function for capturing image will be the same as the last one. The only difference is that we are using captureImage method this time.
function imageCapture() {
   var options = {
      limit: 1
   };
   navigator.device.capture.captureImage(onSuccess, onError, options);

   function onSuccess(mediaFiles) {
      var i, path, len;
      for (i = 0, len = mediaFiles.length; i < len; i += 1) {
         path = mediaFiles[i].fullPath;
         console.log(mediaFiles);
      }
   }

   function onError(error) {
      navigator.notification.alert('Error code: ' + error.code, null, 'Capture Error');
   }
}
Now we can click IMAGE button to start the camera.
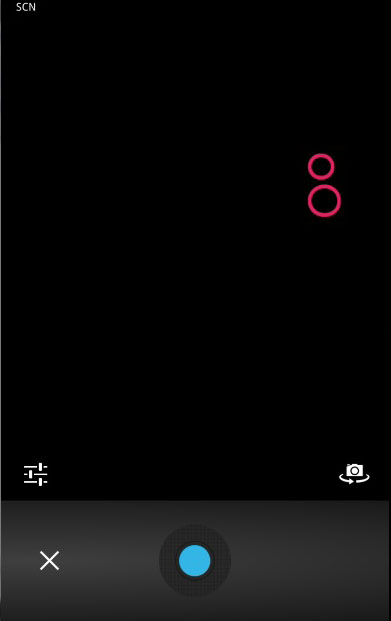
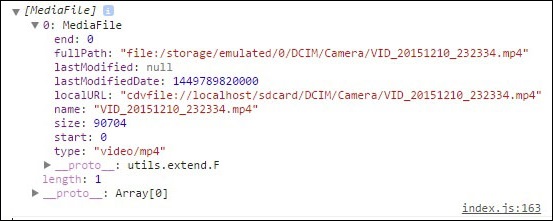
When we take picture, the console will log the array with image object.
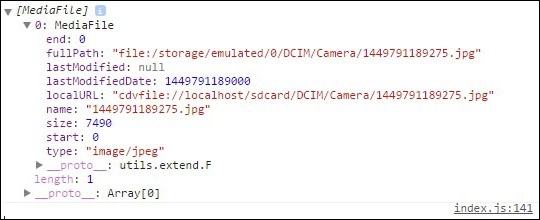
Step 4C - Capture Video Function
Let's repeat the same concept for capturing video. We will use videoCapture method this time.
function videoCapture() {
   var options = {
      limit: 1,
      duration: 10
   };
   navigator.device.capture.captureVideo(onSuccess, onError, options);

   function onSuccess(mediaFiles) {
      var i, path, len;
      for (i = 0, len = mediaFiles.length; i < len; i += 1) {
         path = mediaFiles[i].fullPath;
         console.log(mediaFiles);
      }
   }

   function onError(error) {
      navigator.notification.alert('Error code: ' + error.code, null, 'Capture Error');
   }
}
If we press VIDEO button, the camera will open and we can record the video.
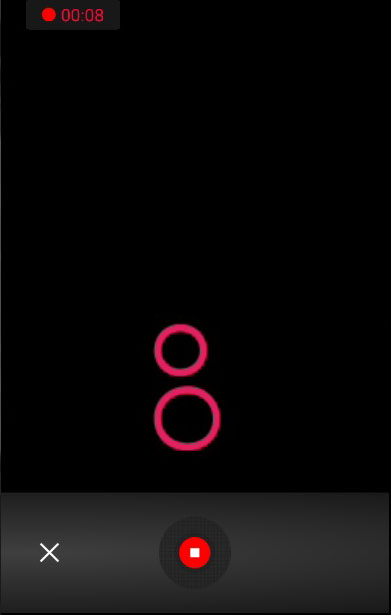
Once the video is saved, the console will return array once more. This time with video object inside.
Cordova - Network Information
This plugin provides information about device's network.
Step 1 - Installing Network Information Plugin
To install this plugin, we will open command prompt and run the following code −
C:\Users\username\Desktop\CordovaProject>cordova plugin
   add cordova-plugin-network-information
Step 2 - Add Buttons
Let's create one button in index.html that will be used for getting info about network.
<button id = "networkInfo">INFO</button>
Step 3 - Add Event Listeners
We will add three event listeners inside onDeviceReady function in index.js. One will listen for clicks on the button we created before and the other two will listen for changes in connection status.
document.getElementById("networkInfo").addEventListener("click", networkInfo);
document.addEventListener("offline", onOffline, false);
document.addEventListener("online", onOnline, false);
Step 4 - Creating Functions
networkInfo function will return info about current network connection once button is clicked. We are calling type method. The other functions are onOffline and onOnline. These functions are listening to the connection changes and any change will trigger the corresponding alert message.
function networkInfo() {
   var networkState = navigator.connection.type;
   var states = {};
   states[Connection.UNKNOWN]  = 'Unknown connection';
   states[Connection.ETHERNET] = 'Ethernet connection';
   states[Connection.WIFI]     = 'WiFi connection';
   states[Connection.CELL_2G]  = 'Cell 2G connection';
   states[Connection.CELL_3G]  = 'Cell 3G connection';
   states[Connection.CELL_4G]  = 'Cell 4G connection';
   states[Connection.CELL]     = 'Cell generic connection';
   states[Connection.NONE]     = 'No network connection';
   alert('Connection type: ' + states[networkState]);
}

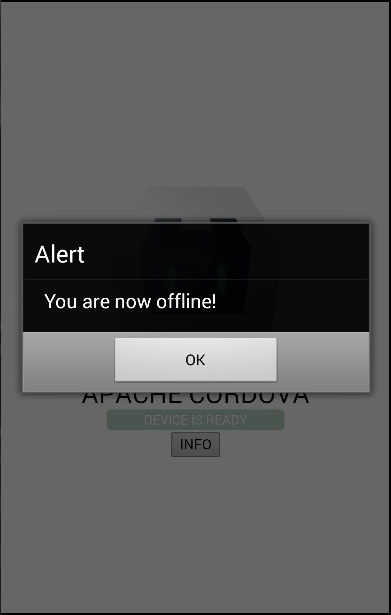
function onOffline() {
   alert('You are now offline!');
}

function onOnline() {
   alert('You are now online!');
}
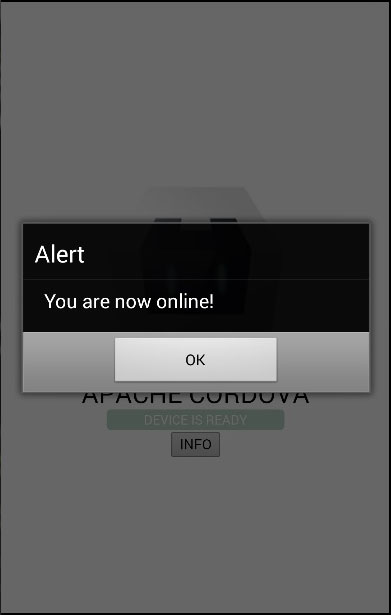
When we start the app connected to the network, onOnline function will trigger alert.
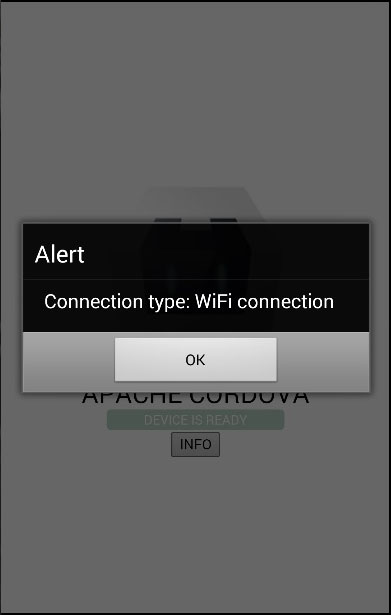
If we press INFO button the alert will show our network state.
If we disconnect from the network, onOffline function will be called.
Cordova - Splash Screen
This plugin is used to display a splash screen on application launch.
Step 1 - Installing Splash Screen Plugin
Splash screen plugin can be installed in command prompt window by running the following code.
C:\Users\username\Desktop\CordovaProject>cordova plugin add cordova-plugin-splashscreen
Step 2 - Add Splash Screen
Adding splash screen is different from adding the other Cordova plugins. We need to open config.xml and add the following code snippets inside the widget element.
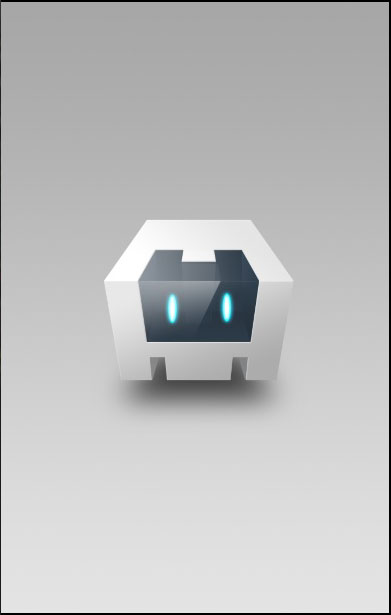
First snippet is SplashScreen. It has value property which is the name of the images in platform/android/res/drawable- folders. Cordova offers default screen.png images that we are using in this example, but you will probably want to add your own images. Important thing is to add images for portrait and landscape view and also to cover different screen sizes.
<preference name = "SplashScreen" value = "screen" />
Second snippet we need to add is SplashScreenDelay. We are setting value to 3000 to hide the splash screen after three seconds.
<preference name = "SplashScreenDelay" value = "3000" />
The last preference is optional. If value is set to true, the image will not be stretched to fit screen. If it is set to false, it will be stretched.
<preference name = "SplashMaintainAspectRatio" value = "true" />
Now when we run the app, we will see the splash screen.
Cordova - Vibration
This plugin is used for connecting to device's vibration functionality.
Step 1 - Installing Vibration Plugin
We can install this plugin in command prompt window by running the following code −
C:\Users\username\Desktop\CordovaProject>cordova plugin add cordova-plugin-vibration
Step 2 - Add Buttons
Once the plugin is installed we can add buttons in index.html that will be used later to trigger the vibration.
<button id = "vibration">VIBRATION</button>
<button id = "vibrationPattern">PATTERN</button>
Step 3 - Add Event Listeners
Now we are going to add event listeners inside onDeviceReady in index.js.
document.getElementById("vibration").addEventListener("click", vibration);
document.getElementById("vibrationPattern").addEventListener("click", vibrationPattern);
Step 4 - Create Functions
This plugin is very easy to use. We will create two functions.
function vibration() {
   var time = 3000;
   navigator.vibrate(time);
}

function vibrationPattern() {
   var pattern = [1000, 1000, 1000, 1000];
   navigator.vibrate(pattern);
}
The first function is taking time parameter. This parameter is used for setting the duration of the vibration. Device will vibrate for three seconds once we press VIBRATION button.
The second function is using pattern parameter. This array will ask device to vibrate for one second, then wait for one second, then repeat the process again.
Cordova - Whitelist
This plugin allows us to implement whitelist policy for app's navigation. When we create a new Cordova project, the whitelist plugin is installed and implemented by default. You can open the config.xml file to see allow-intent default settings provided by Cordova.
Navigation Whitelist
In the simple example below we are allowing links to some external URL. This code is placed in config.xml. Navigation to file:// URLs is allowed by default.
<allow-navigation href = "http://example.com/*" />
The asterix sign, *, is used to allow navigation to multiple values. In the above example, we are allowing navigation to all sub-domains of the example.com. The same can be applied to protocol or prefix to the host.
<allow-navigation href = "*://*.example.com/*" />
Intent Whitelist
There is also the allow-intent element which is used to specify which URLs are allowed to open the system. You can see in the config.xml that Cordova already allowed most of the needed links for us.
Network Request Whitelist
When you look inside config.xml file, there is <access origin="*" /> element. This element allows all network requests to our app via Cordova hooks. If you want to allow only specific requests, you can delete it from the config.xml and set it yourself.
The same principle is used as in previous examples.
<access origin = "http://example.com" />
This will allow all network requests from http://example.com.
Content Security Policy
You can see the current security policy for your app inside the head element in index.html.
<meta http-equiv = "Content-Security-Policy" content = "default-src
   'self' data: gap: https://ssl.gstatic.com 'unsafe-eval'; style-src
   'self' 'unsafe-inline'; media-src *">
This is default configuration. If you want to allow everything from the same origin and example.com, then you can use −
<meta http-equiv = "Content-Security-Policy" content = "default-src 'self' foo.com">
You can also allow everything, but restrict CSS and JavaScript to the same origin.
<meta http-equiv = "Content-Security-Policy" content = "default-src *;
   style-src 'self' 'unsafe-inline'; script-src 'self'
   'unsafe-inline' 'unsafe-eval'">
Since this is a beginners’ tutorial, we are recommending the default Cordova options. Once you get familiar with Cordova, you can try some different values.
Cordova - Best Practices
Cordova is used for creating hybrid mobile apps, so you need to consider this before you choose it for your project. Below are the best practices for Cordova apps development.
Single Page Apps
This is the recommended design for all Cordova apps. SPA is using client-side router and navigation loaded on the single page (usually index.html). The routing is handled via AJAX. If you have followed our tutorials, you probably noticed that almost every Cordova plugin needs to wait until the device is ready before it can be used. SPA design will improve loading speed and overall performance.
Touch Events
Since Cordova is used for mobile world it is natural to use touchstart and touchend events instead of click events. The click events have 300ms delay, so the clicks don’t feel native. On the other hand, touch events aren't supported on every platform. You should take this into consideration before you decide what to use.
Animations
You should always use hardware accelerated CSS Transitions instead of JavaScript animations since they will perform better on mobile devices.
Storage
Use storage caching as much as possible. Mobile network connections are usually bad, so you should minimize network calls inside your app. You should also handle offline status of the app, since there will be times when user's devices are offline.
Scrolling
Most of the time the first slow part inside your app will be scrolling lists. There are couple of ways to improve scrolling performance of the app. Our recommendation is to use native scrolling. When there are lots of items in the list, you should load them partially. Use loaders when necessary.
Images
Images can also slow the mobile app. You should use CSS image sprites whenever possible. Try to fit the images perfectly instead of scaling it.
CSS styles
You should avoid shadows and gradients, since they slow the rendering time of the page.
Simplification
Browser's DOM is slow, so you should try to minimize DOM manipulation and number of DOM elements.
Testing
Ensure that you test your app on as many devices and operating system versions as possible. If app works flawlessly on one device, it doesn't necessary mean that it will work on some other device or platform.
[출처] https://www.tutorialspoint.com/cordova/cordova_quick_guide.htm
광고 클릭에서 발생하는 수익금은 모두 웹사이트 서버의 유지 및 관리, 그리고 기술 콘텐츠 향상을 위해 쓰여집니다.


