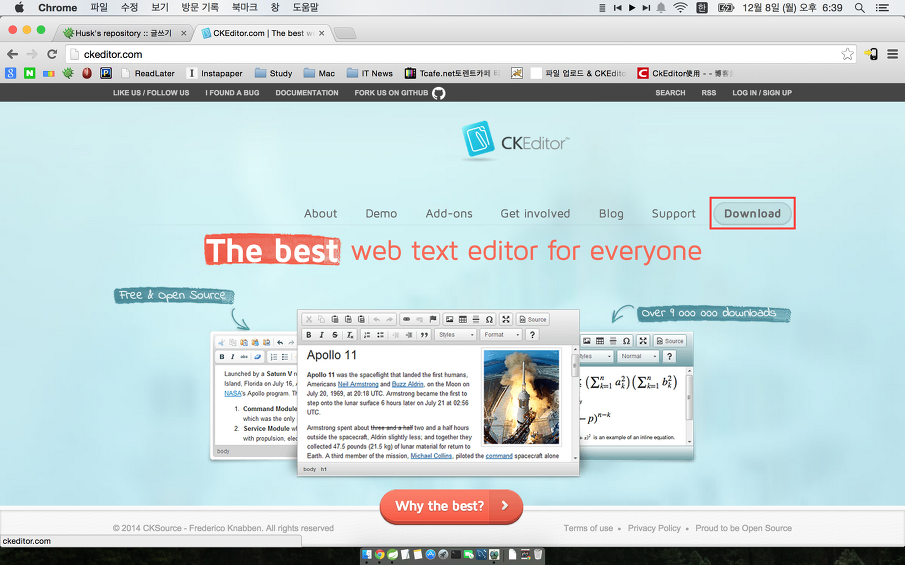
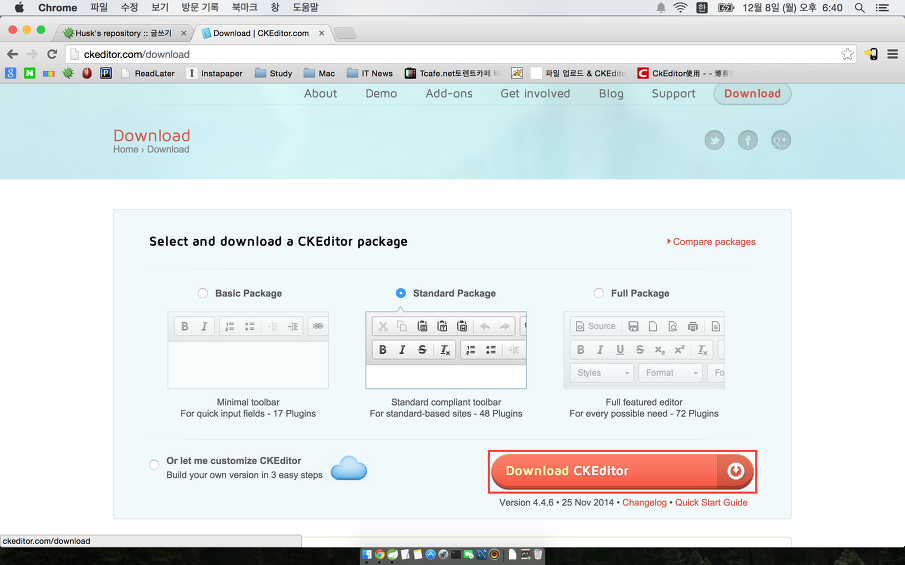
원하시는 package를 받으시면 됩니다.
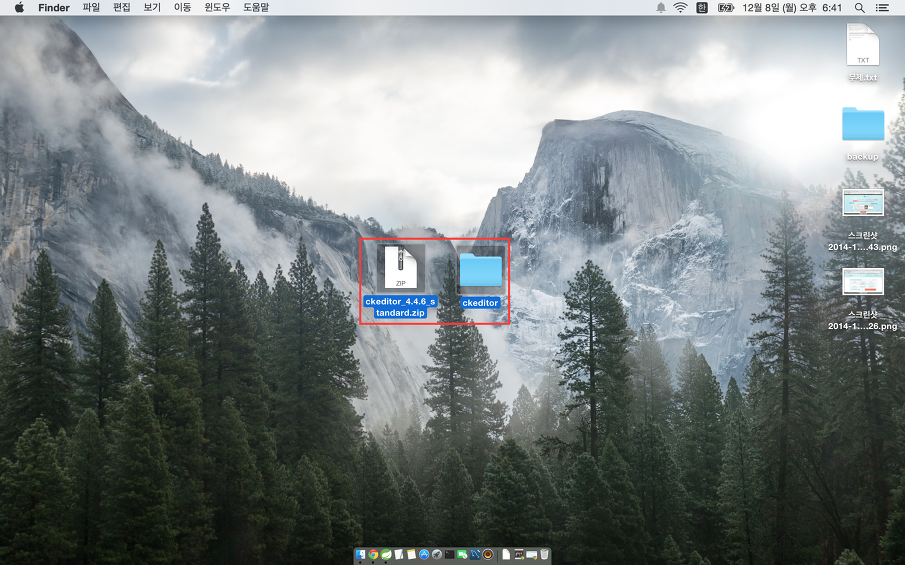
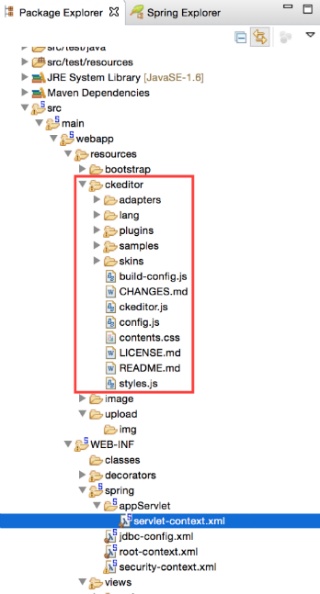
압축을 풀고 ekeditor를 resource 밑에 넣어줍니다.
해당 경로를 참고하여 주시기 바랍니다.
jsp페이지를 작성해줍니다.
<script type="text/javascript" src="/resources/ckeditor/ckeditor.js"></script> 추가
|
1
2
3
4
5
6
7
8
9
10
11
12
13
14
15
16
17
18
19
20
21
22
23
24
25
26
27
28
29
30
31
32
33
34
35
36
37
38
39
40
41
42
|
<%@ page contentType="text/html;charset=UTF-8" language="java" %>
<script type="text/javascript" src="/resources/ckeditor/ckeditor.js"></script>
<form class="form-horizontal" role="form" id="editorForm" method="post" action="/">
<div class="form-group">
<div class="form-group">
<div class="col-lg-12">
<textarea name="ckeditor" id="ckeditor"></textarea>
</div>
</div>
<div class="form-group">
<div class="col-lg-12" align="right">
<button type="submit" class="btn btn-default">저장</button>
</div>
</div>
</div>
</form>
<script>
$(function(){
CKEDITOR.replace( 'ckeditor', {//해당 이름으로 된 textarea에 에디터를 적용
width:'100%',
height:'400px',
filebrowserImageUploadUrl: '/community/imageUpload' //여기 경로로 파일을 전달하여 업로드 시킨다.
});
CKEDITOR.on('dialogDefinition', function( ev ){
var dialogName = ev.data.name;
var dialogDefinition = ev.data.definition;
switch (dialogName) {
case 'image': //Image Properties dialog
//dialogDefinition.removeContents('info');
dialogDefinition.removeContents('Link');
dialogDefinition.removeContents('advanced');
break;
}
});
});
</script>
|
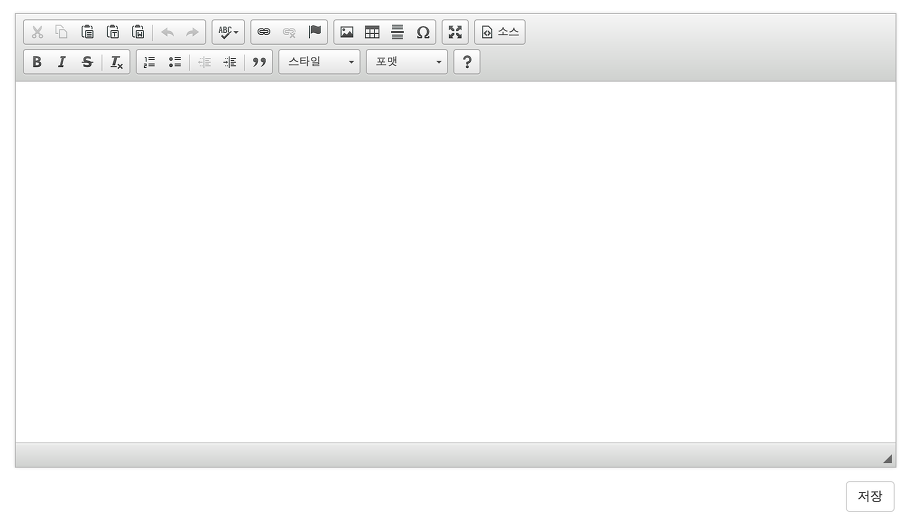
해당 부분까지 작성하시면 일단 아래와 같은 에디터를 확인 하실수 있습니다.
파일 업로드를 위한 dependency를 추가해줍니다.
pom.xml
|
1
2
3
4
5
6
7
8
9
10
11
|
<dependency>
<groupId>commons-fileupload</groupId>
<artifactId>commons-fileupload</artifactId>
<version>1.3.1</version>
</dependency>
<dependency>
<groupId>commons-io</groupId>
<artifactId>commons-io</artifactId>
<version>2.4</version>
</dependency>
|
servlet-context.xml에 빈을 추가해 줍니다.
|
1
|
<beans:bean id="multipartResolver" class="org.springframework.web.multipart.commons.CommonsMultipartResolver" />
|
controller를 작성합니다.
|
1
2
3
4
5
6
7
8
9
10
11
12
13
14
15
16
17
18
19
20
21
22
23
24
25
26
27
28
29
30
31
32
33
34
35
36
37
38
39
40
41
42
43
44
45
46
47
48
49
50
51
52
|
/**
* 이미지 업로드
* @param request
* @param response
* @param upload
*/
@RequestMapping(value = "/community/imageUpload", method = RequestMethod.POST)
public void communityImageUpload(HttpServletRequest request, HttpServletResponse response, @RequestParam MultipartFile upload) {
OutputStream out = null;
PrintWriter printWriter = null;
response.setCharacterEncoding("utf-8");
response.setContentType("text/html;charset=utf-8");
try{
String fileName = upload.getOriginalFilename();
byte[] bytes = upload.getBytes();
String uploadPath = "저장경로/" + fileName;
out = new FileOutputStream(new File(uploadPath));
out.write(bytes);
String callback = request.getParameter("CKEditorFuncNum");
printWriter = response.getWriter();
String fileUrl = "저장한 URL경로/" + fileName;
printWriter.println("<script type='text/javascript'>window.parent.CKEDITOR.tools.callFunction("
+ callback
+ ",'"
+ fileUrl
+ "','이미지를 업로드 하였습니다.'"
+ ")</script>");
printWriter.flush();
}catch(IOException e){
e.printStackTrace();
} finally {
try {
if (out != null) {
out.close();
}
if (printWriter != null) {
printWriter.close();
}
} catch (IOException e) {
e.printStackTrace();
}
}
return;
}
|
* 처음 에디터를 설치하면 에디터의 이미지 버튼을 클릭할때 업로드 탭이 안보입니다.
jsp에서 filebrowserImageUploadUrl: '/community/imageUpload' 를 추가하면 자동으로 업로드 탭이 생성됩니다.
필요없는 탭은
dialogDefinition.removeContents('Link');
dialogDefinition.removeContents('advanced');
로 제거해주시면 됩니다.
* 에디터 이미지 업로드 팝업창에서 파일을 업로드 하면 controller에서 파일을 받고 저장한 후에 window.parent.CKEDITOR.tools.callFunction을 호출하면서 저장하고난 이미지 url을 넘겨주면 이미지를 불러오게 됩니다.
*controller에서 파일 저장 처리를 하였는데 해당 부분은 service로 따로 빼주시고 저장 및 url경로도 따로 빼주시기 바랍니다.
그리고 파일 명 안겹치도록 처리 해주시고 용량 및 파일 검사 여부도 추가해주시기 바랍니다.
[출처] http://huskdoll.tistory.com/121


