Bootiful Development with Spring Boot and React 스프링 부트와 리엑트.js의 연동
2018.10.28 19:41
Bootiful Development with Spring Boot and React
스프링 부트와 리엑트.js의 연동
Bootiful Development with Spring Boot and React

React has been getting a lot of positive press in the last couple years, making it an appealing frontend option for Java developers! Once you learn how it works, it makes a lot of sense and can be fun to develop with. Not only that, but it’s wicked fast! If you’ve been following me, or if you’ve read this blog for a bit, you might remember my Bootiful Development with Spring Boot and Angular tutorial. Today, I’ll show you how to build the same application, except with React this time. Before we dive into that, let’s talk some more about what React is great for, and why I chose to explore it in this post.
First of all, React isn’t a full-fledged web framework. It’s more of a toolkit for developing UIs, a la GWT. If you want to make an HTTP request to fetch data from a server, React doesn’t provide any utilities for that. However, it does have a huge ecosystem that offers many libraries and components. What do I mean by huge? Put it this way: According to npmjs.com, Angular has 17,938 packages. React has almost three times as many at 42,428!
Angular is a good friend of mine and has been for a long time. I’m not abandoning my old friend to adopt React. I’m just making new friends. It’s good for a human’s perspective to have lots of friends with different backgrounds and opinions!
This post shows how you can build a UI and an API as separate apps. You’ll learn how to create REST endpoints with Spring MVC, configure Spring Boot to allow CORS, and create a React app to display its data. This app will show a list of beers from the API, then fetch a GIF from GIPHY that matches the beer’s name. I’ll also show you how to integrate Okta and its OpenID Connect (OIDC) support to lock down your API and add authentication to your UI.
Let’s get started!
Build an API with Spring Boot
NOTE: The instructions below for building a Spring Boot API are the same as the ones in Bootiful Development with Spring Boot and Angular. I’ve copied them below for your convenience.
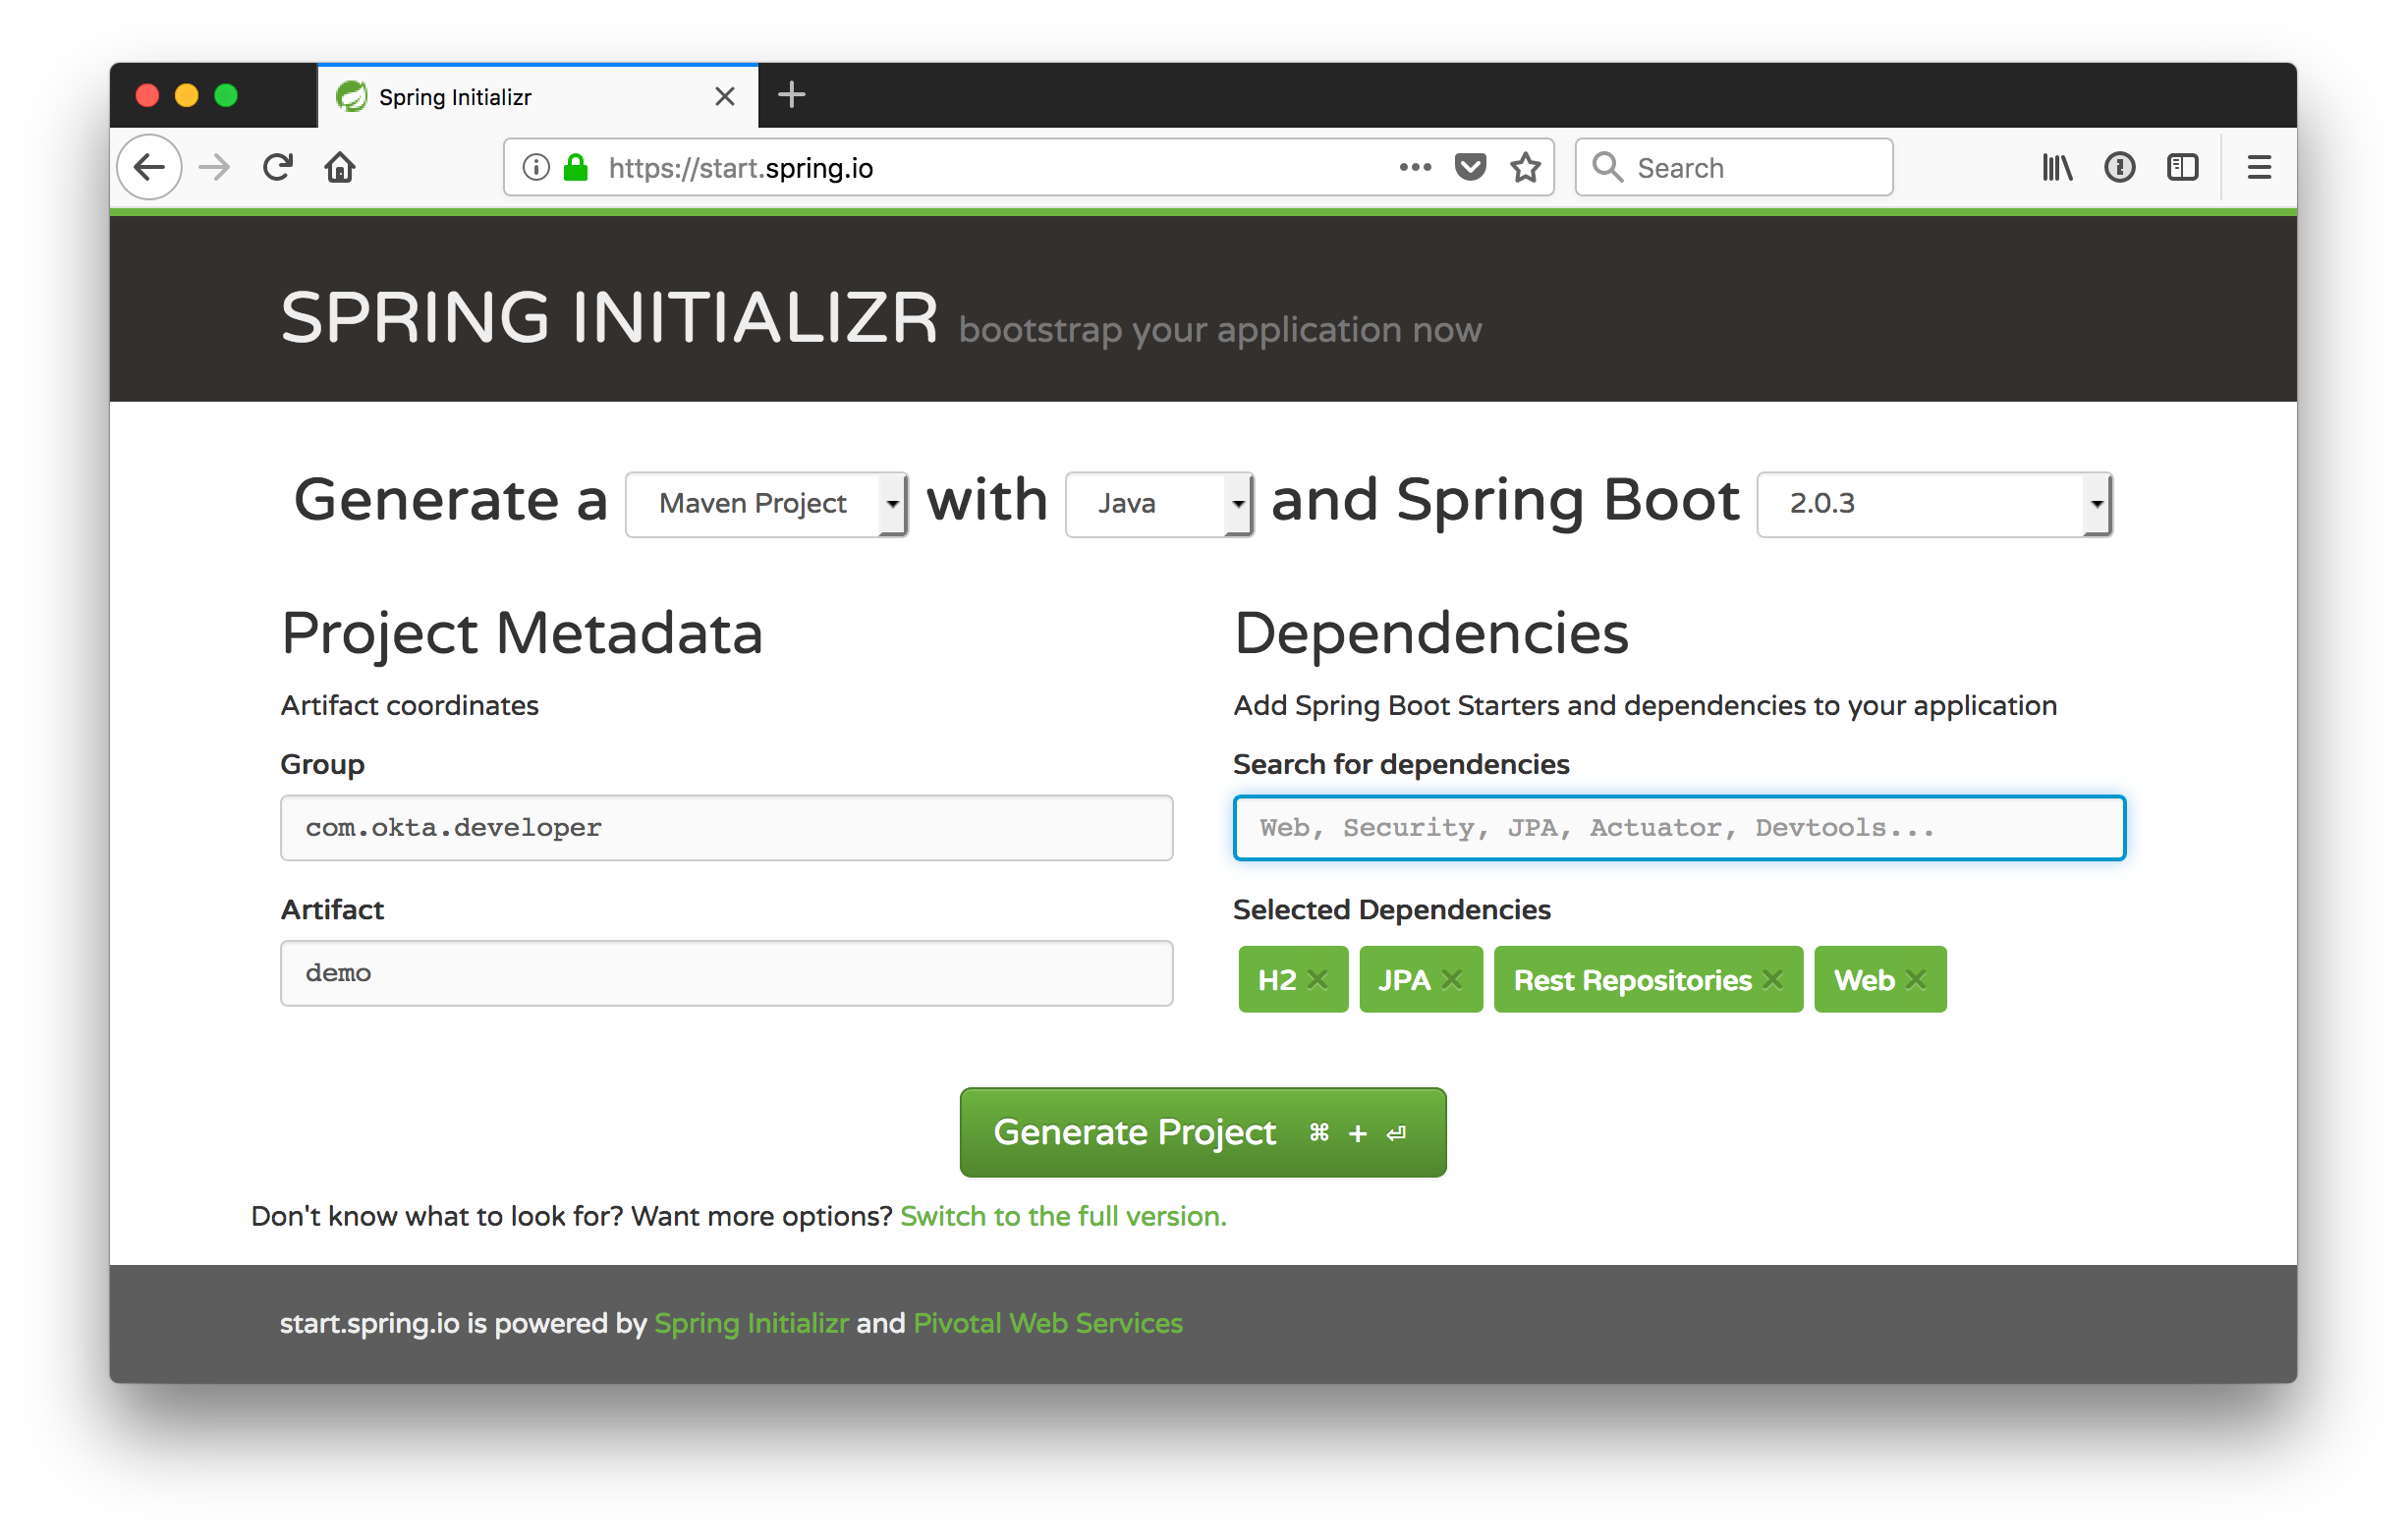
To get started with Spring Boot, navigate to start.spring.io and choose version 2.0.3+. In the “Search for dependencies” field, select the following:
- H2: An in-memory database
- JPA: Standard ORM for Java
- Rest Repositories: Allows you to expose your JPA repositories as REST endpoints
- Web: Spring MVC with Jackson (for JSON), Hibernate Validator, and embedded Tomcat
If you like the command-line better, you can use the following command to download a demo.zip file with HTTPie.
http https://start.spring.io/starter.zip \
dependencies==h2,data-jpa,data-rest,web -d
Create a directory called spring-boot-react-example, with a server directory inside it. Expand the contents of demo.zip into the server directory.
Open the “server” project in your favorite IDE and run DemoApplication or start it from the command line using ./mvnw spring-boot:run.
Create a com.okta.developer.demo.beer package and a Beer.java file in it. This class will be the entity that holds your data.
package com.okta.developer.demo.beer;

import javax.persistence.Entity;
import javax.persistence.GeneratedValue;
import javax.persistence.Id;

@Entity
public class Beer {

    @Id
    @GeneratedValue
    private Long id;
    private String name;

    public Beer() {}

    public Beer(String name) {
        this.name = name;
    }

    public Long getId() {
        return id;
    }

    public void setId(Long id) {
        this.id = id;
    }

    public String getName() {
        return name;
    }

    public void setName(String name) {
        this.name = name;
    }

    @Override
    public String toString() {
        return "Beer{" +
                "id=" + id +
                ", name='" + name + '\'' +
                '}';
    }
}
Add a BeerRepository class that leverages Spring Data to do CRUD on this entity.
package com.okta.developer.demo.beer;

import org.springframework.data.jpa.repository.JpaRepository;

interface BeerRepository extends JpaRepository<Beer, Long> {
}
Add a BeerCommandLineRunner that uses this repository and creates a default set of data.
package com.okta.developer.demo.beer;

import org.springframework.boot.CommandLineRunner;
import org.springframework.stereotype.Component;

import java.util.stream.Stream;

@Component
public class BeerCommandLineRunner implements CommandLineRunner {

    private final BeerRepository repository;

    public BeerCommandLineRunner(BeerRepository repository) {
        this.repository = repository;
    }

    @Override
    public void run(String... strings) throws Exception {
        // Top beers from https://www.beeradvocate.com/lists/top/
        Stream.of("Kentucky Brunch Brand Stout", "Good Morning", "Very Hazy", "King Julius",
                "Budweiser", "Coors Light", "PBR").forEach(name ->
                repository.save(new Beer(name))
        );
        repository.findAll().forEach(System.out::println);
    }
}
Rebuild your project, and you should see a list of beers printed in your terminal.

Add a @RepositoryRestResource annotation to BeerRepository to expose all its CRUD operations as REST endpoints.
import org.springframework.data.rest.core.annotation.RepositoryRestResource;

@RepositoryRestResource
interface BeerRepository extends JpaRepository<Beer, Long> {
}
Add a BeerController class to create an endpoint that filters out less-than-great beers.
package com.okta.developer.demo.beer;

import org.springframework.web.bind.annotation.GetMapping;
import org.springframework.web.bind.annotation.RestController;

import java.util.Collection;
import java.util.HashMap;
import java.util.Map;
import java.util.stream.Collectors;

@RestController
public class BeerController {
    private BeerRepository repository;

    public BeerController(BeerRepository repository) {
        this.repository = repository;
    }

    @GetMapping("/good-beers")
    public Collection<Beer> goodBeers() {
        return repository.findAll().stream()
                .filter(this::isGreat)
                .collect(Collectors.toList());
    }

    private boolean isGreat(Beer beer) {
        return !beer.getName().equals("Budweiser") &&
                !beer.getName().equals("Coors Light") &&
                !beer.getName().equals("PBR");
    }
}
Re-build your application and navigate to http://localhost:8080/good-beers. You should see the list of good beers in your browser.

You should also see this same result in your terminal window when using HTTPie.
http localhost:8080/good-beers
Create a Project with Create React App
Creating an API seems to be the easy part these days, thanks in large part to Spring Boot. In this section, I hope to show you that creating a UI with React is pretty easy too. If you follow the steps below, you’ll create a new React app, fetch beer names and images from APIs, and create components to display the data.
To create a React project, make sure you have Node.js, Create React App, and Yarn installed.
npm install -g create-react-app@1.5.2
From a terminal window, cd into the root of the spring-boot-react-example directory and run the following command. This command will create a new React application with TypeScript support.
create-react-app client --scripts-version=react-scripts-ts
After this process runs, you will have a new client directory with all the necessary dependencies installed. To verify everything works, cd into the client directory and run yarn start. If everything works, you should see the following in your browser.

Thus far, you’ve created a good-beers API and a React app, but you haven’t created the UI to display the list of beers from your API. To do this, open client/src/App.tsx and add a componentDidMount() method.


componentDidMount() {
  this.setState({isLoading: true});

  fetch('http://localhost:8080/good-beers')
    .then(response => response.json())
    .then(data => this.setState({beers: data, isLoading: false}));
}
React’s component lifecycle will call the componentDidMount() method. The code above uses fetch, a modern replacement for XMLHttpRequest. It’s supported in most browsers according to caniuse.com.
You can see that it sets the beers state with the response data. To initialize the state for this component, you need create a few interfaces and override the constructor.
interface Beer {
  id: number;
  name: string;
}

interface AppProps {
}

interface AppState {
  beers: Array<Beer>;
  isLoading: boolean;
}

class App extends React.Component<AppProps, AppState> {

  constructor(props: AppProps) {
    super(props);

    this.state = {
      beers: [],
      isLoading: false
    };
  }
  // componentDidMount() and render()
  ...
}
Change the render() method to have the following JSX. JSX is Facebook’s XML-like syntax that renders HTML via JavaScript.
render() {
  const {beers, isLoading} = this.state;

  if (isLoading) {
    return <p>Loading...</p>;
  }

  return (
    <div className="App">
      <header className="App-header">
        <img src={logo} className="App-logo" alt="logo" />
        <h1 className="App-title">Welcome to React</h1>
      </header>
      <div>
        <h2>Beer List</h2>
        {beers.map((beer: Beer) =>
          <div key={beer.id}>
            {beer.name}
          </div>
        )}
      </div>
    </div>
  );
}
At this point, you’ll likely get a message in your browser that says something like the following:
/Users/mraible/spring-boot-react-example/client/src/App.tsx
(6,11): interface name must start with a capitalized I
As a Java developer, I’m not a fan of prefixing interfaces with “I”. There’s also a few other tslint warnings I don’t agree with. To complete this tutorial with a set of sensible rules, modify client/tslint.json to have the following rules:
"rules": {
  "interface-name": [true, "never-prefix"],
  "no-empty-interface": false,
  "array-type": [true, "generic"],
  "member-access": [true, "no-public"]
  "ordered-imports": false,
  "object-literal-sort-keys": false
}
If you look at http://localhost:3000 in your browser, you’ll see a “Loading…” message. If you look in your browser’s console, you’ll likely see an issue about CORS.
Failed to load http://localhost:8080/good-beers: No 'Access-Control-Allow-Origin' header is present on the requested resource. Origin 'http://localhost:3000' is therefore not allowed access.
To fix this issue, you’ll need to configure Spring Boot to allow cross-domain access from http://localhost:3000.
Configure CORS for Spring Boot
In the server project, open server/src/main/java/.../demo/beer/BeerController.java and add a @CrossOrigin annotation to enable cross-origin resource sharing (CORS) from the client (http://localhost:3000).
import org.springframework.web.bind.annotation.CrossOrigin;
...
    @GetMapping("/good-beers")
    @CrossOrigin(origins = "http://localhost:3000")
    public Collection<Beer> goodBeers() {
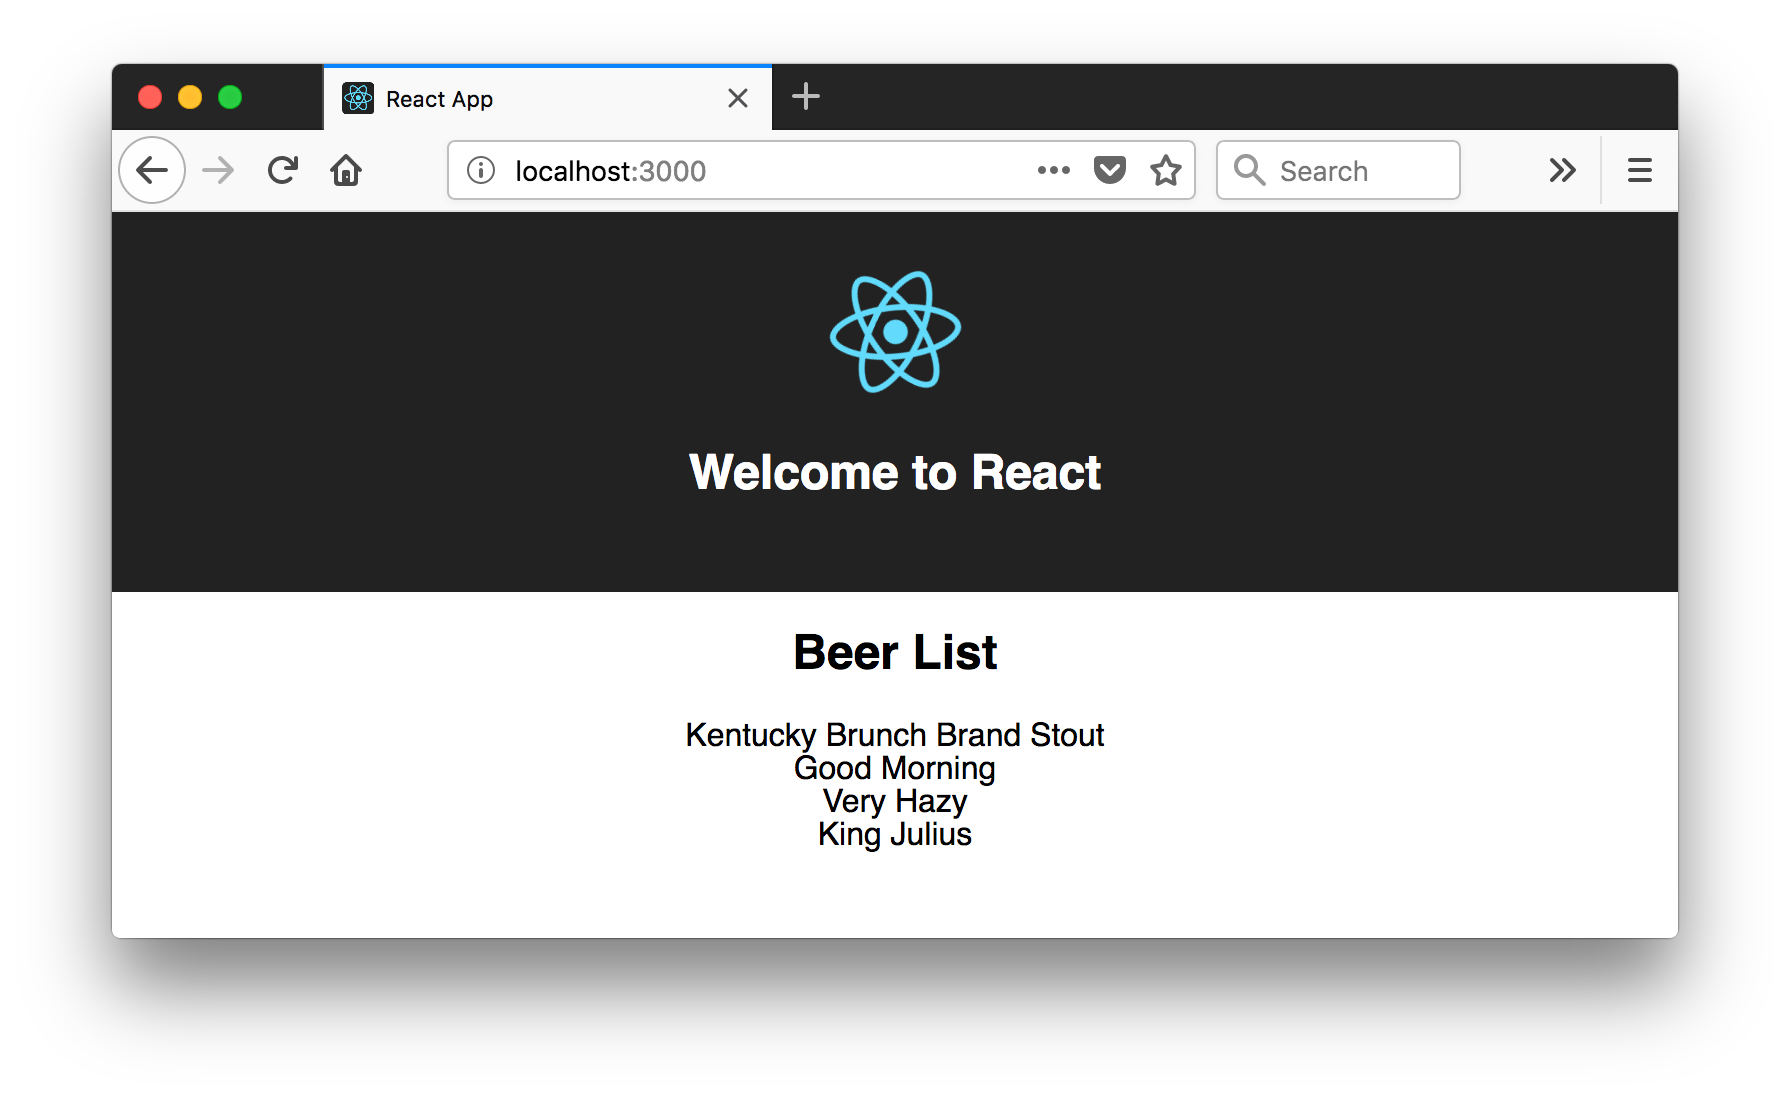
After making these changes, restart the server, refresh your browser, and you should be able to see a list of beers from your Spring Boot API.
Create a BeerList Component
To make this application easier to maintain, move the beer list fetching and rendering from App.tsx to its own BeerListcomponent. Create src/BeerList.tsx and populate it with the code from App.tsx. Change all code references from App to BeerList, except in the JSX code (where App* CSS classes are specified).
import * as React from 'react';

interface Beer {
  id: number;
  name: string;
}

interface BeerListProps {
}

interface BeerListState {
  beers: Array<Beer>;
  isLoading: boolean;
}

class BeerList extends React.Component<BeerListProps, BeerListState> {

  constructor(props: BeerListProps) {
    super(props);

    this.state = {
      beers: [],
      isLoading: false
    };
  }

  componentDidMount() {
    this.setState({isLoading: true});

    fetch('http://localhost:8080/good-beers')
      .then(response => response.json())
      .then(data => this.setState({beers: data, isLoading: false}));
  }

  render() {
    const {beers, isLoading} = this.state;

    if (isLoading) {
      return <p>Loading...</p>;
    }

    return (
      <div>
        <h2>Beer List</h2>
        {beers.map((beer: Beer) =>
          <div key={beer.id}>
            {beer.name}
          </div>
        )}
      </div>
    );
  }
}

export default BeerList;
Then change client/src/App.tsx so it only contains a shell and a reference to <BeerList/>.
import * as React from 'react';
import './App.css';
import BeerList from './BeerList';

import logo from './logo.svg';

class App extends React.Component<{}, any> {
  render() {
    return (
      <div className="App">
        <header className="App-header">
          <img src={logo} className="App-logo" alt="logo"/>
          <h1 className="App-title">Welcome to React</h1>
        </header>
        <BeerList/>
      </div>
    );
  }
}

export default App;
Create a GiphyImage Component
To make it look a little better, add a GIPHY component to fetch images based on the beer’s name. Create client/src/GiphyImage.tsx and place the following code inside it.
import * as React from 'react';

interface GiphyImageProps {
  name: string;
}

interface GiphyImageState {
  giphyUrl: string;
  isLoading: boolean;
}

class GiphyImage extends React.Component<GiphyImageProps, GiphyImageState> {
  constructor(props: GiphyImageProps) {
    super(props);

    this.state = {
      giphyUrl: '',
      isLoading: false
    };
  }

  componentDidMount() {
    const giphyApi = '//api.giphy.com/v1/gifs/search?api_key=dc6zaTOxFJmzC&limit=1&q=';

    fetch(giphyApi + this.props.name)
      .then(response => response.json())
      .then(response => {
        if (response.data.length > 0) {
          this.setState({giphyUrl: response.data[0].images.original.url});
        } else {
          // dancing cat for no images found
          this.setState({giphyUrl: '//media.giphy.com/media/YaOxRsmrv9IeA/giphy.gif'});
        }
        this.setState({isLoading: false});
      });
  }

  render() {
    const {giphyUrl, isLoading} = this.state;

    if (isLoading) {
      return <p>Loading image...</p>;
    }

    return (
      <img src={giphyUrl} alt={this.props.name} width="200"/>
    );
  }
}

export default GiphyImage;
Change the render() method in BeerList.tsx to use this component.
import GiphyImage from './GiphyImage';
...
render() {
  const {beers, isLoading} = this.state;

  if (isLoading) {
    return <p>Loading...</p>;
  }

  return (
    <div>
      <h2>Beer List</h2>
      {beers.map((beer: Beer) =>
        <div key={beer.id}>
          {beer.name}<br/>
          <GiphyImage name={beer.name}/>
        </div>
      )}
    </div>
  );
}
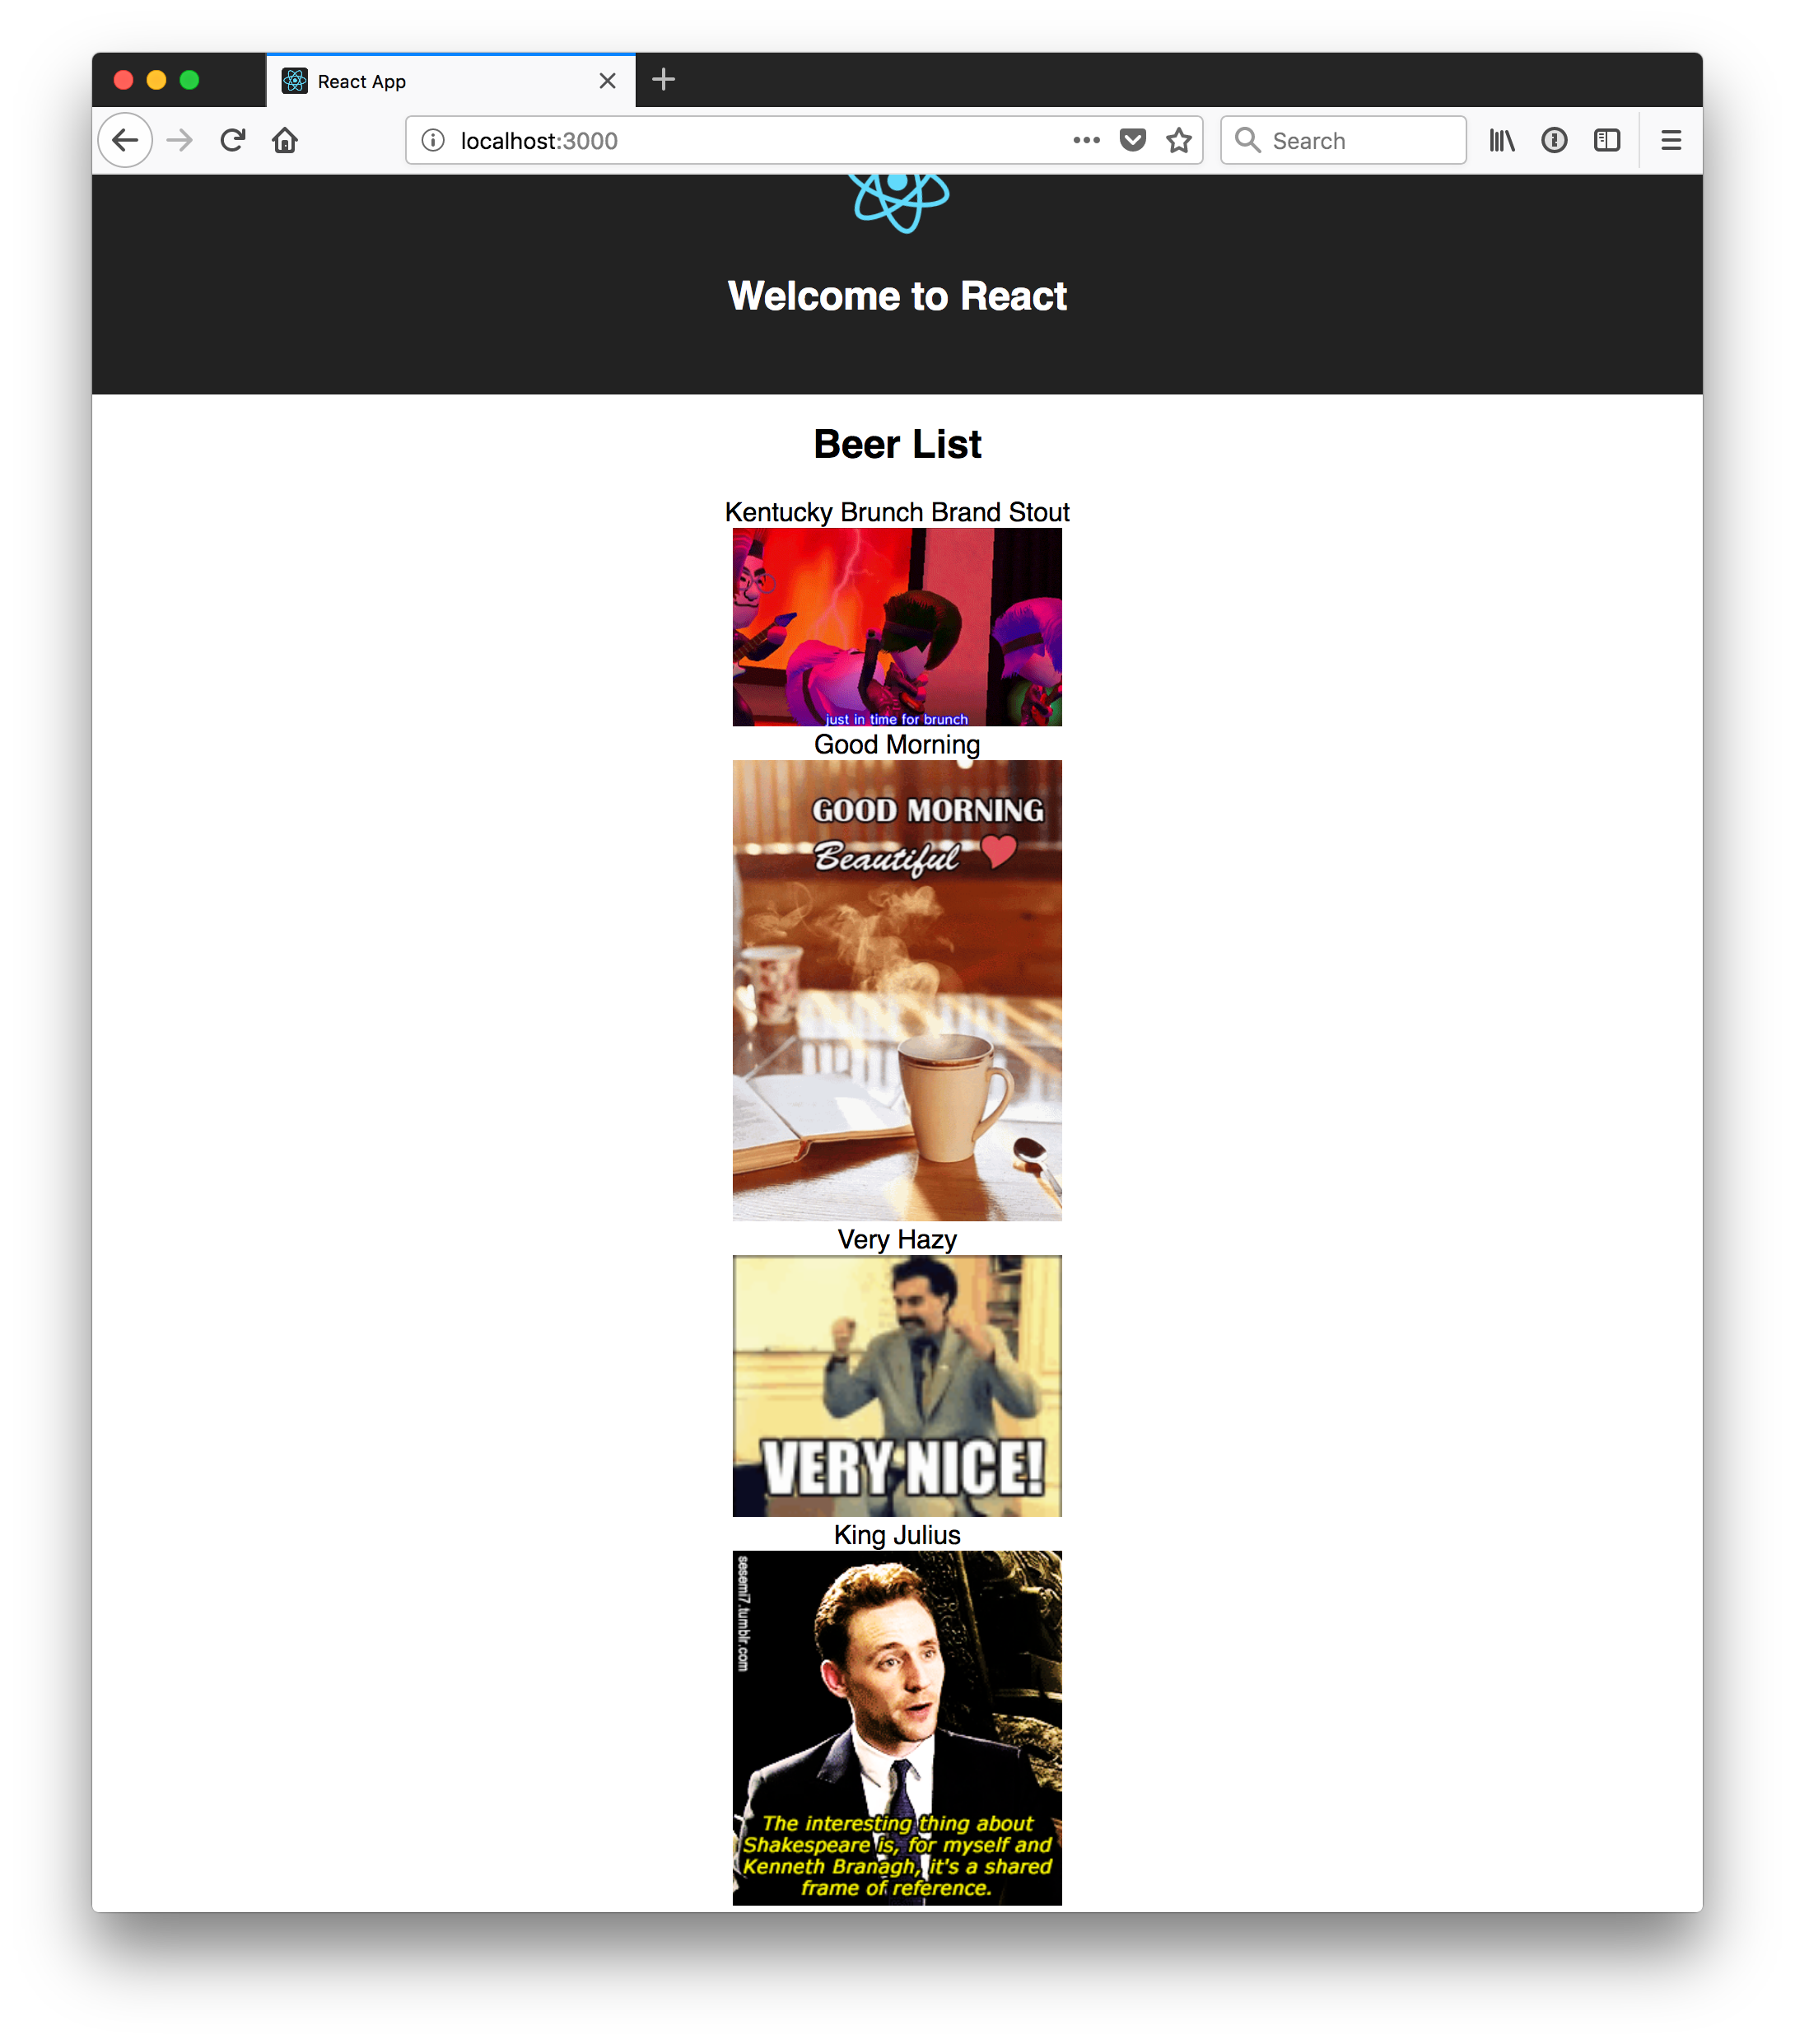
The result should look something like the following list of beer names with images.
You’ve just created a React app that talks to a Spring Boot API using cross-domain requests. Congratulations!
Add PWA Support
Create React App has support for progressive web applications (PWAs) out-of-the-box. To learn how it’s integrated, open client/README.md and search for “Making a Progressive Web App”.
To see how it works, run yarn build in the client directory. After this command completes, you’ll see a message like the following.
The build folder is ready to be deployed.
You may serve it with a static server:

  yarn global add serve
  serve -s build
Install serve and run serve -s build -p 3000. You should be able to open your browser to view http://localhost:3000.
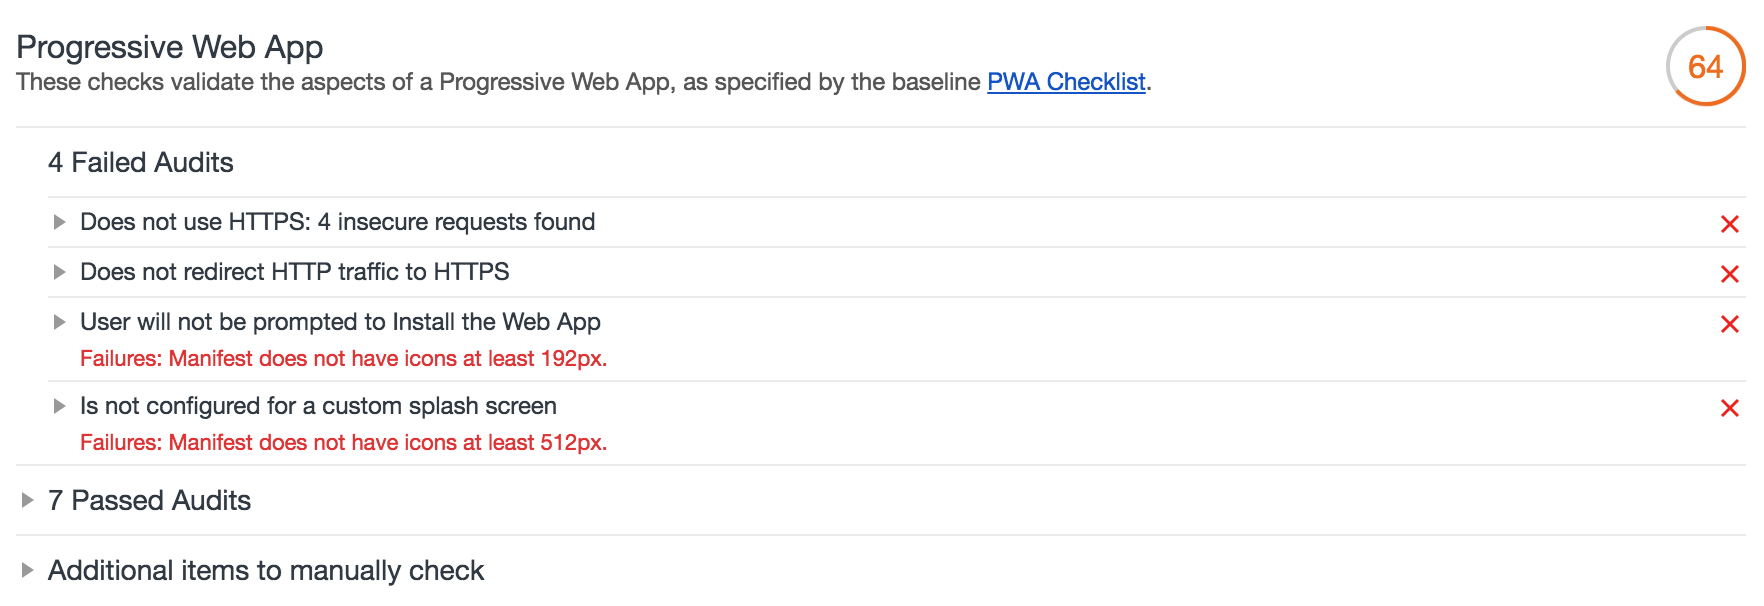
I ran a Lighthouse audit in Chrome and found that this app only scores a 64/100 at this point.
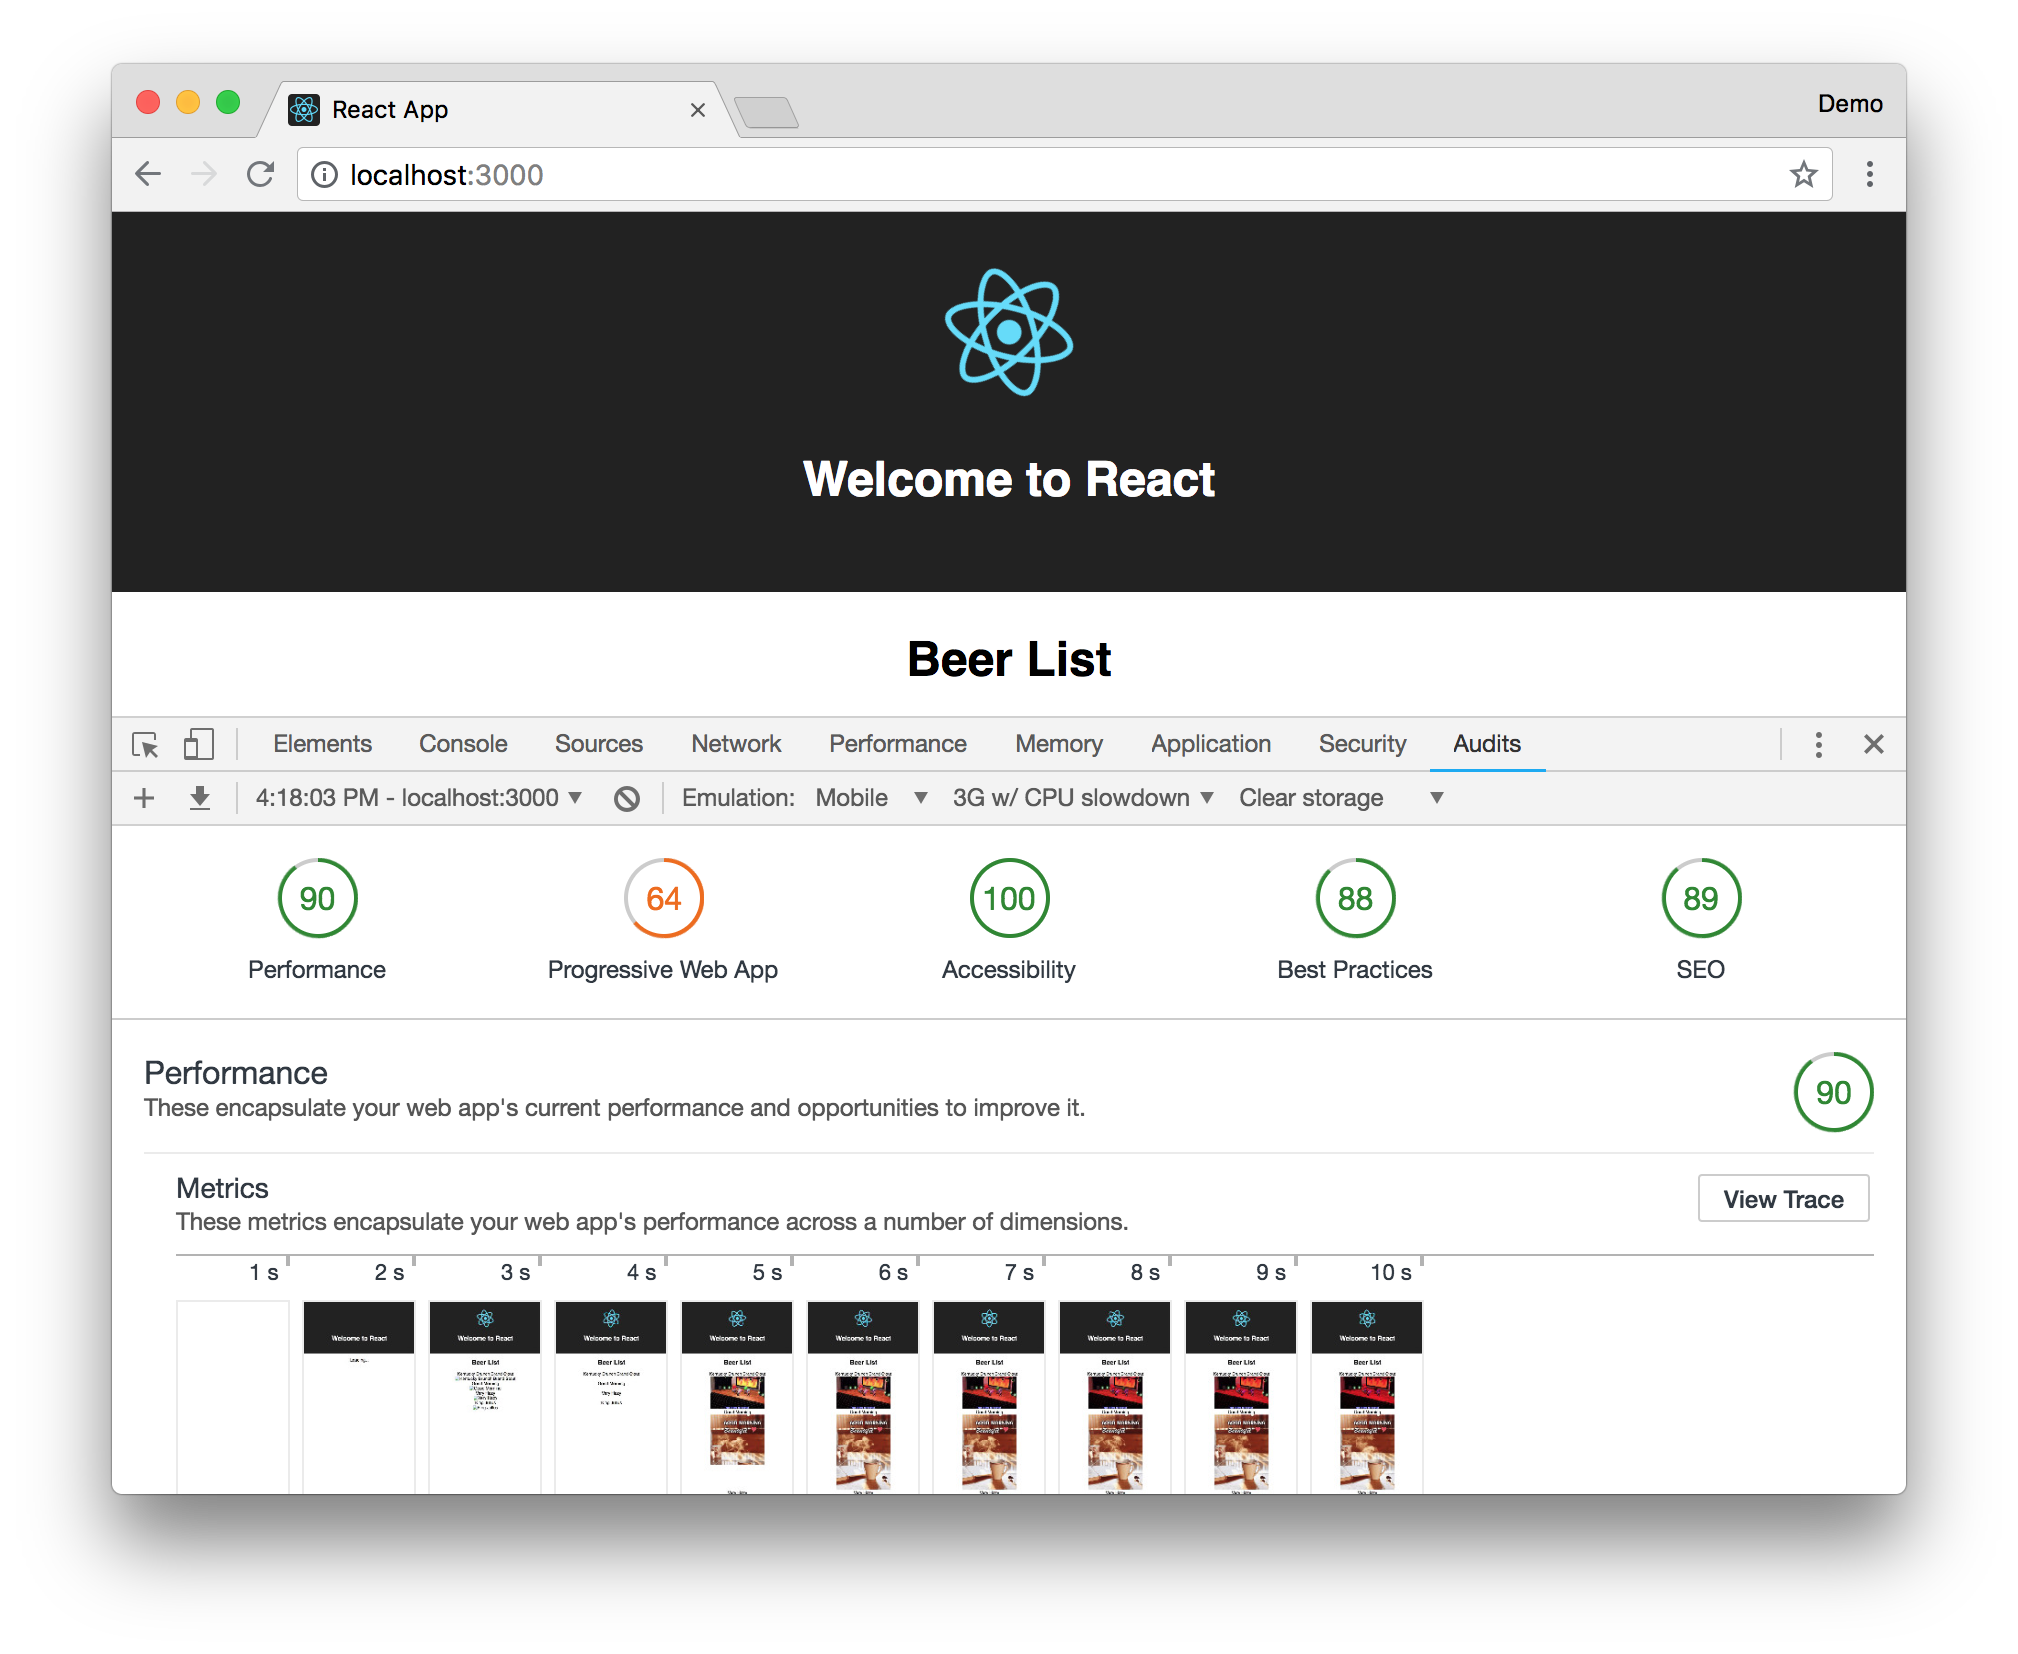
In the PWA section of the report, it’ll tell you that you need at least 192px and 512px icons.
You can download a 512-pixel free beer icon from this page.
NOTE: This icon is made by Freepik from www.flaticon.com. It’s licensed by CC 3.0 BY.
Copy the downloaded beer.png to client/public. Modify client/public/manifest.json to have a name specific to this app, and to add the 512-pixel icon.
{
  "short_name": "Beer",
  "name": "Good Beer",
  "icons": [
    {
      "src": "favicon.ico",
      "sizes": "64x64 32x32 24x24 16x16",
      "type": "image/x-icon"
    },
    {
      "src": "beer.png",
      "sizes": "512x512",
      "type": "image/png"
    }
  ],
  "start_url": "./index.html",
  "display": "standalone",
  "theme_color": "#000000",
  "background_color": "#ffffff"
}
After making this change, I was able to achieve an 82 Lighthouse score for PWA. The most prominent complaint from this report was that I wasn’t using HTTPS. To see how the app would score when it used HTTPS, I deployed it to Pivotal Cloud Foundry and Heroku. I was pumped to discover it scored
광고 클릭에서 발생하는 수익금은 모두 웹사이트 서버의 유지 및 관리, 그리고 기술 콘텐츠 향상을 위해 쓰여집니다.